
Leaderboard


Popular Content
Showing content with the highest reputation since 04/24/2023 in all areas
-
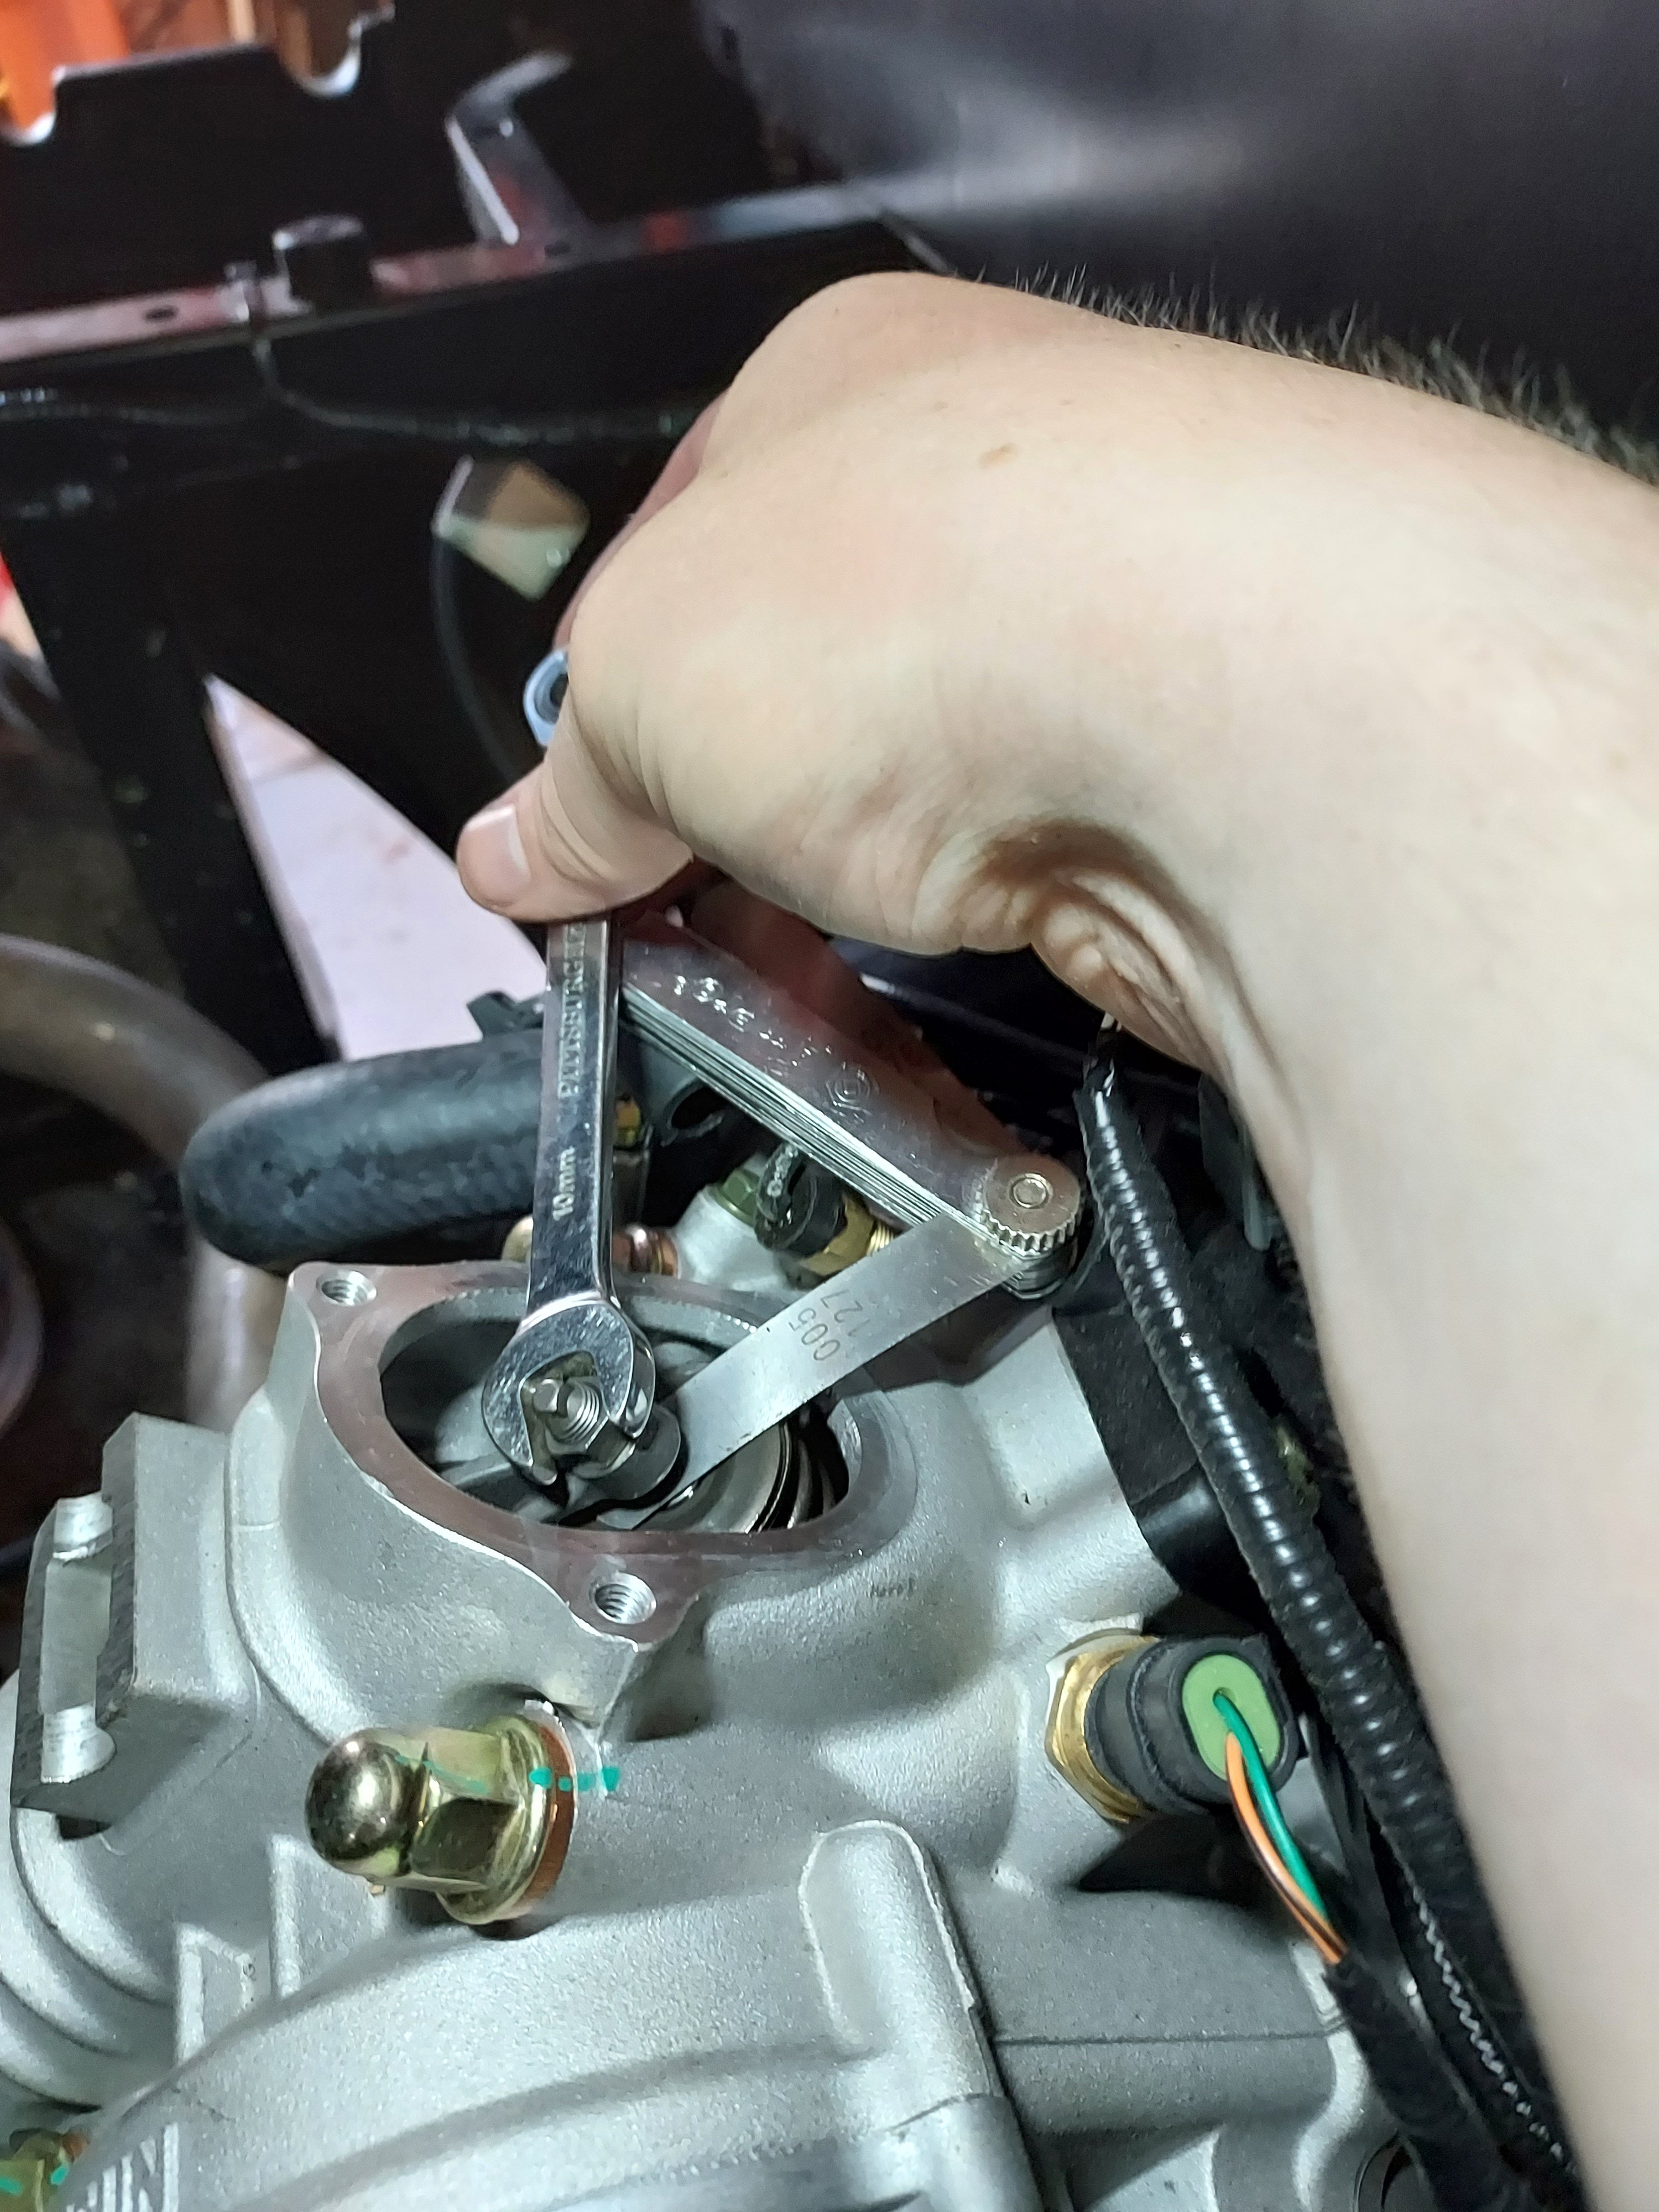
Since I've seen some questions on this I took some pictures and will provide instructions on a valve adjustment for the UT400. This should be the same for the 550's and other various Coleman/Hisun single cylinder models with the cylinder slanted aft. I have seen several people ask of it is really necessary, and read several reports of valves being out of adjustment from the factory. My valves were .004" intake, and .010" exhaust with about 5 hrs on the machine. I've seen different numbers thrown around for factory spec, but I decided to go with 0.005". This is called valve lash. What is is is a gap between the rocker arm and the valve then the camshaft isnt opening the valve. Why does it matter? If it's too large the valve doesn't open all the way, if it's too small the valve dosent close. This can cause valve damage (overheating) as well as loss of engine power (burned fuel is going out exhaust rather than pushing the piston dow). Tools required : 5MM Allen wrench, 10MM box wrench, needle nose pliers, flat feeler gauge set, rags First you need to remove the fan cover on the passenger side. There is a cooling vent hose on the back side, remove the hose clamp and slide it off. From there there are 4x 10mm bolts holding the cover. The forward ones can be accessed from under the seat. Next remove the spark plug from the drivers side. Carefully wiggle the spark plug wire off. Grip it as low as possible and give it a little twisting motion as you pull it off to help free it. Its a tight fit for a socket, but there is a sheet metal wrench in the toolkit that fits it. Unscrew the plug and set it aside. This allows you to spin the motor over freely with no compression to fight. When you reassemble this is a good opportunity to switch to an NGK iridium plug for better performance/less fouling DR8EIX) Next you need to remove the intake and exhaust valve covers. The intake us the forward one. There are 3x 5MM Allen screws to remove. The Exhaust is the rear with 2x 5MM Allen bolts. Both covers have O-Rings instead of gaskets and are reusable. When you remove the rear be careful and use your rags as there will be oil that drips out. Next up we need to spin the motor over to top dead center. Grab each rocker arm and give em a little wiggle up and down. Spin the engine over by grabbing the fan with your other hand. Spin the engine over until both rockers have some wiggle and are loose. Once both rockers are loose slide the feeler gauge in like shown above. Try different feelers as needed to determine your starting spec. You should feel some drag but still be able to move the feeler without too much force. If you need to adjust, use the 10MM wrench to slightly loosen the locknut, then with the correct feeler gauge in place, tighten the top square nut while wiggling the feeler in and out. Once you have it right you need to tighten the 10mm lock nut without moving the square head bolt. Once the lock nut is tight recheck the clearance. That's it, button everything back up and make sure you have it all reassembled before running it again. If you find this helpful give me a thumbs up or comment. If you have any questions or need more help let me know. If there's interest maybe I'll do some more of these
 4 points
 -
Hello to anyone who reads this. I am Jon and I own J&M Outdoor Power, a very small, small engine repair shop. I was approached by Coleman about 6 months ago to become one of their Warranty Centers. I recently received 3 different UT400's and a UT500 all with similar issues. These units range from 2 months to 2 years old. Customers state that the unit(s) was/were running fine, then heard a pop and a loss of power, two would no longer start. The two that would run would not achieve normal operating speed (around 20mph I would say) without redlining the RPMs. I quickly found that the Valve lash on each unit had become too large on some(both intake and exhaust) and too tight on one(just intake). After setting the gaps to .005(I found multiple different people suggesting bigger and smaller gaps, but no definitive Coleman Spec number yet) every unit starts, runs, and achieves top speed without issue. I don't know how many others have come across these issues, and I wanted to get something out on the web for others in the same predicament. Please let me know if you have had similar issues. Edit: I realize that this will not be a fix all solution for this issue, as the oil level and condition should be verified before moving to the valves. Many times improper oil conditions will cause valve lash to change. These units all have good oil and proper oil changes.3 points
-
Are you talking about an electric heater? if yes its likely too much current. There might be 10 amps of available current coming out of the rectifier that isn't already claimed by the ECU and factory lights. 10 amps @ 12V = 120 Watts, which is about what an electric heating pad runs. If you're talking about a fan for a engine coolant based heater it's probably ok. If you have accessories and the running voltage is below 13.5V you have too much stuff attached. If the battery light comes on it means the battery is actively being discharged while running. Stator based charging systems on these things and tractors etc are really meant to power the ECU and factory systems not to provide a lot of extra power for other stuff, it's not like the alternator on a car.2 points
-
happy new year!2 points
-
The main trick is tilting the front end up. Block the rear wheels and jack up the front end at least a foot. A convenient ditch works well also.....rear wheels in a shallow ditch. The head bleeder screw should be opened. With the engine NOT running, almost fill the radiator (leave some air to avoid a mess) and burp (squeeze the lower hose line before the metal tube at the engine base passenger side floor area). Watch the radiator and the the bleeder. With the radiator "higher" than the head bleeder, the air should be bled and coolant dribble out. Close the bleeder and refill radiator (your clue you displaced the air with coolant) and start the engine. Burp more while running and if you get the circulation going the hoses will warm up. More bubbles should surface at the radiator filler neck. Shut off engine. Open bleeder and release any air in the head. The puke jug needs to be filled about an inch above the full cold line. Use a shop towel as a "seal"and use an air nozzle to SLIGHTLY pressurize the puke tank removing the air from the tubing line to the radiator neck. Then the radiator starts to overflow, a third hand can install the radiator cap. Run the engine and determine the head and hoses are at the close to the same temperature (as in warming up) through out the system. IR temp gun....fairly cheap now....can get real numbers. Scan the radiator, hoses, cylinder and head.....if all close you are done. Recheck fluids when done riding. Recheck the bleeder and top off the puke jug as required.2 points
-
From the look of the picture on the post, I can think of a couple things2 points
-
Its' not a car, this is a motorcycle engine with a small stator charging system. You can't expect to run high wattage accessories like a heater or huge light bars on these things . That will overwhelm the charging system, drain your battery an stop your engine. Could damage the charging system and voltage regulator too. You only have about 10 amps extra to run any accessories including lights.2 points
-
My dealer gave me an electronic version of the service manual and I have sent it to Kingfish. I will see if it will upload here for others to use. I'm not sure if there is a more appropriate way to do this, let me know if there is.. 2015-2017 Service Manual - Sector E1.pdf2 points
-
my Hisun in my Massimo , sold by Tractor Supply, assembled in Dallas, say Made In China on every part of all of it .. Altho it now has multiple Yamaha parts mixed in. lol2 points
-
https://motorcycledoctor.com/wp-content/uploads/2021/08/Valve-Adjustment-HiSun-2.pdf This should do it.2 points
-
Yeah, I adjusted mine multiple times without any luck. I had extended the shifter rod, as mentioned on this board, as well as some videos I watched, and that resolved the shifting issue. Now, after it slips into forward or Reverse, it never slips out. PS: If you go this route, remember to readjust the cable to compensate for the extended shifter. I had to do the adjustment an couple times after extending the shifter and then the problem was resolved.2 points
-
I finally found a service manual in stock and was able to make the adjustments per the specs!2 points
-
Problem was using cheap eBay injector. Bought quality one and hot pipes went away. Running like new.2 points
-
Buddy, I've been using that phrase a whole lot lately.2 points
-
Massimo MSU500 won't shift to low I would check the shift linkage. Adjust it make it a little longer, if it is not long enough it won't shift to low2 points
-
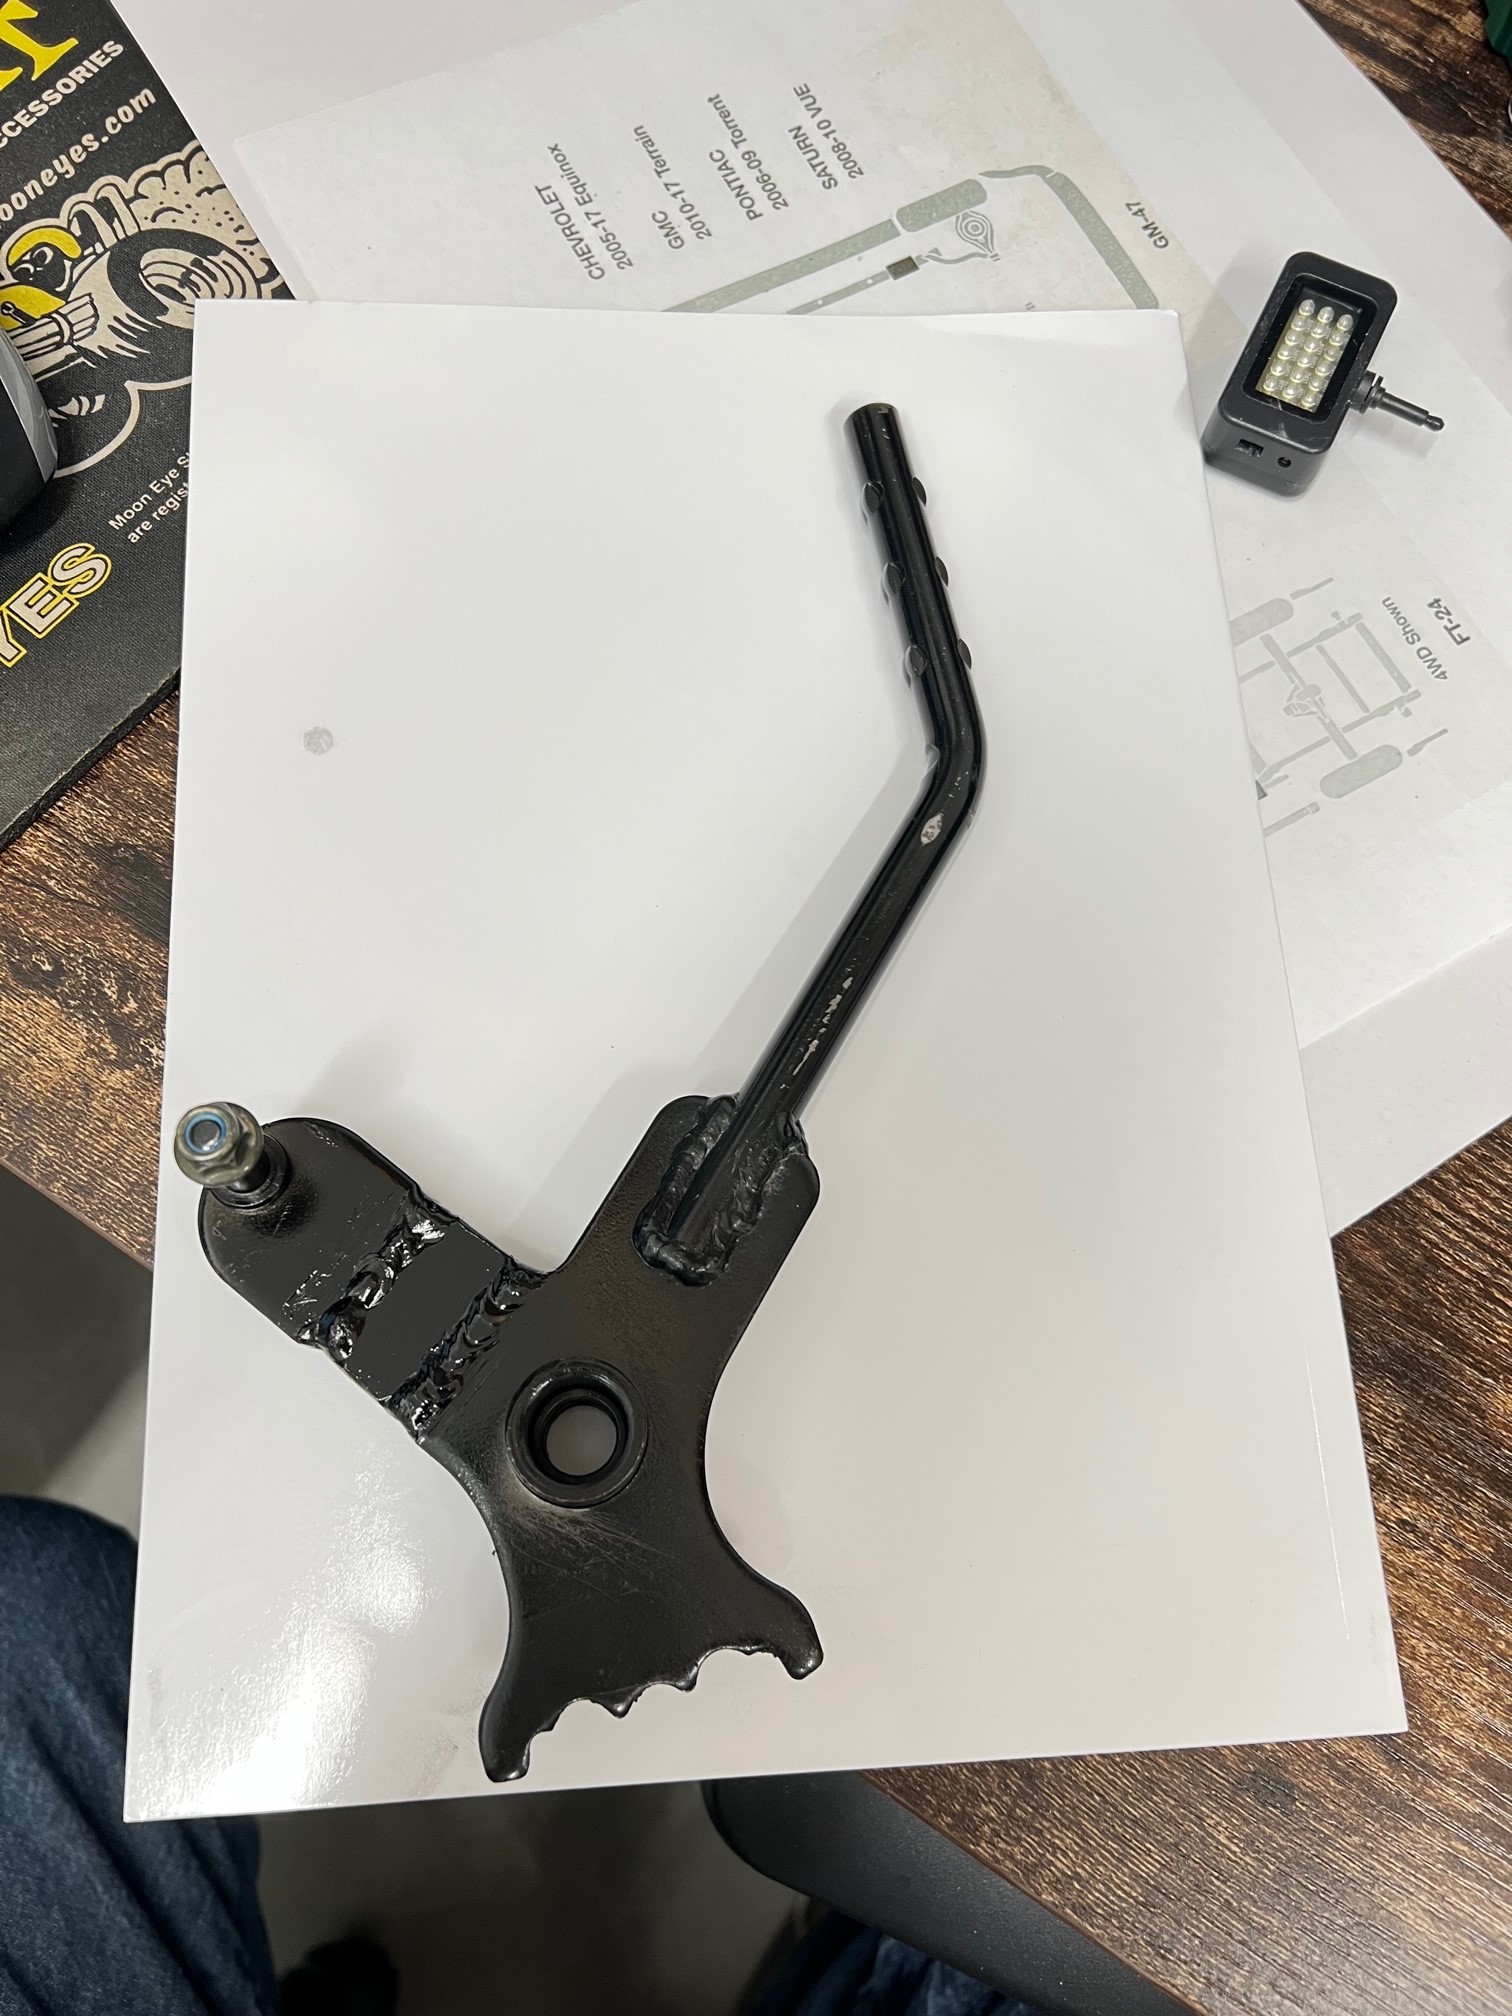
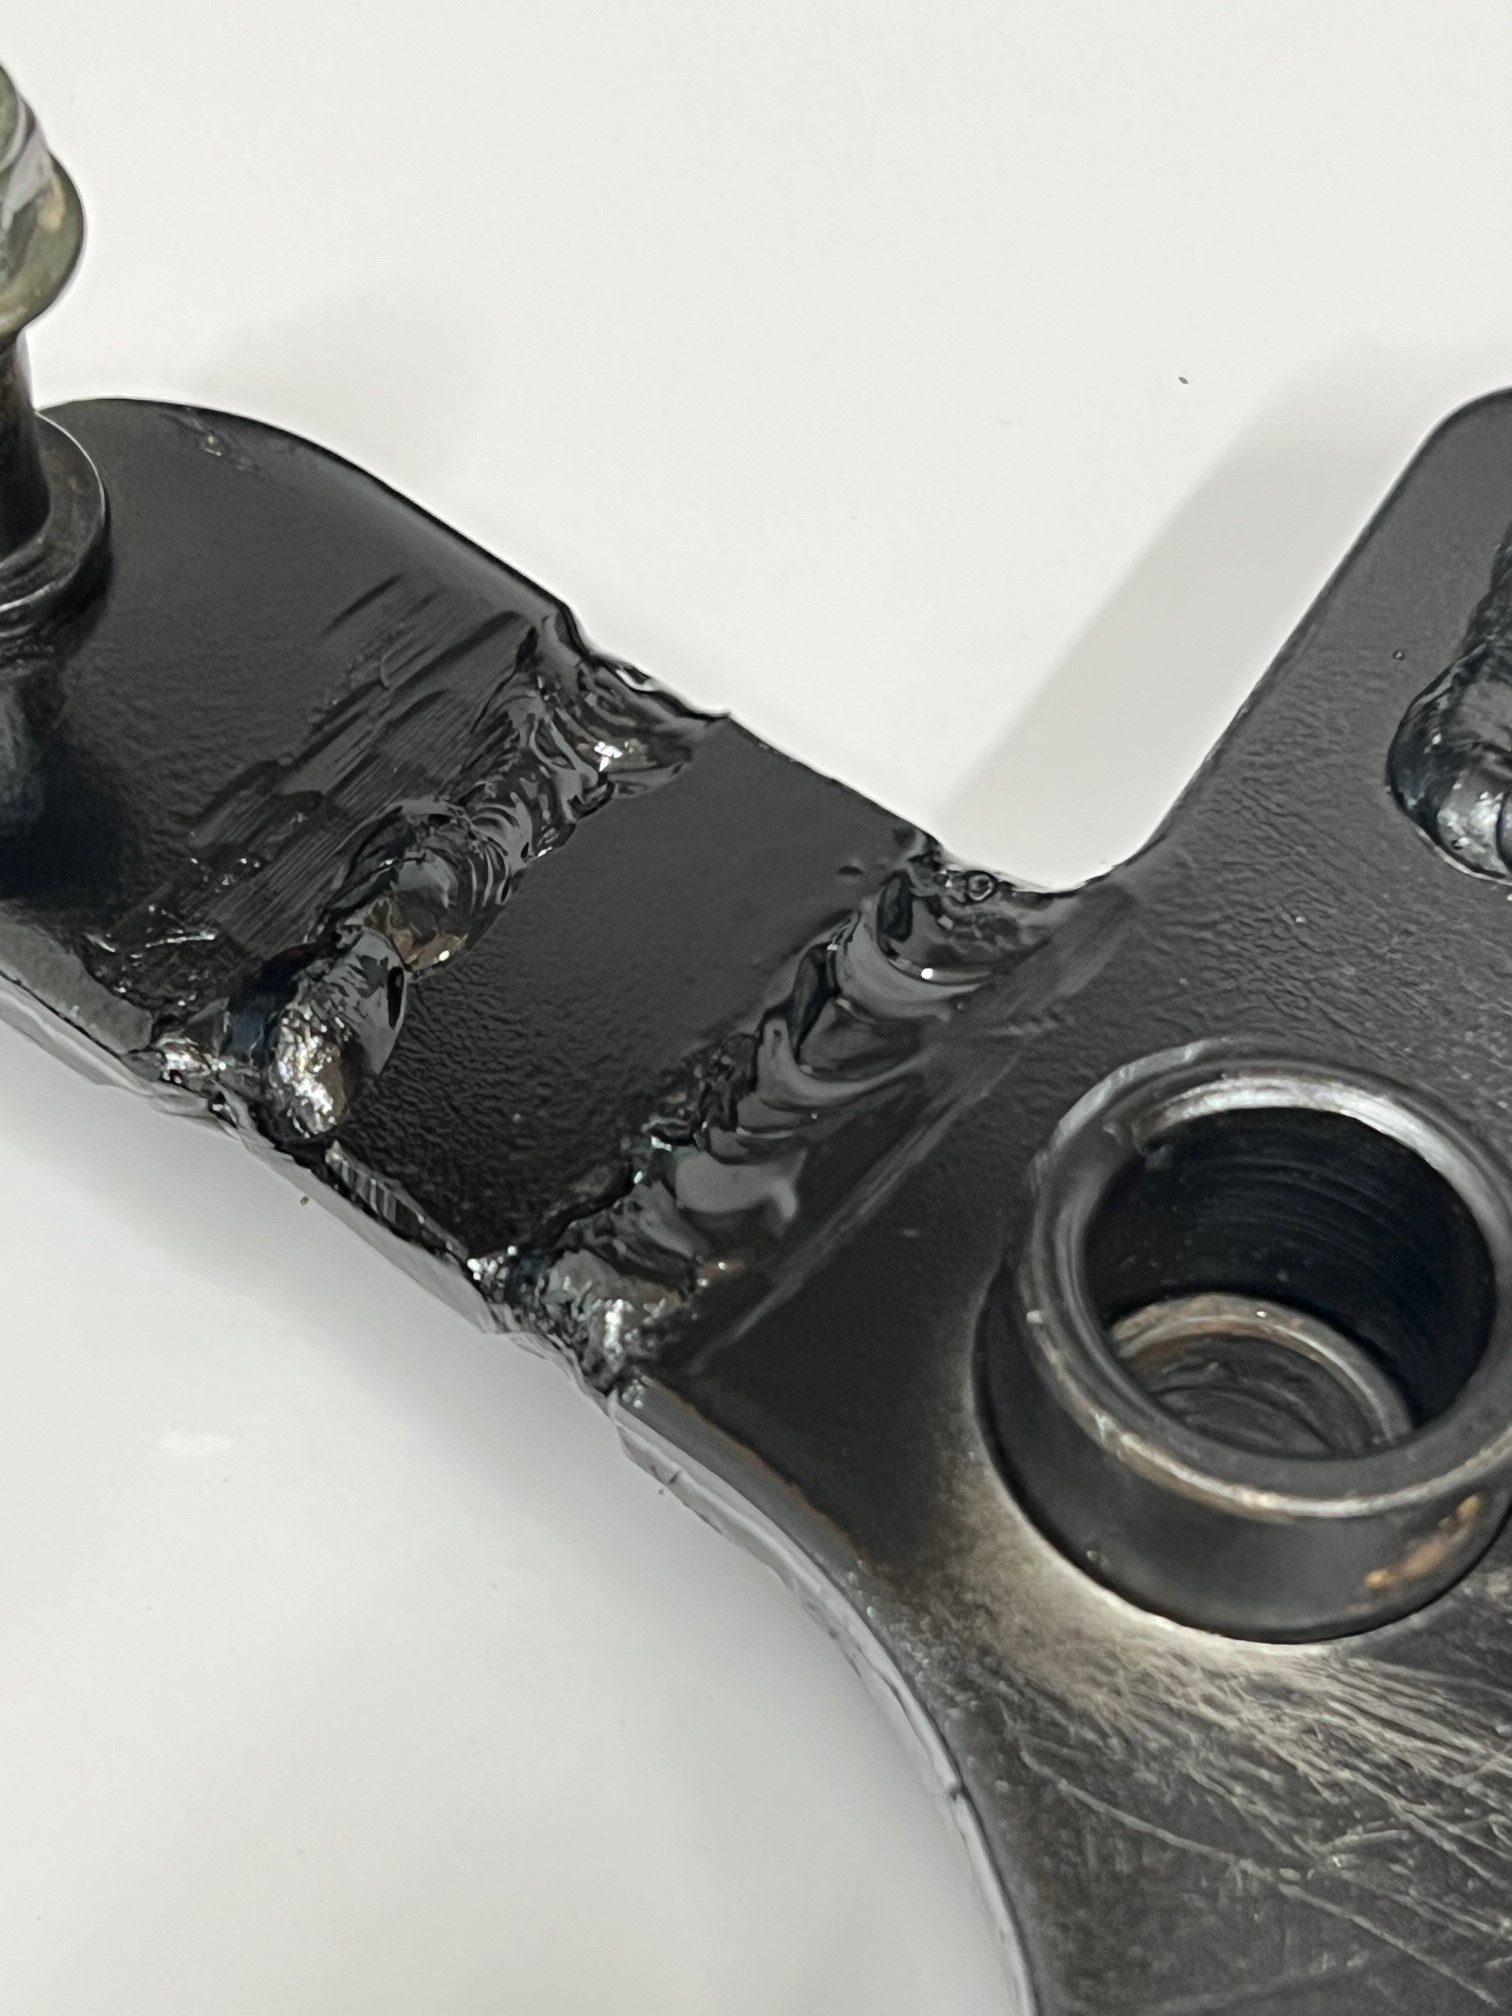
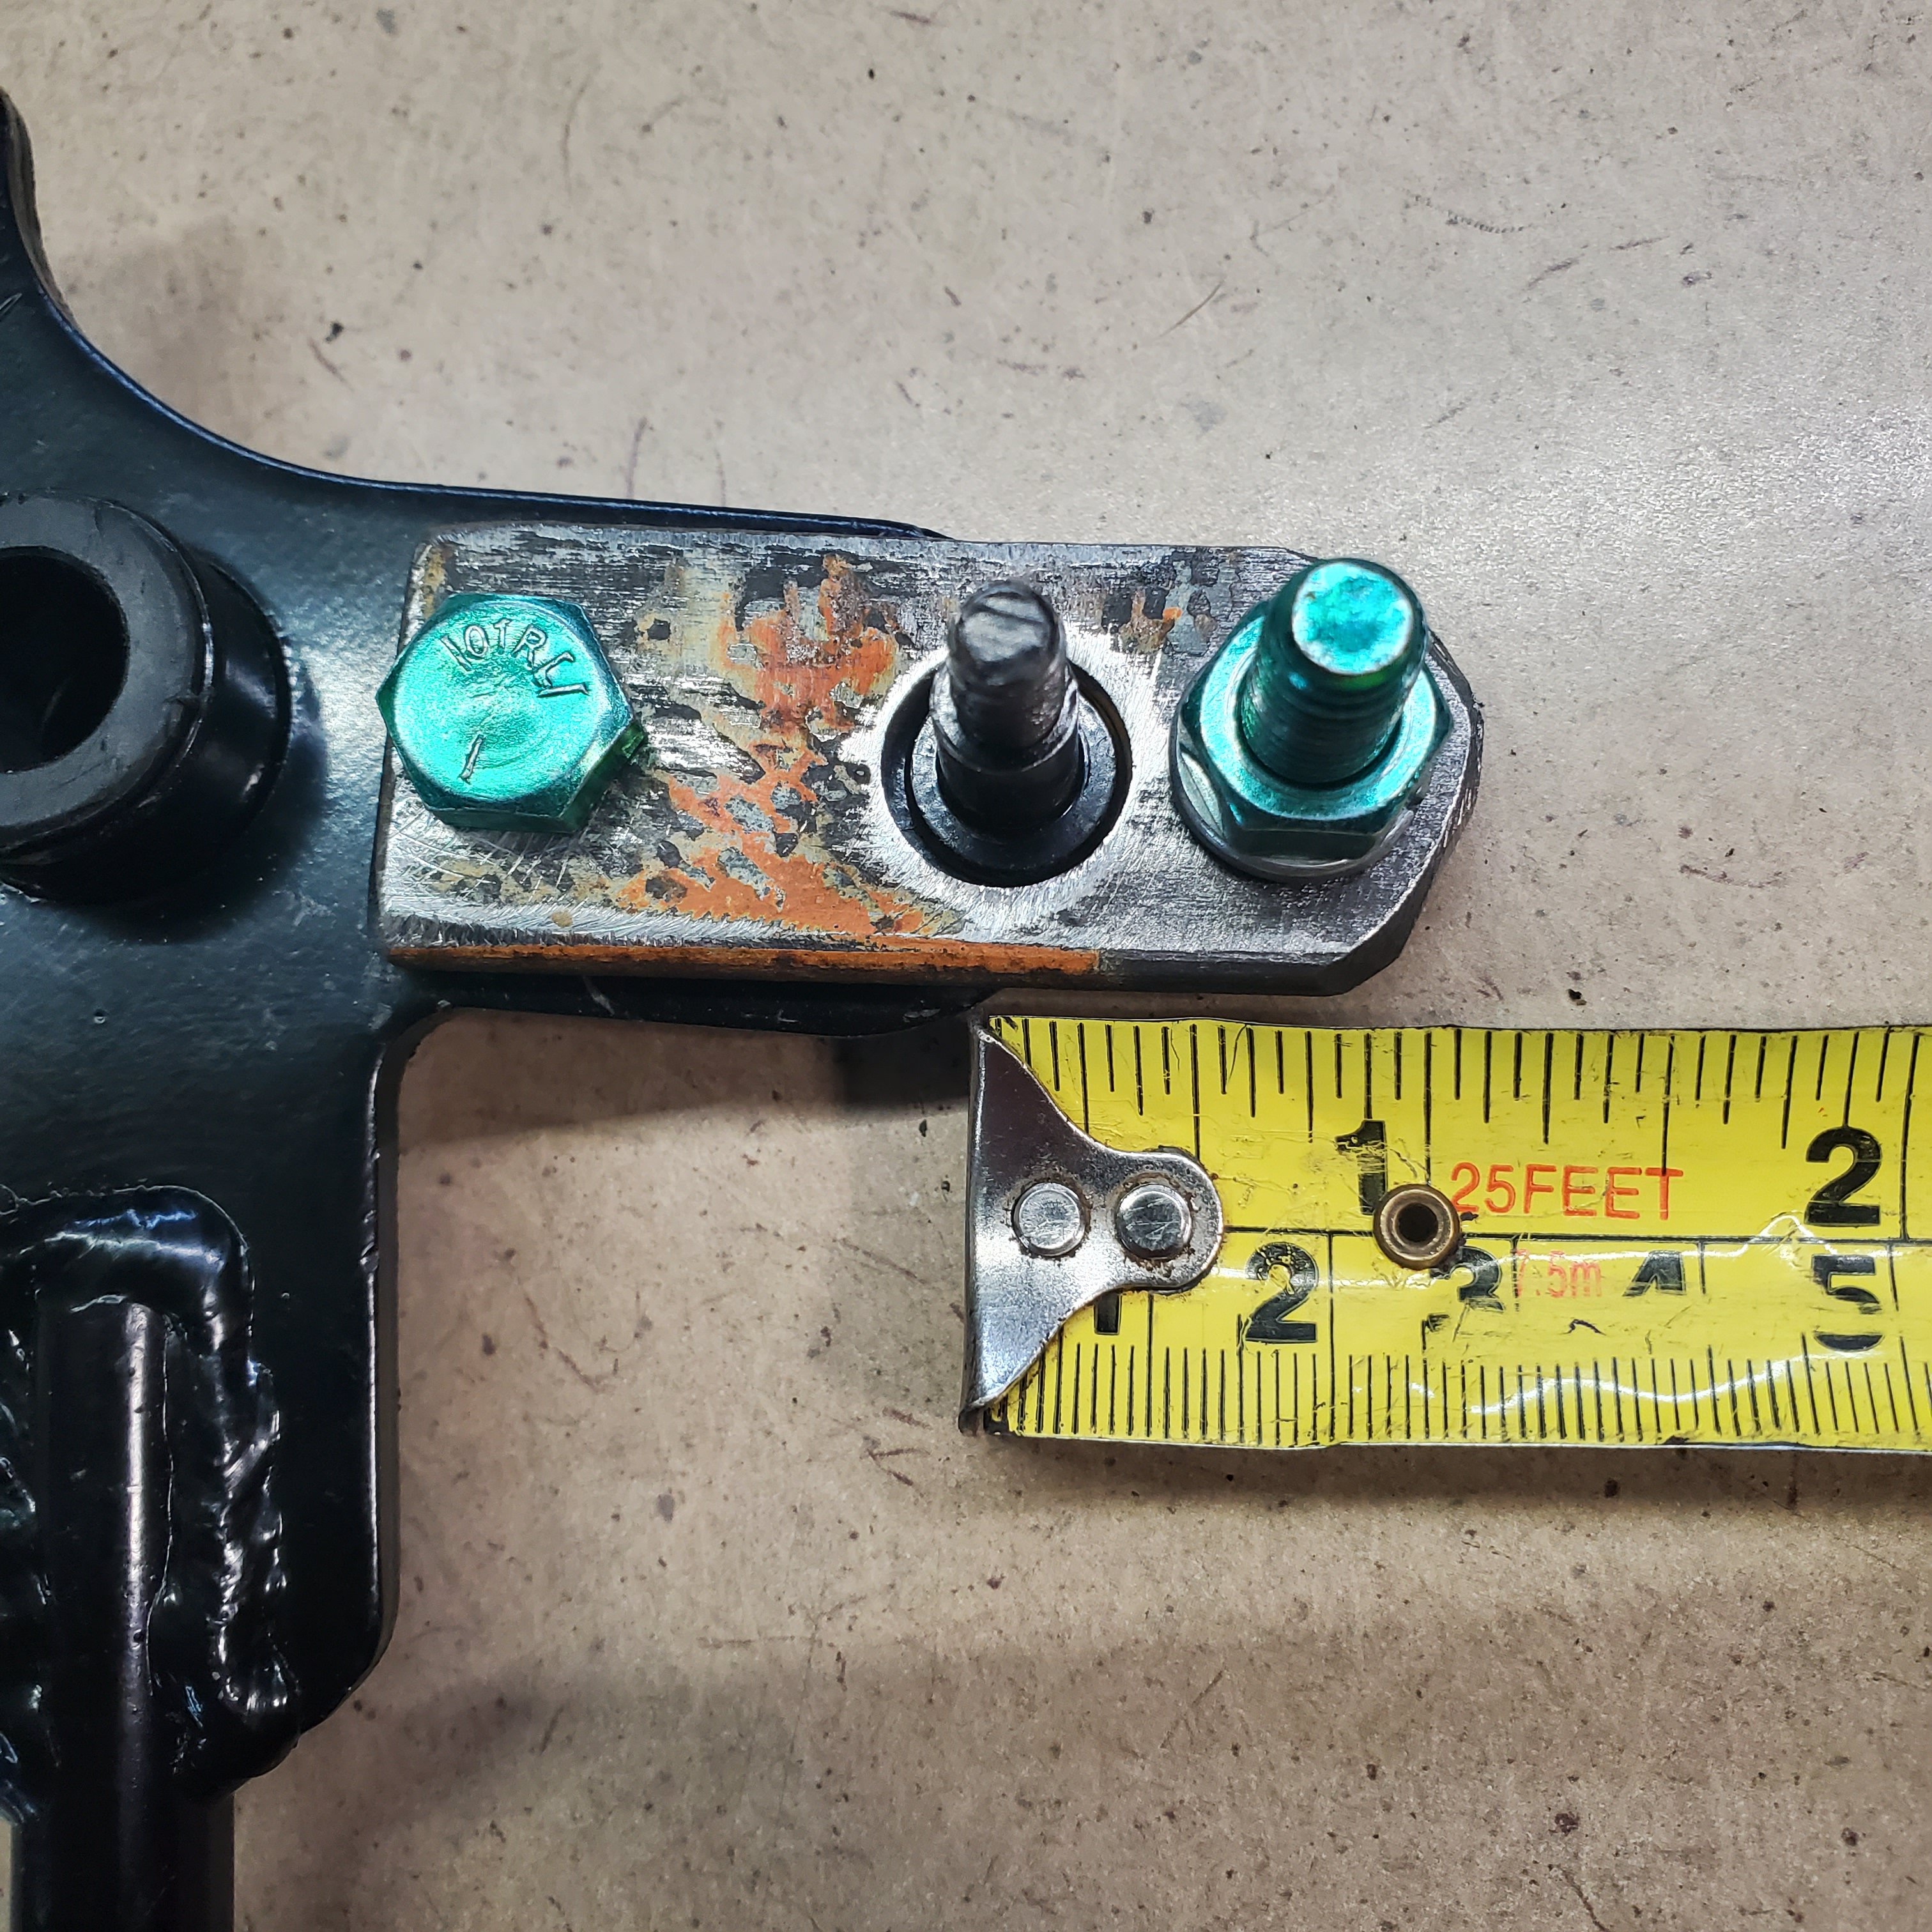
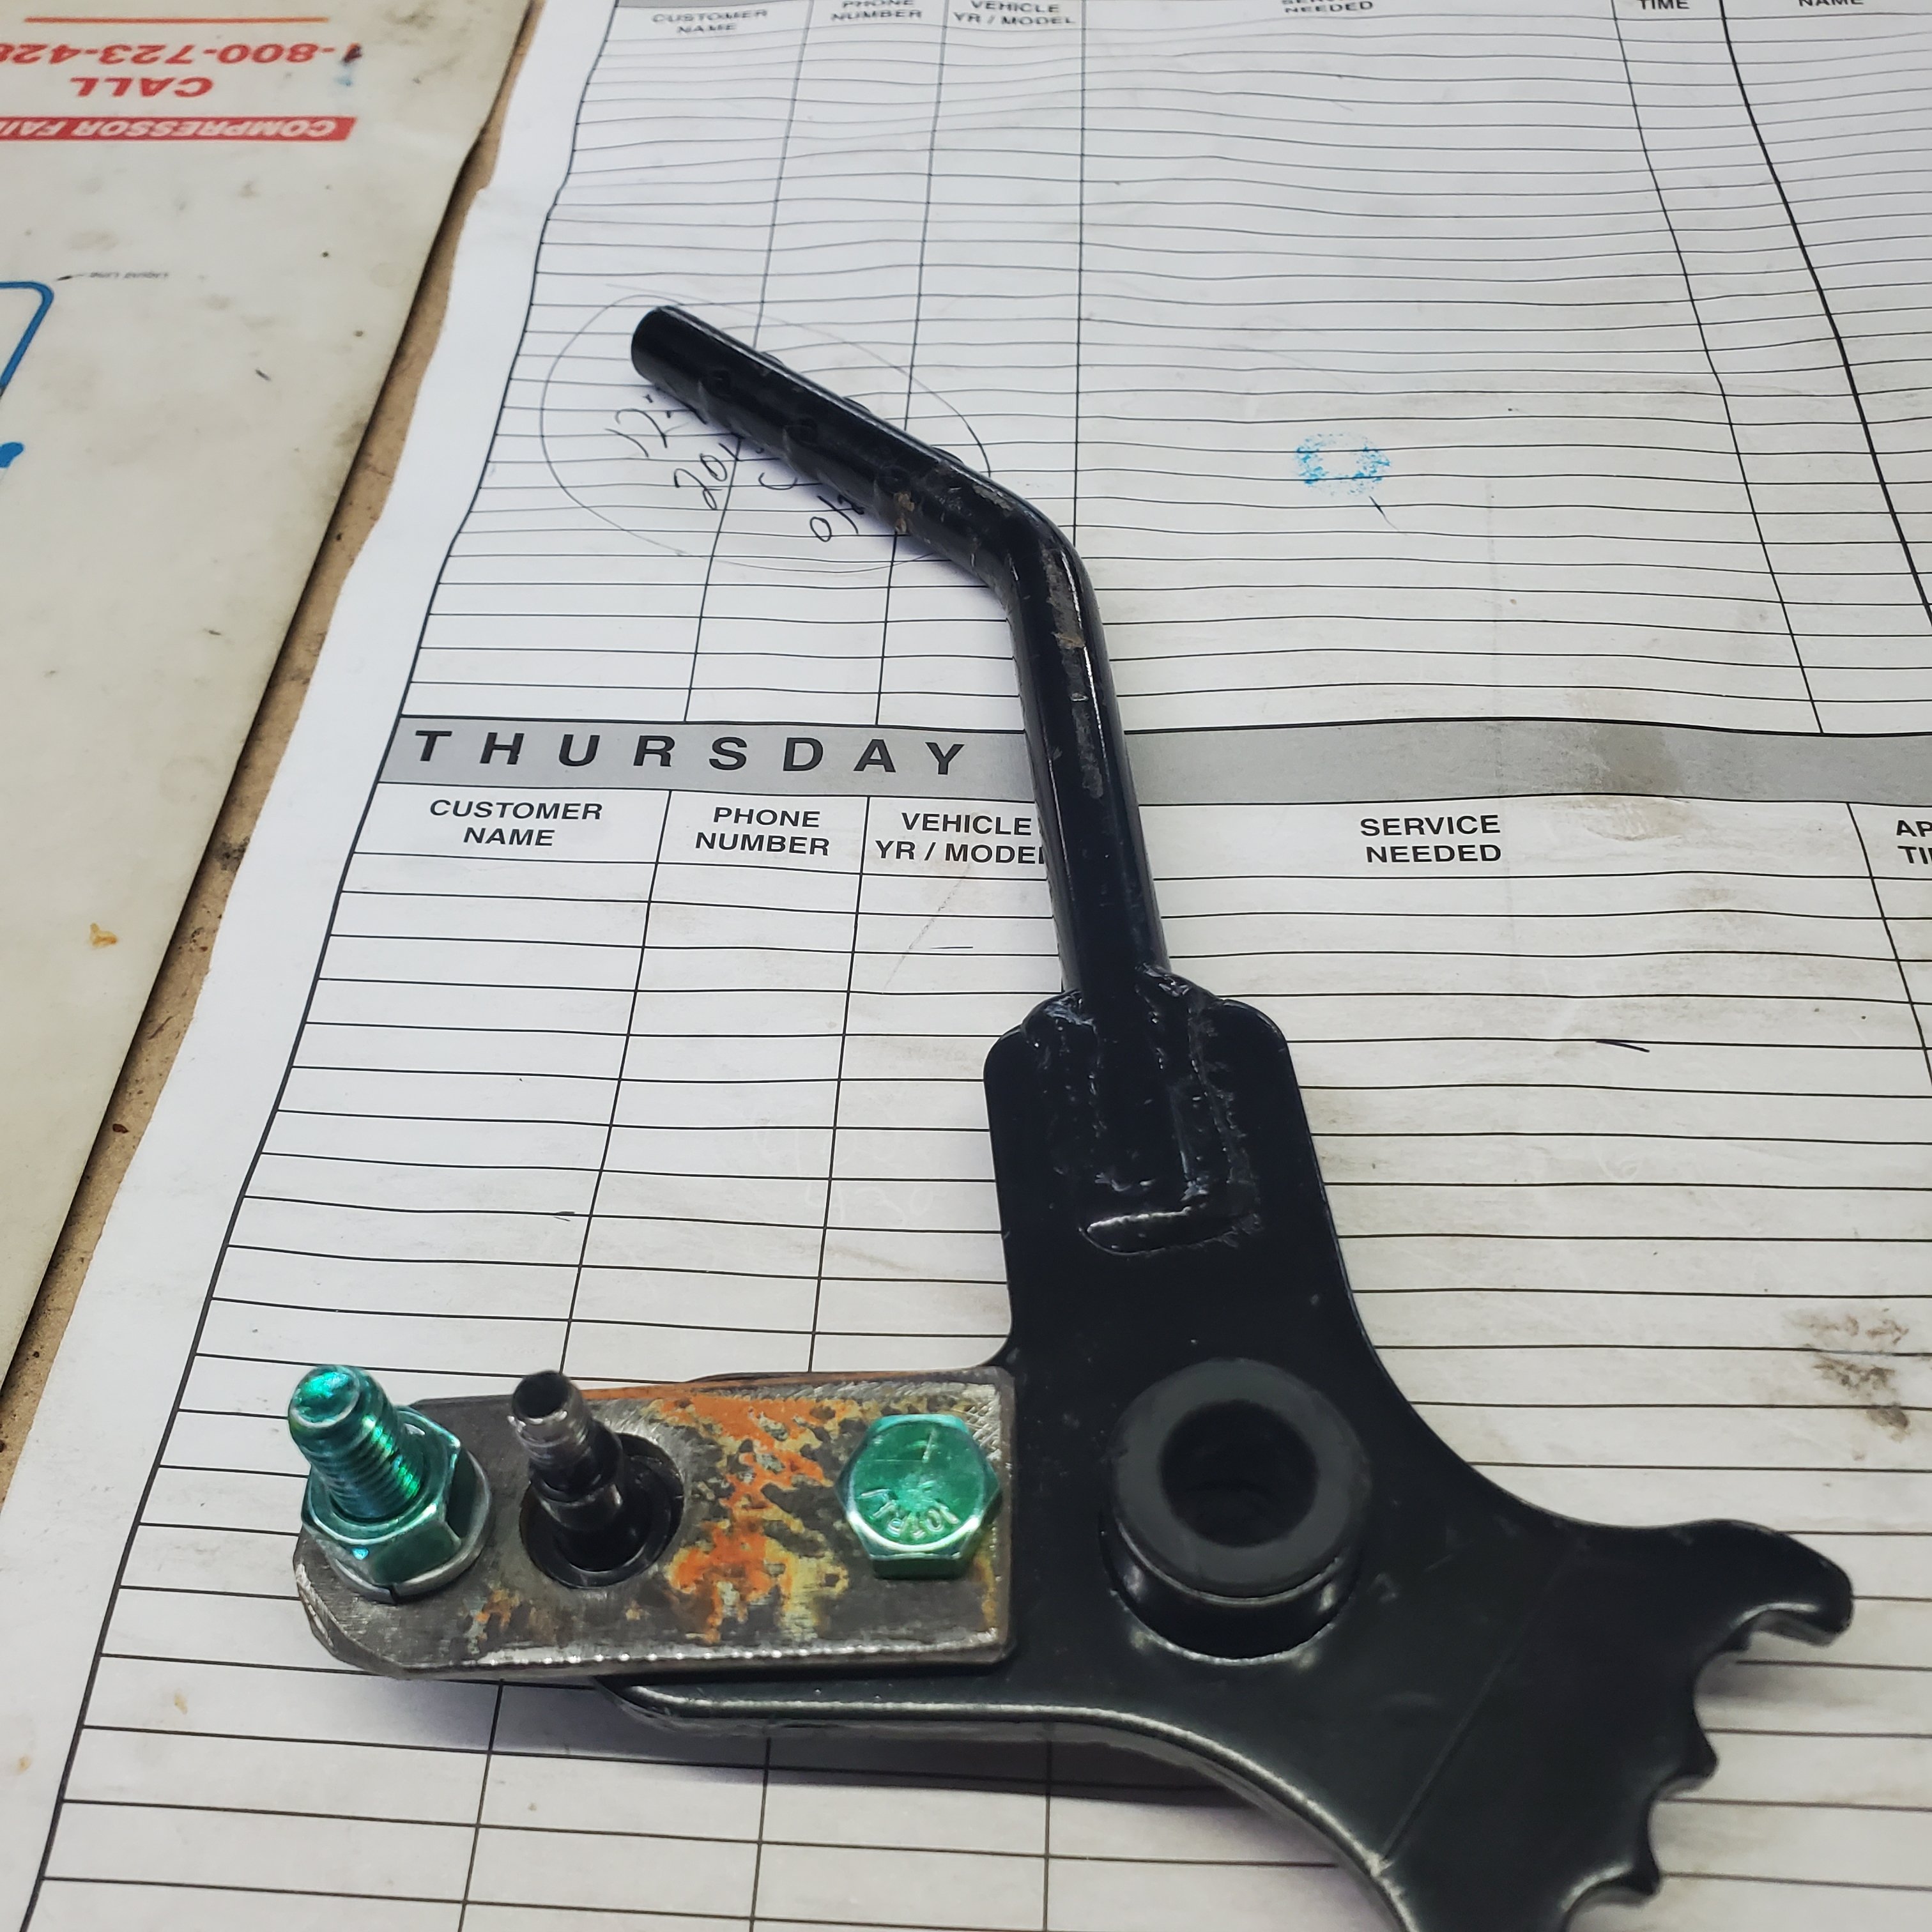
Hello again! I now have a pretty good running Coleman UT400 after a top end rebuild, wet clutch rebuild and a repaired crankcase... ! It plows snow great, but I was also having the jumping out of gear problem, mainly reverse, but a couple times out of forward. I would quickly place it in N and then let the engine idle down and shift again. This worked most of the time. I did some research and found that some have modified the shift linkage. The problem with just adjusting the shift cable is that it really NEEDS more throw, not an adjustment. From what I've read and viewed on the Internet, the linkage arm needs to be about 3/4" longer to gain more throw in both directions. On YouTube, the guy had to remove the shift linkage hole trim and notch the side of the dash to get the shift linkage off the pivot pin. BUT this is NOT necessary. When the "E" clip has been removed and you fish it out of the firewall somewhere, the shift lever is now loose. I had to pop the top of the shift knob off, remove the retaining screw and then heat the lower portion of the knob to get it to come off the lever. Once you have the shift lever loose, push it towards the right to slide it off the pivot shaft. But it won't come off just yet. Use a small pry bar/screw driver and slide the nylon flanged bushing out of the left side of the lever. This lets the lever slide off and get into a "loose" condition and it will twist and come right off without removing the dash trim, that could be a bugger to get back on correctly. Once the lever is off, press out the other bushing so when you're welding on the linkage arm, you don't melt the bushing. I found a piece of scrap metal the same thickness as the lever arm, just over 1/8" thick, close to 3/16". I cut my arm and beveled the edges for better welding. I added a piece just over 5/8" long and kept about a 1/16" gap between the arm and the new piece. Once welded on bother ends, it adds up to just about 3/4" or so. I reinstalled the lever after painting it and did an adjustment on the cable. By the way, it's easier to remove the cable from the bracket on the frame. This gives you more clearance to maneuver in that area with your hands. ALSO, you will need to get a 12" adjustable wrench and slide it over the cable mounting bracket and tweak, to the front, the steel so the cable is pointed upward a bit to now realign with the new longer shift arm lever. There's more than enough metal for the tweak and it will line up perfectly. I now bottom out the shifter on the transmission BEFORE I run out of throw on the shifter... I've tested it just a bit so far and it shifts much better with the longer throw. One of the Coleman authorized repair facilities said that he worked with Coleman to get a new part that's longer by 3/4". He's modified a few and it works perfectly for him. Just doing the cable will just short you on the other end. Here's some pictures of my modified shift lever etc.
2 points
-
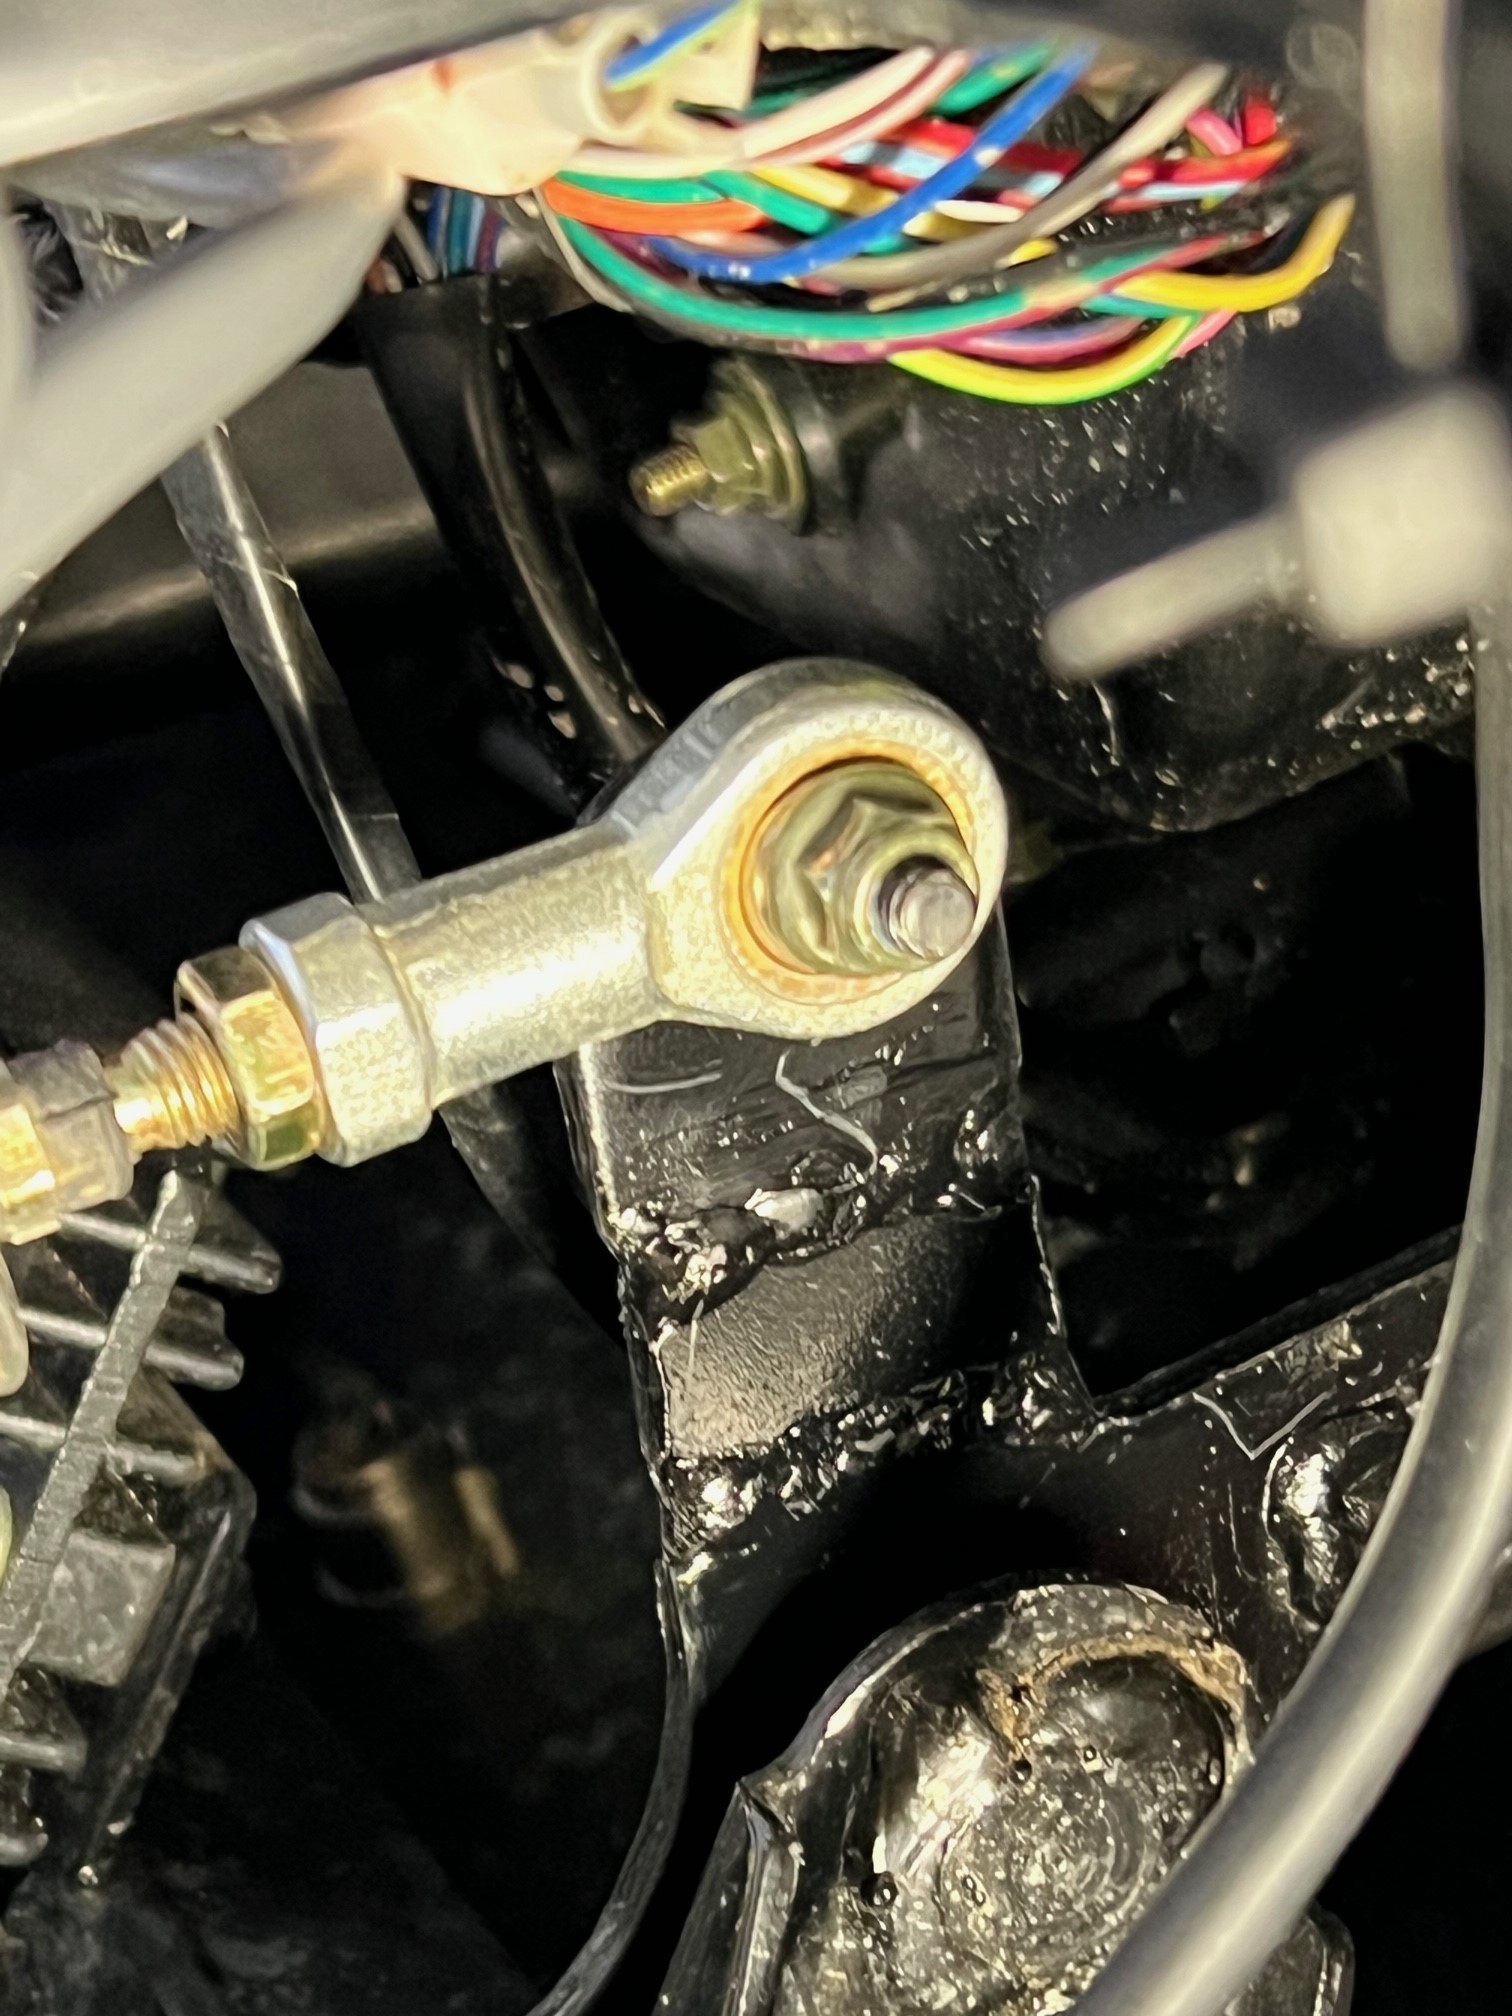
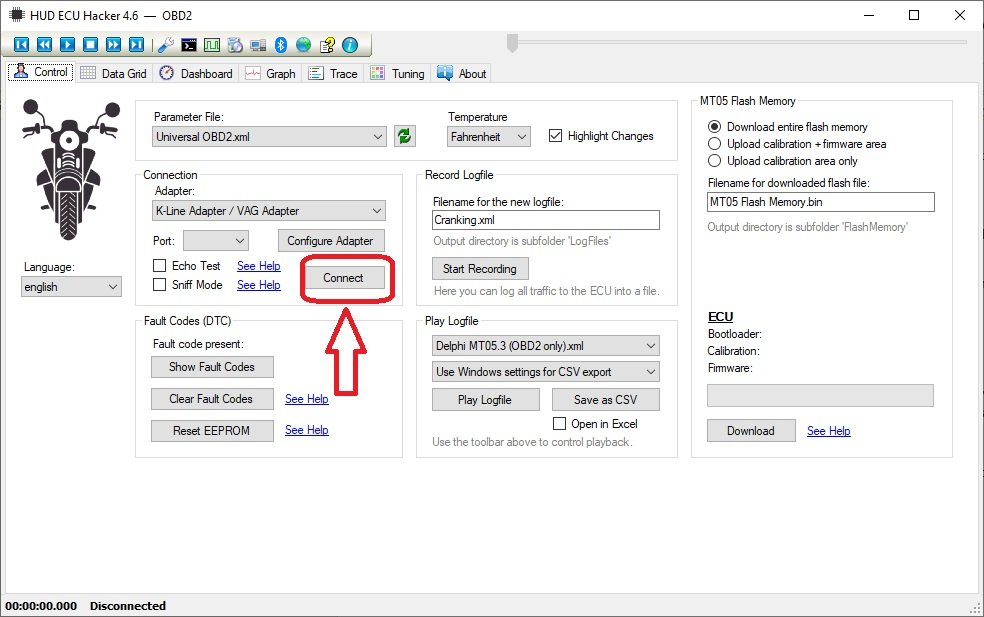
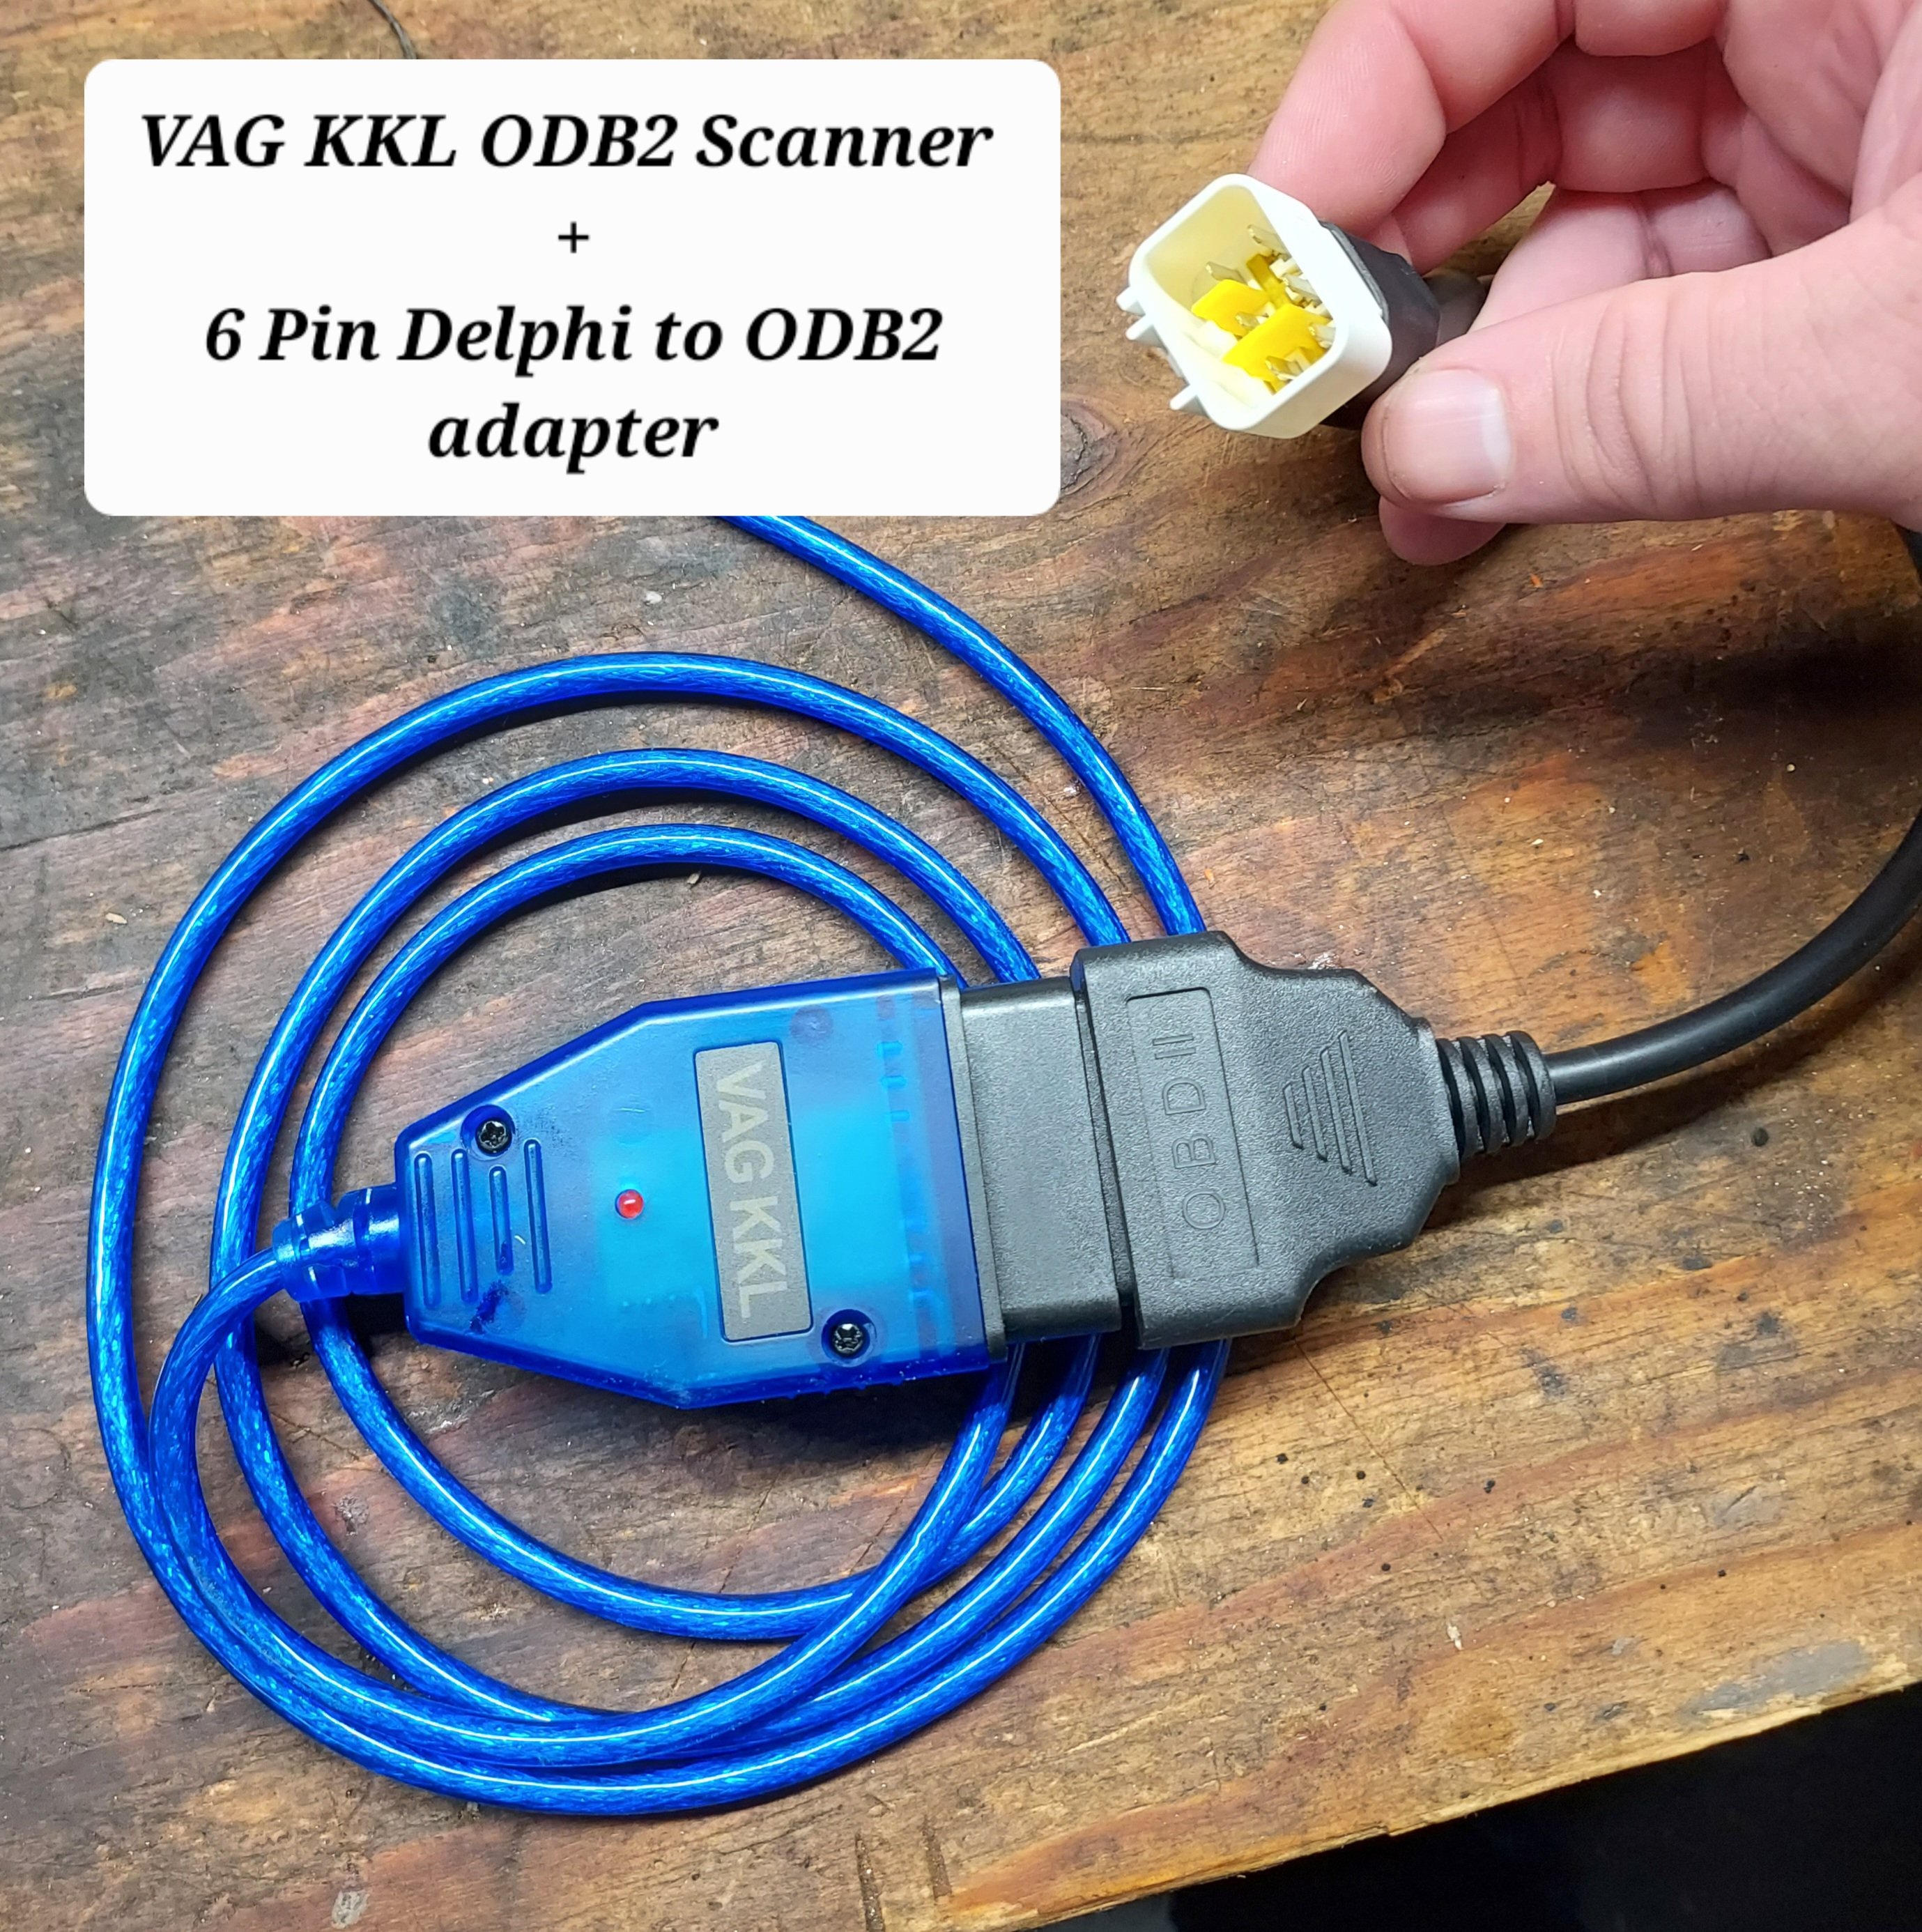
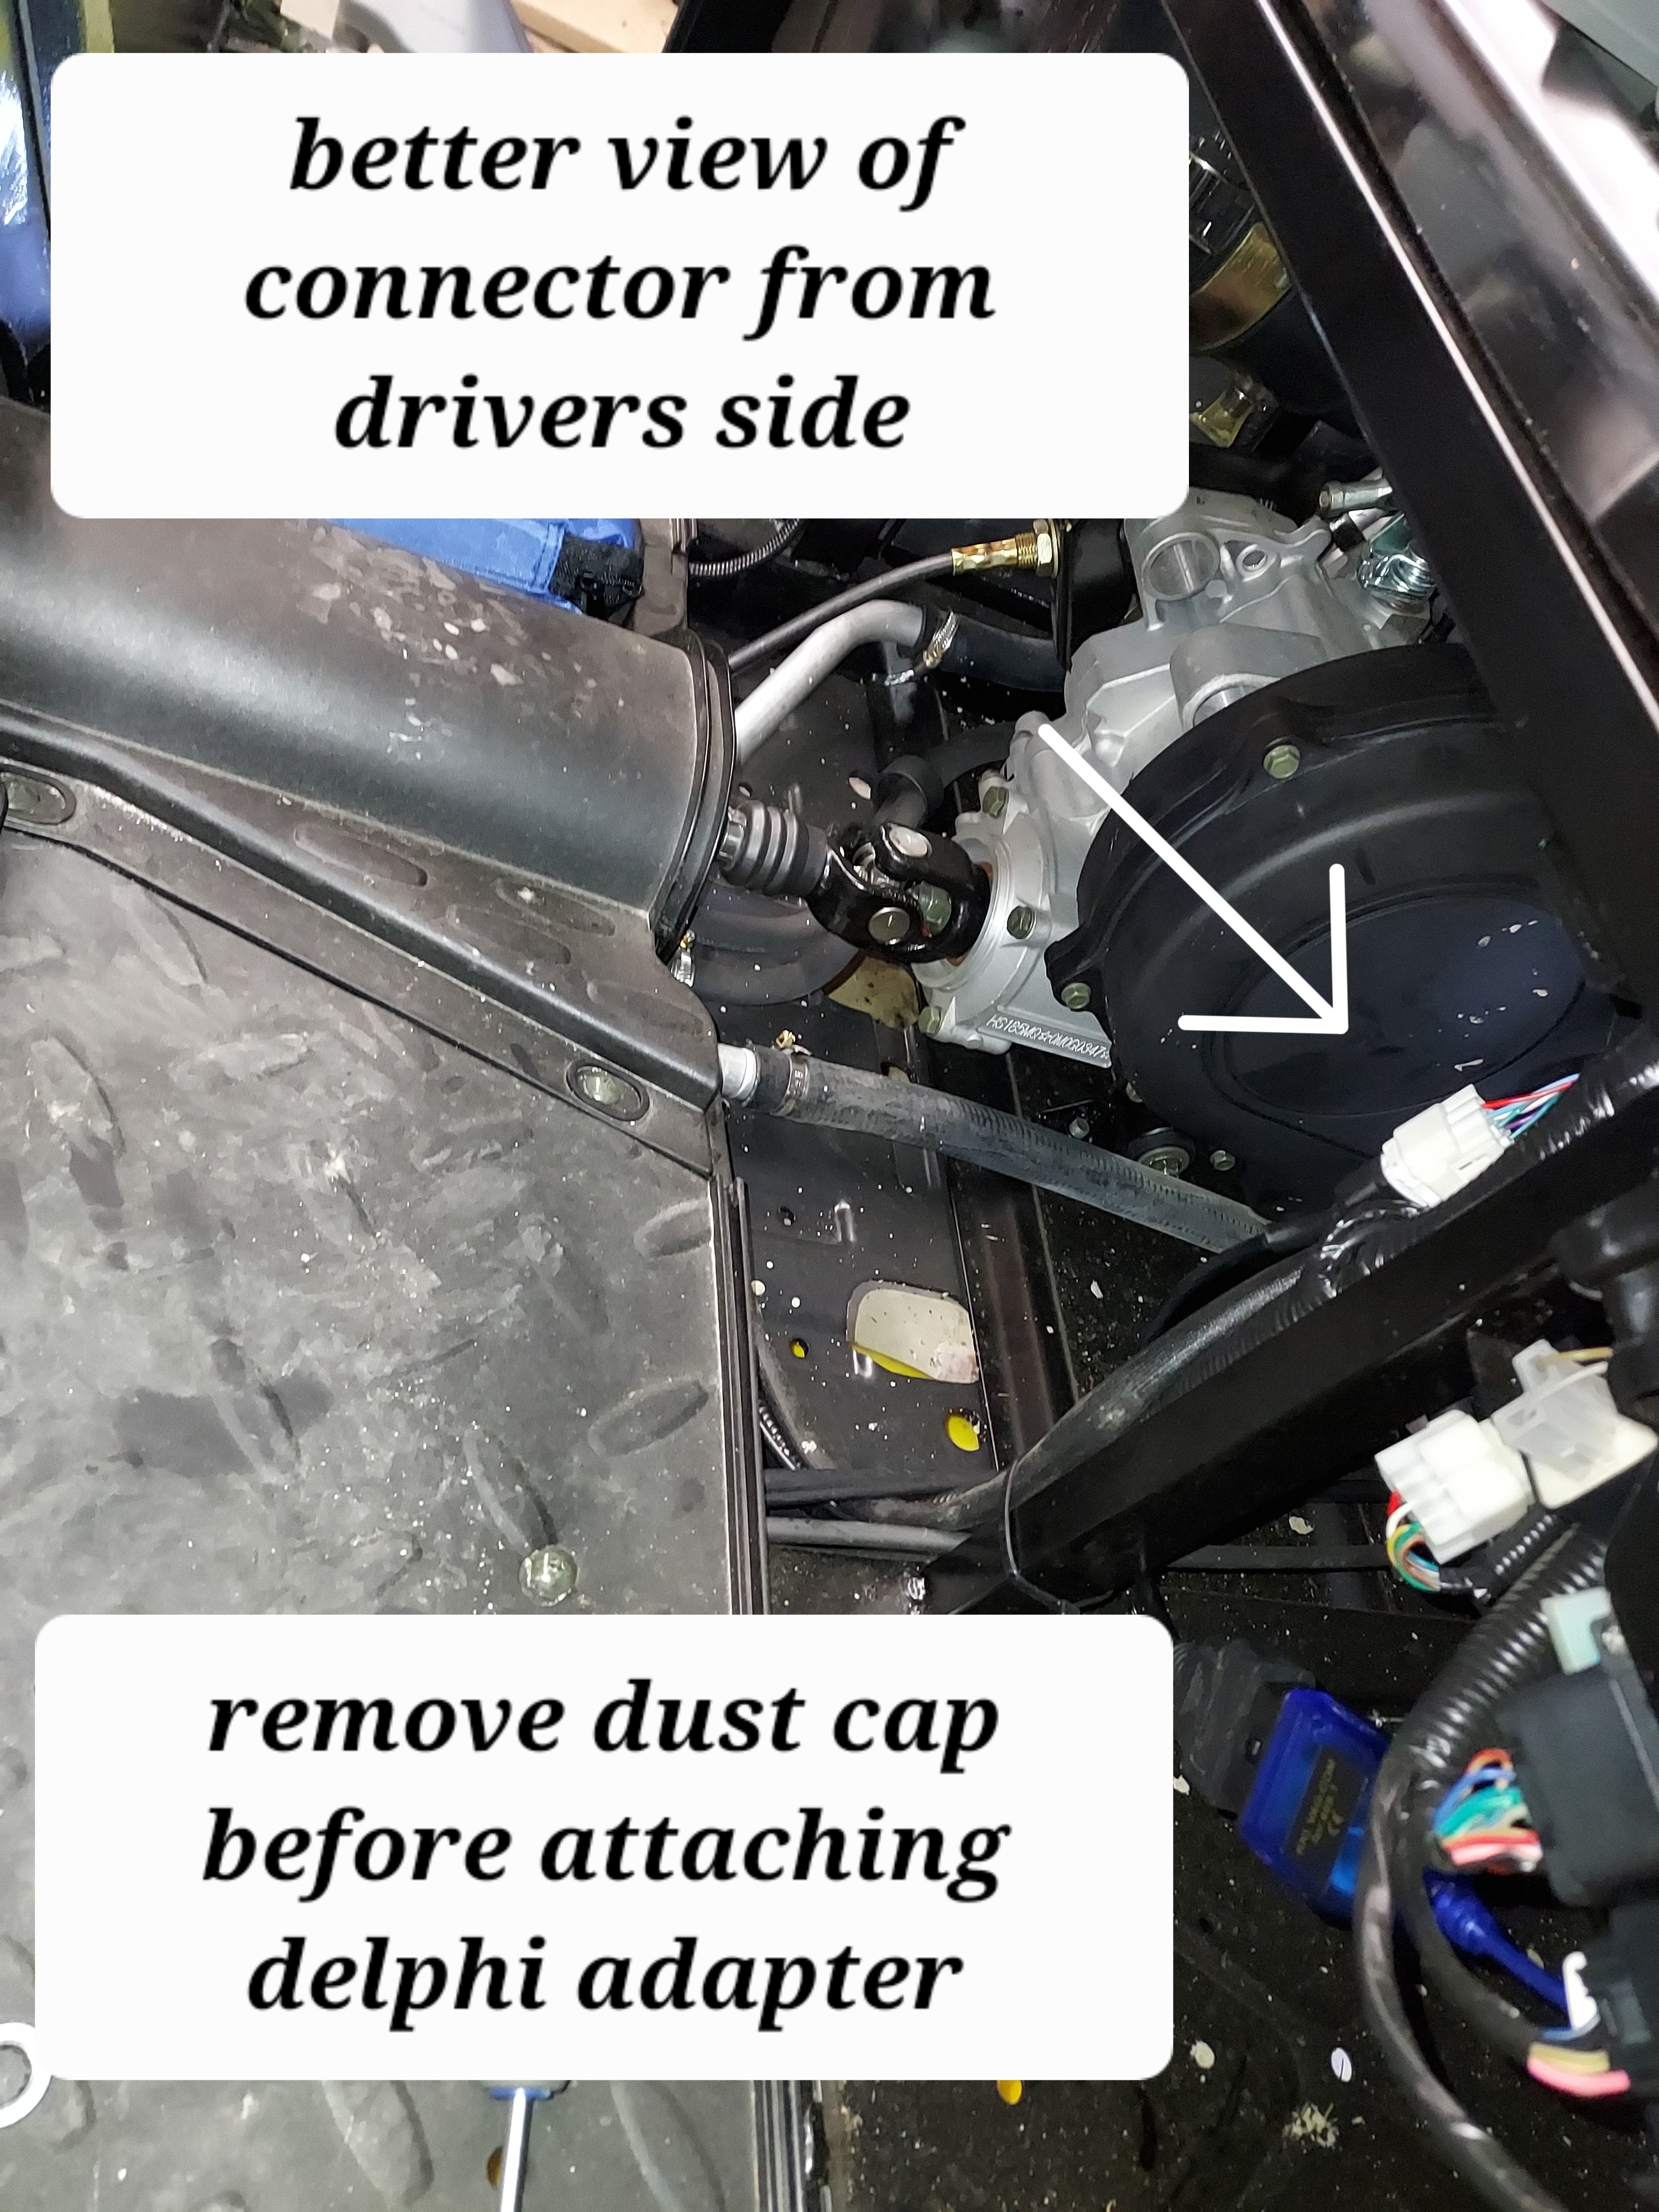
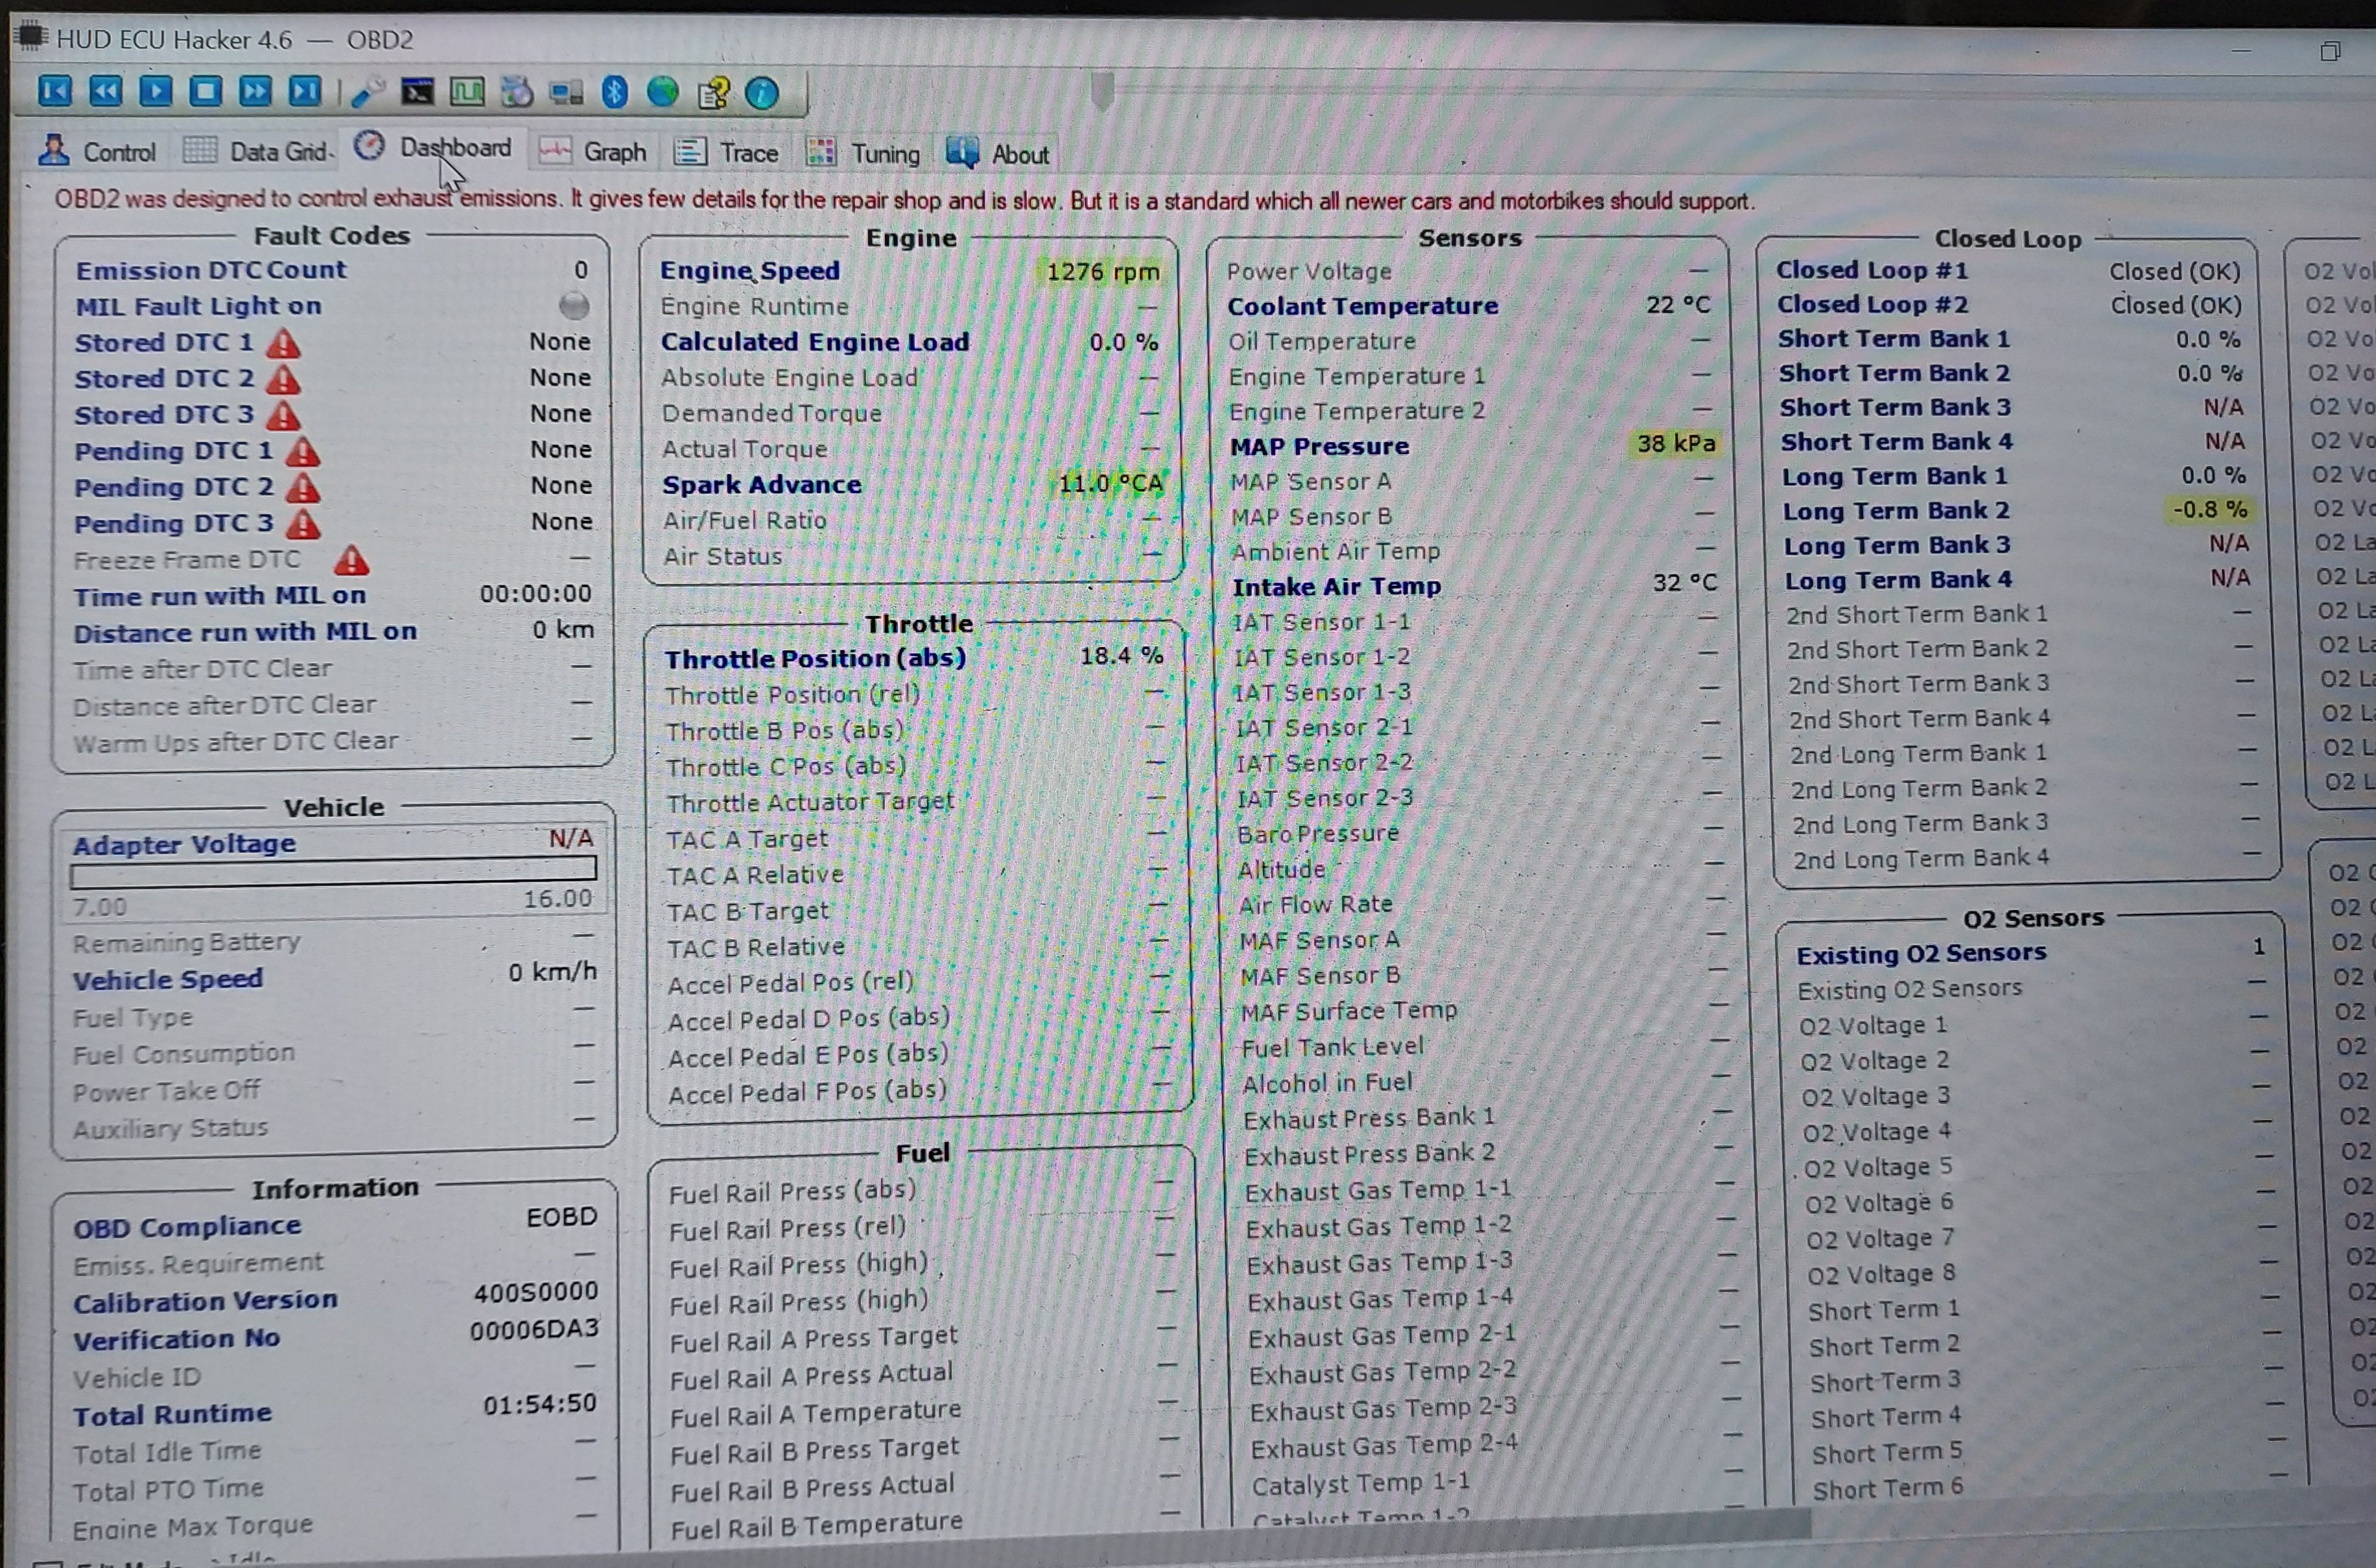
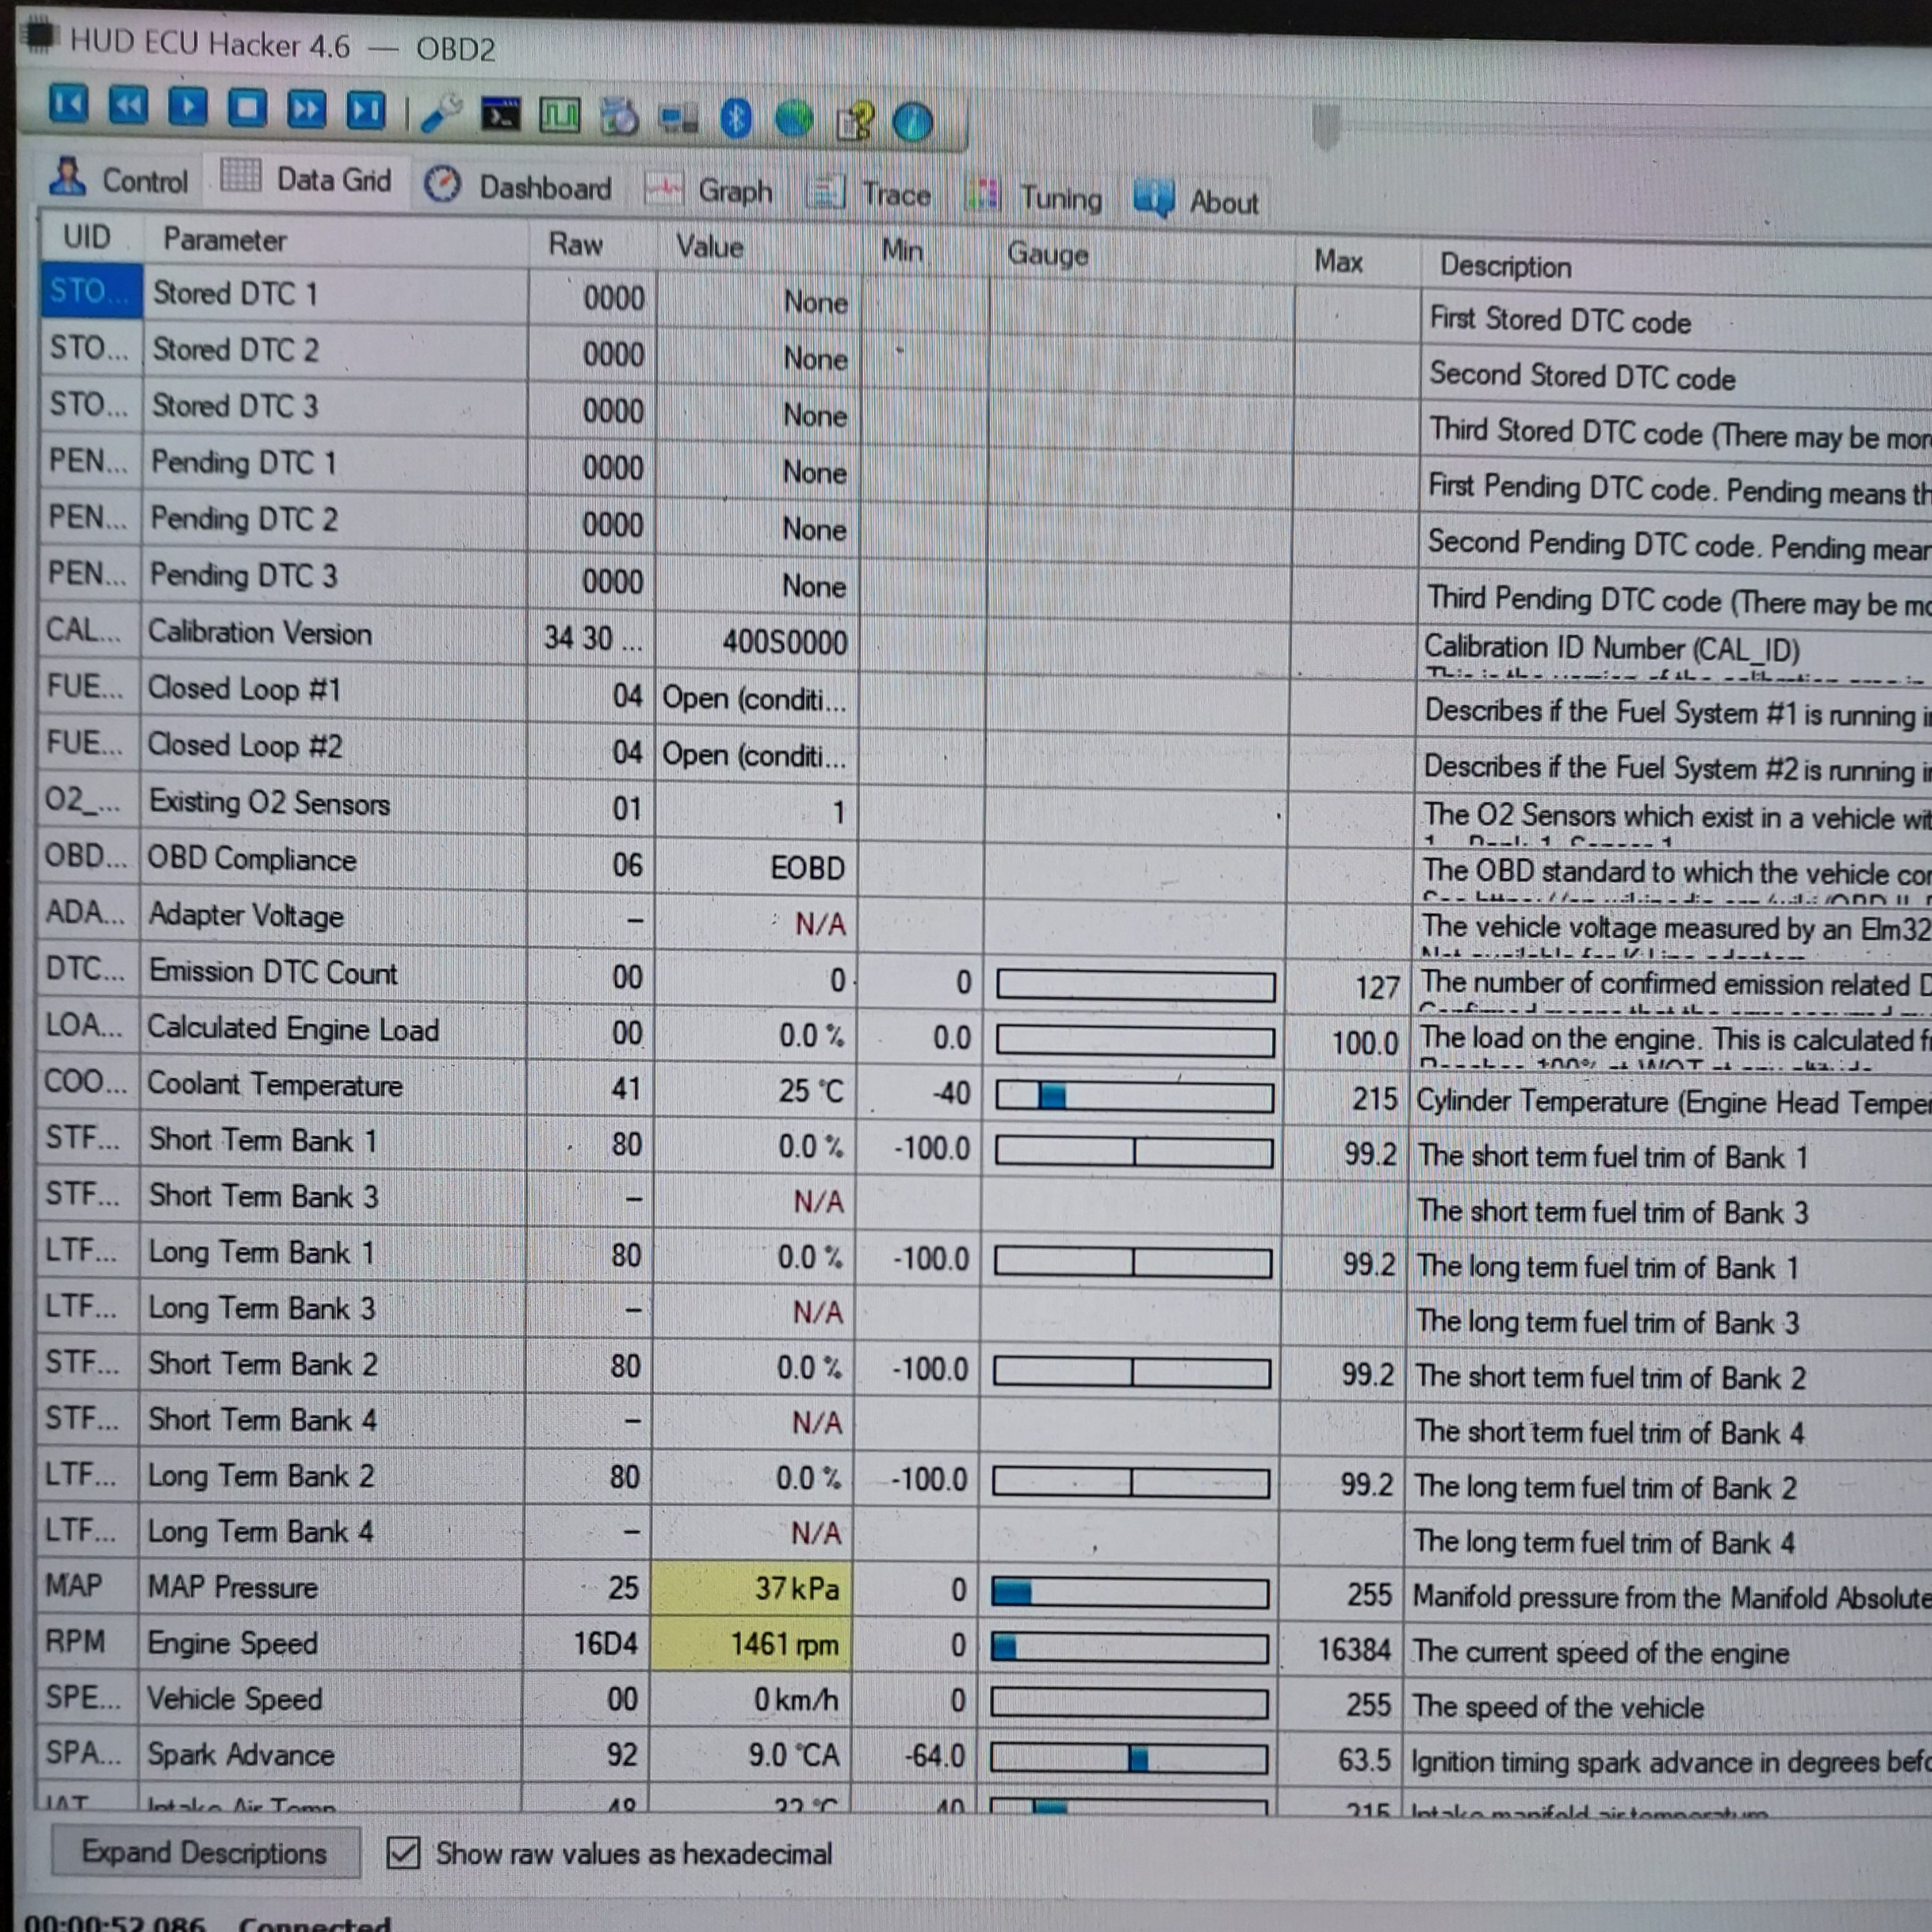
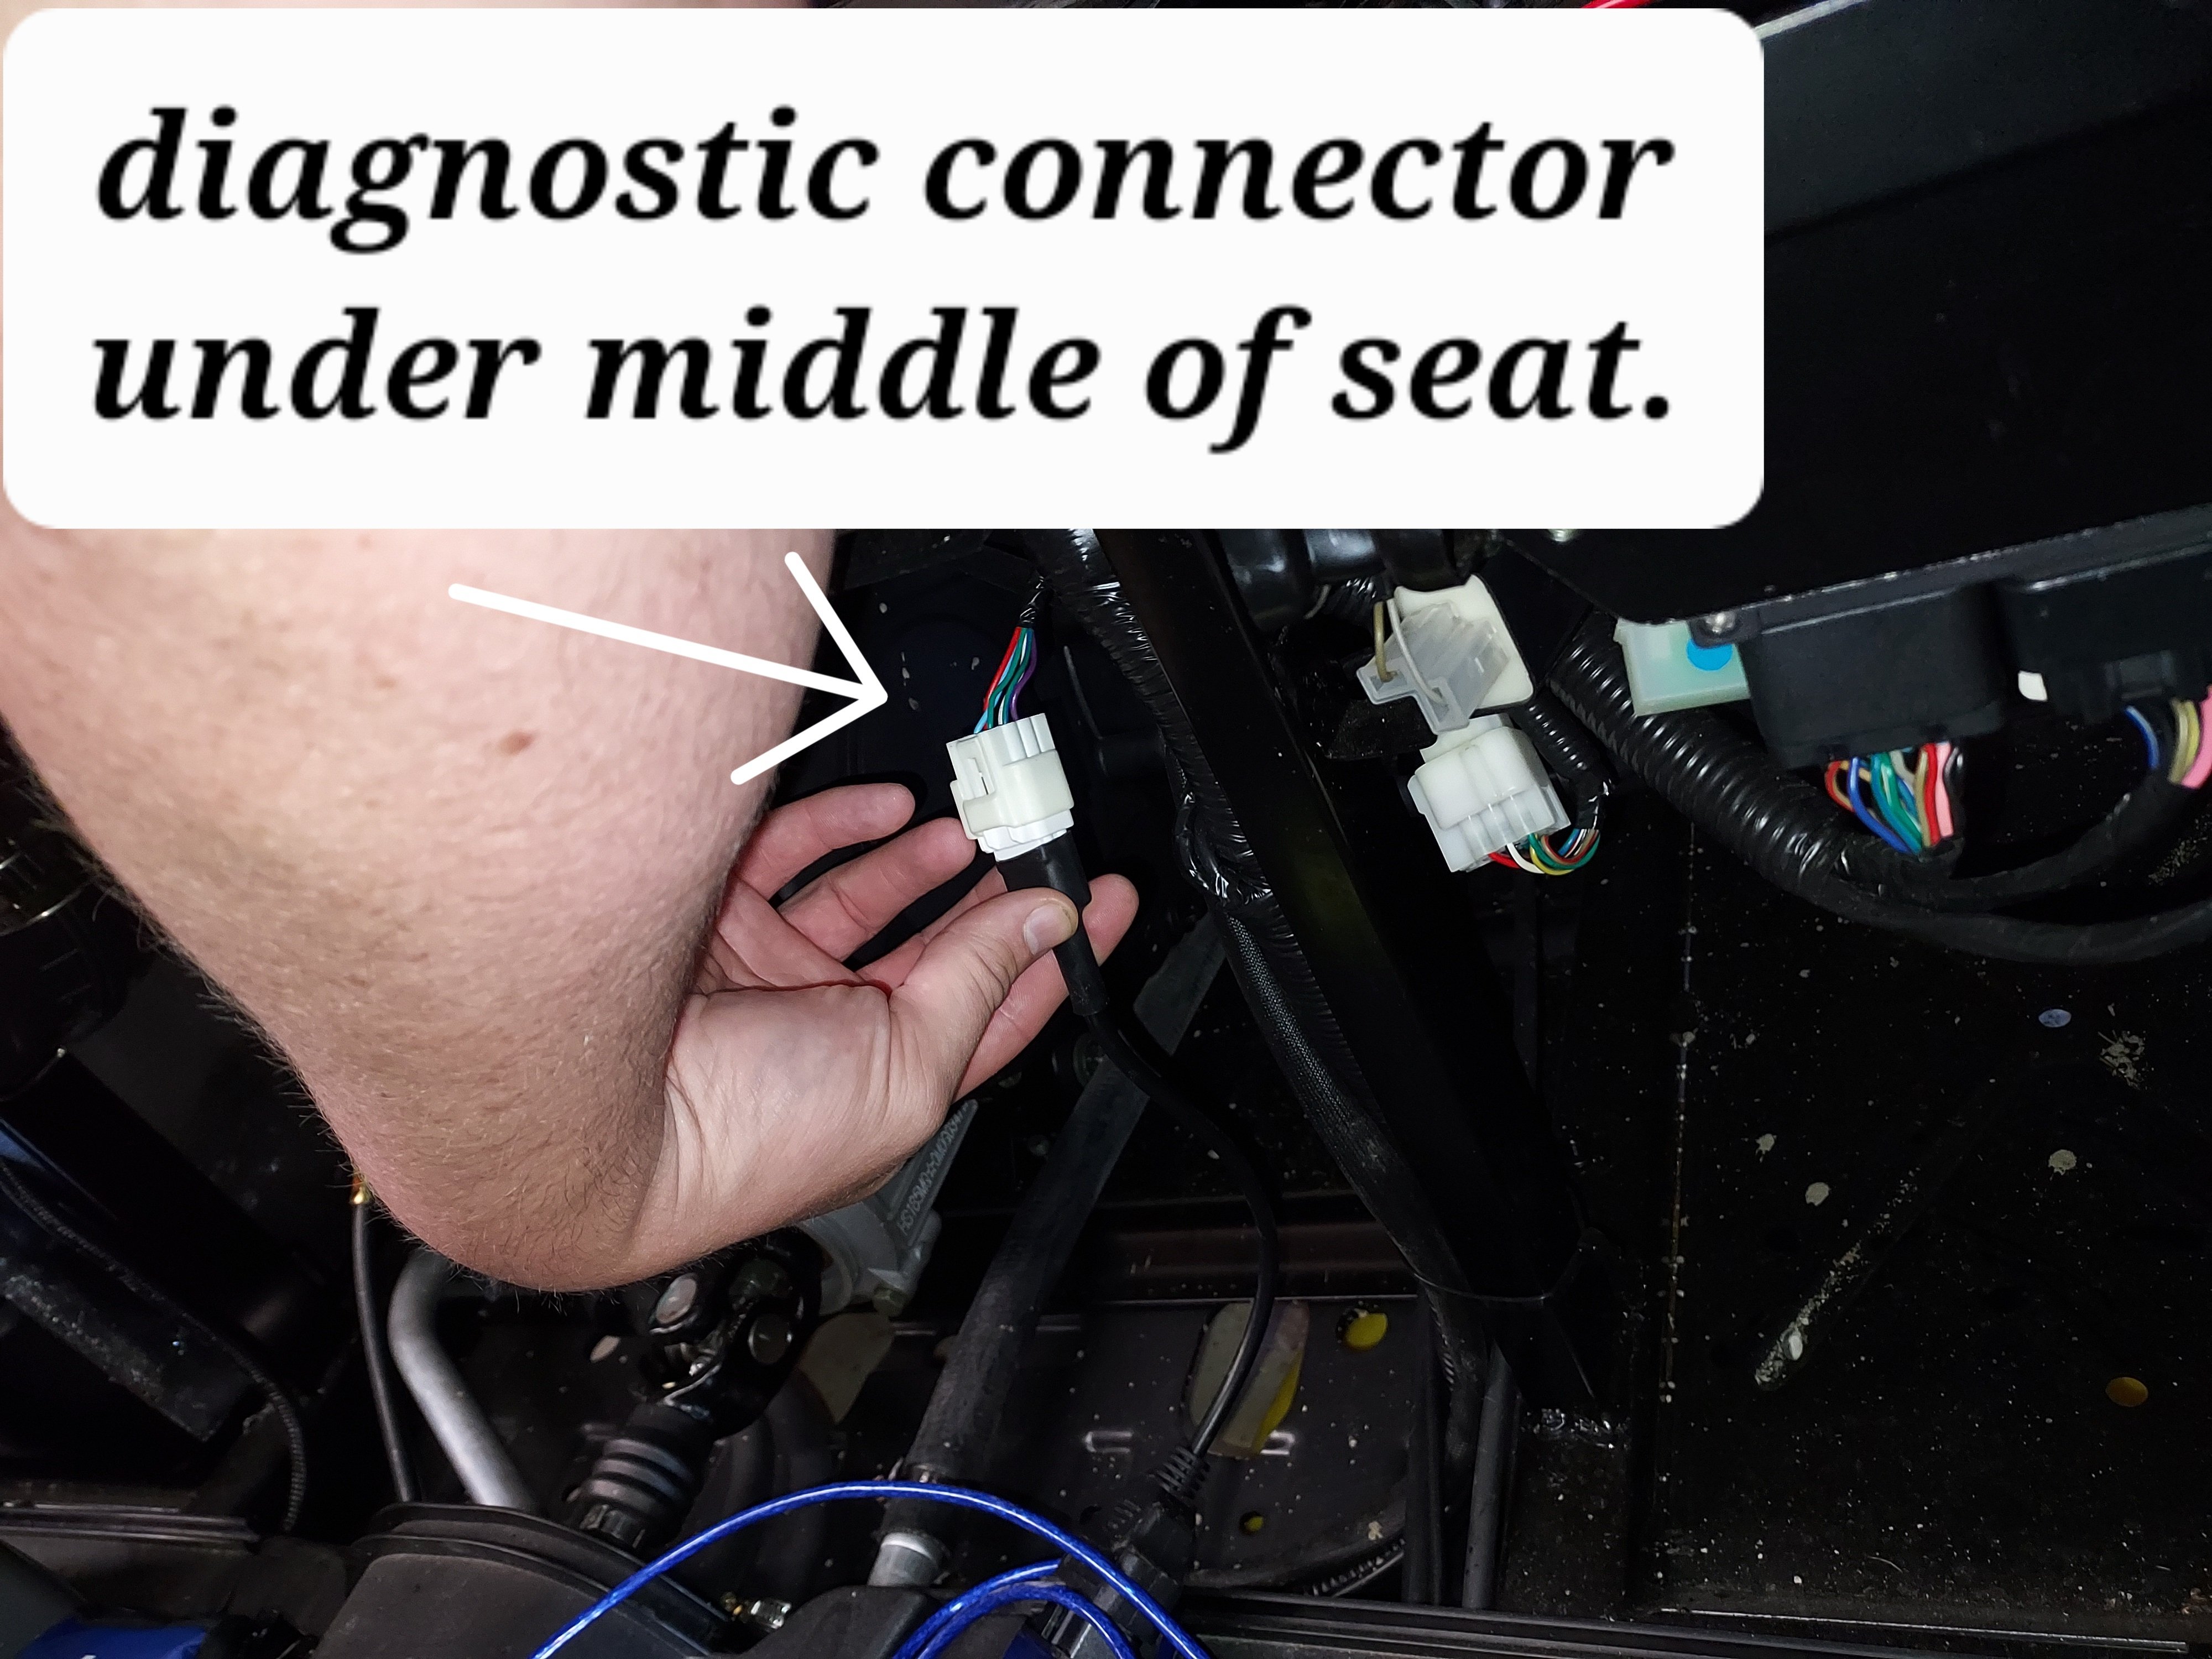
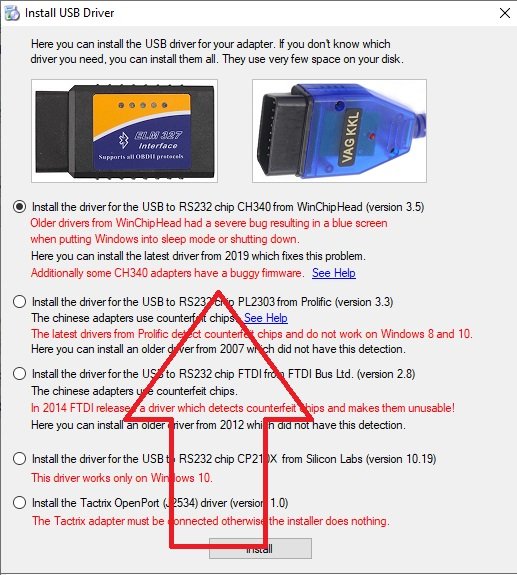
In order to connect with the ECU we need two cables. The first is a USB ODBII cable. HUD ECU Hacker’s documentation has a lot of different confusing options, but here’s what I went with and managed to get working, the cable is called “VAG KKL” it is a USB to ODB2 cable. It is available from a variety of sources for $10-15. The second thing we need is a “6 pin delphi to ODB2” adapter cable. It is also available for a similar price. In my case I ordered both from ebay, but there are other sources. Once we have our cable in hand we need to find the plug it in on your machine. My personal rig is a Coleman UT400, but the wire location should be similar for all Hisuns. My cable was located under the middle of the seat area. Just inboard of the battery, where the main wire harness split loom runs. The cable is a 6 pin (3x2) with a dust cap. Remove the dust cap and plug in the 6-pin end of the Delphi adapter cable. Note: When I was done, I left the 6-pin adapter connected, and zip tied it so it now runs to in front of the battery for easier access in the future. Next download and install HUD ECU HACKER DOWNLOAD Open HUD ECU Hacker on your PC It should prompt you to choose a driver to install. This particular cable uses the “CH340” driver (First choice on the menu) click to install, once installed hit the X in the corner to go back to the main page Once the driver is installed plug in the USB Cable, and plug the ODB2 end into the 6 pin adapter. The red led on the adapter should light up indicating it has power. Drop down and pick a com port on the main screen, it should show the VAG KKL adapter as a com port. Click connect on the main menu. It will pop up a bunch of fast scrolling text indicating it is connecting. Once connected you can click through the various tabs to see different data sets. The main menu also has the option to show fault codes, clear fault codes, reset the EPROM back to factory. The other function that may be helpful is recording a log file. You can record a log while operating the unit, and come back later and replay it to try to better diagnose what is happening. Within the various pages you will see the reading from each sensor. Sometimes a sensor reading will be off enough to cause running issues, but not enough for the ECU to realize its an issue. For example if the engine thinks it’s really warm, but its actually cold, it may not inject enough fuel to start. There are also more advanced functions, like adjusting fuel mapping, but that is beyond the scope of this tutorial. Full HUD ECU Hacker Documentation (Very technical reading) If you find this helpful give me a comment below or a thumbs up.
2 points
-
Try playing with the adjustment. The 500/550's don't have the same shifter cable/lever issues as the 40's but the cable can stretch over time. If you're getting grinding and popping out of gear it could be worn clutch dogs too, which require some effort to replace as they're internal to the transmission. If you're having shift issues and grinding it's best to be proactive about adjusting because it does damage the dogs over time, and eventually will just pop out of gear at will once the dogs are rounded enough.1 point
-
Hello! I am a University of Notre Dame student and have been enlisted by Lippert Components INC. to help them understand you, Side-by-side users. Taking the survey in the link below would help us to help you in improving the buying experience of Side-by-sides. Thank you so much for your attention and participation. https://nd.qualtrics.com/jfe/form/SV_aYrwsZyjs2ZHK3I1 point
-
Oh Joe.....ever since you bought your Massimo you've been suspicious 🤣🤣🤣1 point
-
I have a 2022 500 Hisun product, I have had them in the past. I change my oil myself and trying to drain through the hole where I remove the plug is a mess. How does everyone keep the belly pan clean during the oil and filter service? Wes Jackson1 point
-
Really weird. Glad you are aware of this peculiarity.1 point
-
I realize that many of you do not have diesel machines. For those that do, this is for you: Just wanted to post my experience this past week. Here in Texas, we had pretty good dip in temps. For 4 days it did not get above 25. At night, it was single digits or close to it. I always put Sta-Bil fuel stabilizer in the storage tank (30 gallon). And up until this tank I was using Power Service (white bottle) for anti-gel. Never had an issue. This tank, however, I switched to Stabil All season (anti gel). It is supposed to good down to -40. Zap. That is a big fat lie. I put in twice the amount called for in the instructions. Result was less than optimal. I drove the SxS 100 feet (to go get the mail) and it died. I looked at the fuel bowl and it was a cloudy, wax substance. So, the Stabil did not work. That said, I'm not sure that I ever tested the Power Service in the same manner. So I am not saying that one is better than the other. What are your experiences? Are these products inferior? What do you folks in the northern states / Canada use? Am I missing something? CC1 point
-
Sometimes water can come from condensation. My tractor has water separator so that may be a factor why I have no issues anywY good luck.1 point
-
The one I used and linked above is a generic chart. Unfortunately there is very little information on Hisun... and I guess Coleman machines... Maybe becuase Hisun is a knockoff of the Yamaha Rhino, at least the older Hisuns. For ours I try to get aftermarket Yamaha Rhino parts when I can as usually they are cheaper and more accessible. But I don't think it works that way for the new machines as they aren't really copies anymore... unless they are and I don't know. Luke1 point
-
So after studying the schematic, I started looking for the 30A fuse that goes from the charger to the batteries. I found it mounted to one of the batteries. The fuse holder had actually melted. I replaced the fuse and holder and the charger started right up. I kept an eye on temperature of the new holder and the wires running to it. They get quite warm, but not enough to melt the new holder at this point. I am worried what made it so hot in the first place and am concerned it will happen again. We'll just have to wait and see.1 point
-
They probably would but I doubt you would be happy with them these are for cars not off road vehicles have you tried tractor supply or rural king or other stores of this type they usually have tires for these things1 point
-
piston slap /wrist pin .. ? lots of possibilities. Rod knock usually just gets louder on revving. Drain oil, see if theres metal in it.1 point
-
I have a 2022 same problem. In fact on my way to Bass Pro today for this plus Also watch for misadjusted tail gate latches that put too much pressure on the bed causing it to crack.1 point
-
Does anyone know the part number for the stator and flywheel on the 2015 intimidator 750 gas? It has a kohler Ech730-3036 engine.1 point
-
There should be a rubber O-ring around the fuel pump. Between the fuel pump and tank. Put a little grease around the O-ring. That will help the ring turn to lock. Yes it should be a little hard to turn since you have to compress that O-ring. Once you get the ring started in the locking tabs. Get a brass hammer or solid rubber hammer. If needed you can use a brass punch against the ring. And tap with the brass or rubber hammer. Reason for rubber or brass is those material don't cause sparks. You don't want sparks around the fuel pump or fuel tank. Let us know how it goes for you. Send pics. Greg1 point
-
No - it will not stay running long enough for you to do that.1 point
-
Discover the thrilling world of SxS Adventures with UTV Offroad Adventures in 2024! Be sure to explore their website for comprehensive details about each event. These experiences promise an unforgettable time, and with high demand expected, swift registration is key if you're keen to participate in any of them. Head over to www.utvoffroadadventures.com now to secure your spot in these exciting journeys!
1 point
-
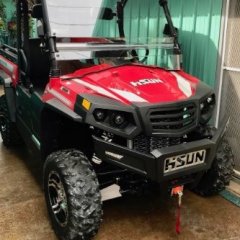
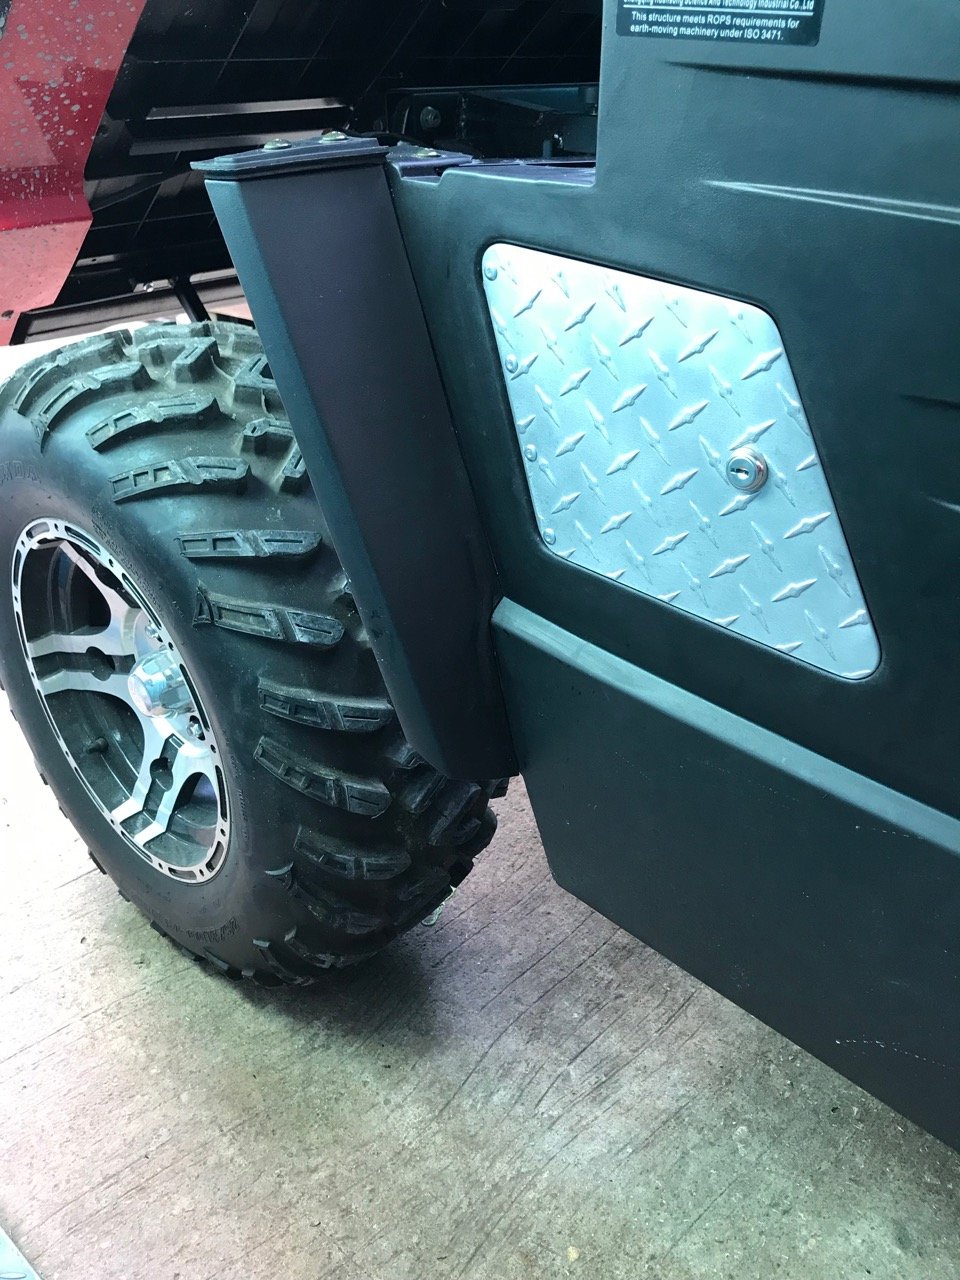
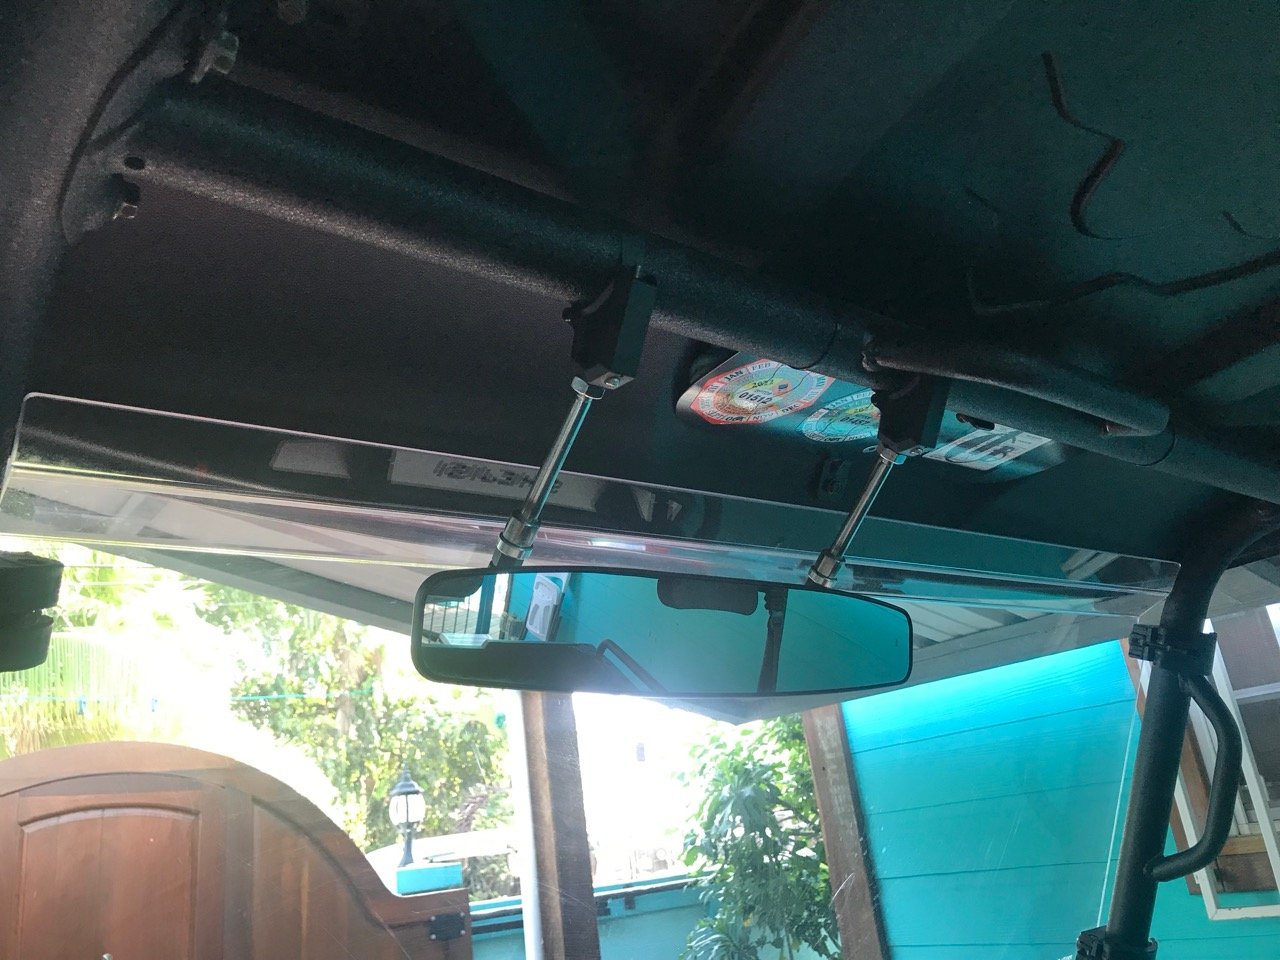
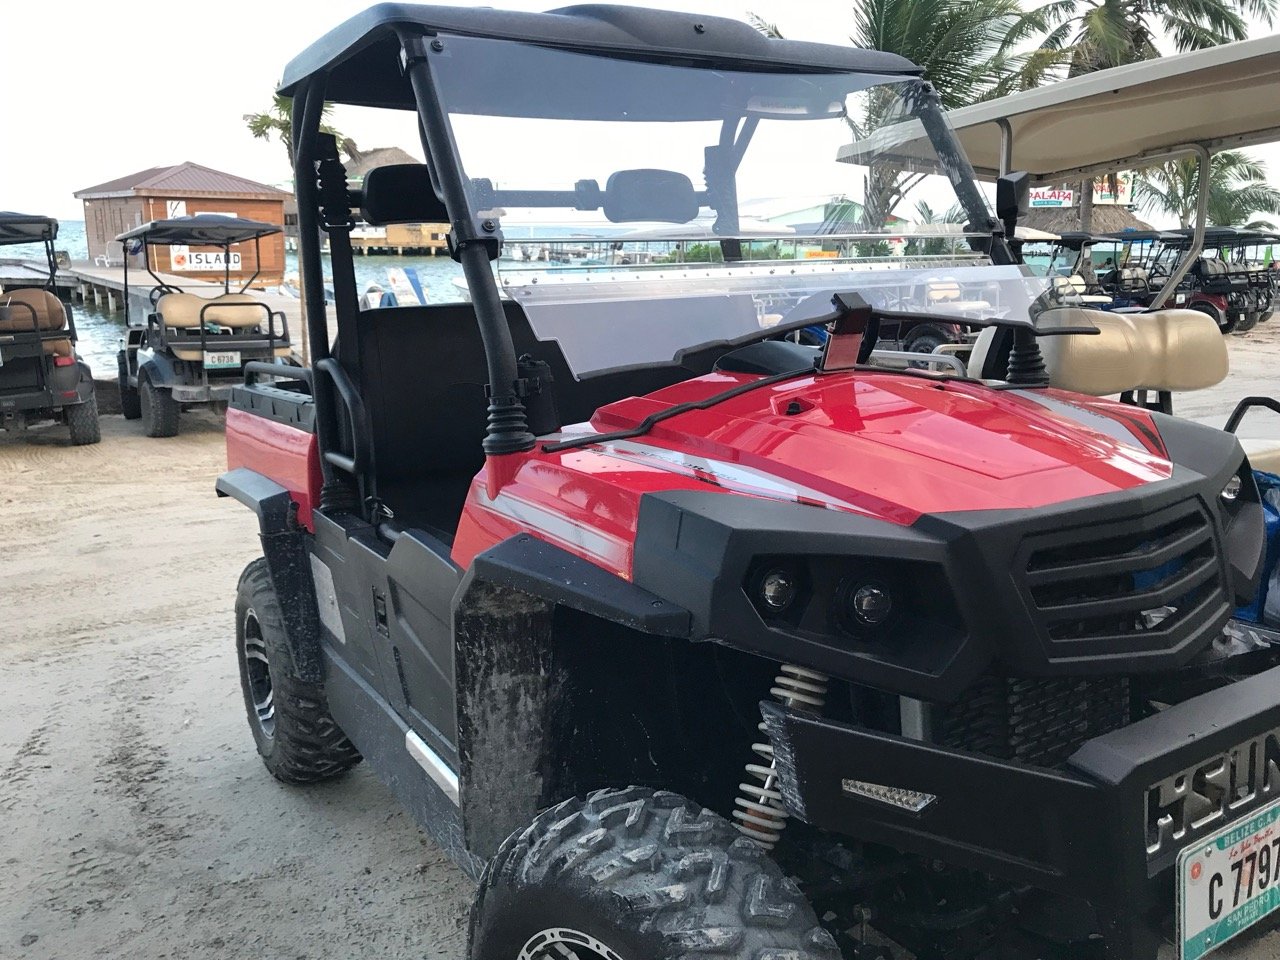
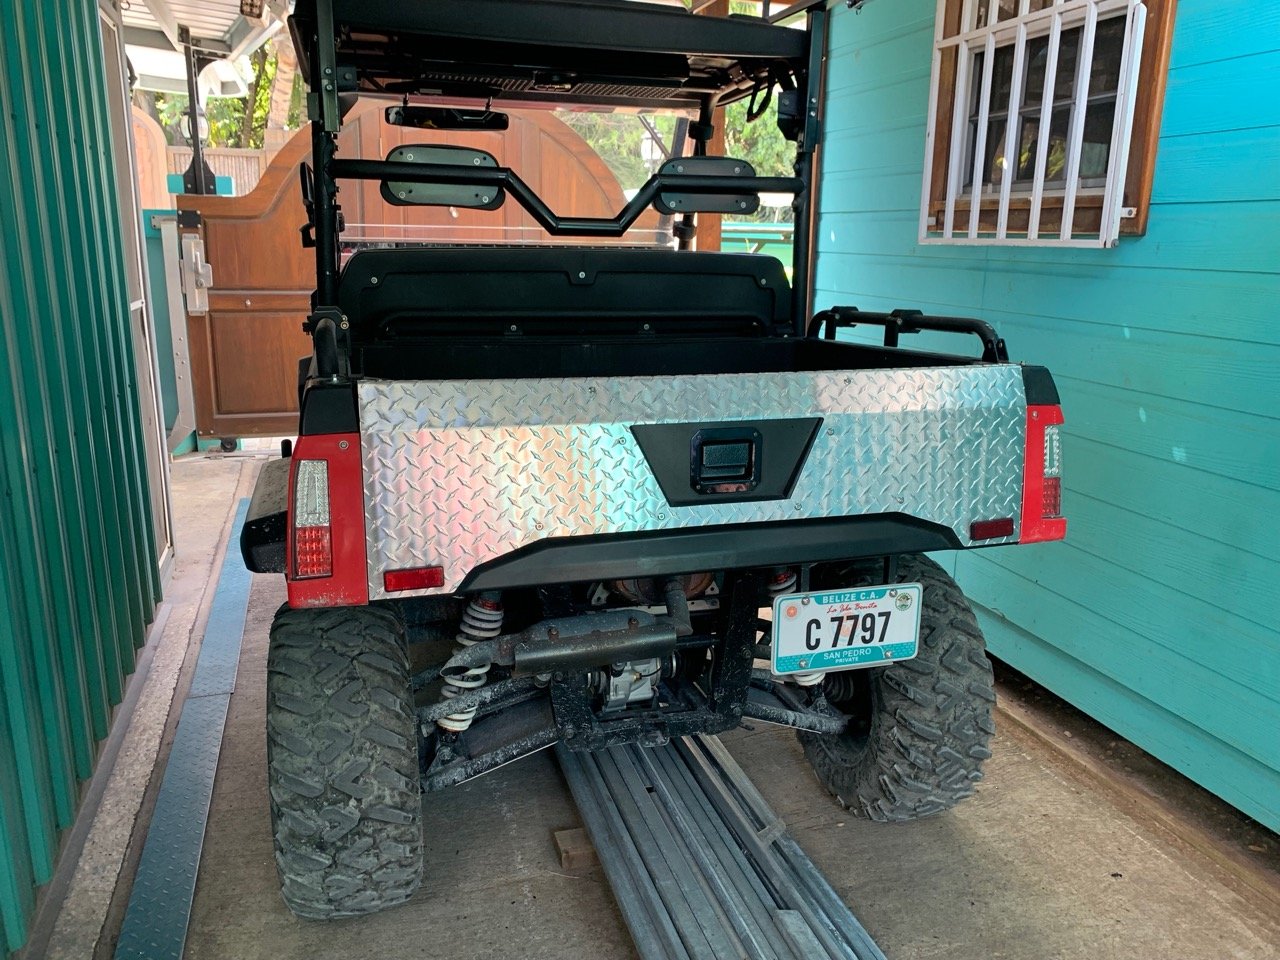
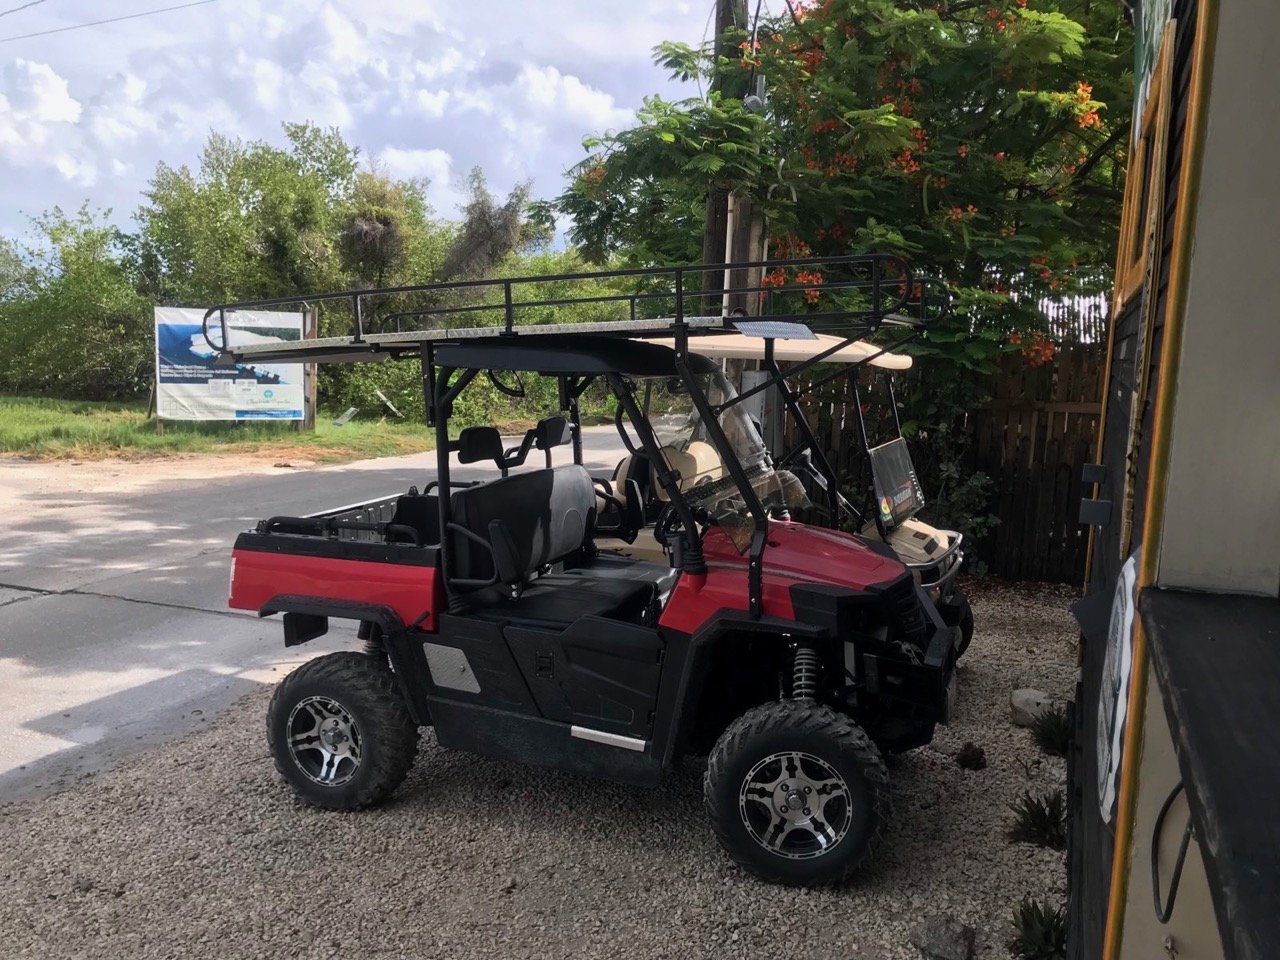
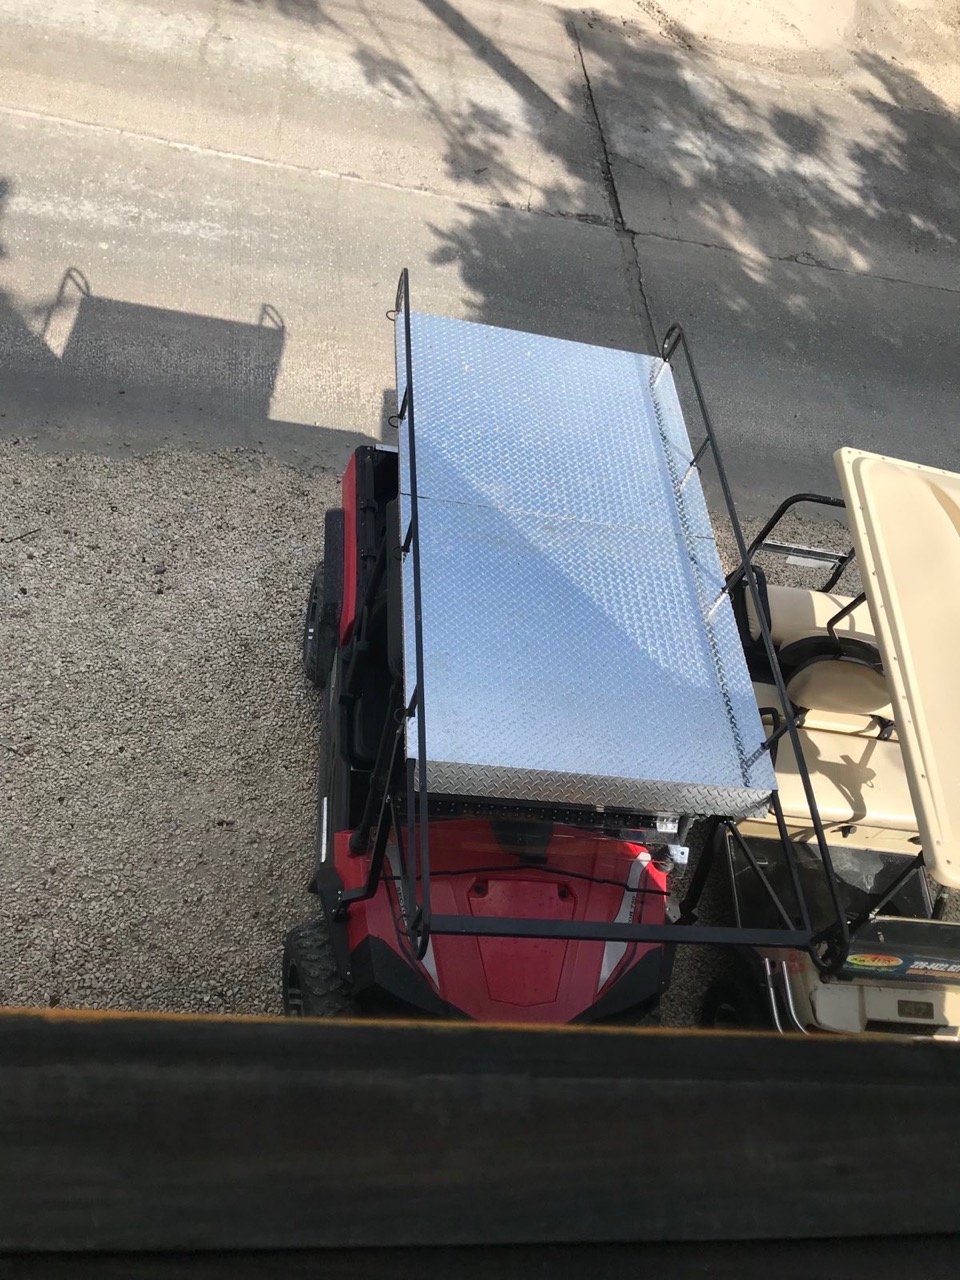
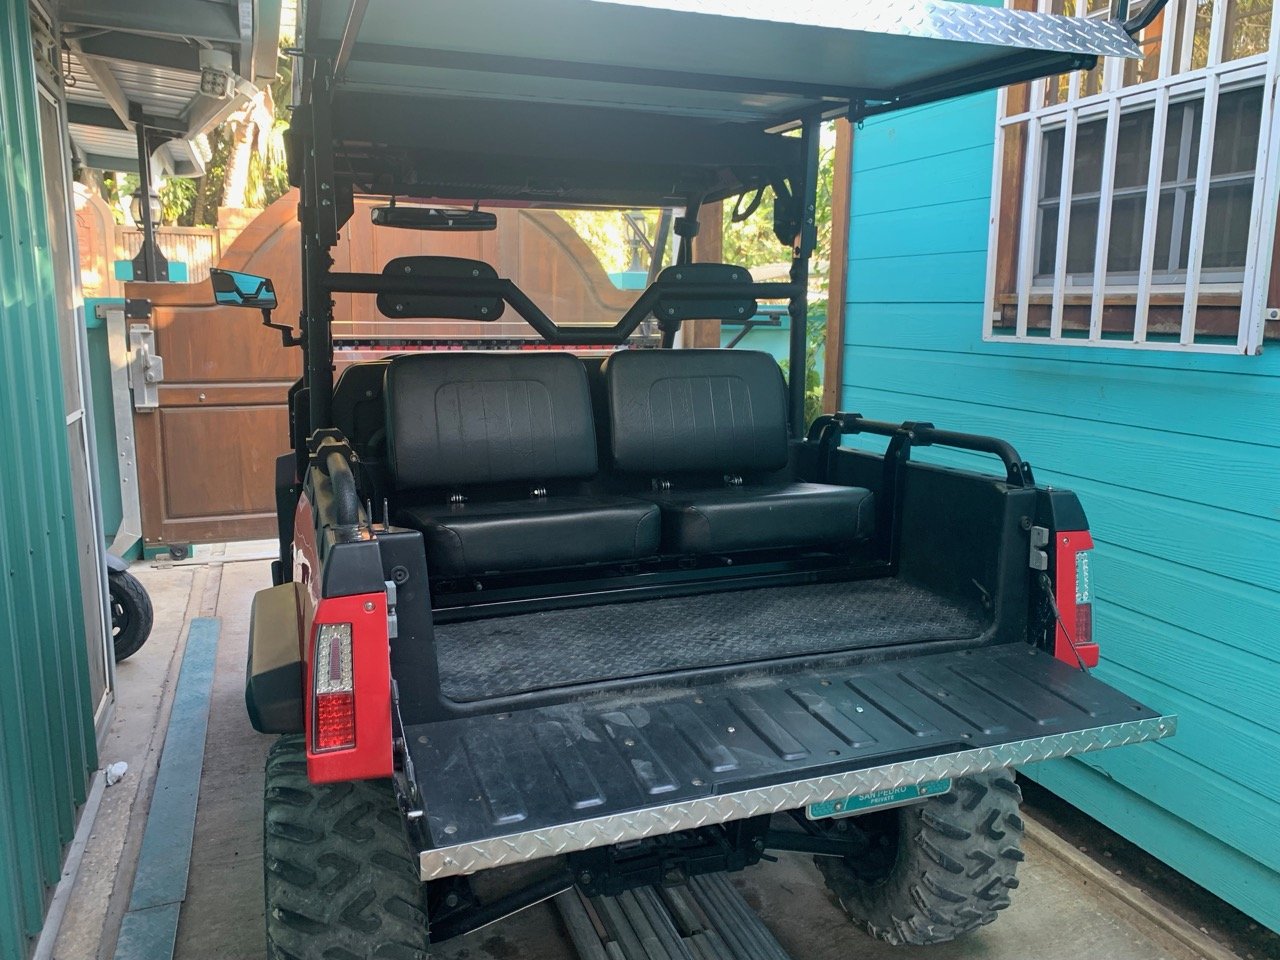
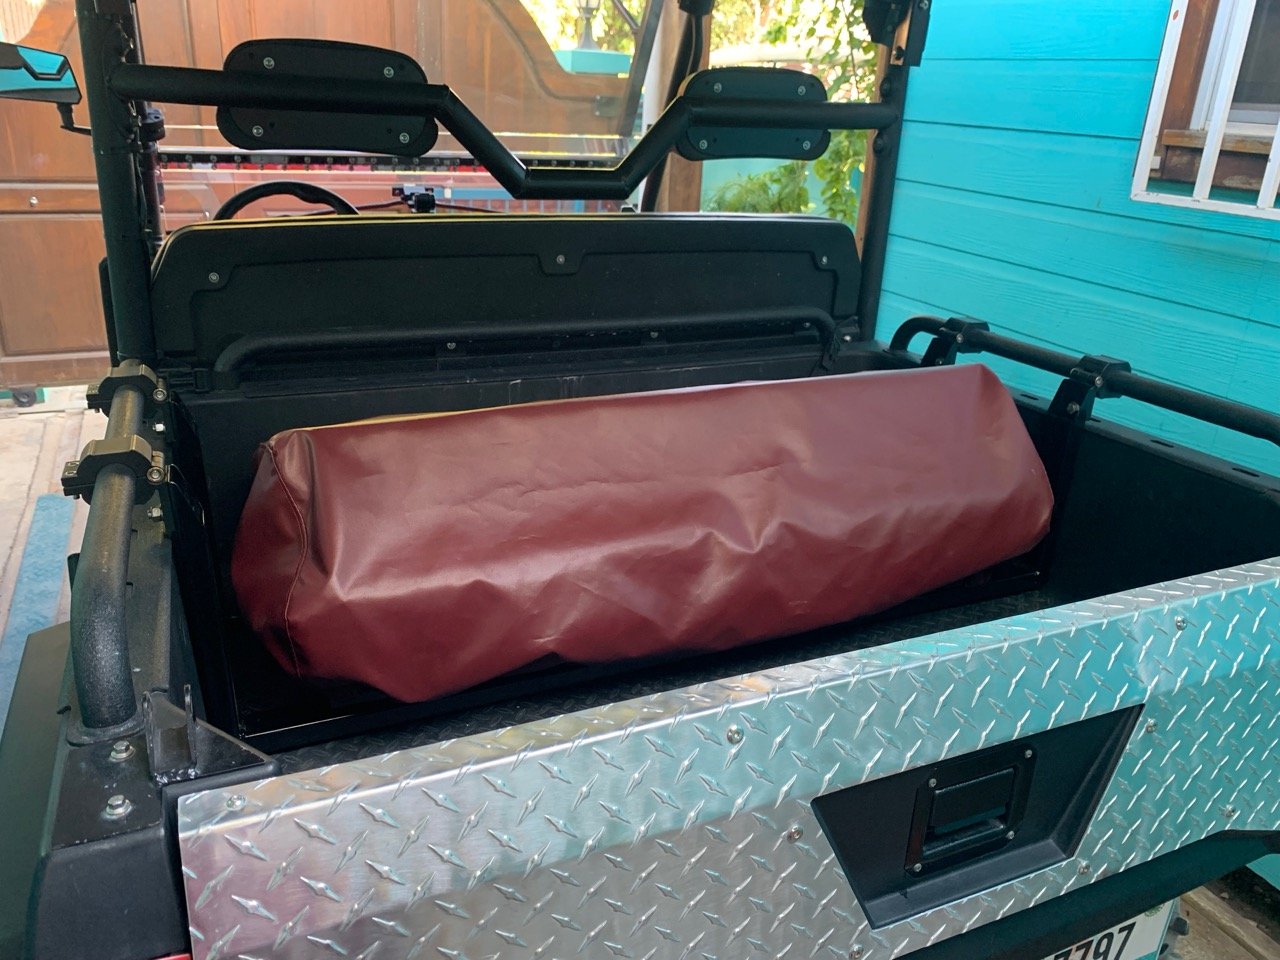
Haven't posted in a while since solving the excessive cabin noise issue, so I thought I would share a few upgrades to my Sector... Realize that this is driven daily on the street, so some of the mods are to make it more streetworthy. Locking gas door. Rear view mirror. Modified windshield for better airflow in cabin. Lowered and modified headrest bar for improved rear view. Tailgate protector. Folding armrests. Overhead utility rack. Keeps the interior cooler and dryer, too! Folding rear seats. Dust cover and seat protector. If anyone wants links to the rear view mirror, seats, or arrests, let me know and I will post. But know that everything requires some level of fabrication. The utility rack was all custom built. Cheers!
1 point
-
You probably have a bad ground in the rear. You may be able to add a jumper "ground" from the inside of the lamp assembly and see if that helps the dimming issue. If so, make a new permanent ground and that should take care of the issue. Good luck, Dan1 point
-
Thanks for the info! Going to try that today.1 point
-
I agree with you, Joe. If they made a filter that could remove all the dirt and other contaminants, we would have much greater oil change frequencies.1 point
-
No idea, but I welded mine closed. No issues so far.. machine is much quieter without a pencil size exhaust leak..1 point
-
Shine pen light into chain and lower sprocket cavity.....just to be sure the chain in on the sprocket. Keep tension on the chain and tie a nylon twist string (not braided as they do not stretch) to the "top" of the timing chain with the other end tied off on the roll cage. The top tie point must be very close to the position the cam gear will install to. Slide in the cam gear and milk the chain around the gear and then keep the chain and gear tight so the chain cannot jump of the lower sprocket. Mount gear to cam and verify the timing dots and sling weights. The 3 hand fix. BEN1 point
-
COLEMAN UT 400 NO REVERSE WE FOUND THE CURE! In our case adjustment would make the UT 400 go into reverse but you would loose forward in the doing, very frustrating! However when removing the seat and the upper engine cover you can see the shift lever clearly and with the cable adjusted properly to engage forward and the ever so annoying ratchet sound of reverse gears we found if you apply slight pressure to the shift lever on the transmission it would engage! Turns out there is just simply not enough throw on the cable, So back up to the shift lever and noticed there is a stop next to the detent on the lever that if slightly more gap would allow just a bit more throw. So here is the cure, Remove the nut (10MM) on the cable post, remove the C clip from the pivot post, remove the bezel ring at the shift lever by bending straight the tabs and remove the shift lever. I used a 4 1/2 inch angle grinder with a cut off wheel and removed about 1/2 of the stop on the inside edge next to where the detent ball will sit on both the reverse and forward sides of the lever (cuz lets just be certain) After reassembly it was noted that simply holding the shift lever into the gear you want and ever so gently tapping the throttle the transmission selects both forward and reverse every time without fail. You see the cable is only as long as it is and adjusting it will only make it go one direction further, but by removing a bit of metal it allows the whole thing to travel just enough to make the difference. I'm not going to say this is the end all be all but it sure worked for us and maybe with a bit of luck will for you as well.1 point
-
Hi Tyson, The rear cv axle for 650 Commando is still available like yesterday It is in South Carolina now and if you buy, it will be sent by UPS. So, if you buy earlier, you get it earlier, no need long time waiting. Would you please send me email at [email protected] for further discussing? Thanks Casey/ Leaf Asia 2023-05-29
1 point
-
Roger - Inability to properly shift into both Forward and Reverse is a common problem with this unit. You get one or the other along with gear grinding. It is what appears to be a design flaw with the Coleman UTV400. Another thread exists on this board describing it. Two fixes so far: DIY an extension to the shift handle to increase the throw distance or wait for Coleman to supply a fix-it-kit to your Warranty Service Shop and get it done there. In my case? Still waiting. However, we've been able to mostly make things work. On our Coleman UTV400, Forward works fine with an occasional gear grind starting out. Reverse was and is a better-pay-attention issue. We found that rather than slamming the gear shift all the way to the bottom of its throw, stop approx. halfways between Neutral and full bottom. With a hand on the shifter and fluttering the gas pedal, we've found that usually we can feel the shifter (and transmission) settle into Reverse. Until a real fix happens, we don't put ourselves in any MustBackOut situations. Regards, Ted in OK1 point
-
On the massimo msu500 , Start the motor, then press on the gas all the way and let the riv limiter cycle holding the gas pedal all the way down, turn off the ignition, then let up on the gas pedal. Then it should be reset.1 point
-
Try disconnecting the gear position switch on the transmission. Mine was messing up and thought it was in low. Don't really need it unless you like the BEEP!1 point
-
after all the complaints on this forum about the other brands of utv's, i will stick with my mule...........not the fastest, not the most powerful, but it hauls stuff around the house and plows snow just fine..........1 point
-
Couldn't have said it better myself. For a guy who hates Hisun he sure spends a lot of time posting in the Hisun forum...1 point
-
Simply not true.. Just yesterday massimo shipped me a complete new windshield at no charge as a warranty replacement because the lower piece bowed a bit and didn't seal against the upper. I called on Monday. The tech called back yesterday and I sent a photo. Windshield shipped same day along with a side net latch . No charge. So you make a lot of statements you don't seem to be able to back up. Such as finding hundreds of new Honda utv s when no one else can find one and claiming Massimo doesn't honor their warranty when clearly they have been nothing but top notch in my recent exchanges with customer support. . If you don't like your machine, dump it. Why are you wasting your time on this forum whining in other owners ears?1 point
-
That is just normal operation and the same with cars and trucks! But the issue is with these the firewalls are not insulated!!! so we feel it1 point
-
Against the brute it launch faster than my utv but around 65kph i close the gap and pass in front at around 100kph Against the renegade i stay behind but not by so much distances And against the Polaris on 27" tire it was neck and neck whit my utv until we Reach 30kph and leave it in the dust In deep mud my utv on OEM 25" tire have beated all ecxept the renegade but its okay i was pulled only one time for the entire day One of the 4 brute force got big electrical issue and 2 brake an axle in the marsh For a chinese product all guys as been quite impressed on the overall performance and reliability of it for the price1 point


This leaderboard is set to New York/GMT-04:00
