


whobbies
-
Posts
53 -
Joined
-
Last visited
Content Type
Profiles
Events
Forums
Gallery
Downloads
Community Map
Posts posted by whobbies
-
-
TTT
Sent from my iPhone using Tapatalk
I have not seen one yet, is the roll cage exact as the 800 or 900's?
-
We have a website up and running where you can see and get more information on our Performance Radio Systems for RZR 800 - 900 2-seaters.
Please go to: www.utvatvstuff.com
The new ABS systems are selling very well and come complete with a matched radio/speaker package that sounds great! The units fit perfect up into the factory stock roll bars and does not interfere with your head room. You can find them on ebay or purchase them direct from us for- $279.95 + 24.00 shipping.
We have geared up for the holiday season, but we will probably sell-out prior to Christmas, so act fast if you want one under the tree.
The new rear speaker pod is designed to fit up into the roll cage above your head at the rear of the cage. Two 6.5" marine grade speakers are installed to offer a (4) speaker system if using our Console, or it can be used for your own personal radio installation. These will be available 11/30/12 and sell for- $129.95 with speakers, or $79.95 without speakers.
Free Radio-Condom Water-Proof radio cover included with each purchase from this forum.
For more information you can call us toll free at: 800 444-1995 M-F 9:30 - 5:30 Est.
-
Hello,
We are a 30 year old American manufacturing company with our primary interests in the Toy and Hobby industry.
Last year we entered the UTV market manufacturing a overhead stereo sound system for RZR 800's and 900's. We are now in full production selling direct to the end user at great prices.
If you would like some infomation email us at: [email protected] and we will provider you the details.
Doesn't matter what kind of roof you have or if you have one at all, the unit is designed to suspend from (6) mount points and tucks neatly inside the rool cage.
All mounting hardware is included from base Do-It-Yourself models to Fully loaded Systems.
The quality is fantastic and they are made and assembled in the USA.
Prices between - $99.00 - $349.95
Thank you,
Tony C.
-
I have a 1600 Joyner engine with very low hours that I will sell very cheap.
Give me a call at 863 699-1812 M-F 9:00 - 5:30 Est.
Ask for TonyI will sell the engine for -$500.00 + shipping
-
My good hub required taping the bearing in. My bad hub went in on it own without any help and could be pulled out with my fingers.
rocmoc n AZ
As long as the bearing does not "rock" I would try it if you have to like I described. You just have to be careful not to get the Lock Tight inside the bearing. I usually smear it inside the hub and also on the bearing outer race. Make sure the hub is cleaned with acetone and also the outer bearing. To get them out I have to use a torch to melt the Lock Tight. I find that the GREEN "permanent" is the best to use. Let it cure over night. I repaired the head on one of our 5 HP Milling machines like this over 5 years ago, and that machine is run hard daily with quite a bit of side-loads.
I do like the idea of a Timkin type bearing like automotive over the ball bearings, and I think I'm going to check out how the one you mentioned was done.
I drilled and installed Zerks in my new ball joints yesterday and hope that will help their life. They are kind of crappy as far as quality, not smooth at all like most automotive types.
I did find a way to us VW (1968) tie rod ends over the Joyner one's though. Make a sleeve with the taper I.D. to accept the VW end and insert the assembly into the existing hole on the hub arm. There is just enough threads to get a good hold using a nylon lock nut. You do have to cut the tie rod and weld in a threaded bung for the VW end, but the results are far better than the stock one's. No slop at all.
-
Lenny, Given you have a good hub. Couldn't you heat treat a hub (heat it with a touch) and cool quickly to harden the material. Would this improve the life of the hub ?
rocmoc n AZ
The bearing has to spin in order to damage the hub, that's what is causing the problem, and yes the casting is not nearly as hard as the bearing race so it will be the wear point. If you have a new hub go ahead and use the lock tight smeared on the inside of the hub when seating the bearing. It will help prevent the bearing from turning. I can't tell you how many bearing hubs I have re-used over the years whether it be for motorcycle or machine use. The machine press from the manufacturer was probably not enough to begin with, could of been for many reasons including easier for the assemblers to push the bearings in without using a press, who knows? I've been to many a factory in Asia and I've seen some strange goings on over there. Heat treating is tough to do at home and doesn't work very well, and not a great idea to send it out unless you know the rockwell you need or you can get back a piece of steel that will break like glass. But in this case heat treating is not the answer, you don't want two hardened parts, you want the press fit to be the correct tolerance, and with most bearing applications I machine to 2-tenths and never more than 5-tenths.
I don't want to sound like a know-it-all, but I have over 30 years owning and operation a manufacturing company, and well versed in many applications. I have had many a disaster to attend to, and if I can help save someone some time, money, and aggravation I am glad to do so.
-
Sorry, I don't believe Locktight is the answer. If you have the correct bearings and they are still loose, then the hub is worn. I too have one that way. The hubs are not made of high enough quality material in my opinion. You will either have to replace the hub or do Lenny's mod. Lenny's mod IS the correct long-term fix. I will be going that route someday myself.
rocmoc n AZ
I guess it depends on how worn (how much the bearing spun and damaged the hub). In my case I still had to use a rubber mallet to tap them in, but it should of been about 2-tenths fit to be best.
I have had lots of good luck seating bearings for applications such as this in the past using the green thread lock to assure that the bearing doesn't spin. Again this probably won't work if there is a few thousands of play, but it is certainly worth a try in my case.
-
Good morning Tony,
Two supplies, No Limits Powersports http://www.joyner-atv-utv.com/ and Silver Bullet http://silverbulletmotorsports.net/
Both are good, the difference is price & product. Silver Bullets' product & price is a little higher using roller bearings. No limits' is less expensive with the stock ball bearings. It is personal choice, I used No Limits. Did the stock / orignal bearings require a puller to remove? If they did you hubs are probably OK. If they are not tight on install the hubs are showing wear. The hubs wear more than the bearings IMHO. Lenny did a taper bearing replacement but he has the equipment and knowledge for the mod. It sounds like you do also and may want to contact him directly to get the info and what he did. His mod is much much better !!!!!!!!
rocmoc n AZ
I purchased the roller bearings and can't seam to get them to compress to get all the slop out. There are no shims and I'm not sure if there were that would be the answer since the axle nut should be a compression type for that kind of application. Mine go in but not as tight as I would like. The simple fix to that is a coating of RED or GREEN Locktight. That will hold bearings in very tight providing that we are only talking a few tenths, as in my case.
If you know something i don't about how to tighten the rollers I would love to hear.
-
charlie,
IMHO, 31 inch is the way to go. The engine power band is much more usable & the trans/diff gearing is more friendly. The only neg is you loose a little in first for really slow rock crawling. Next IMHO is the 30 inchers. The stock size tires just plane suck!
rocmoc n AZ/Mexico
rocmoc,
Do you know where to get the bearings for the front wheels. I purchased a set that are similar but a dual Timken type. When I install them there is still some play? Looks like I have to use shim washers, but no sure. Searched bearing companies but it is a Bastard size. Any advice is appreciated.
Thanks,
Tony
-
Yes I have found that out, however I did like your fix. I did put a VW ball joint in last night and made a tappered spacer and it seems to work pretty good, just enough threads and I used a nylon lock nut. I will check it better when I get home and see if it will do the job safely.
Just purchased front bearings, another problem. Had to get them out of Europe. In have good friends Mike and Allen owners of Boca Bearing here in Florida. Mike spent a good 1/2 hour with me trying to find the direct replacement with no luck. I ended up going with a tapered sealed set. Is there something I missed?
Lenny, sorry " VW Tie rod end" not ball joint.
-
Here is the link;
http://www.utvboard.com/topic/2351-replacing-a-arm-heims-joints/
There are no auto parts supply ball joints that fit.
LEnny
Yes I have found that out, however I did like your fix. I did put a VW ball joint in last night and made a tappered spacer and it seems to work pretty good, just enough threads and I used a nylon lock nut. I will check it better when I get home and see if it will do the job safely.
Just purchased front bearings, another problem. Had to get them out of Europe. In have good friends Mike and Allen owners of Boca Bearing here in Florida. Mike spent a good 1/2 hour with me trying to find the direct replacement with no luck. I ended up going with a tapered sealed set. Is there something I missed?
-
Have had them on for a couple of years now and haven't had any problems what so ever. PS, the heims joing change over I posted has several pictures showing what I did.
Lenny
Lenny, Where did you say I can see what you did to replace the ball ends? Also is there a auto crossover for the ball joints?
Thanks,
Tony C.
-
Hmmmmm. Some of you guys have gone way above and beyond anything I ever considered...
However, if whobbies ever wanted to go water cooled, you might look into this neat little site: http://www.subarugears.com/
Great looking build bye the way.
My business is full of changes and problems to solve almost on a daily level, and we have overcome so many obsticals converted to innovations over the course of three decades to be where we are today with ourt product line. I actually enjoy solving problems, (once I get over the Bitching) and making products better, and I am fortunete to have the facility and tools at my disposal making it a bit easier, however that's no excuse not to take on a project, I remember using my 4" die-grinder as a multipurpose machine back in the day. It keeps you thinking, and for every effort there is usually follow-up knowledge gained for the next project.
I urge people in my industry to take on projects, and myself and my company provides plenty of support to see them through sucessfully. This is something we seem to be loosing in our country today and it is and will effect us in the long run.
Not everyone is mechanically inclined, I know this all too well, because if they were I would not have the business I have today, however my sons whom are surrounded by all of this are a perfect example of capability without persurverience, and I don't understand it at all, in their case it is plain lazyness. I can not get them to understand the importance in starting and completing a project, as the whole is a problem solving endeavor Personally I get the enjoyment more-so out of the building experience, and when it's done, it's fun for a while then it ends up in the back of the shop or sold.
The whole process also keeps me focused for the duration, and I can have two or more projects going at one time which can take a year or two or three to complete, and do so as I have the desire.
I drive by golf courses daily to and from my factory, but never had the desire to give it a try, yet I sell products to thousands of guys that play golf. It is something that many of my friends don't understand, yet I find completly normal in my life. It may very well be a sickness, but one I have learned to self-medicate to keep me out of the hospital?
That's my excuse, outside of the unwillingness to throw away $5500.00, and be beat by this machine. I'm sure there are many of us on this forum with similar illnesses, maybe not as severe? Don't be afraid to go through with a project regardless of how crazy it sounds to you and what your friends may think. there are always guys willing to lend advice, especially here, and the worst thing you will get in return is experience.
Thank, Tony C.
P.S.- The hardest part was mostly mental, the first cut with the Sawsall, after that it's a piece of cake.
-
Tony, for the front brakes you may want to consider what I did. I put an extra Joyner caliper on each side of the front. Just extended the brake bracket to the up side and weld another anchor point to the spindle housing. T'd off each brake line. Actually I have 2 calipers on all 4 wheels for my driving brakes. A lot better stopping power.
Lenny
My biggest concern was the material the hubs were made out of and was concerned with welding to them, but to my surprise the casts were high quality and they welded very nice. Also, I know use are using your machines off road, but with two calipers on those thin discs are you having any heat issues?
-
Tony, for the front brakes you may want to consider what I did. I put an extra Joyner caliper on each side of the front. Just extended the brake bracket to the up side and weld another anchor point to the spindle housing. T'd off each brake line. Actually I have 2 calipers on all 4 wheels for my driving brakes. A lot better stopping power.
Lenny
Good idea, if I need additional I will do that.
-
Chevy or Chery? and did you say you put a VW bearing in the swing arms, out of which VW?
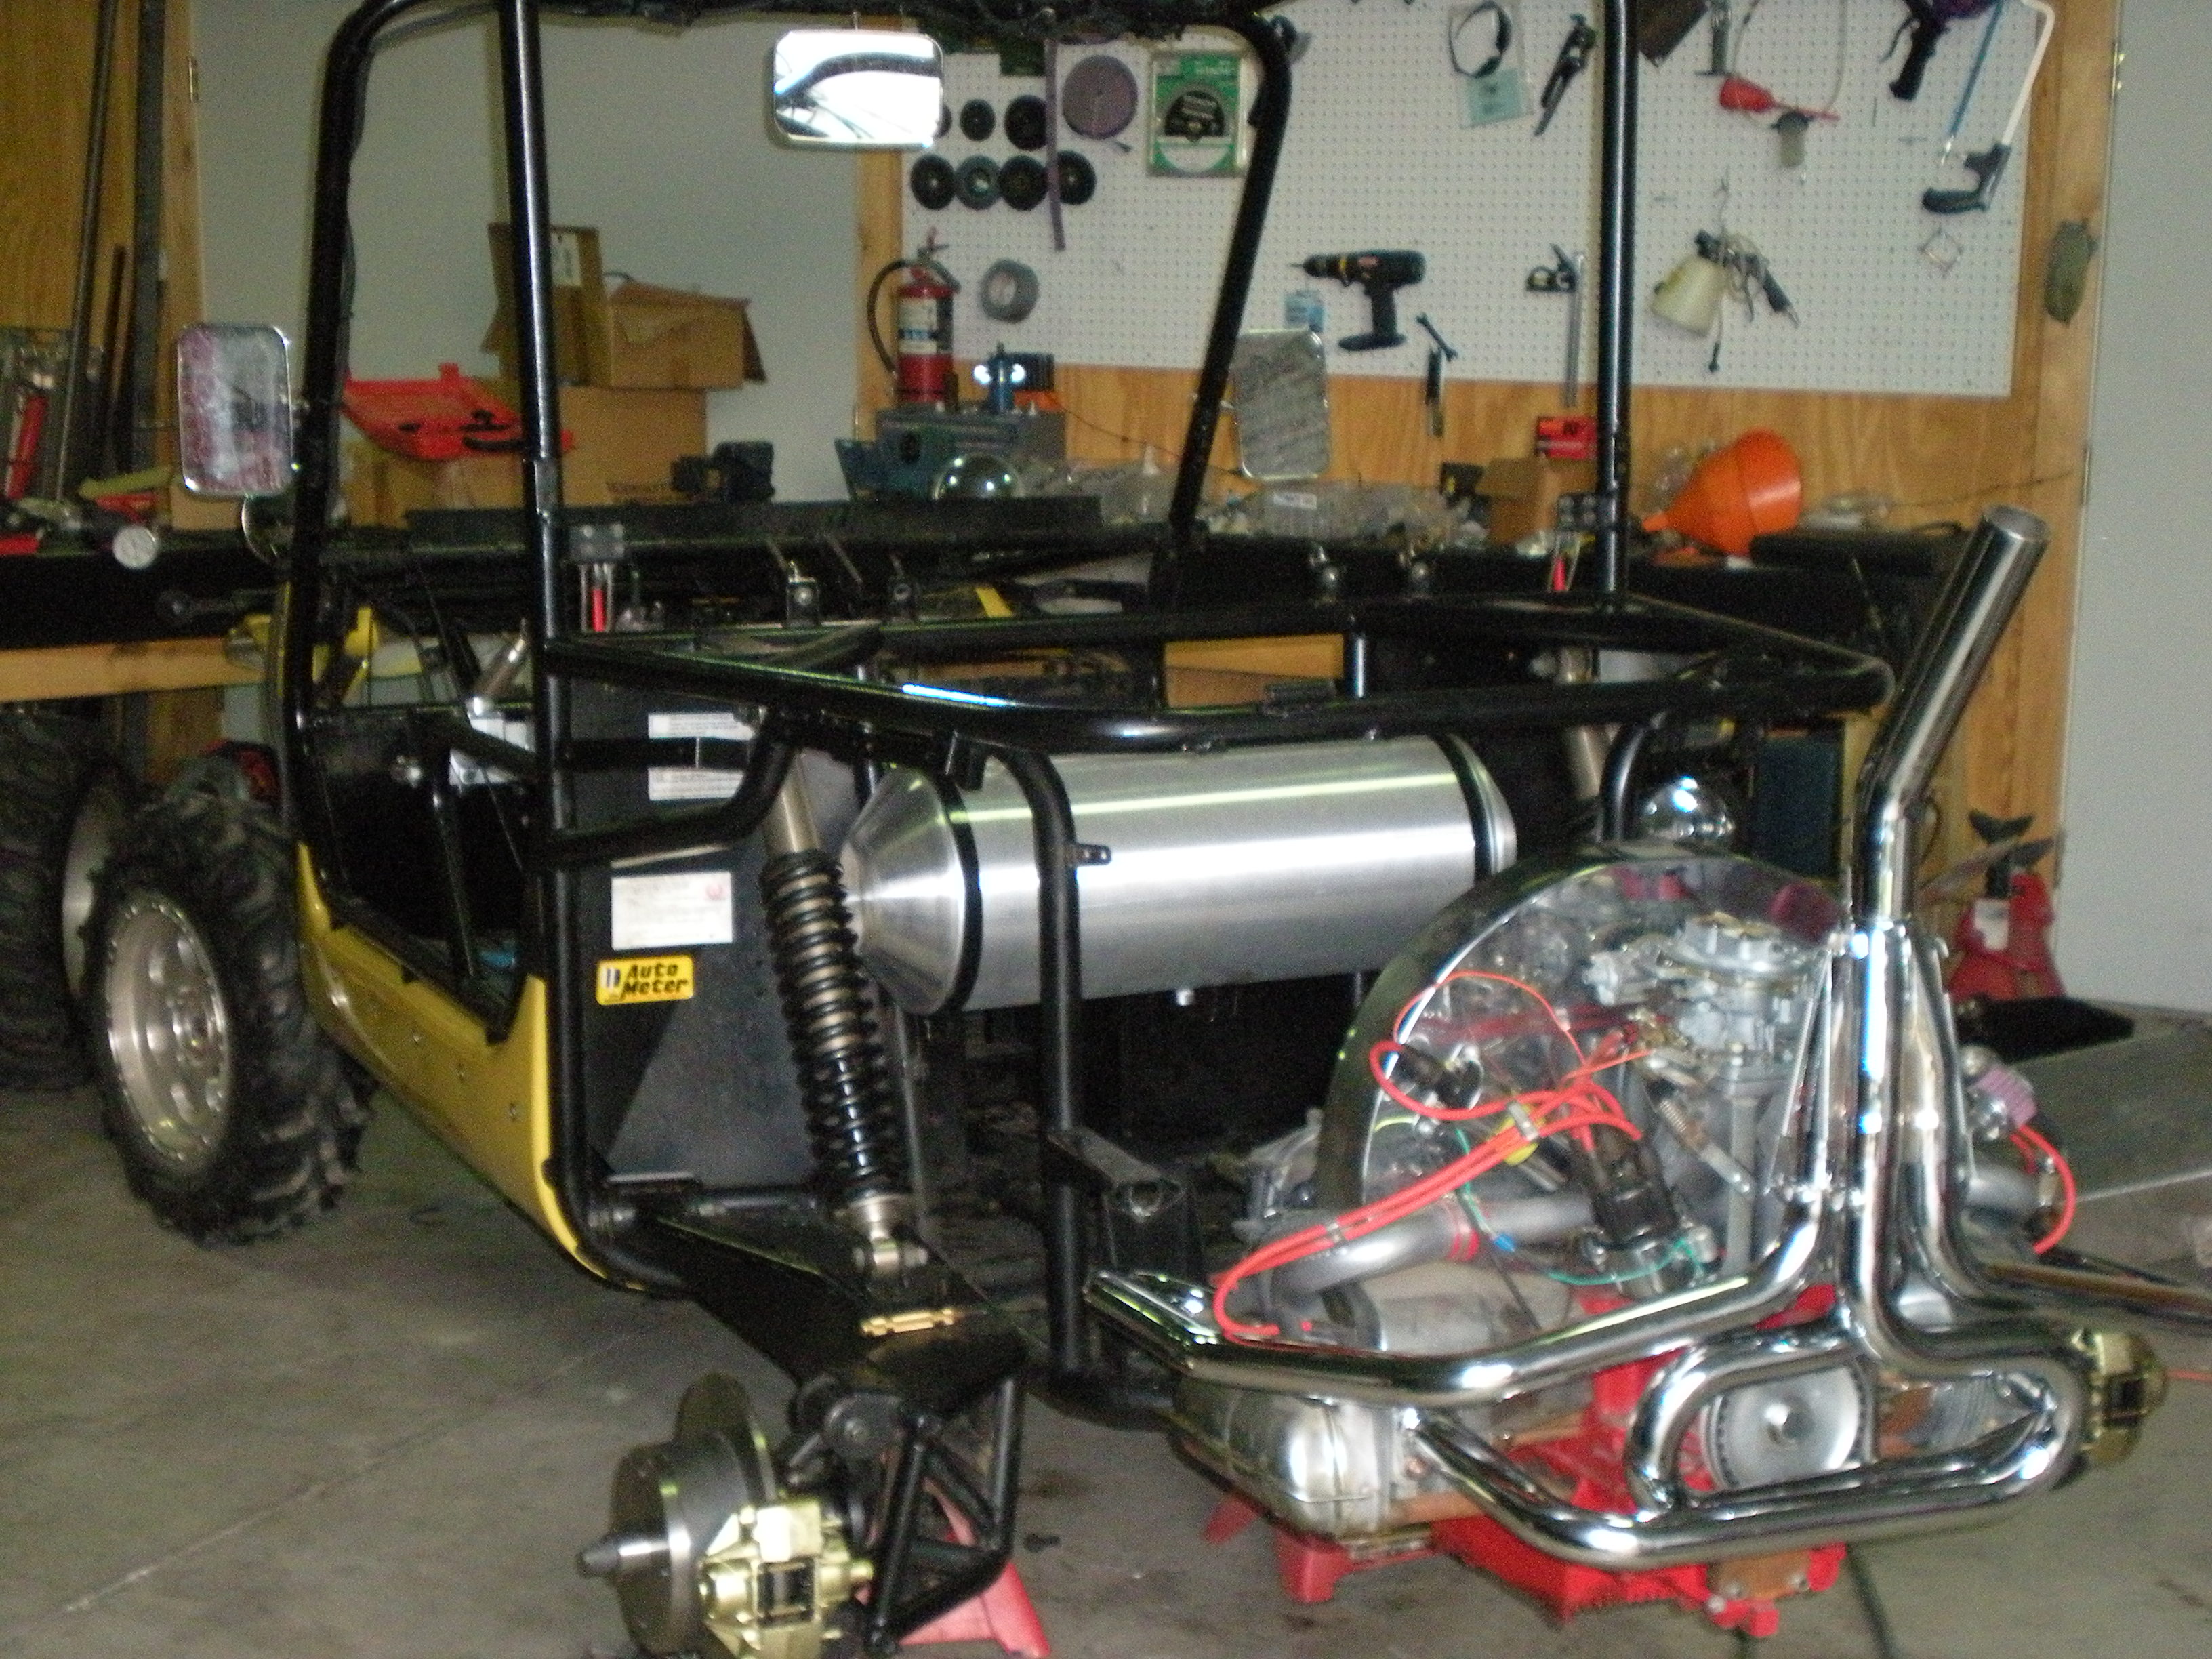
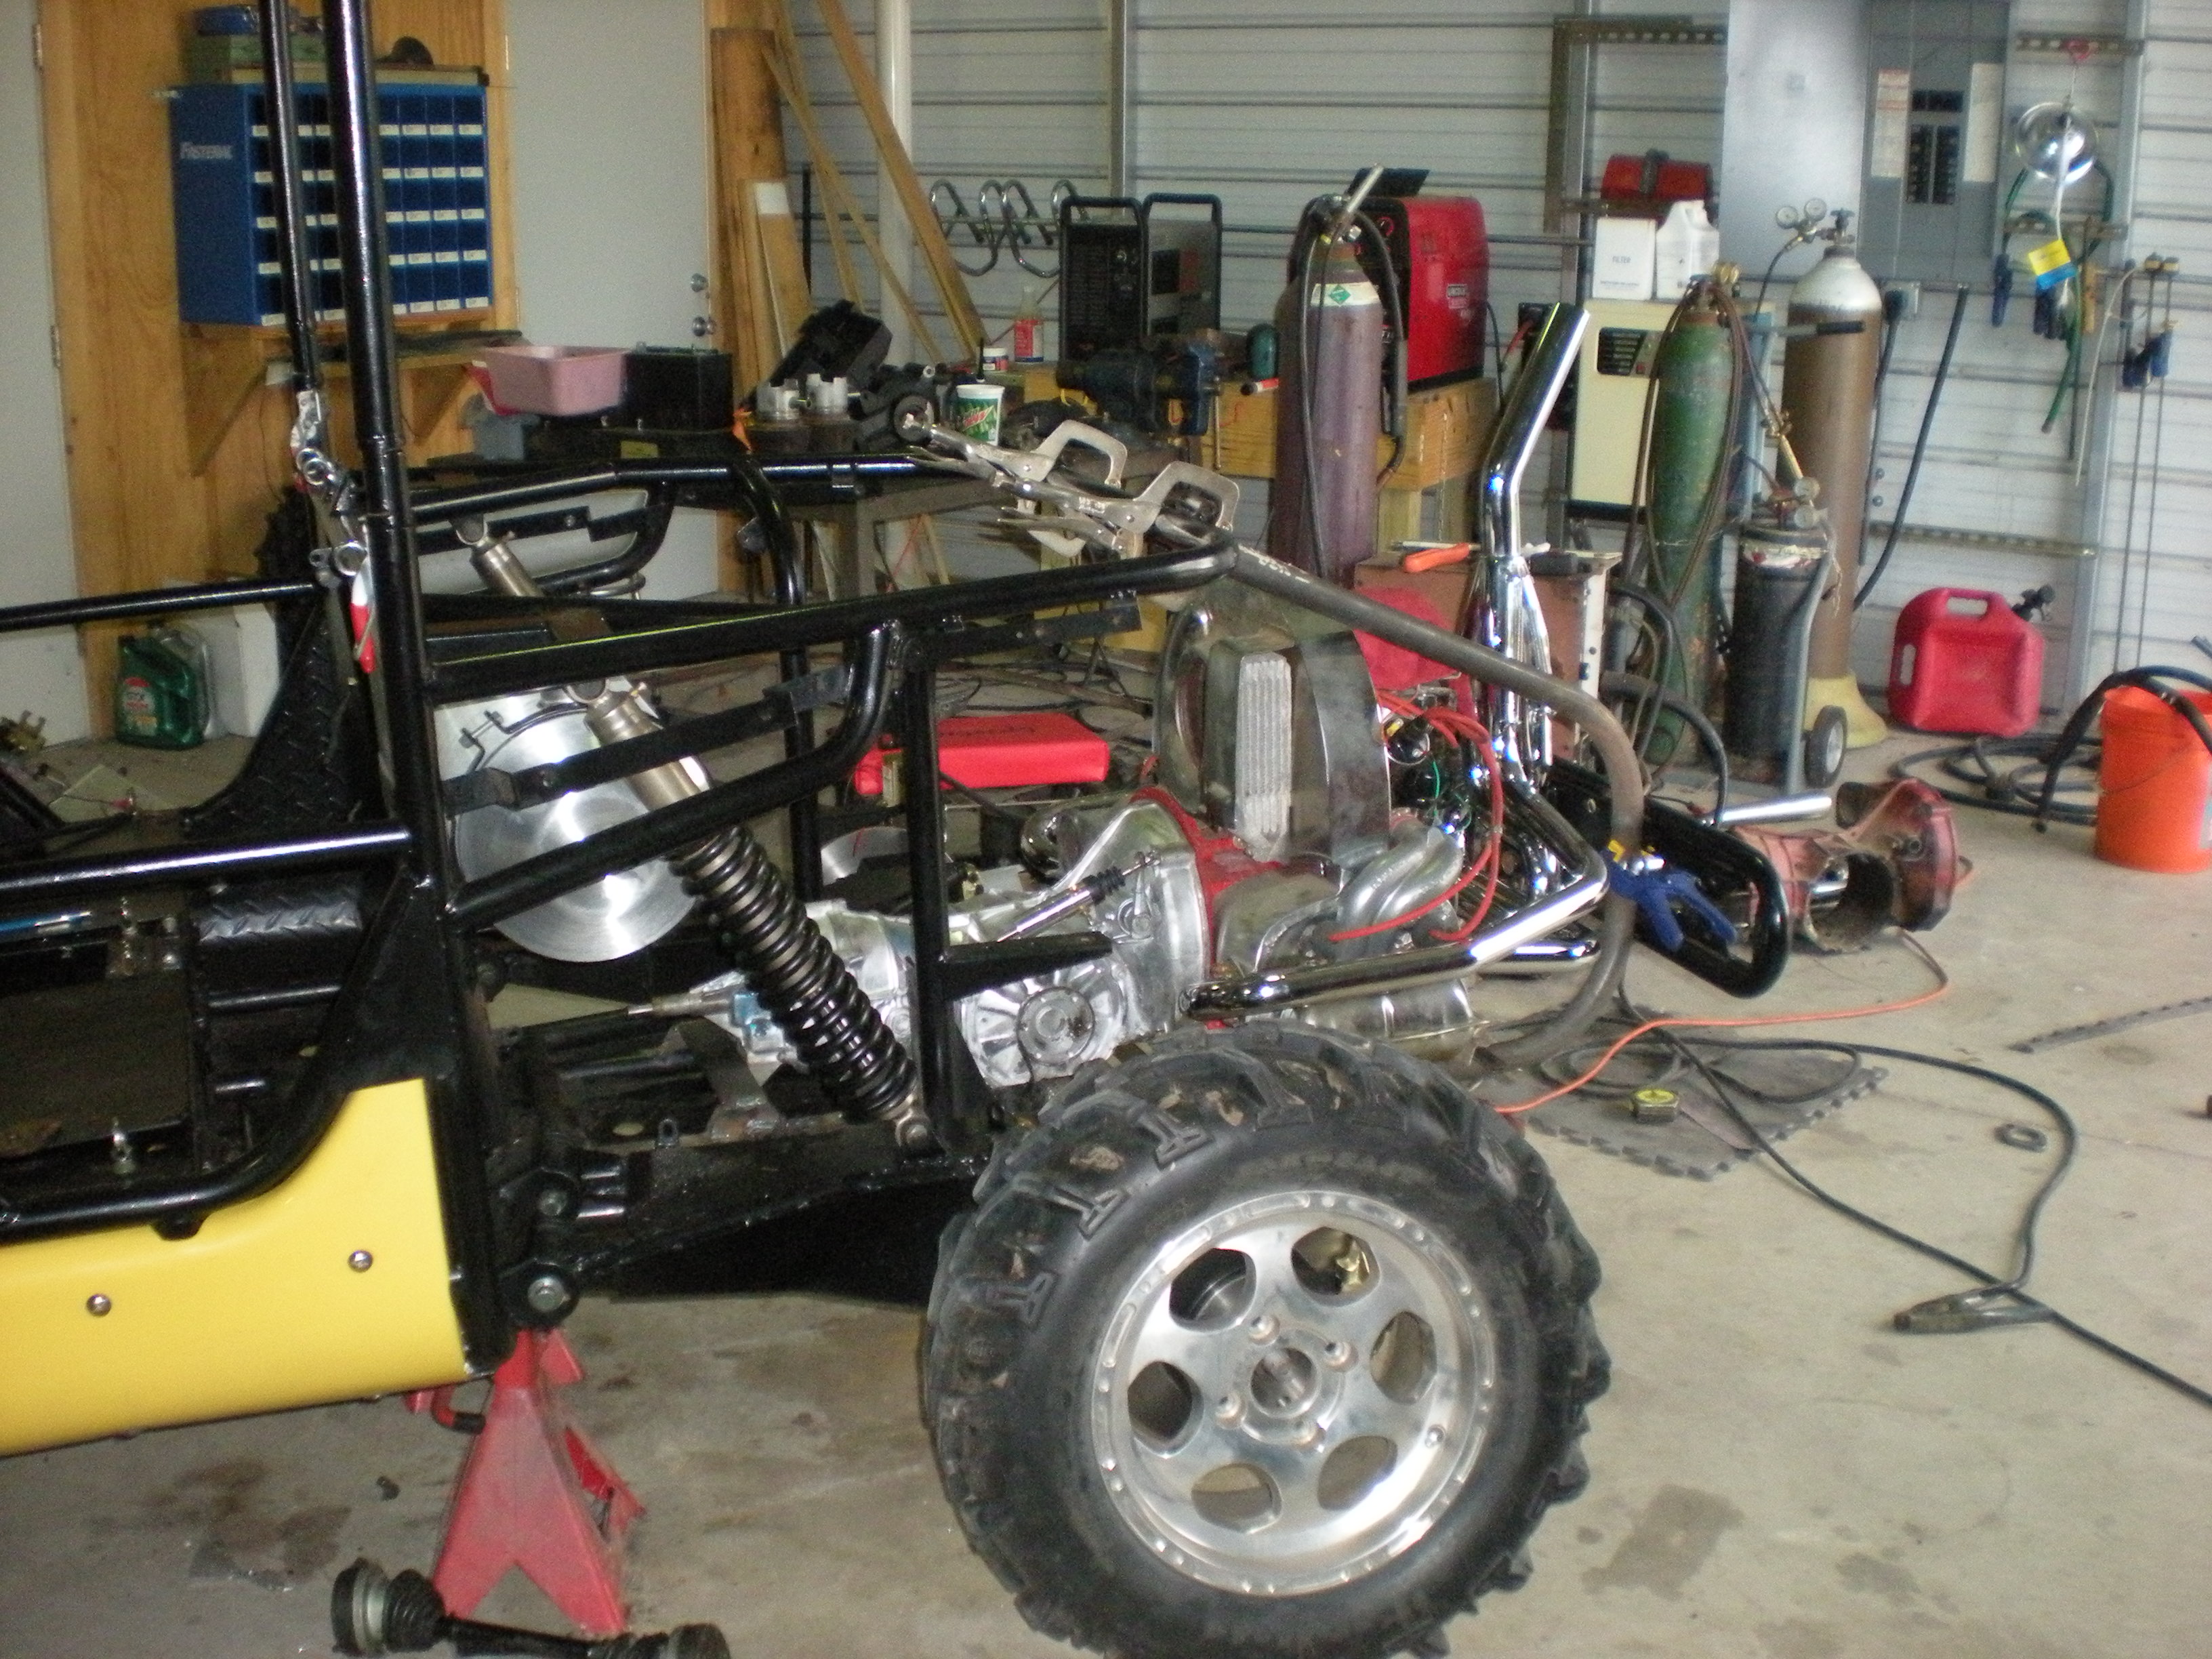
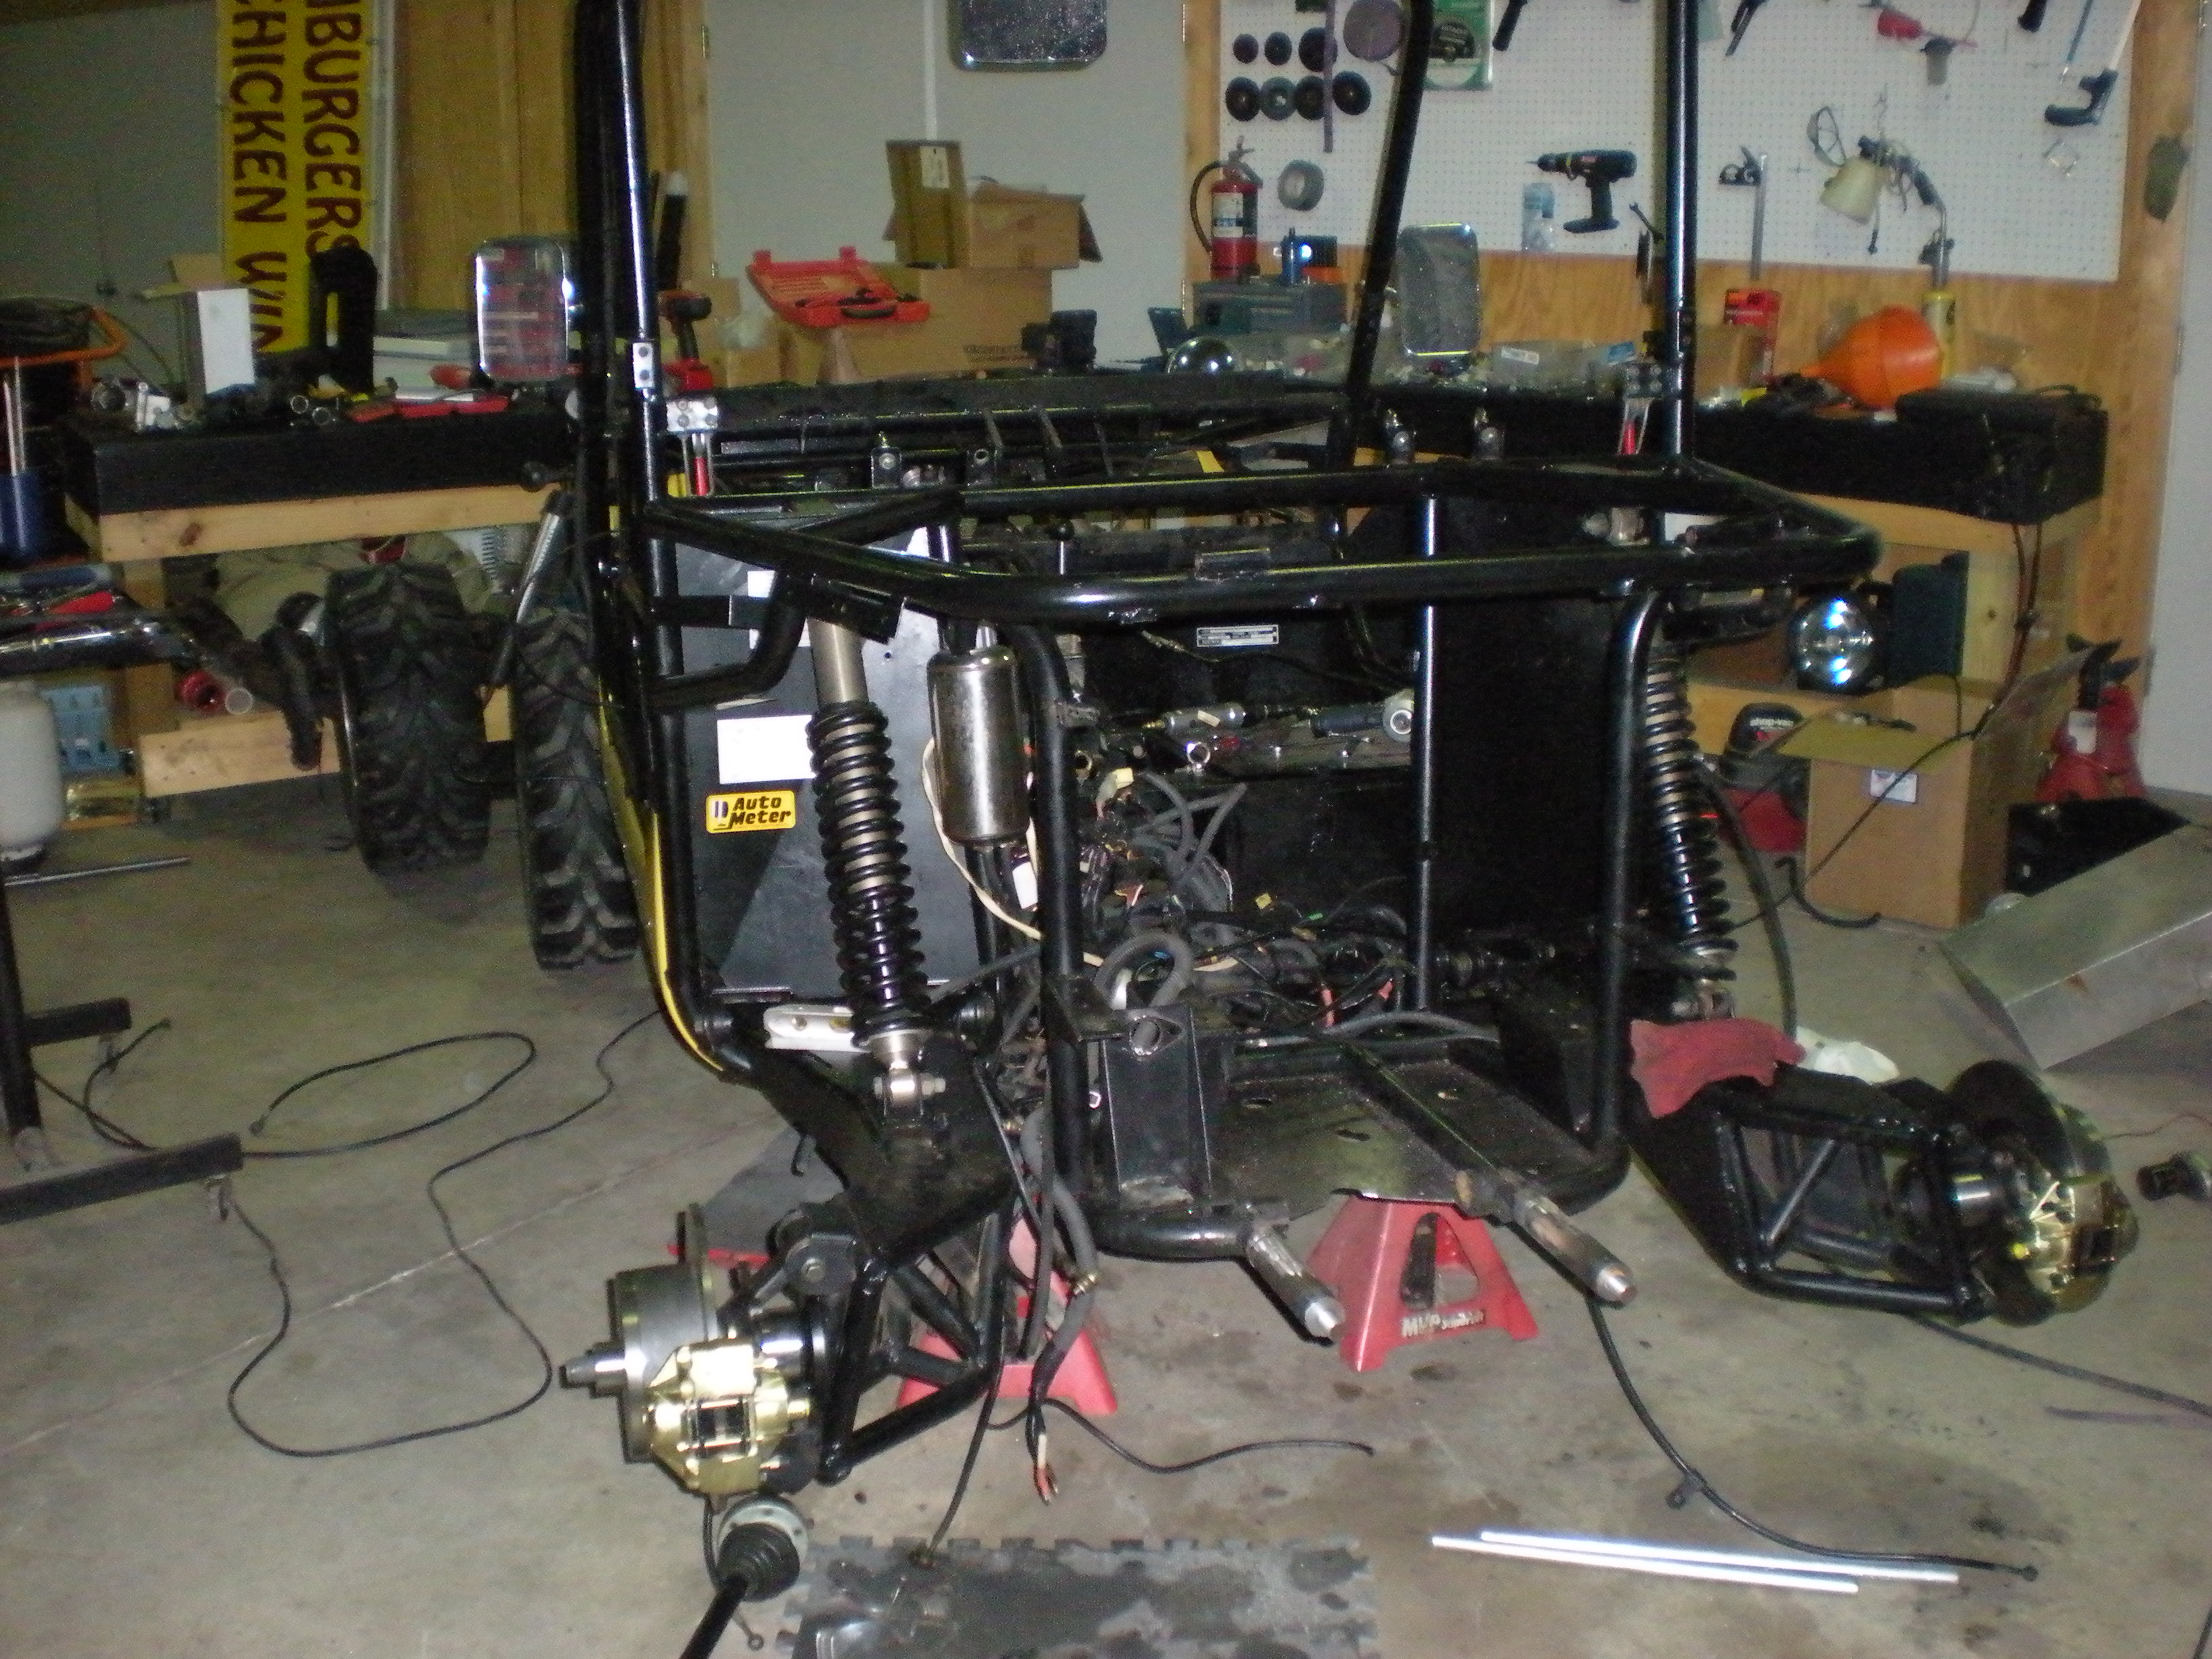
Here are a few current pictures of the progress of FRANKENJOYNER.
Thanks,
Tony C
-
Chevy or Chery? and did you say you put a VW bearing in the swing arms, out of which VW?
I want to be clear that I used GM calipers and rotors drilled and studded for the Joyner rims. The Joyner rims have a bigger offset than any automotive I could find worthy of the road. In NO WAY would I use or recommend the Joyner brake system for on road use, they are much too small, more appropriete for a Quad rather than a buggy or car as in my case. I am going to leave the front brakes and hubs Joyner and trust that the large rear brakes will provide enough stopping power. Although I would much rather have the larger brakes in the front, I have built some "shorty" VW powered cars in the past that only used rear brakes, and they stopped the car very well. I did re-plumb the brake system with a genuine CNC master cylinder dedicated to the rear brakes and the Joyner Chinese copy to operate the front brakes.
Thanks,
Tony
-
Chevy or Chery? and did you say you put a VW bearing in the swing arms, out of which VW?
Chevy (GM) brake calipers.
You have to purchase or make carriers used for sand rails, machine the I.D. of the Joyner hub to accept them. I machined -0.001 froze the carrier and pressed it into the Joyner hub, then carefully welded it in place. It was a close fit and pretty exacting to insure the carrier would press straight in.
Thanks,
Tony
-
Hi Tony, I see you didn't use the 1600cc engine I sold you. The engne is like brand new but the Vw engine should be easier to deal with, parts and all. If you want to re-do your A-frame heims joints, see my posting in the first part of August titled 'Replacing A-frame Heims Joints. This is a good solid approach and is much stronger and not too expensive. With your machining ability,you wouldn't have any problems doing what i did. I don't have an ounce of play anymore. I guess I'm not the only one on this board that is a bit crazy and will get involved in projects that most responsible people wouldn't consider doing. Sounds like you did a nice job. It will be interesting to here how it runs out, should be pretty quick. Always good to have another forum member who has great ideas to share.
Lenny
Lenny,
I still have the engine but the retro concerned me after the catostrophic drive shaft U-joint break happened. I know Porsche and VW engines in and out, and I have a couple in my shop waiting for a set of wheels, so I used one of my stronger one's to test on the Joyner. I think it will be a blast, especially street legal. It's funny when you think about it that VW is responcible for the dune buggy since the early 60's, and today now 50 years later I put one in the Joyner almost like it was ment to be there.
I also found the exact steering rack that Joyner copied from a US manufacture at AppleGate for $150.00 and put one on order, and yes I will have a look at what you did for the ball ends, I need to be sure of the front end when on the road.
Proubably the coolest thing was being able to machine the rear bearing carriers out and cold-press and weld the VW bearing carrier in place. Even with the Chevy brake calipers used the Joyner rear rims (I.D.) cleared by 1/4", it has been much easier than I thought.
I also found a company at a tradeshow when in China a couple months back that make a similar off-road buggy, most of the parts looked identicle, however they were "unsure" if the parts would fit Joyner???????? They were also using the Chery engine. If you are interested I will look for the email, they will sell direct but they would assume no liability.
Thanks,
Tony C.
-
Looks good,definately opens up your options for other engines if you want.Keep us posted with the progress and more photos.Are you interested in selling the chery engine and trans?
Rick, Sorry I already sold everything, one of the guys on this forum asked about three months ago. I do have a 1600 VIPER engine and ECU that I will sell cheap. I think all in all it will be a fun daily driver, and a hit at the VW meets.
Thanks,
Tony
-
WOW! can't wait to hear & see more,, sounds fantastic,,,,,Quig
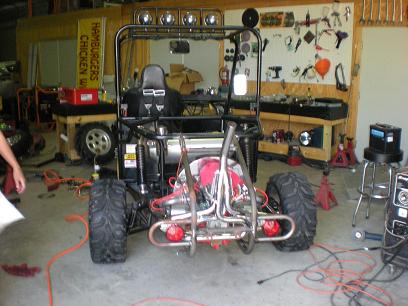
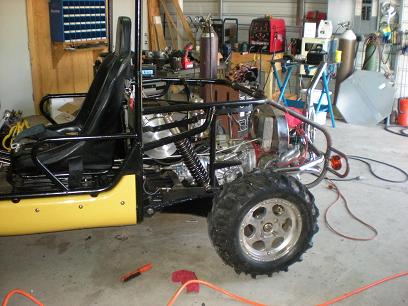
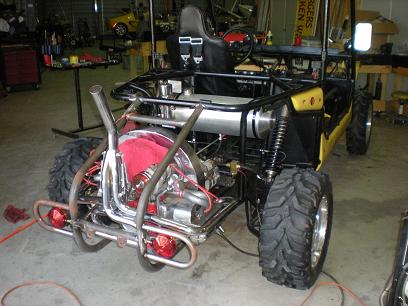
Here are some pictures of FRANKENJOYNER In the early stages. At this time I have completed the rear of the chassis with a bolt-on sub frame that in one of the pics is started. This looks real nice and adds what is needed to the origonal chassis so it doesn't look like an engine sticking out of the back of the origonal frame.
You can see the basic tranny /engine install and rear hub conversions to adapt to a VW bearing carrier and IRS axle stubs. Not much left to do before the maiden test than disassemble, powder coat the new parts and re-assemble. I did add a couple uprights to tie the tranny mount tubes to the chassis frame, though not in these pictures.
Thanks,
Tony
-
Question: By installing the VW Engine and trans did you eliminate the 4wd? If not did you mount the engine and trans sideways? sounds very interesting and really looking forward to the photos.
Rick, Yes I eliminated the 4WD. Here in Florida we don't have the sand like you guys, we do have sugar sand but much of our terrain grass and weeds grow over it providing a harder surface. There will be instances that if I decide to try it in areas with lots of sugar sand that I will have to configure the tires to be paddles on the back and thin runners on the front.
I wanted to make this easy to work on and practical to use as a street driver, so I chose to mount the tranny and engine conventional. I could of reversed the engine and then use pretty much any 4 cylinder adapted to the tranny, but would have to forfit the front wheel drive anyway, so I took the path of least resistance.
I receintly purchased my wife a 2011 RZR and we seldom use the 4WD, so all in all for our uses I think it will work fine as a 2WD vehicle. I have gotten over well 100 HP out of a 1600 bored and stroked, so if I need more HP I'll get to work on a new engine for it. I'll try to find some of the pics and put them up ASAP.
Thanks,
Tony
-
I did the following 2010,
Rebuilt & redesigned the cage
Added a passenger handhold
Had to replace the rear diff mounts
Rubber mounted the rear diff
Got rid of the safari deck in the rear
Moved the rear coil-over shock mounts
Add additional Fox shocks in the rear in old mounts
In 2011 I will
Add doors
Add power steering
Replace rear wheel bearings
Replace fuel tank with a Fuel Cell
Install Lenny's diff kit in front & rear diffs
rocmoc n AZ
Rocmoc,
It just beat me down, and as much as I like the chassis construction I didn't want it to go to waist, so this is what I am doing to my Trooper, here it goes:
Removed the Chery engine, tranny and entire diff and axle system
Cut and re-designed the rear chassis and installed a type 3 VW tranny, and 1725 air-cooled engine
Modifed the rear bearing carriers to accept VW buggy hubs
Installed Chevy rear brakes and discs, drilled and pressed lugs to accept Trooper rims
Installed 10 gallon spun aluminum gas tank
Made a custom rear bolt-on engine / cover / cage assembly
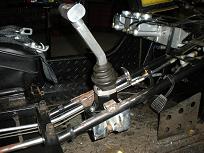
Lowered the steering wheel and adapted a custom steering wheel
Set the dash board up with all American gauges
My wife and I have been working on this super-cool conversion for the past three months on and off at night and any weekends we are not working. There has been allot of customizing but it is going smoother than I thought, and that's a nice surprise. It's almost like some of the components fiot in place with little mods. The tranny shifter works better than any I have done before, and that was this weekends pleasent suprise. I put one of my VW offroad engines in it for starters with a dual barrel carb and it makes about 80 HP, so we will se how it does with that.
Being in Florida it's much easier to register customs for the street so I have decided to make this a street legal "one of a kind" we call it: FRANKENJOYNER.
I have built several buggies in my day and this one is turning out to be the most enjoyable, and getting to watch my wife struggle with the 1000 foot-pound Chinese bolts has been a plus. I tell her that they have to make the bolts that tight for the same reason some small guys drive big trucks, no offense intended.
I have taken a bunch of pictures and I will post them once I get this creation on all fours.
I am in need of some ball rod ends and even ball joints as I want to make sure the front end is road worthy. I anyone knows the cross-over or where to get origonals, please let me know.
I think the Joyner is a great concept and the chassis design and assembly is outstanding, but I had too many other problems, and parts just became to tough to get. I did buy it used and abused so in no way should anyone use this as a negitive point if looking into purchasing one. I paid $5500.00 for mine and just wasn't willing to let it go to waist, so for another $2000.00 and a some long hours we will have another cool toy in our collection.
Thanks,
Tony


New stereo systems for RZR 800's and 900 Single Seaters
in Polaris UTV SxS Forum
Posted
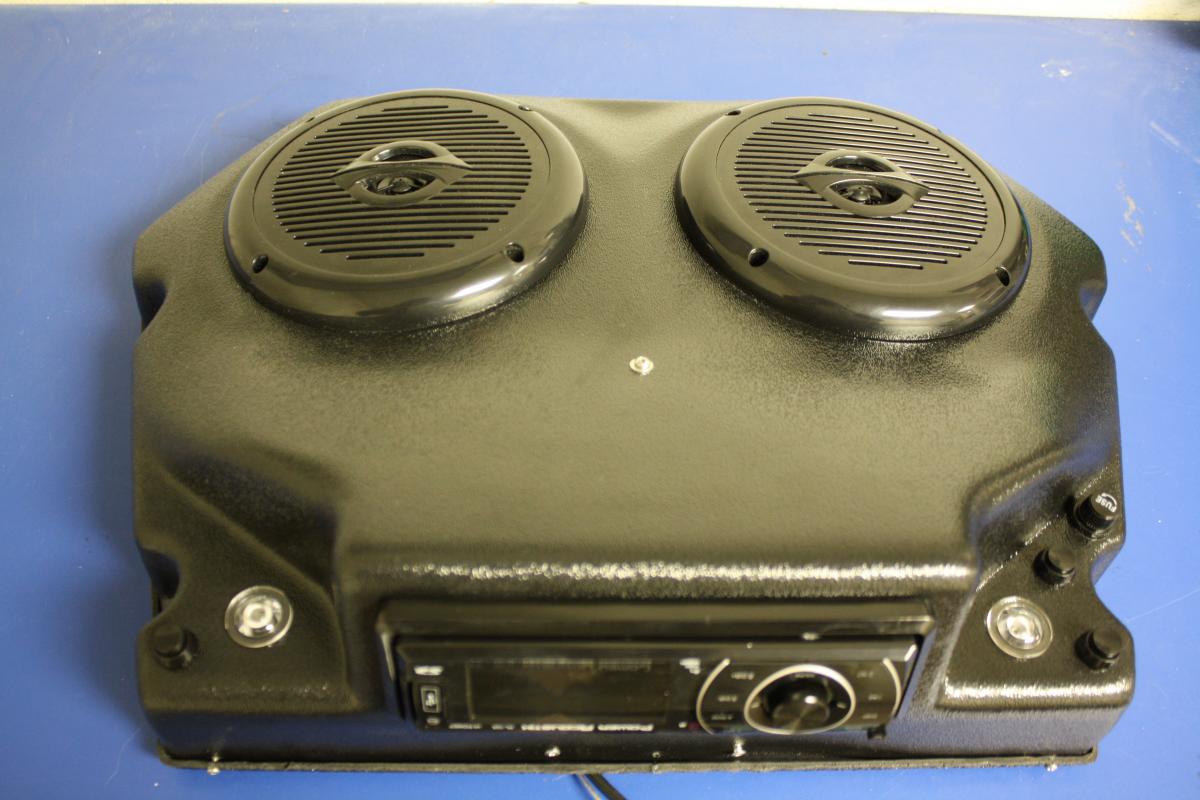
Just back to let you guys know that our Stereo Consoles for the Polaris RZR's have become a hot item. We are now manufacturing them in 1/8" ABS plastic with raised grain black finish. They can be purchased with or without radio and speakers, and we are offering many options for radios, and or speakers.
We have a perfect sales record on ebay where you can read all of the consumer purchases since we brought the unit to market. I have heard many times that they can not believe the sound and design of a completed unit for as much as 1/2 the price of other units on the market.
We are working closely with both a radio and speaker manufacture and are able to install a 200 watt fully digital media AM/ FM stereo head to a set of true dual coaxial poly coned 80 watt speakers, a great combination that sound great! The complete system sells for under $300.00.
It will fit, Polaris RZR's - 570, 800, and 900 dual set units.
You can visit our site at: www.utvatvstuff.com or call toll free in the USA at- 800 444-1995 for more information or to place an order. Each complete radio system will receive one of our coolest innovations, called "The Radio Condom" a $20.00 value.