


bruhaw
-
Posts
179 -
Joined
-
Last visited
-
Days Won
1
Content Type
Profiles
Events
Forums
Gallery
Downloads
Community Map
Everything posted by bruhaw
-
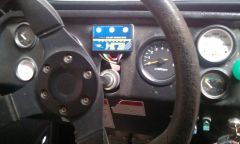
From the album: Bruhaw T-4
-

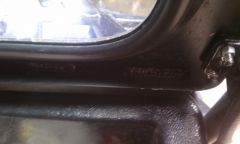
From the album: Bruhaw T-4
-
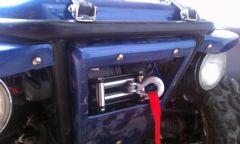
From the album: Bruhaw T-4
-
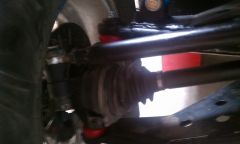
From the album: Bruhaw T-4
-
From the album: Bruhaw T-4
-
From the album: Bruhaw T-4
-
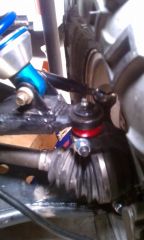
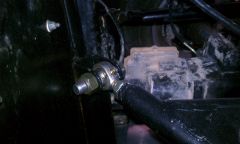
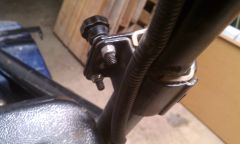
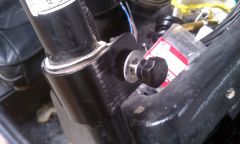
Turned both ways and it is not close to hitting anything. So, looks good. From the way it looks it would have to be a pretty long bolt through the ball joint to come close to hitting the A arm.
-
Kinarfi - I have very little bolt thread past the nut - only a few threads. The other night when I did one side I did check when completed and it wasn't hitting anything. Had the wheel off and was able to go back and forth without interference. Will check again the other side too but think there is no clearance problem at all.
-
Went with 12M X 55 X 1.75 and the shoulder was exactly the same as the stock 10M. Easiest way to do was to pull the wheel and jack up under lower control arm to put pressure on both upper and lower joints. Drilled out with a 15/32 and this included the ball joint area as I left them in like Lenny and Kinarfi said to do but not after doing only one with the joint out and then not being able to get the bolt to go through without hammering it in. So learned my lesson on the other 3 and left the joint in and just drilled away. Went back and did the other one the right way. Did not tap but rather put a washer on the nut side and used a Nylock nut which by the way is grade 8 along with loctite. So there are Nylocks that are grade 8. Was able to torque to 100 pounds and the clamp that locks the ball joint in has no gap in it unlike before where there was a decent amount there. Besides being clamped tight the shoulder on the 12M will hold it in there very well. Wish I would have done all of this when I changed out all the ball joints with zert fittings and new urethane bushings but OH well. Thanks for bringing this up Tinman. I know this goes way back to 2009 when Lenny and Kinarfi and others had problems. I figure better safe than sorry as it would cost a helluva lot more if it popped out at a higher speed in bad terrain. Done now and on to the next project whatever that may be. Thanks Guys!
-
Thanks guys for the replies. I was going to use a Nylock nut with the loctite as well. Ok to use the Nylock? I don't think it is grade 8 though. Not sure if they even make a grade 8 Nylock.
-
Lenny - what if you just drilled it out for a 12 mm using a hardened bolt and lock nut and did not tap it out. It would then be more like a clamp and with the hardened bolt you could torque it very tight. The shoulder on the bolts I am using match up with the stock ones so there is no problem there with mating to the ball joint notch. What do you think? Any opinions?
-
See link below on T4 on Craigslist. Talked with Casey at JMC on a post about Lannmarker the other day. Owner of JMC said the picture of the Trooper T4 on their site was one of the originals that they cobbled together and it looked good but was not well built. They used the T2 side skirts for front and rear. This one looks like it as well and it also has the same aluminum top with rear flare on it. Could be an original. You could own a piece of history or piece of crap depending on how you look at it. I would choose the latter. http://phoenix.craigslist.org/evl/mcy/3027054833.html
-

From the album: Bruhaw T-4
-
From the album: Bruhaw T-4
-
From the album: Bruhaw T-4
-
From the album: Bruhaw T-4
-
From the album: Bruhaw T-4
-
From the album: Bruhaw T-4
-

From the album: Bruhaw T-4
-
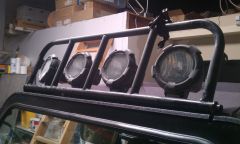
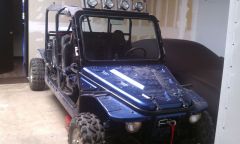
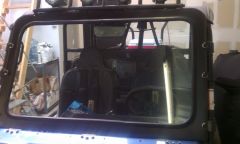
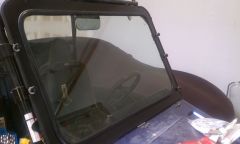
I used 1/4" aluminum and total cost was about $100 for the sheet metal.
-
It was a full sheet of aluminum that I had the inside cut out and any good glass shop will then make it to fit the opening. As far as driving - yes in dusty conditions and I do know that dust will get in the cab if you don't have the venting. On both sides of the windshield there is about an inch opening which I am hoping is enough to prevent some of that. The lexan windshield I had on it prior fully enclosed the front and it still wasn't that bad. The small openings should help some and If need be I can add some holes but I don't have a lot of area around the windshield to go 4" that is for sure. Also, I put some more pictures up in the gallery and a couple of them show the clamp very well. It does have rubber inside that wraps around the tubing. They are very similar to the ones on Extreme Metal Products for sure. No hinges on the windshield. What you are seeing is hinges for the front hood.
-
From the album: Bruhaw T-4
-
From the album: Bruhaw T-4
-
From the album: Bruhaw T-4
-
From the album: Bruhaw T-4
