


nocturnalsixer
-
Posts
389 -
Joined
-
Last visited
-
Days Won
5
Content Type
Profiles
Events
Forums
Gallery
Downloads
Community Map
Posts posted by nocturnalsixer
-
-
Yes, http://community.webshots.com/user/TrooperFolk It's an account I created prior to UTV Boards improvements that allow for photo being uploaded directly and if you want, I'll share the user name and pass word with you. but up in the right box, there is a view full size place to click on and if you like, there is also a slide show button.
To view your photos sure
Sent from my DROID RAZR using Tapatalk 2
-
I'm at about 1300 miles...the front look good to me one tire leaks i just air it up every few days I'm lazy and rear tires are pretty chewn maybe half tread still ill measure still but i ran it mostly on gravel roads and dirt roads and over tree limbs and trunks etc most time in mud 1x4 just do good until it get too muddy. But i do tend to break the rear loose and wag it all over the road
Sent from my DROID RAZR using Tapatalk 2
-
Agreed i thought those did pretty well where i went and drive even though lot of others had bad experience. Ill get back to u on tread heights
Sent from my DROID RAZR using Tapatalk 2
-
Agreed the first o2 sensor is a must so computer can adjust your fueling with the sensor. I have ran my trooper without the second o2 sensor it seem fine without that. Second sensor is usually to confirm that the first one is working and to fine tune it.
Sent from my DROID RAZR using Tapatalk 2
-
Sorry to disappoint you that they aren't aftermarket the ones i have on right now is the factory far east ones in 27"
Ill take picture when I'm home
Sent from my DROID RAZR using Tapatalk 2
-
Agreed shipping sucks.
Tinman
If you really want tires, it will be a bit but when i get new tires on my trooper, my old all 4 tires are yours if you pay just shipping (if shipping is reasonable) front tires are still meaty and rear are at 40-60% if u want photos just ask.
Sent from my DROID RAZR using Tapatalk 2
-
No problem
Sent from my DROID RAZR using Tapatalk 2
-
Looks like we know who hauls the food, drink & firewood at the next Jamboree! Good job!
rocmoc n AZ/Mexico
That looks like a good solid job. Makes me want to plan a gold heist. Shoot, I bet we could get a good couple of ton in that box and it would easily hold it. Good job.
Lenny
Rocmoc, thanks and, if everyone else would carry my gear then sure ill carry the heavy stuff as long as i don't get top heavy.
Lenny, thanks also only way ill go on gold heist is if i can go back into 1880'S with the trooper then sure i don't see what would stop us except for the legendary cowboy shooters like Wyatt Earp or likes of him lol.
Sent from my Nexus 7 using Tapatalk 2
-
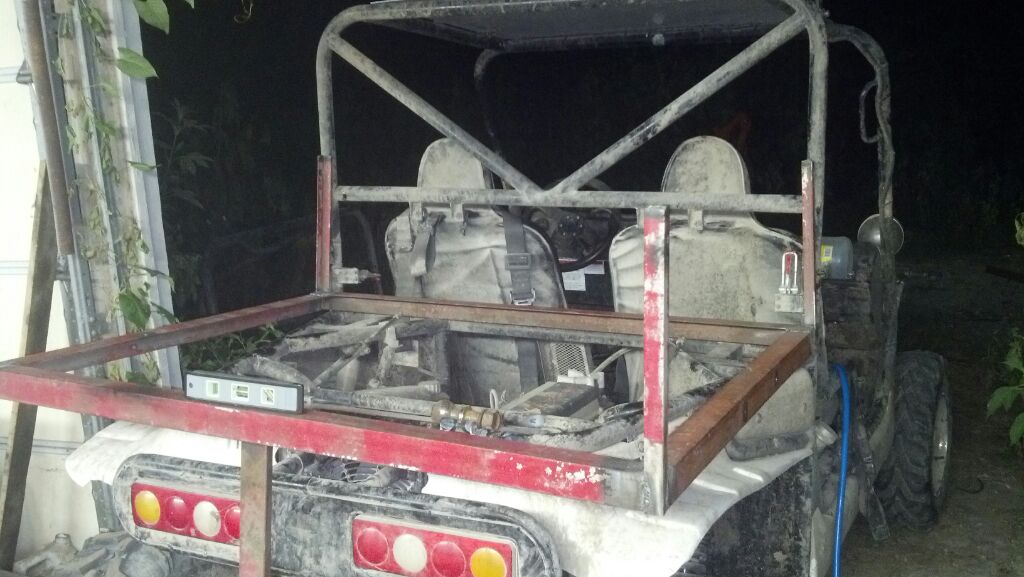
Was working on my machine today and thought id take picture for you
Sent from my DROID RAZR using Tapatalk 2

-
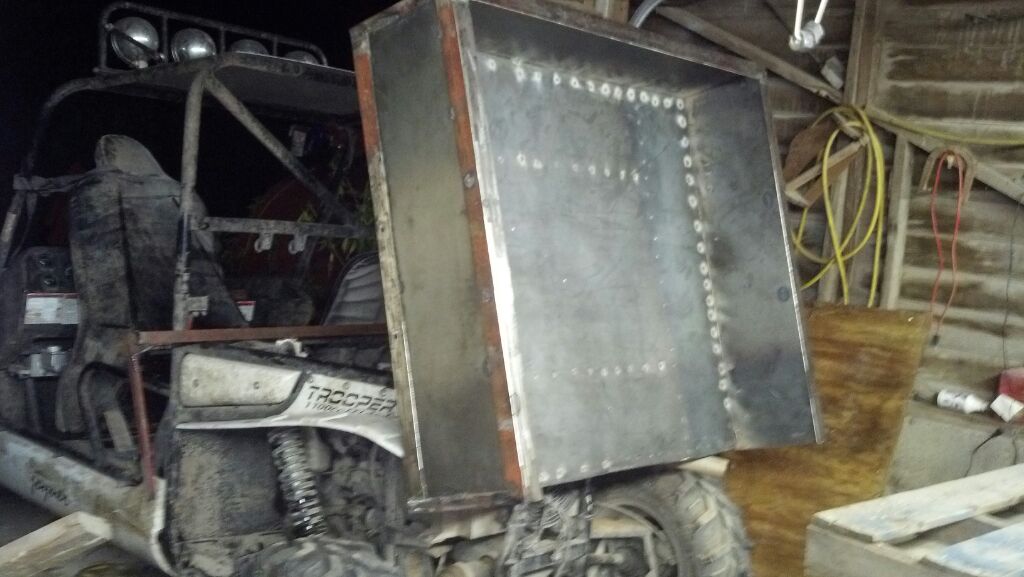
Thought id update my page with my progress
I chopped up the traction slapper bars for muscle cars into hinges and latches for the box.
Now i just gotta build a latch catch on front of box to secure the box down and then mount the taillights on and build a tailgate and paint it
Sent from my DROID RAZR using Tapatalk 2
-
-
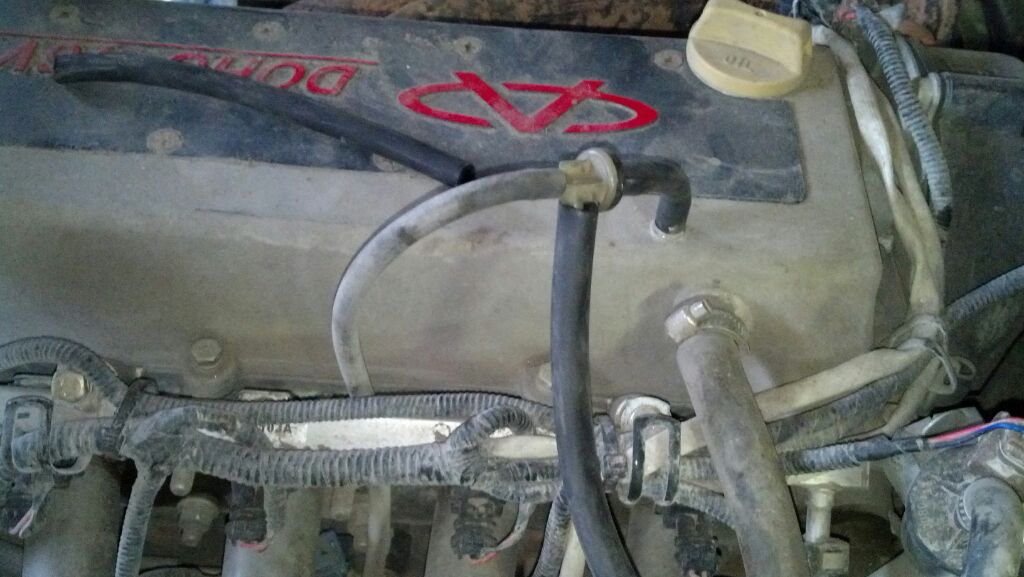
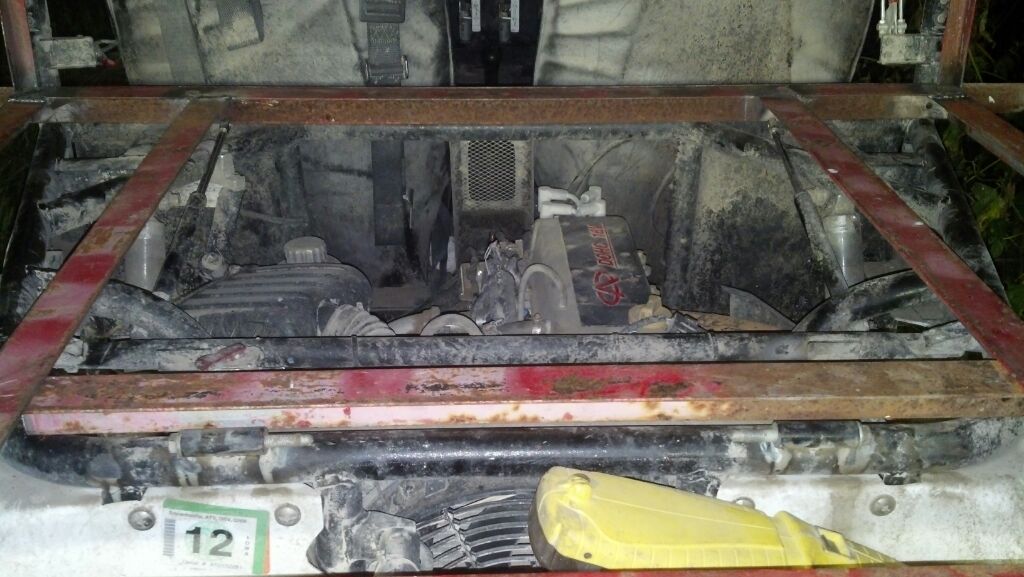
My new pro cool 27" x 19" radiator arrived and i was wondering if anyone know what size the hose on engine side are?
I didn't want to open up my cooling system just yet until i have everything ready, i plan to use universal radiator hoses, if i can't find correct one i would either get the radiator outlet/inlet resized and
matched up to original one at radiator shop or i might cut off piece of old hose and clamp New hose over the old piece of hose using it as an reducer sleeve
Sent from my Nexus 7 using Tapatalk 2
-
2008 T4 w/Cherry Bomb add-onOk well the muffler I have put on does restrict it to much...It's definatly has to be changed......I was tring to climb a hill with my buddy and it wouldn't make it the last 5 foot...Took off the cap off the exhaust I made and we made it with no problem....So it will be updated...Don't use the small Harley Muffler....Unless you don't care about power loss.
Dirty dog, that's a nice set up u got there, do it ever get in way of anything? Like backing up into it?
Bigdan,
That's good to know the small Harley mufflers are power robbers now i wonder if the regular Harley muffler are the same.
I'm thinking about if i want to add on something quieter than open exhaust because my wife will plug her ears every time we go out in it lol
Sent from my DROID RAZR using Tapatalk 2
-
Got my pictures for you guys to look at. The frame is all aluminum and the wood is plained down cedar fencing slats from Home Depot. I plained it down to about .400" thick to smooth the surface and eliminate some weight. The whole assemble weighs 53 pounds. You will see one picture showing a tab sticking up from the frame behind the seats. there are two of these, one on each side. The box has two 3/4" tapered pins on the front of its frame which slide into these tabs. This is what holds the front of the box securly in place. The pins are tapered so that they slide in until they wedge tight in the holes so there is no play to cause rattling. The rear of the box is held down and slightly forward into the pins by the original toggle type draw clamps that were used to hold down the front of the original deck. The front panel of the box is slotted so I don't have to remove the intake filter to get the box off. This slot uses a velcroed foam pad that seals off the slot from the front. All wood is screwed down along with construction adhesive being used at all joints between wood members and also wood to frame. The counter sunk washers used under the screws are hollowed out on the under side so that the outer edge of the washer digs into the wood capturing the wood around the hole preventing it from spliting as easily happens when just using screws. The surplus tail gate chain stores in the hollow aluminum vertical corner post. The post has a slot down its back top side to slide a link into at what ever length is needed. I can remove the box in literally 10 seconds. I wanted to be able to remove the box quickly in case of fire so I can get at the engine comparment fast. I had one fire already and nearly didn't get it out because I couldn't get at it. There are 17 pictures in all so click thru them.
Lenny
The box look very nice, maybe u should enter your trooper in a 4x4 show i bet u are a shoo in for a trophy haha.
My box will be painted but sadly it won't be a work of art like yours but that's ok ill just really destroy my box lol.
Also lenny and Kinarfi i don't know why or if it's just me but when i click on your photos you posted on this thread i see small pictures not full sized ones. Are those hosted off-site?
Lenny,
also what kind of fire was the first engine fire? Electrical or fuel?
I think that's a great idea be able to remove it so fast, i plan on getting longer hydraulic assist struts to allow the box to tilt much further back and i plan having fire extinguisher in my reach after i heard about your fire. I didn't think about having a fire extinguisher onboard until u mentioned your trooper fire.
Kinarfi,
I saw the video and yes the back up light seem real bright in the video with guy with green shirt.
I'm such a cheap chump lol i went and bought pair of regular "tail, turn, and brake" signal complete $5 each at farmer store lol now i just need get back up light or eliminate those and figure a way to mount it on box itself or out of harms way somewhere else.
At first i was thinking about having lights on side of box like classic trucks but i quickly decided that stuff will be hitting on it so i want it tucked and out of way.
Sent from my Nexus 7 using Tapatalk 2
-
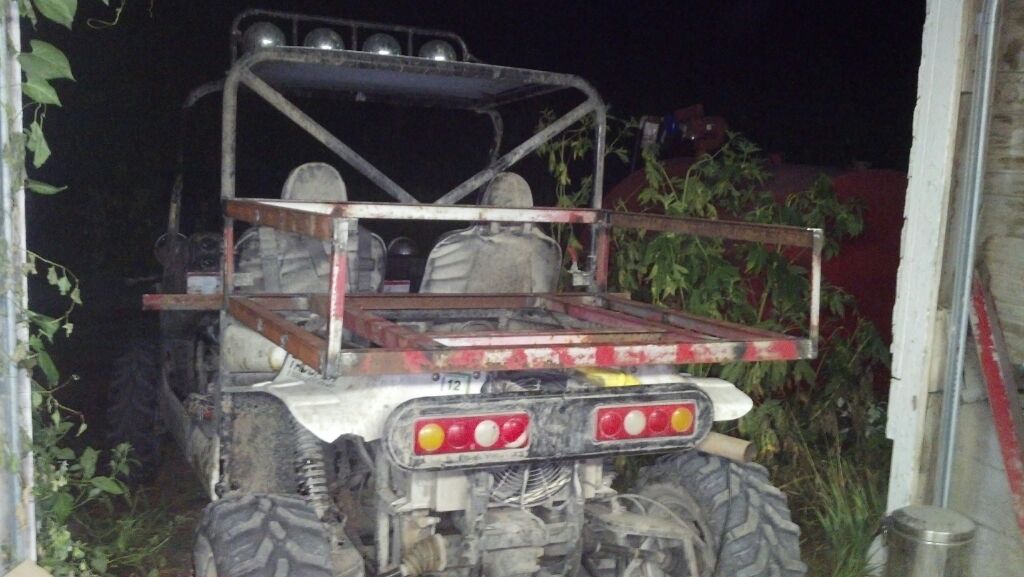
"Brute trooper" everyone might ask why...because my trooper don't look pretty and get the job done and its no trailer queen i put 1500 miles in only 3-4 months and used it for pulling a lot of heavy metal and my full size 4x4 and small trailers it keep impressing nee
Sent from my DROID RAZR using Tapatalk 2
-
Those were white lights, but there gone now, the ones I have now are only 1" in diameter and several times brighter than the ones in the video. To get the tail lights to blink like mine do, you need to ad a circuit to the lights,(exclusive or gate), it's the next 2 pictures after the video, I'll try to remember to get a photo of the backup lights if you want.
How much brighter are those new back up lights? I want something like spotlights on back of my "brute trooper"
Sent from my DROID RAZR using Tapatalk 2
-
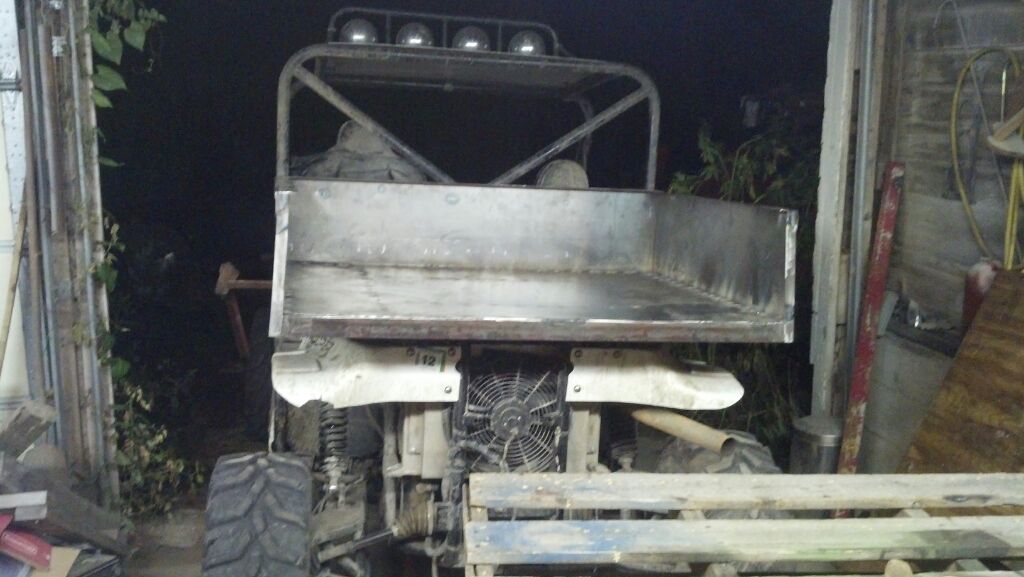
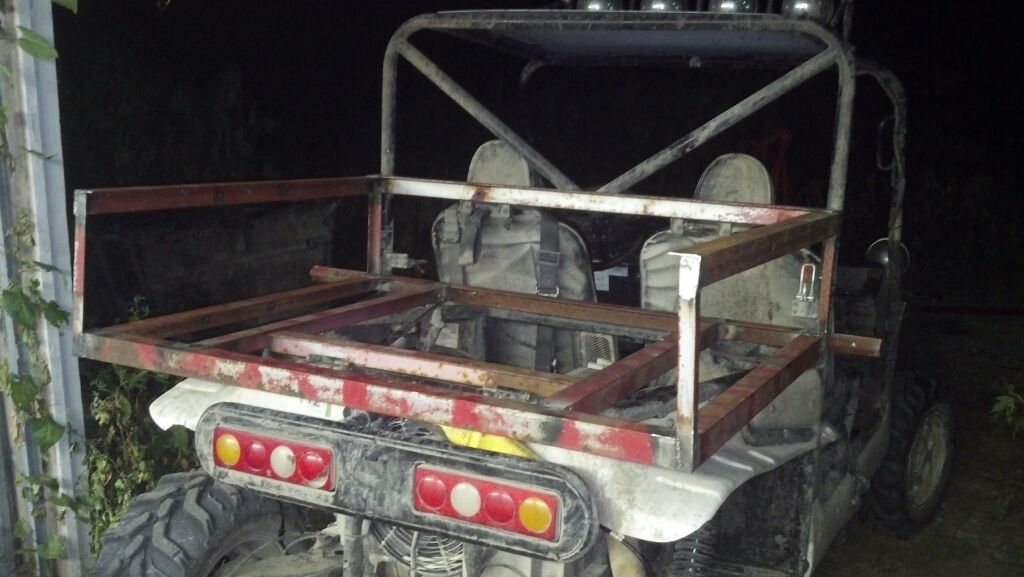
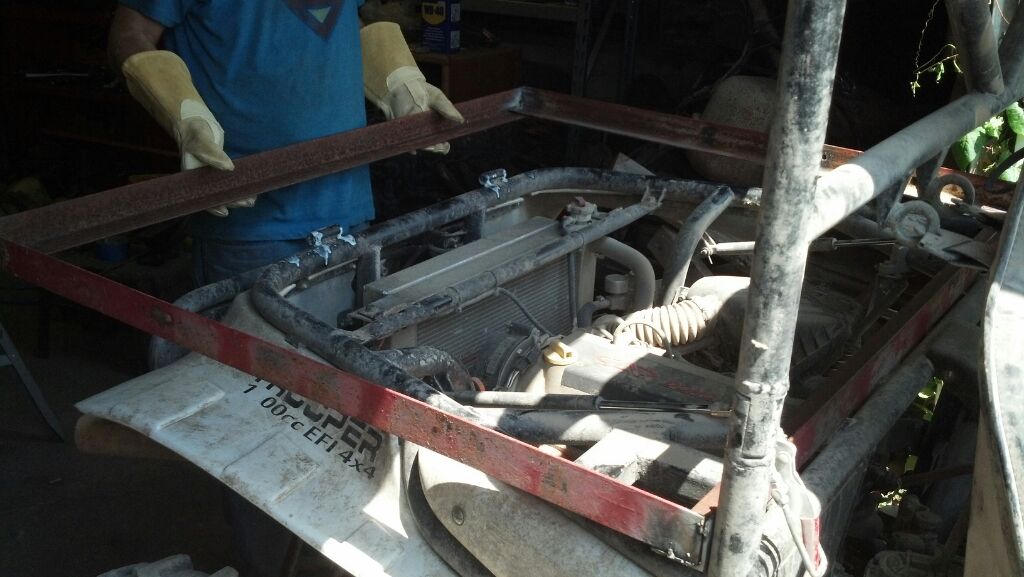
My progress so far...sheet metal is impossible to find anywhere on weekend i guess i should had planned ahead but at least i can get precut premeasured sheet metal and just weld it in place
I had been running all over cities (few) looking for sheet metal so not much got done... I plan on finishing mounts and brackets for front secure down the box/old hood then metal hinge legs for the rear hinges to tilt the box then another little legs bracket to hold hydraulic strut on to the box so it can be assisted tilt like stock hood.
Then the whole taillight assembly will be removed it interferes with operation of the box tilt.
Sent from my DROID RAZR using Tapatalk 2
-
Tail lights, go LED, http://good-times.we...104282158MVvWow I also have 10w LED back up lights that really really work good.
Very nice set up the back up lights for some reason look reddish to me in video...is it actually white?
I was actually kicking around led trailer taillights probably more slimmer one but not sure yet.
Did u needed to add any resistor inline to make leds work?
Sent from my DROID RAZR using Tapatalk 2
-
Rocmoc riding in back lol i hope you got a crash seat for him to strap in at least.
I'm curious how you did tailgate i still am stumped on that and also I'm trying to decide on taillights if i want use the original mounted recessed into the box or different one completely
Sent from my Nexus 7 using Tapatalk 2
-
Lol lenny, are you doing tailgate also? How big will your box be?
I have one or two ideas on that...might be removable or hinged. I just got up so I'm relaxing before i go back in garage and clean up metal etc then go town get sheet metal and lay it on the skeleton then black sand blast it and clean then paint it and also its going to tilt like stock hood to make unloading much easier
Also I'm going to leave lip on top of inside the box for few reasons...... #1 Tie down points and #2 a great surface for me to lean on and rest arms on same time and #3 hopefully help keep stuff inside box.
Sent from my Nexus 7 using Tapatalk 2
-
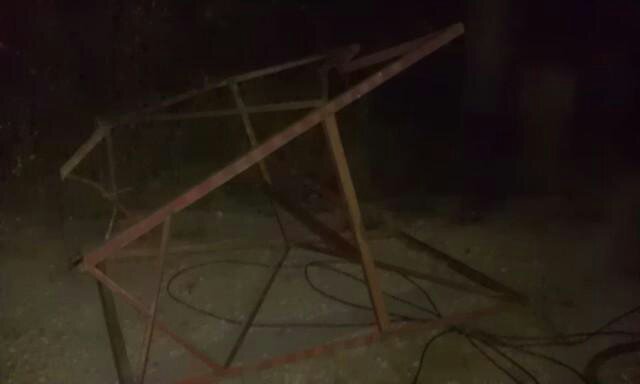
I had been burning the midnight candle oil, this is where it stopped at this evening
I know i gotta clean the metal too
Sent from my DROID RAZR using Tapatalk 2
-
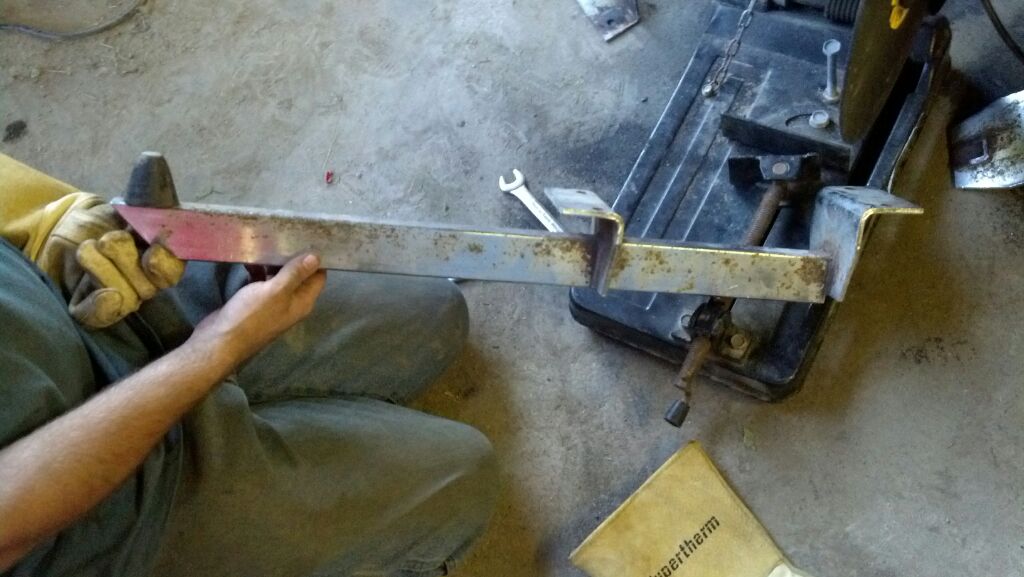
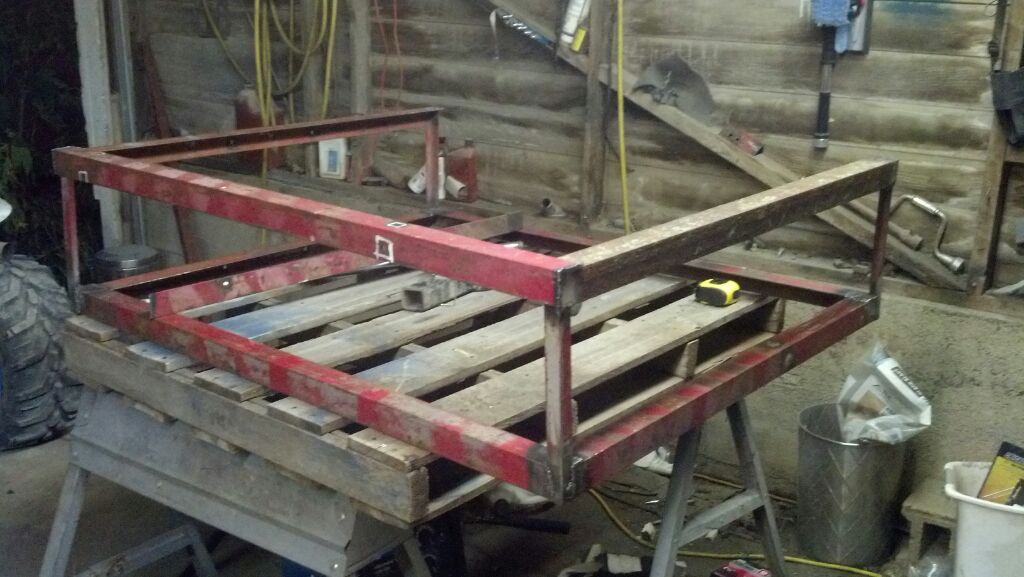
I finally broke down and went bought an plasma cutter and borrowed my buddy's miller welder and used my old fuel tank standing frame for outdoor that been sitting in grasses. Anyways i got started on the basic frame work.
Its planned to be 51 inch wide and 42 inch long and about 16 inch tall not sure about height completely yet though
Sent from my DROID RAZR using Tapatalk 2
-
Well, they won't make any noise until the blow up and make a pop, but then they're dead. The best way is to measure the voltage,either measure the voltage from source to drain or from drain to ground. Another way would be to mount an LED in either of them places so you can see at a glance if it's on or off.
I'm hearing impaired so i won't be able to hear the transitior pop at all, will it be possible to mount indicator led on dash that goes to the mosfet? Or maybe mount the led right above the mosfet that its hooked up to so when there's a issue we just look at those and see led
Measure voltage you mean look for voltage drop?
Sent from my Nexus 7 using Tapatalk 2
-
My definition of bus is it has a common terminal to all fuses, in our case +12v
The FETs are available from all electronic suppliers but I used IRF4905 from International Rectifier for the PFETs, there is also many others, search for MOSFET P-CH
Through hole
TO220, TO220AB,
The NFETs are just run of the mill fets like the 2N7000 and used to turn on the PFETs
What I did was use a piece of aluminum bar to mount them on and to dissipate any heat they generate, very little, and act as the common bus, I mounted the FETs so the tab was insulated from the bar. If you're really interested in using FETs, I'd be glad to help.
Kinarfi,
I'm always eager to learn new stuff, and i have always wanted to use solid state transistors instead of relays on many of my projects because some relays get wet and stick and other relay get hot from high amp load for too long and sort of solder contact points together and become stuck activated.
Is there ways to test the mosfet like u could do with relays by feeling or listening for the click and use test light/dmm
Sent from my Nexus 7 using Tapatalk 2


payload box?
in Joyner UTV SxS Forum
Posted
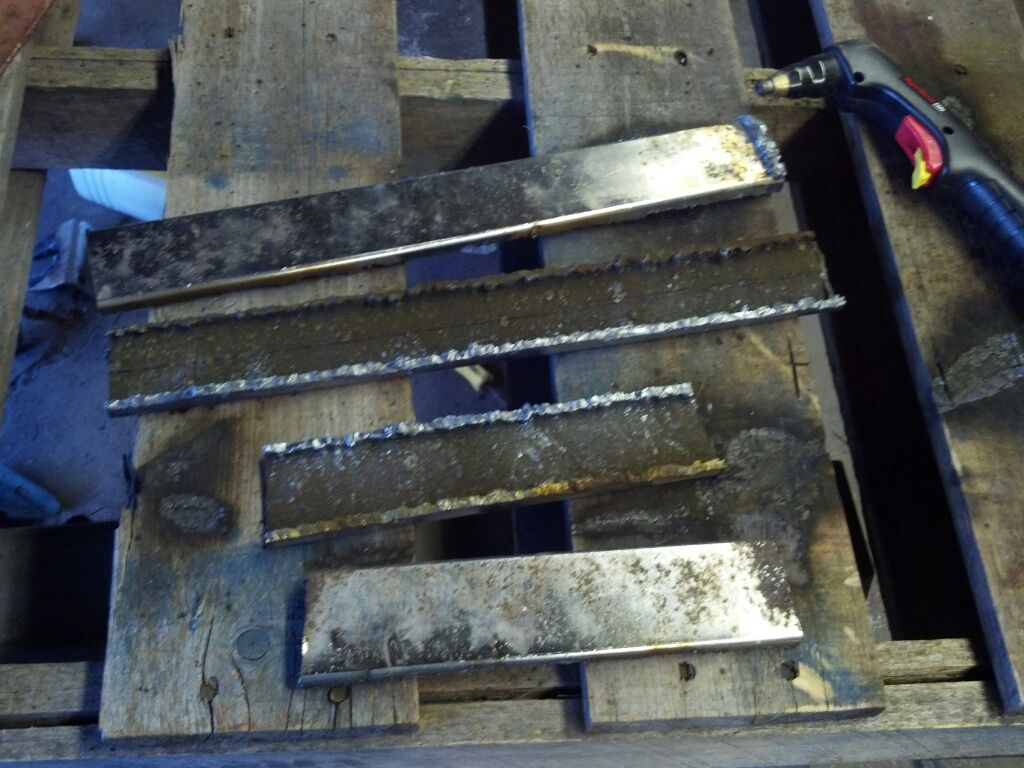
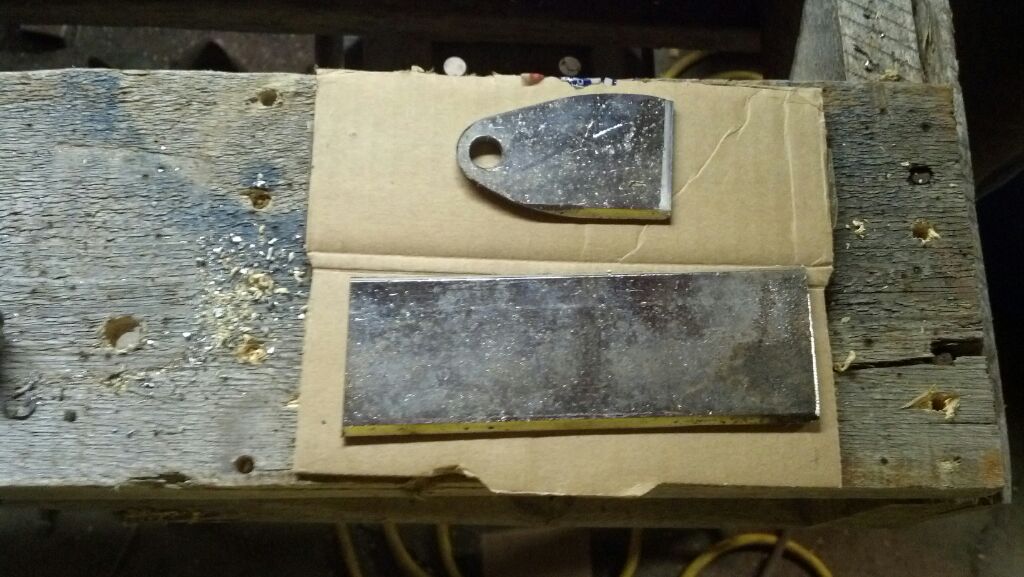
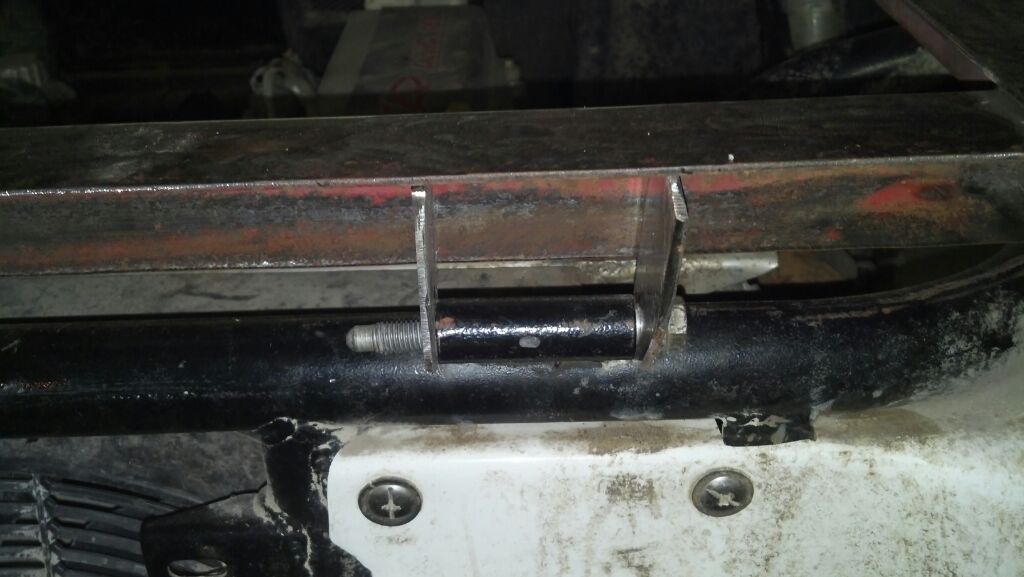
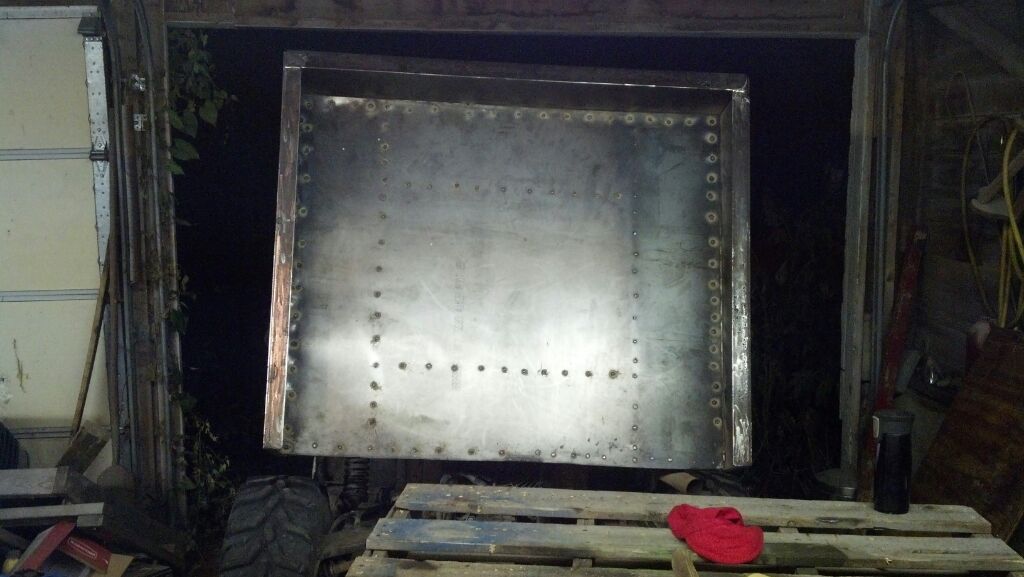
This is how i did my latch catches for front. I have about $100 into this just for sheet metal plus the lights but everything else was free. It was all 1/4" mild steel angle iron and 16 gauge sheet metal and 3/16 mild steel for hinges and latch catches and latch catches bracket
Sent from my DROID RAZR using Tapatalk 2