djl
-
Posts
16 -
Joined
-
Last visited
djl's Achievements
")


-
Hi Ben. Thanks for the info. I lubed the splines using Lithium grease. I applied a good bit of gasket-maker to the washer where it contacts the splines in order to prevent an oil leak. I did not apply any gasket marker to the outside (nut side) of the washer. I did re-use the old nut. I intended to use waterproof grease to seal up the splines on both ends of the driveshaft (enough to completely fill the cavity) to prevent water from getting in. If I find any oil contaminating the waterproof grease I will know what to do to fix it. 🙂
-
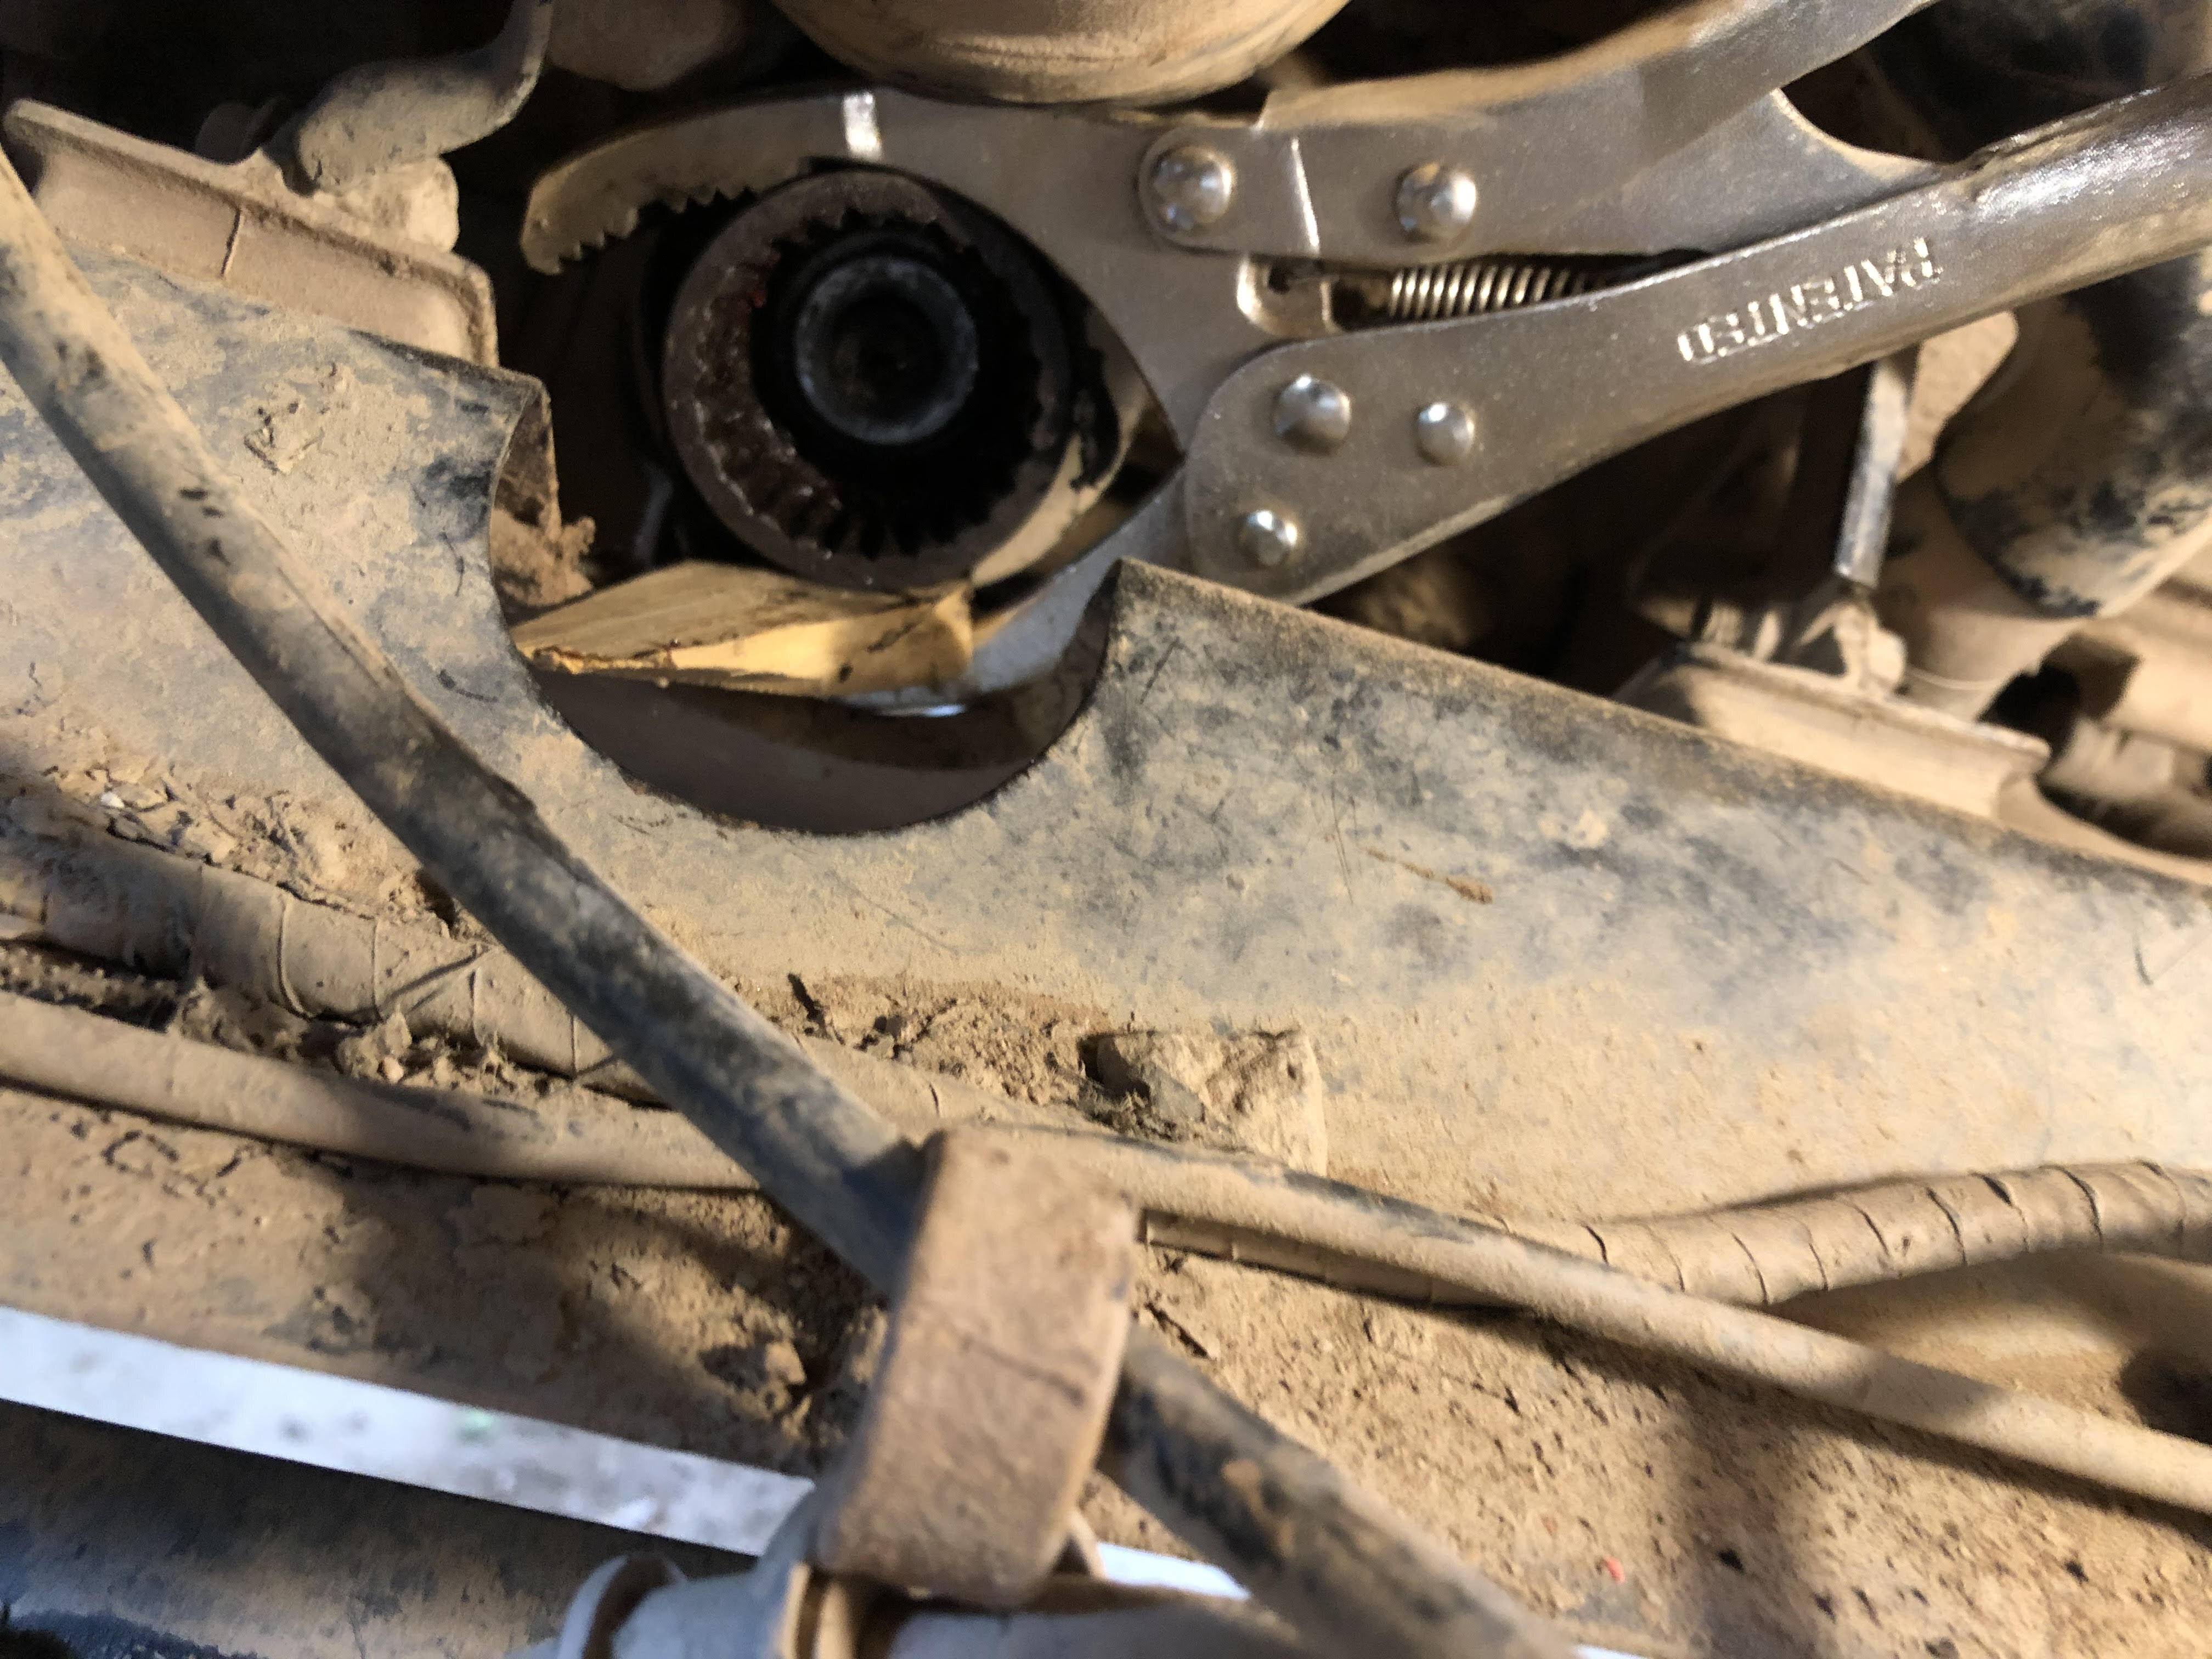
Hi aefron88. No the nut is not staked. I got it apart yesterday by using a piece of motorcycle tire inner tube (for grip), a pair of oil filter vice grips, a block of wood and an impact gun. A complex operation. 😆 Once the nut was removed, the boss would still not come off so I used a pair of vice grips and a ratchet strap to apply some tension and struck the side of the boss with a punch and 4lb hammer. 🙃 Inside the boss I found what I initially thought to be the remains of a plastic washer, but after reviewing the parts diagrams I am convinced that it was an excess of loctite that had hardened and bound the boss to the splined shaft. I removed and replaced the oil seal (put a wipe of gasket maker on the outer circumference to be safe) and installed the new boss without issue. Had to reuse the oil filter vice grips to get it torqued to spec. Thanks!

-
Hi All. The splines are pretty well worn where the rear driveshaft fits into the adapter (boss?) on the rear of the engine. I have a new driveshaft / adapter / seal to install but am having difficulty loosening the nut holding the adapter onto the transmission output shaft. I purchased a chain-type vice grip tool thinking that I could get it around the adapter to prevent it from turning but have not had any luck getting it in there yet (very tight space). What approaches have you used that have worked? Thanks!
-
Hi Jim. That noise sounds more like starter noise then engine noise to me. FYI.
-
2011 Hisun 700 Primary Sheave Not Closing Completely
djl replied to djl's topic in Hisun UTV SxS Forum
Hi Greg. Thanks for the warning re: the belt. Interestingly, the manual states that only the rollers should be greased and it doesn't mention that the sliders should be. As a result I greased the rollers and not the sliders. The sliders have hard plastic inserts that should slide (and wear) well against the dry sheave assembly grooves. It specs 90g of grease to be used on the rollers, which is about a handful. Like you, I felt this to be a bit excessive and used less. Given the heat and centrifugal forces within the sheave, I will not be surprised if I find that the grease has been evenly distributed when I open it up next. If I have to spend some money on sheave parts, I will be looking for a setup that will provide me a bit more speed. There are aftermarket sheave kits that provide both lower and higher gearing. 😁 -
Hi Greg. Interesting approach. I had run across an aftermarket option that adds a '2nd' muffler across the rear of the chassis under the box overhang and thought it might be something to consider. I will keep this flex pipe idea in mind. I will start with earplugs- this should reduce the noise for me. If neighbors complain, I will consider other options. 🙂
-
Hi All. I did a bit more research on this issue and the leak is coming from the 'weep hole' on the water pump. Coolant will drip from weep hole when the coolant seal within the water pump begins to leak. Oil will drip from the weep hole when the engine oil seal within the water pump begins to leak. The purpose of the weep hole is to prevent coolant system pressure from forcing coolant past the oil seal and into the engine. I have ordered a new water pump so suspect that will fix it. Thanks! Research findings: https://www.youtube.com/watch?v=dAsu66SkMVA https://www.youtube.com/watch?v=it-TFg3ulYI
-
2011 Hisun 700 Primary Sheave Not Closing Completely
djl replied to djl's topic in Hisun UTV SxS Forum
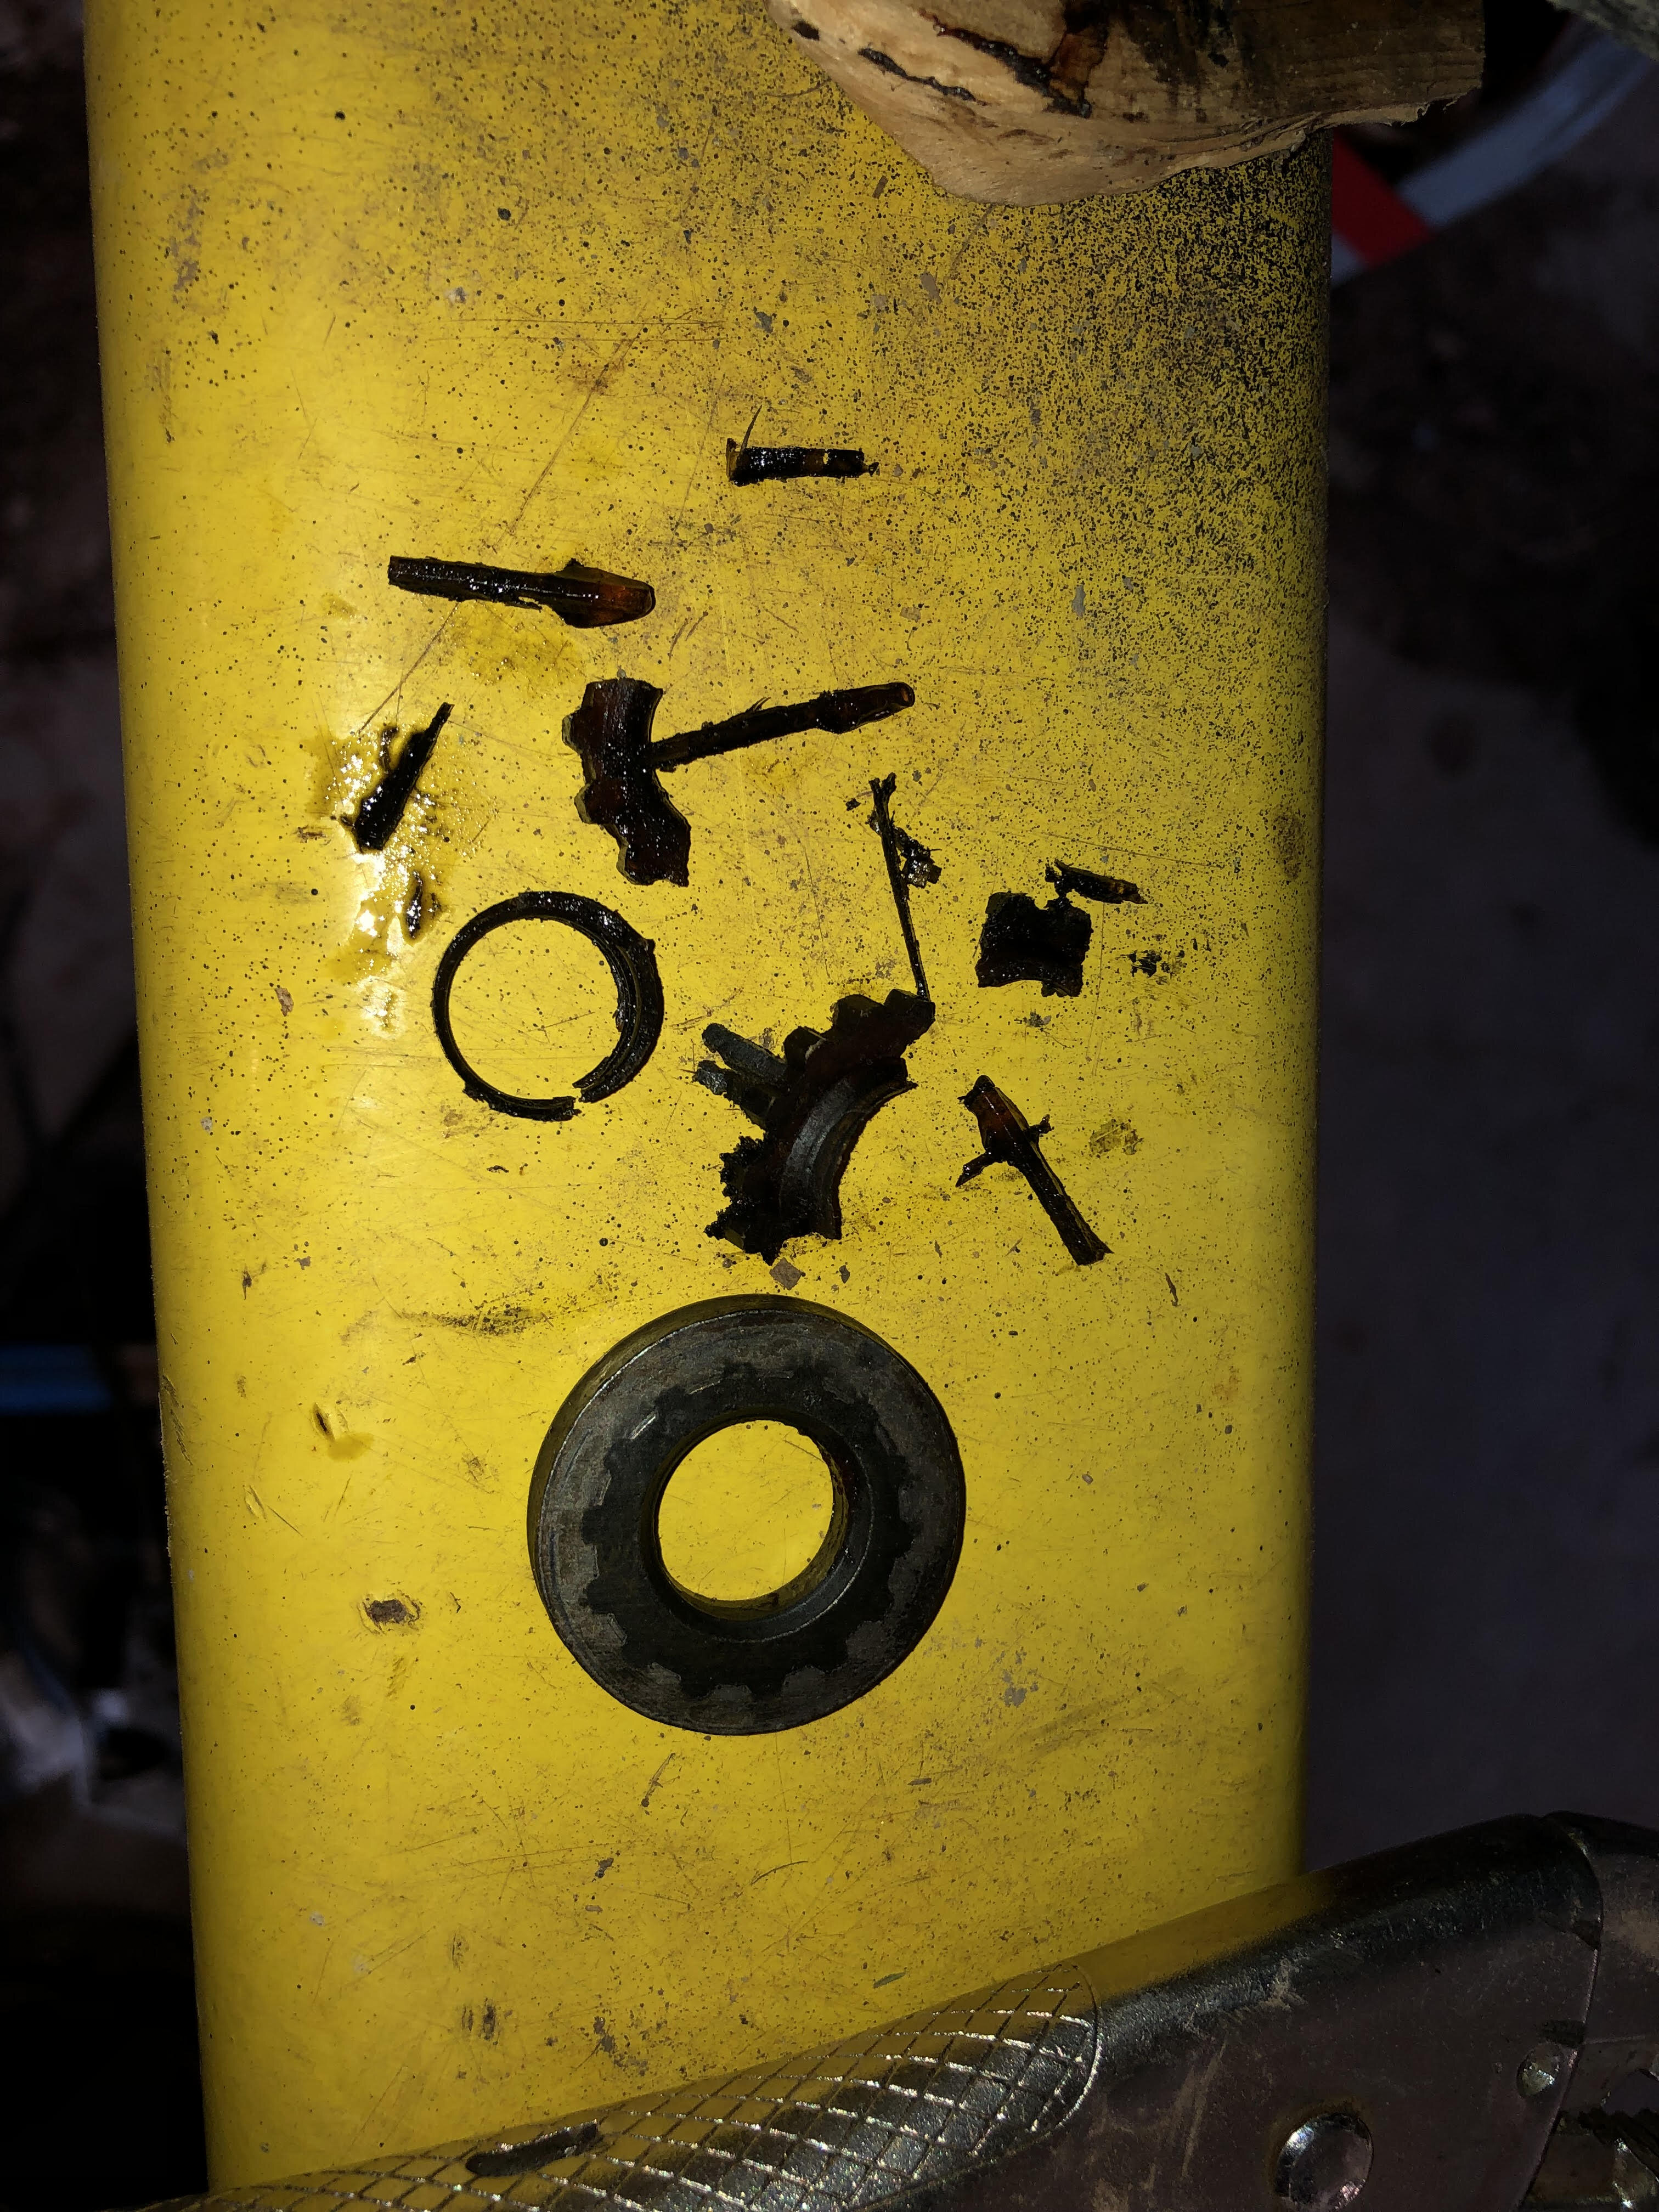
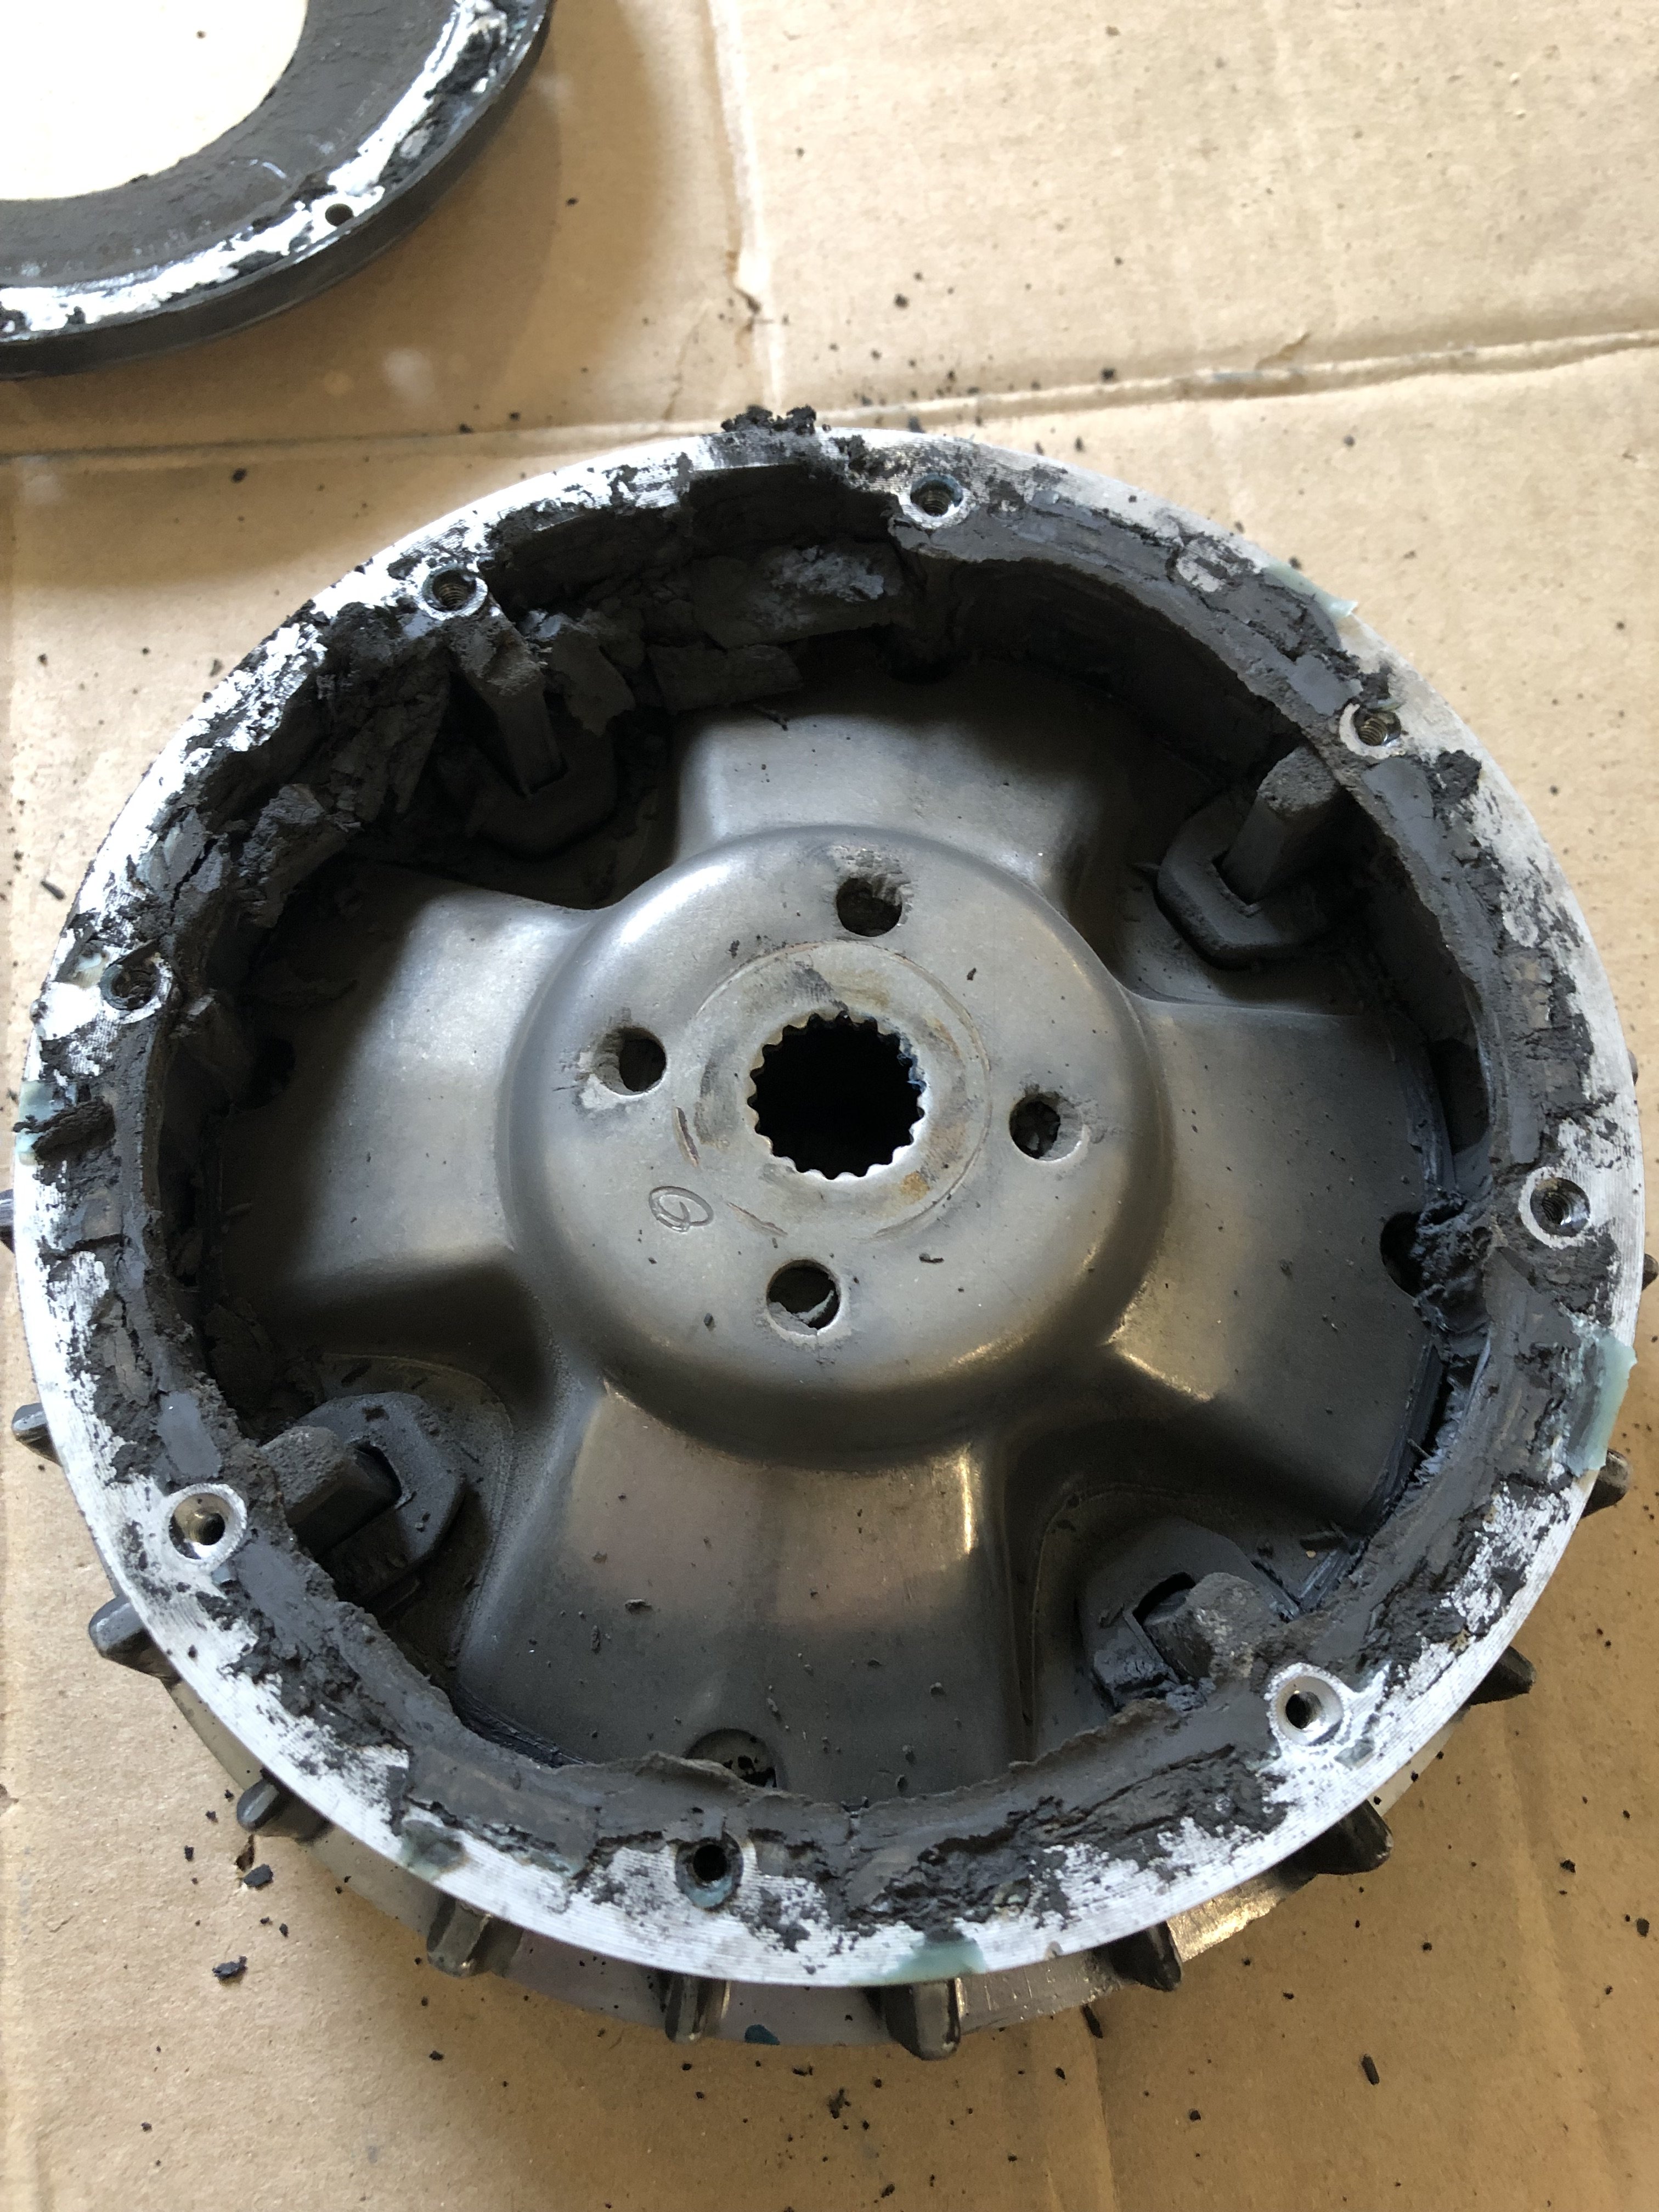
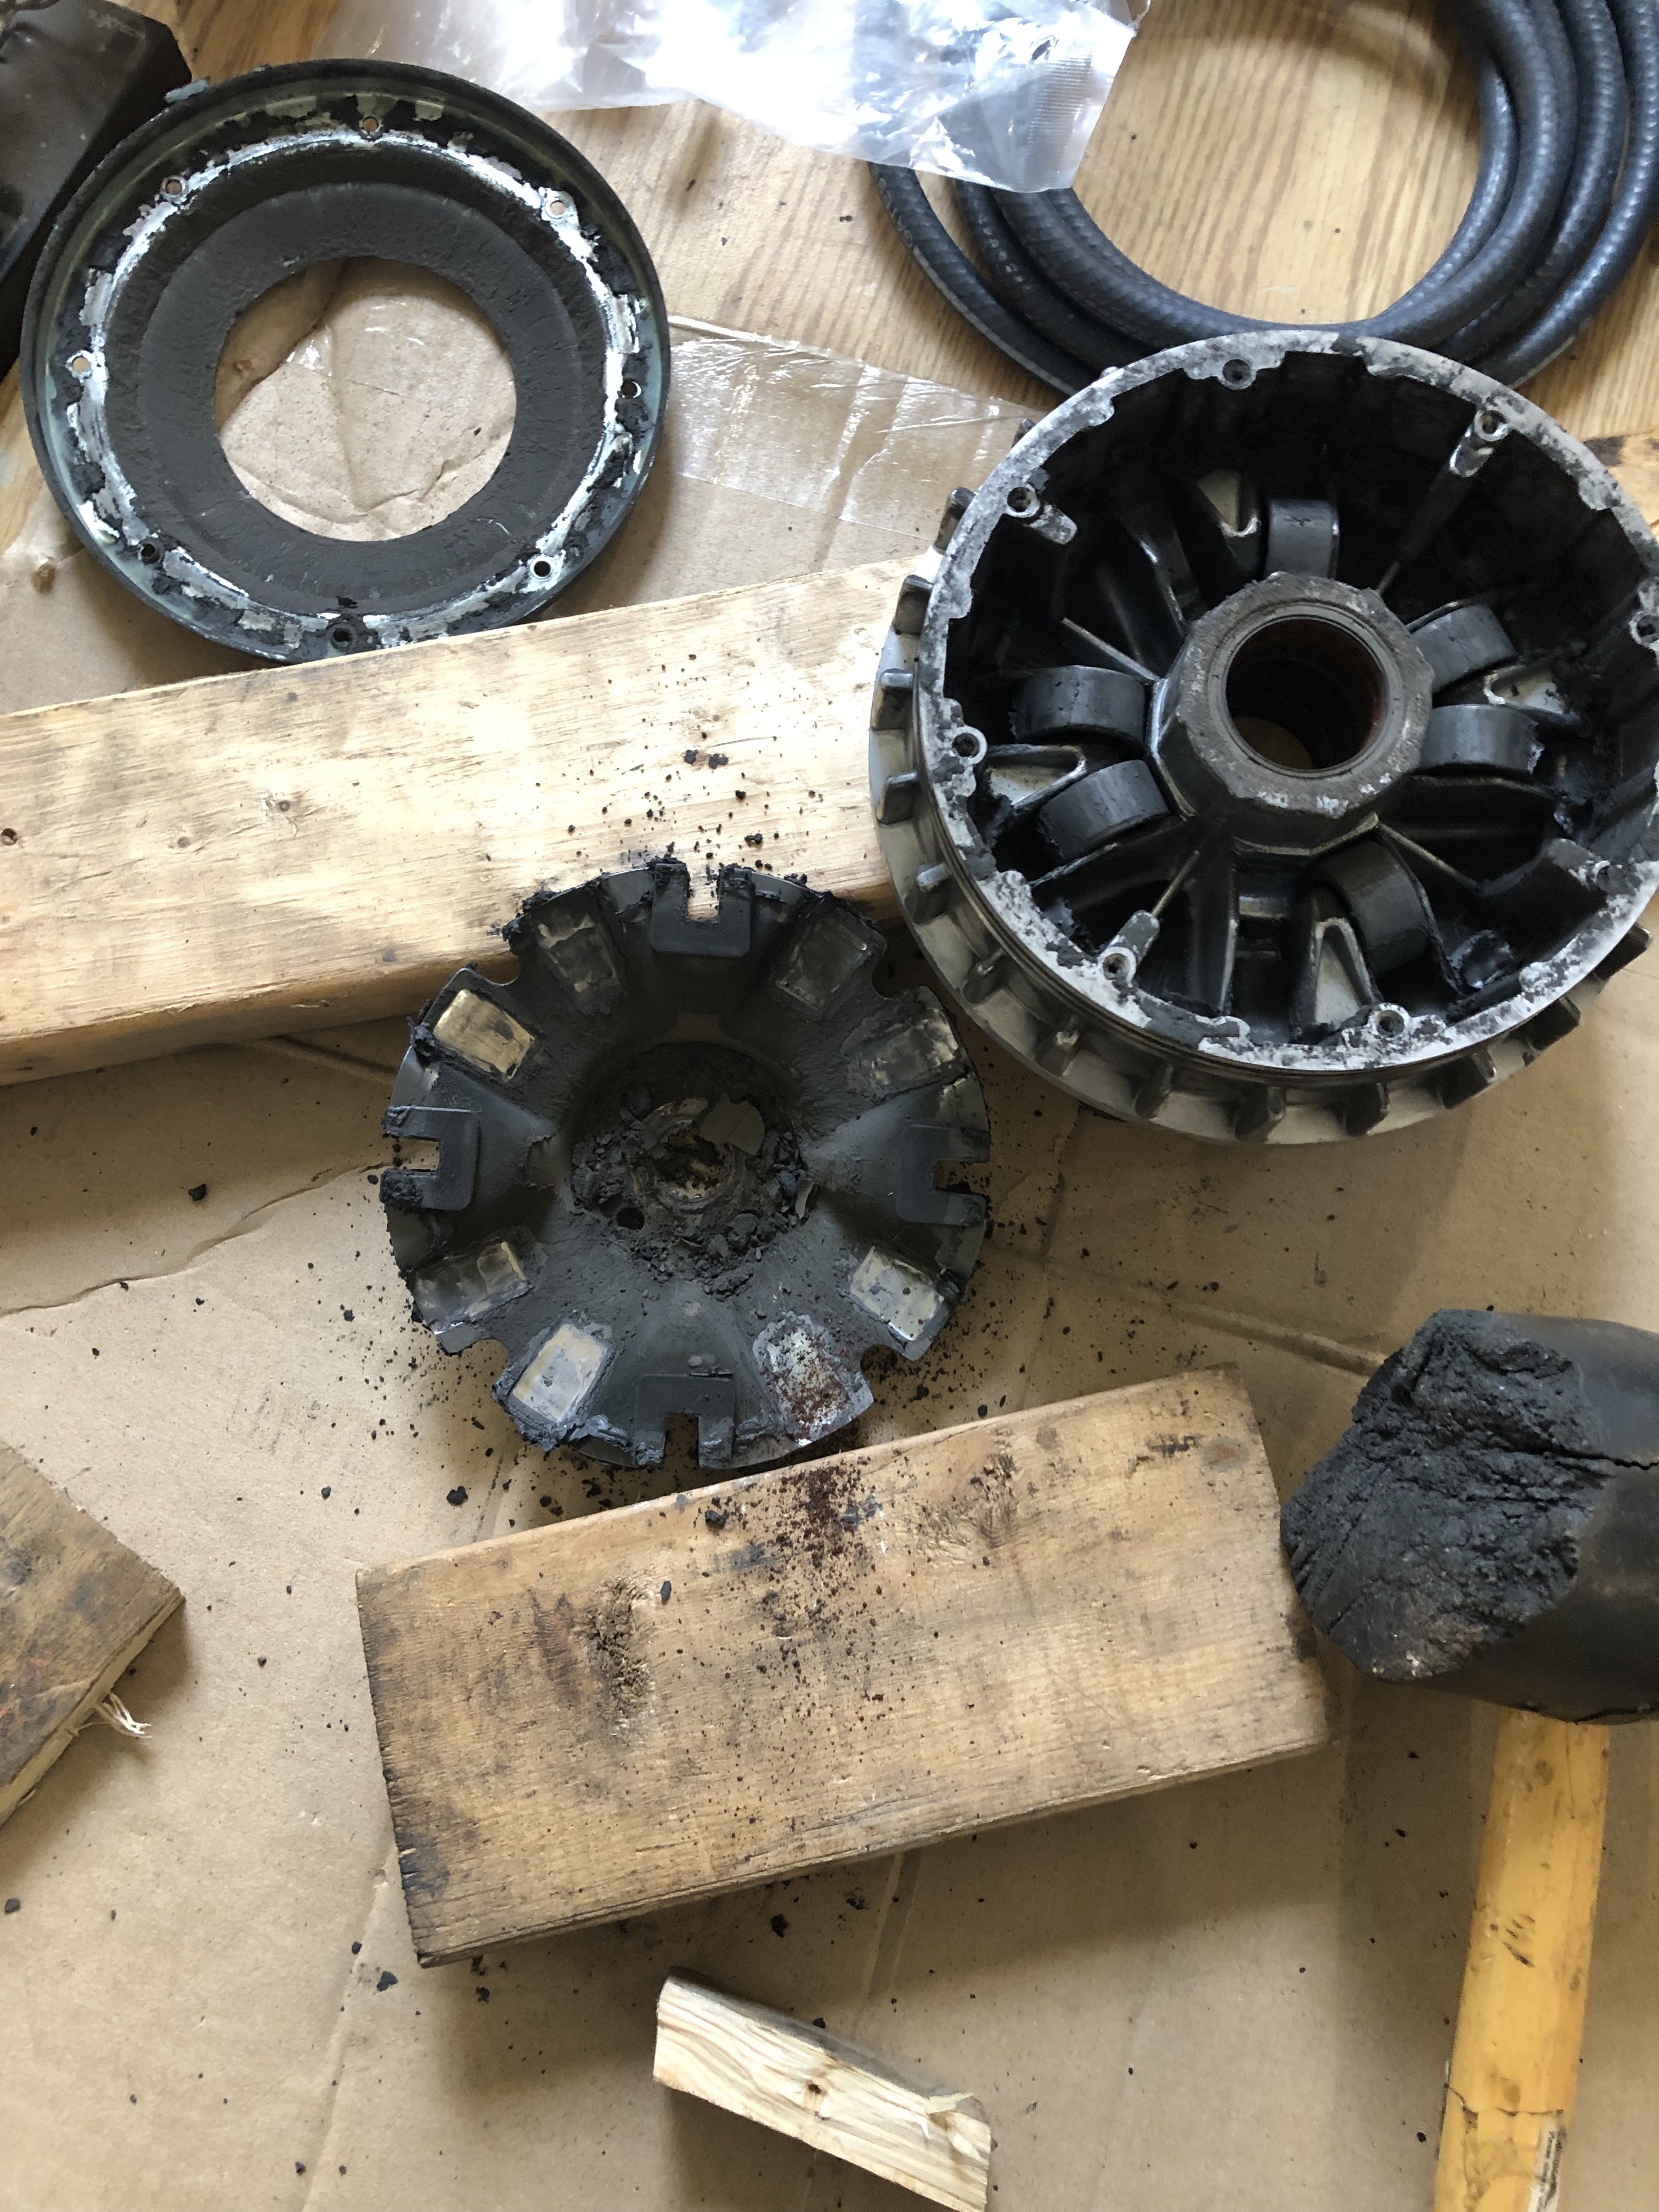
Hi All. I believe that I found the problem. Where it was raining today I dismantled the primary sheave assembly and the grease had hardened and piled up against the outer reaches of sheave travel (see attached photos - yikes!). I performed the primary clutch sheave service as described in the service manual. The diameter of the weights were within spec but a couple of them had flat spots. I also noticed that the steel plate had grooves worn in it in a couple of spots, and the primary sheaves appeared to have 'grooves' where the belt was prevented from riding any higher on them. I cleaned everything up, re-greased and re-installed. In neutral the belt will now ride up to the top of the primary sheave but only if you accelerate the engine hard. It still prefers to run in the 'groove' but I am hopeful that with the additional load introduced by the machine that the groove will not play as big a role. 🤔
-
Hi Greg. I was trying to avoid loosening / adjusting the exhaust header bolts as they do not appear to have been touched since originally assembled at the factory. 🙂 I did check the bearing at the rotor end of the driveshaft and it didn't have any noticeable play. Thanks for the response!
-
Hello All! I heard a dripping noise after checking my drive belt for bearing noise (see other post). I was able to determine that it was coming from a protrusion under the passenger side of the engine - see attached video. Any idea what this is and what is likely required to repair it? Thanks in advance! IMG-0235.MOV
-
Hi All! I thought that the drive system was making a bit more noise than I expected so I secured the belt drive cover aside and ran up the rpms in neutral to check for bearing noise, etc. There wasn't any noise but I did notice that the primary sheave did not close as far as I expected, the belt only came within ~3/4" from the top of the sheave. See video link below (I was unable to upload it directly). I ran the RPMs up 5,000 (manual indicates that this is max for this engine). Is this expected behavior or should I remove the primary sheave and check roller diameters, clean & re-grease everything? I will be traveling with newer machines so want to be sure that I can travel as fast as this machine is capable. 🙂 Thanks in advance! https://www.dropbox.com/scl/fi/qof63w1kohal8wzmikfpt/IMG_0234.MOV?rlkey=j4h8ejm0ogjvlluyy5olagvrn&dl=0
-
Hi All. I wanted to provide an update. I overcame this particular issue by manufacturing a couple of 1/8" shims to place between the rear engine mounts and the chassis. This provided ~3/8" of clearance between the park brake rotor and the exhaust pipe which should be sufficient. Thanks!
-
Hello Stephanie. The dumpbox on my 2011 HiSun 700 is not electric. Pull the lever on the front corner of the dump box and tip it up. 🙂
-
Hi All. I have been performing some maintenance on my 'new-to-me' 2011 HS700. Typical maintenance items: front wheel bearings, stuck brake caliper sliders, brake pads, caliper rubbers, exhaust bushings, lower shock bushings. Upon replacing the exhaust bushings I noticed that the park brake rotor is contacting the exhaust (right where the bushing goes). It would have previously not been in contact only as a result of the bushing having been worn out. Has anyone run into this issue and if so, how were you able to fix it? I am currently considering a shim under the rear engine mounts to get a bit of clearance between the exhaust bushing and the park brake rotor. Thanks!
-
Hello All. I am unable to find any other references to the 'Rhino 700 kit' other than water pump and engine rebuilds. Is anyone able to provide a link? Thanks in advance!