-
Similar Topics
-
 By rdc
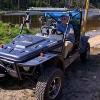
I have a 2007 Joyner 1100 sand viper and before it even get's to where the thermostat opens up the oil pressure get's so low I have to shut it down. What could fix this ? I thought about adding an oil cooler with fan, thicker oil, or removing the thermostat. Any advice?
-
 By Pop Bob
I had been driving for about 15 minutes, everything fine. All of a sudden the engine was surging, losing power, would run with 1/2 throttle or greater and was backfiring badly. Luckily I was close to home and got it back. The tipoff to me was that I thought I was hearing intake noise. Sure enough, the rubber boot which connects the air cleaner and intake piping to the throttle body came loose. Obviously the computer was confused. It turned out to be an easy fix, but this is now added to my inspection list. Just thought this might help someone else.
-
 By Fmaxiron
I just purchased a 2023 Honda Pioneer a couple of weeks ago and had the hard roof and a front Honda Pioneer windshield installed at the shop before taking ownership. As things are drying up here in NC, the grass and dust are beginning to fly right through the back of the cab while driving. I was wondering if anyone has any good recommendations on rear windshields, dust panels, or mesh screens to help stop this?
Thanks a lot!
-
 By esmarkey
Hi, I purchased a used Cub Cadet 750 Challenger that seemed like the belt was slipping so I put a new belt in. It still acts like the belt is slipping but now I am thinking it is the clutch?
What is the best way to remedy this problem?
Can the clutch be rebuilt?
Are there aftermarket clutches available?
-
 By MilSurpYinzer
Hey all, I was just wondering what you guys consider a necessary upgrade or spare part to have or mod onto your machine.
I'm going for a kind of shtf survival rig that's not going to be SUPER heavy and I'm looking at getting:
A spare belt (I keep seeing this mentioned everywhere I look so it must be important)
A spare tire and mount( So would I need a jack like one from an old jeep or something else?)
Tire chains for the winter
And maybe a cargo bed upgrade so things don't slide out.
Bumpers because duh.
I already installed high output lights and have a windshield, roof, back window, and winch. And I outfitted a Molle panel for the back of my passenger seat with extra supplies like food, first aid, and spare mags.
Any advise on increasing durability, longevity, and having something on hand because it's absolutely necessary would be a plus.
Thanks so much!
-


Recommended Posts
Join the conversation
You can post now and register later. If you have an account, sign in now to post with your account.
Note: Your post will require moderator approval before it will be visible.