Quantcast
Jump to content

curved windsheild installation


Guest Lenny

Recommended Posts

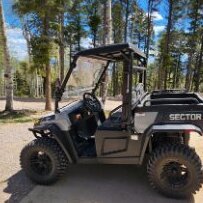
About a month ago I ran across a front plastic panel which came off it looked like a 60" flat panel TV. It was at a thrift store and I got it for $2. Whala, I had a windsheild. Iv'e posted pics. The lower side has a up slope to it's support frame. This is so my hinged hood will open without hitting. The windsheild is curved more at the bottom then the top. Curving it gives a nice flat undistorted looking screen as apposed to flat installations that always look warped. The other thing I think I'm finding is that a lot of the wind goes around to the sides. I haven't been out behind others kicking up dust but I hoping this will help keep the dust from curling back into the cab area from behind. We'll see. I do not hear any exrea wind noise from the wind hittig the windshield.

http://good-times.webshots.com/photo/20706...104282158cXqcDI

http://good-times.webshots.com/photo/21745...104282158xNVhqX

http://good-times.webshots.com/photo/24129...104282158cCBJOx

http://good-times.webshots.com/photo/26545...104282158bwVtxR

Lenny

Link to comment
Share on other sites

The plastic was flat and I just bowed it. I've included pics ( again not correctly) of the hood hinge. I used a stainless hinge I had around that had 3/4" legs on it but 1" legs would be better. I like a strap hinge as its the strongest way to go and it spreads any stresses over a much larger area. You have to use pan heads or counter sunk heads so the legs of the hinge can get close enough together. The hood support rod is a peice of 6061-T6 aluminum. this is quite strong and also springy. It's bowed so when I stow it, I just pull its end down against the crossing angle peice, flex it straight and tuck it behind the little tab I welded on.

If your looking for stainless continous hinge, call MSC supply. Their a huge company with a 4- 5 thousand page catalog. 1-800-645-7270.

http://good-times.webshots.com/photo/29987...104282158GLhEqk

http://good-times.webshots.com/photo/20454...104282158Soxmpm

http://good-times.webshots.com/photo/29491...104282158adECBp

http://good-times.webshots.com/photo/22392...104282158PorKja

Lenny

Link to comment
Share on other sites

Join the conversation

You can post now and register later. If you have an account, sign in now to post with your account.
Note: Your post will require moderator approval before it will be visible.

Guest
Reply to this topic...

×   Pasted as rich text.   Paste as plain text instead

  Only 75 emoji are allowed.

×   Your link has been automatically embedded.   Display as a link instead

×   Your previous content has been restored.   Clear editor

×   You cannot paste images directly. Upload or insert images from URL.

  • Similar Topics

    • By cliffyk
      I had mentioned in a previous post that I had removed the front anti-roll bar from my 2020 Outfitter 400; I ran that way for a month or so without noticing any downside however recently I installed a 'suicide knob" (see below) to assist my Parkinson's disease affected arms in turning the beast--but after doing so i found that in the quicker, tighter turns the knob permitted the vehicle would nosedive a bit, dig in, and plow  on hard surfaces--not scary, but quite noticeably.
      So I put the bar back on. Then today I got about 1-1/2 miles down the main road on the nearby power lines, turned around and came home to take it off--with the bar on, at 25 to 30 MPH, the front-end of the beast jumped like rabbit at each bump in either wheel rut., for a nearly brutal and quite uncomfortable ride. the bar (20 mm solid steel) is far too robust for the weight of the vehicle. The front bar on my 3900 lb. Infinity M37 is 30 mm...
      suicide knob--for you younger folks:

    • By Spider
      My touch screen shuts off and turns back on while driving. Is there something I can check or do to try and fix it? I have a 2022 T-boss 550x with about 7 miles on it. thanks
    • By Mike L
      Does anyone know if you can adjust the front bench seat on an 850-5?  I am about 6' 2" and the legroom for me is almost unbearable.  My leg begin to cramp after a short distance.  I noticed there are what look like adjustable nuts under the seat but I am not sure if they are for adjustment.
       
      Mike
    • By Hisun .500
      So my hisun 500 is tore up and all the wiring is wasted i was wondering can i pull out all the wiring and just put in the. Basics .please help
    • DIY like a pro! Shop from over 1,000,000 Repair Manuals at eManualOnline.com! As low as $14.99 per manual. Shop now.
    • By Dan_Lockwood
      If you pay any attention to your UT400, you have probably noticed that the right front wheel tips in at the top a LOT.  The left fronts seem to be about right from what I've seen.  I look at them all when I'm at different stores just to see if they're all that way, and yes, they all seem to be that way.
      There "should" be adjustments on either the ball joints or the inner pivot points, but these are solid, not way to adjust them.
      I have the UT400 up on my 2-post lift and the right spindle seems to be around 3-deg tipped in at the top and the left spindle is about straight or maybe half a degree tipped in.  This is at full suspension drop, not ride height.  I took the shocks off and rotated the spindles from bottom travel to full max up travel, way more than the shocks will allow.  The higher the spindle lift, the more tip in there is on both spindles.  This is true because of the unequal upper and lower A-arms.  It's just the nature of of the dual A-arms and them being unequal in length.
      I took the inner pivot 8mm bolts out and inserted a lot smaller 1/4" bolts and pushed the lower A-arm inward and the angle on the spindle decreased.  I then took the top inner bolts out and did the same thing, but pulled out instead.  This got the spindle equal to angle of camber on the left side.  I used the offset in the holes to see how much I need to go on the lower alone.  I was also concerned about bottoming out the axle assembly because the spindle centerline will not be a bit closer to the front diff.  But as it all turned out, it was not close to bottoming out.
      I cut about 1/4" out of the two 1" A-arm tubes as they were welded to the lower ball joint mount casting.  I tack welded them back together and trial fit it all together.  That seemed to be about right.  I took it all back apart and welded it up solid.  Now it all looks to match the left side quite well.
      Also want to use this in our yard and the stock tires are NOT turf friendly, especially with the solid "spool" rear differential.  I found these on Amazon, 25x12-12" and 25x8-12" hard pack race tires as they're called.  They're 6-ply and tubeless.  The initial probably I had was that the size rating was not even close to the actual size.  They said, install and then recheck the diameters and I did.  They did get larger, but the rears are more than 1" smaller in diameter than the side wall stamping.  Instead of 25", they're 23.75" tall.  What I DON'T WANT are shorter tires.  I had already purchased the used wheels at 12" to match the original factory diameter, but in hindsight I would now opt for 14" wheels with 4x110mm bolt pattern and would have been able to find a tire in the 27" diameter range a lot easier and cheaper.  Live and learn they say.
      Here are some pictures of before and after.


  • Gallery Images

×
×
  • Create New...