Quantcast
Jump to content


Collapsible side rear view mirror


Quig

Recommended Posts

Need help finding collapsible side mirror for trooper. Need 1 that will stick out far enough I can use it with new full enclosure. Anyone know of anything? Thanks for any ideas,or help,have broke off 2 already!!

I broke a few mirrors too. I finally ran across some good solid truck mirrors that are 6"x9". I'm sick of tiny mirrors. They are more like what you would find on an older truck, chromed metal housing and quite heavy built. They seem to take hits real well. I have them mounted more ridgid now but plan on making them able to rotate back, or forwqard for that matter. The current mount bracket has a tightenable ball joint at the mirror and goes from there with about a 5/8" diameter chrome tube extending to the front side roll bar tube. I plan on welding a round flat plate at the end of this tube. This plate will be about 3/16" thick and about 2" diameter with a hole in the center. A matching flat round plate will be welded to the roll bar tube except it will have a 3/8"-24 threaded hole in the center. These plates will be horzontially flat. Between the two plates I'll use a 2" diameter round piece of friction material, I have some 1/8" thick brake material I used for making my own mountain bike brake pads. I'll use a 3/8-24 bolt with a lock nut on the bottom side to clamp the two plated together with the brake pad material in between. The fine thread makes adjustment easier. I have used this before and find that I can tighten the bolt tight enough to keep the mirror in position with normal jarring around and yet allow the mirror to rotate should it get hit.

Lenny

Link to comment
Share on other sites

I broke a few mirrors too. I finally ran across some good solid truck mirrors that are 6"x9". I'm sick of tiny mirrors. They are more like what you would find on an older truck, chromed metal housing and quite heavy built. They seem to take hits real well. I have them mounted more ridgid now but plan on making them able to rotate back, or forwqard for that matter. The current mount bracket has a tightenable ball joint at the mirror and goes from there with about a 5/8" diameter chrome tube extending to the front side roll bar tube. I plan on welding a round flat plate at the end of this tube. This plate will be about 3/16" thick and about 2" diameter with a hole in the center. A matching flat round plate will be welded to the roll bar tube except it will have a 3/8"-24 threaded hole in the center. These plates will be horzontially flat. Between the two plates I'll use a 2" diameter round piece of friction material, I have some 1/8" thick brake material I used for making my own mountain bike brake pads. I'll use a 3/8-24 bolt with a lock nut on the bottom side to clamp the two plated together with the brake pad material in between. The fine thread makes adjustment easier. I have used this before and find that I can tighten the bolt tight enough to keep the mirror in position with normal jarring around and yet allow the mirror to rotate should it get hit.

Lenny

Sounds great, pretty much what I'm looking for, just wish I could buy 1. Might have to make it if can't find something close. Thanks,,,Quig

Link to comment
Share on other sites

I broke a few mirrors too. I finally ran across some good solid truck mirrors that are 6"x9". I'm sick of tiny mirrors. They are more like what you would find on an older truck, chromed metal housing and quite heavy built. They seem to take hits real well. I have them mounted more ridgid now but plan on making them able to rotate back, or forwqard for that matter. The current mount bracket has a tightenable ball joint at the mirror and goes from there with about a 5/8" diameter chrome tube extending to the front side roll bar tube. I plan on welding a round flat plate at the end of this tube. This plate will be about 3/16" thick and about 2" diameter with a hole in the center. A matching flat round plate will be welded to the roll bar tube except it will have a 3/8"-24 threaded hole in the center. These plates will be horzontially flat. Between the two plates I'll use a 2" diameter round piece of friction material, I have some 1/8" thick brake material I used for making my own mountain bike brake pads. I'll use a 3/8-24 bolt with a lock nut on the bottom side to clamp the two plated together with the brake pad material in between. The fine thread makes adjustment easier. I have used this before and find that I can tighten the bolt tight enough to keep the mirror in position with normal jarring around and yet allow the mirror to rotate should it get hit.

Lenny

Forgot to mention that the flat round pieces need to slightly dished to make the most stable mount. About 1/16" is enough then facse the dished shapes together. This will p ut the support at the outer edges and preclude any tendency to want to rock. Remember that flat pieces will want to slightly dish in when the bolt is tightened. LOL

Lenny

Link to comment
Share on other sites

Forgot to mention that the flat round pieces need to slightly dished to make the most stable mount. About 1/16" is enough then facse the dished shapes together. This will p ut the support at the outer edges and preclude any tendency to want to rock. Remember that flat pieces will want to slightly dish in when the bolt is tightened. LOL

Lenny

Sounds like you're talking belleville springs or washers

Link to comment
Share on other sites

Sounds like you're talking belleville springs or washers

Belleview washers would be ok with some design change. They can't be welded But you have the right idea. I have belleview washers but they are onl;y about 1" diameter.

Lenny

Link to comment
Share on other sites

Join the conversation

You can post now and register later. If you have an account, sign in now to post with your account.
Note: Your post will require moderator approval before it will be visible.

Guest
Reply to this topic...

×   Pasted as rich text.   Paste as plain text instead

  Only 75 emoji are allowed.

×   Your link has been automatically embedded.   Display as a link instead

×   Your previous content has been restored.   Clear editor

×   You cannot paste images directly. Upload or insert images from URL.

  • Similar Topics

    • By didgeridoo
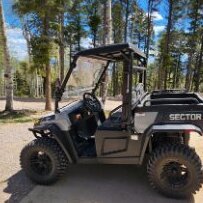
      Hello, All!  I've decided to replace the traction batteries in my 2018 Sector E1 with a 48V Lithium set. They may be expensive, but I figure the Discovery Dry Cell are, too. I am not looking for the max driving range, as I have never received near the brochured range to begin with, but a good mix of charge/ get work done/ charge is what I am expecting.
      I have settled on the 48V EAGL kit from bigbattery dot com. Each battery pack provides 30Ah. The kit ships with a charger, as well. The packs would be physically connected in parallel (using a busbar) to one another, maintaining the 48V voltage, but together would be able to provide the amp draw the buggy pulls when going up hill or towing a rake (rated 320 max continuous Amps). This is in comparison to the serial connection the eight 6V lead batteries. Each of the EAGL batteries looks to have its own BMS; am I correct in thinking I will have to use their included charger rather than (simply) changing the onboard charger to lithium mode? The chemistry of the pack is LiFe PO4, for what it's worth.  I haven't torn anything apart yet (to diagram), so  I am not sure how the dash will interpret the AMP draw, but the kit I am looking at includes a dash mounted charge indicator.
      If anyone has completed a similar conversion, do you have any tips? Specifically, how did you remove the original batteries, and how did you secure the new ones? I am guessing that almost any change from the stock batteries would involve at least some modifications. Any tips would be appreciated, especially things I may have failed to consider. Thanks!
    • By hdtran
      That's the question! Or, if you want to add details:
      (a) How do you use the UTV? (roads? off-road to get to trees? etc.)
      (b) If you are wearing a helmet--how frequently? What type of helmet?
       
      My own answers: (a) Most of the time off-road to get to downed trees, cut the trees to logs and haul the logs back for splitting. (b) Very rarely, a ski helmet and not a motorcycle helmet.
    • By BernieG
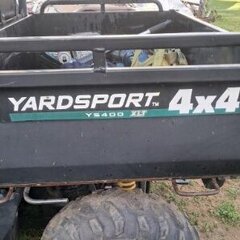
      I could really use some help identifying some disconnected components on a Yard Sport YS400. The first part is this pipe, which comes out of the exhaust port area or the cylinder. It looks like it had a piece of rubber hose on it, but the hose is gone, and I have no idea what it was previously connected to.

      The second item is this vacuum valve looking thing.  Again only one line is still attached.  What is it's function and what other lines should be connected to it?

      The last thing is this hose, which exits the side top of the fuel tank (not the fuel line hose) but is not connected to anything

       
      Any help the community could provide would be greatly appreciated.  This UTV belongs to a friend, and I am trying to help him get it running correctly for his kids.
    • By Jhud
      In the market for side by side. Narrowed it down between the pioneer 1000 or defender Hd9. Looking for pros and cons of both. Any info would be helpful in my selection process. Noise, speed, reliability, ride, all of it.
    • By Retired Plumber
      The rear differential lock light is on and I would like to get it off. How do I do that it is a Coleman UTV700.
×
×
  • Create New...