Quantcast
Jump to content

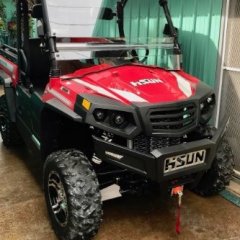
Hisun Sector e1 Battery replacement: any tips?


Recommended Posts

Hello, All!  I've decided to replace the traction batteries in my 2018 Sector E1 with a 48V Lithium set. They may be expensive, but I figure the Discovery Dry Cell are, too. I am not looking for the max driving range, as I have never received near the brochured range to begin with, but a good mix of charge/ get work done/ charge is what I am expecting.

I have settled on the 48V EAGL kit from bigbattery dot com. Each battery pack provides 30Ah. The kit ships with a charger, as well. The packs would be physically connected in parallel (using a busbar) to one another, maintaining the 48V voltage, but together would be able to provide the amp draw the buggy pulls when going up hill or towing a rake (rated 320 max continuous Amps). This is in comparison to the serial connection the eight 6V lead batteries. Each of the EAGL batteries looks to have its own BMS; am I correct in thinking I will have to use their included charger rather than (simply) changing the onboard charger to lithium mode? The chemistry of the pack is LiFe PO4, for what it's worth.  I haven't torn anything apart yet (to diagram), so  I am not sure how the dash will interpret the AMP draw, but the kit I am looking at includes a dash mounted charge indicator.

If anyone has completed a similar conversion, do you have any tips? Specifically, how did you remove the original batteries, and how did you secure the new ones? I am guessing that almost any change from the stock batteries would involve at least some modifications. Any tips would be appreciated, especially things I may have failed to consider. Thanks!

Link to comment
Share on other sites

  • 2 weeks later...

Since I created this post, I have installed the new Lithium batteries into my Hisun Sector E1. It was really not too complex. Here's what I did:

Remove the seat. Remove the panel in front of the batteries (screws on top, and bottom, then loosened the outside panels to make it easier to remove). Then remove the plastic panel over the top of the batteries (you may not have to, but this gave me more room to work). I then removed the battery leads from the 6V batteries. For belt and suspender points, I wrapped the end of the battery leads as not to short anything out as I worked. The battery tie-downs were next and removed easily with a 17mm socket. The J hooks simply fell to the floor as the tie-down was removed (they are easy to put back in place). Finally, remove the batteries; it is easiest to remove the inboard batteries first, straight to the driver/passenger floorboard. The rearmost outboard battery was next, and it has to make a 90 degree turn to come out through the space vacated by the inboard batteries. Then the forward most outboard battery can come out easily. Remember, these batteries are heavy, so watch where your fingers, hands and feet are, as there may be sharp edges inside the battery compartment. Since the pack I got comes with a charger, I removed the onboard charger. Three bolts to remove from the charger from the frame, then pull the charge indicator light from the dashboard well. under the UTV, remove the plastic guard under the floorboard  (4 screws), and the wires from the charger go  through to the motor controller/battery harness.

Once the battery compartment was cleaned, it is time to install the new batteries. I wished I could have mounted them in the inboard battery tray, but the leads I had were not long enough to place the busbar where I wanted. I mounted the 4 batteries outboard, and made sure the connectors faced inward, with the battery indicator cable on the forward passenger side tray.  Since the EAGL batteries are shorter than the Discover batteries, I used a piece of 1/2 inch PVC pipe and a fender washer to take up some room from the battery tie-down to the J-hook. I then ran the battery indicator wire to the dash, using the tunnel under the floorboard. Ziptie or otherwise secure the cable, as the driveshaft is in the tunnel, too, and you wouldn't want the cable to rub on the spinning shaft. With a rotary cutting tool (Dremel), I made a hole for the battery indicator on the dash and connected the wire. Then, to connect the battery to the busbar, I made all the positive and negative connections for the 4 battery leads, the motor controller lead, and the charge lead (all positives together, and all negatives together). I secured all the leads with zipties, and finally make the battery connections. The EAGL batteries have disconnect switches that need to be turned on. They also have blue LED voltage indicators, which, unfortunately, I cannot read since they are too close to the edge. I checked that each pack was on, then finally, started to reassemble the seat/battery compartment. 

Turned on the "ignition", put it in gear, and it worked! The gauge in the dash showing amp draw works, but the battery voltage indicator is probably not calibrated for LiFe batteries. With the big battery dot com kit, the lighted battery indicator should show the pack status.

I am still testing the battery packs, but I am happy so far. They allow me to keep speed up the hills (20MPH vs 10 or 12MPH). I haven't done a range test yet, but since the whole cart is nearly 350 pounds lighter, Im guessing that range will be improved over the old batteries. If I do need more range, I can install up to 3 more EAGL batteries before I have to relocate the busbar to add the 4th.

The stock DeltaQ IC1200 charger on the Hisun is really good; waterproof and high-wattage capable, and I wish I could have reused it. There is a way to update the charger to change the charge profile from Lead-acid to Lithium batteries, but there is not (yet) a profile for the EAGL LiFe battery, so I am using the charger purchased from big battery dot com.  Perhaps DeltaQ will make a profile in the future...

Remember to wear safety equipment, (gloves, goggles, etc) as you are dealing with batteries. While the Discover batteries are sealed, they are also vented, and precautions should be made in case some acid may have made its way out. Watch for sharp edges in the compartments. Make sure you don't cause any electrical shorts by bridging any positive and negatives as you are wrenching and ratcheting. Secure all wires to prevent chafing, rubbing, or other wear against vibration or moving parts.

Have fun, and good luck if you attempt a similar upgrade to Lithium packs on your Hisun EV!


Link to comment
Share on other sites

  • 3 weeks later...

Hey - do you have any pics of the installation? There are two EAGL kits - which one did you buy he 120ah or 60ah?

How did you get to the 2080ah of the original batteries?

So are you still happy with it all - my main issue is getting up steep hills where we live, not range. The Discoveries are getting to two years old and are struggling with anything but a full charge and cold weather really saps them. 

Cheers.

Link to comment
Share on other sites

Just a few points to guide people on lithium cells. The original pack  is not actually 2080ah, or rather it is but not in the correct way you express a pack ah . They have quoted that figure based on 8 x 260ah  so its quoting 2080ah on a 6 volt battery. Thats not how the pack ah is worked out.  The original is actually a 260ah pack at 48v .  But with  any lead you dont actually have access to all of that for storage purposes, as the voltage drops below a usable figure. If you took each battery down to 0v you may get the 260ah , but kill it in the process. Whats important with lead is having adequate ah to supply the discharge rate  the motor/ control requires. Thats where Lithium have the edge.   So with Lithium (any version) you can have a lower ah of the pack but you do need to ensure you have enough to easily deliver the high discharges needed. If you have a low ah, based on your run time needs, you may well then be seriously over stressing the packs to deliver the amps required under high load. Thats not good. On my UK Li Ion conversions we use a 60v set up (Uses OEM cell blocks from a UK vehicle maker) with a total of 180ah (6 x 30ah).  60v also reduces the current draw and heat under load, and these stupidly high quality cells can discharge at 175a (thats a pack  max discharge of over 1000a)  each cell block, so they are really very un stressed. That means they dont get hot, that means the cells dont swell, that means long life. If you use lower capacity or lower discharge rate cells then the life can be seriously shortened. Lifepo4 are good but tend to have lower discharge rates than the Li ion, but lifepo4 just melt rather than catch fire, but also do need to be clamped as they swell more under high discharge rates.  

Batteries have what is called a "C" rating which is a value relating to the rate of discharge and charge they can cope with, so a 100ah cell with a C rate of 1 can easily discharge at 100a, if its charge rate is a max of 0.2c then it can charge at 20amps. Cheaper cells can often discharge at perhaps 3c for short times, high quality (and different chemistry some lipo etc) can stretch to 10c. The  li ion ones I use can discharge at over 5c.  Aim for a constant pack discharge rate of 400a to cope with a decent load for more than a few seconds, and you will be OK. That means if you have a 90ah pack with a 3c constant discharge rate you will be damaging the pack from the start. If you are using old ex car battery cells (or second life packs) then you should not expect them to constantly deliver the same way as they could when new. They should be de rated.  Based on discharge and longer life I would not install a pack under 150ah of any Lithium. If I did I would not expect a long and happy life. If thats OK then all is good. If you are likely to get hacked off when they fail after a couple of years usage, then it may be worth re thinking what your pack ah is to start with.

Back to lead, a 12v lead starter battery can do perhaps 8C for a few seconds, then they start to get hot, then the plates buckle then they fail. No good for a traction battery but ok to start a gas engine.  Lead traction are also not able to deliver really high long time discharge, which is why they go for a seemingly big pack in the first place, just to get a reasonable chance of being able to deliver performance under load, and have a reasonable life.  Traction batteries can however be heavily discharged which a starter cant. Leisure can also do this but cant deliver the high currents so never use these as a traction replacement.

I do reprogram the DeltaQ ic1200 (Delta Q did have a suitable algorithm for my needs) and this uses a feature of re programming the temp sensor input so it becomes a short to start option that is linked to my Pack Monitoring Unit (PMU) that talks to the OEM electronics on the cell blocks, so giving pack level safety on charge over voltage or temperature. That is really important.

You also need to reprogram the Sevcon to reflect the new discharge curve of the Lithium cells you use. If you dont it will still be able to discharge the pack to a low voltage that is below what the Li  cells can take.

I hope some of the above is of help.


Link to comment
Share on other sites

Great info, thanks. 
Stupid questions time:

If the setup is for 48v, 60v is really not an issue? It’s the amperage that is more important?

Are you saying it’s actually beneficial to go to 60v?

Does the setup described above by digeredoo seem adequate as a replacement in your opinion? 
 

cheers. 

Link to comment
Share on other sites

The 48v sevcon controller can work out to about 68 volts, the DC to DC can go way above 90v. The inverter is the critical device, and I reprogram that to suit the battery profile and also cut back on voltage above 67v so that allows for some regen on a full battery, but doesnt cause it to cut out fully. The voltage given out to the main contactor is controlled by the sevcon. But we cant get the original "Fuel gauge" to read  correctly so we simply add a new gauge for this.

Its an advantage also having a DeltaQ IC1200 algorithm that works with the cell blocks (it does not actually take them to their absolute max voltage , so even better ) and the Sevcon voltages.

With any EV, voltage is King, the heat given out by the power systems is important and that is a function of the square of the current so if 50amps load  the square is   2500 if 60amps the value is 3600 so you can see the seemingly  small change of 10v (or 20%) gives an increase of nearly 50% in that value.  So with a constant load that means heat output is dramatically reduced by going to a higher voltage.  Where this really helps is when the pack is going down in charge and the voltage does start to sink, and current goes up. Its not such an issue for us.

But against all of that is the issue of higher voltage and getting into the realms of being considered as a HV install, and making sure that stuff is suitably insulated , fused, labled etc

I couldnt comment on a persons specification of install, as they have obviously made an investment  decision based on a lot of factors. I have just given some guidance to help people understand the issues involved, and for many with little experience of the issues its easy to go down the wrong route for  what may seem like the right reasons (or a Youtube video) .

Link to comment
Share on other sites

BuggyBoy, I went with the 120Ah pack. I am happy with the kit so far, but I am still testing it. I will say that it is much better than the lead batteries it replaced. I am not sure if it is the weight difference, or the batteries' ability to maintain higher voltage under load that is enabling this, but it is much faster up hills (we live in Eastern Tennessee) than the old batteries. As in, you can go 20MPH, vs the 10-11MPH up hills. I have used the cart to pull a powered rake (Black boar chisel plow) to rake and grade my gravel driveway and the batteries performed fine. No excessive heat, and my driveway is uphill.

I have yet to permanently mount the charger inside the vehicle. Again, I wish I was able to download the profile for the DeltaQ IC1200 that would work with the new batteries, but the charger (Upgrade Fast Charger) that shipped with is working fine. 

The other issue, which EV Support mentioned, is that the battery dashboard "gauge" is no longer calibrated. That's fine for me, because the replacement battery pack came with a digital capacity meter, which I mounted in the dash. I should point out, it hooks into just one of the batteries, so, as you are going uphill, the meter goes way down, but recovers as you ease off the accelerator or come to a stop. To be honest, the original "gauge"  never worked until the battery was struggling, then would lose a bar on the meter.

In the future, I may opt for a high voltage setup, but I think that may be reserved for a different UTV.  I needed to  replace the aging lead-acid batteries, and this setup was as plug-and-play as I could ask for. An extra 30Ah battery is still on the table for me, which would bring me to a total of 150Ah. With the standard kit's busbar, I can add up to eight of the 48v LiFe batteries for a total of 240Ah capacity.

Best of Luck!

-Gary

Link to comment
Share on other sites

  • 8 months later...

Been a while planning this.  I bought a used "Axis" E1, the version of the Hisun E1 that used to be sold through Lowe's.  I like it a lot and use it for hauling firewood and a log splitter around my property, but it always threw the low voltage alert under load going up hills and would slow down to a crawl or even stop if it had been used just a little.  While the Discover lead-acid batteries were probably failing anyway, I have to wonder if the OEM batteries were the wrong choice from the beginning since I don't think they are capable of much more than 100A continuous output, well below the 400A motor.

After extensive searching online for a 48V setup that would be both easy and capable of a 400A continuous output, I found the ReLion Insight 48V LiFePO batteries.  They actually have the same standardized GC2 exterior dimensions as the Discover batteries, so no adapting was necessary for the trays.  I went with their 4 battery bundle which included a digital "fuel" gauge, two dummy spacers (which I didn't need) and an offboard charger (also didn't need, but a good backup).  Their technical support was very helpful and actually sent me the zip file to update the existing Delta-Q onboard charger profile for their batteries (profile P269).

I pulled out the old batteries and connected the new batteries in parallel in the four battery positions near the centerline using new cables of the same uniform length.  I did re-use the cables for the final connection to the motor controller.  With these new batteries, they also come with CAN cables to connect all the batteries together.  That way the onboard BMS built in to each unit talks to each other, and the "fuel" gauge also connects via CAN so it gets the total picture and doesn't have the same problem mentioned above by Didgeridoo.  When it's turned on, the gauge detects how many batteries are connected and reads out a digital percentage and total remaining amp hours.  Pretty neat system.

I kept the blinking green light from the onboard charger since it still works and lets me know if the Delta-Q charger is properly providing current, but I got rid of the decal below it and installed the round digital gauge in it's place.  Turned on the batteries (they have their own on/off button if you want to isolate them), turned the key, and it all worked perfectly.  Loads of torque, no low voltage battery warning, and full advertised speed available.  Plus, the four new batteries weigh 138lb total vs 520lb for the old Discover batteries.  As mentioned before, the existing instrument cluster battery level isn't accurate, but I don't care since I now have a digital percentage to look at.  The amp output gauge does work though, since I believe that is reading from the motor controller.  Before the conversion, I couldn't get over 100A output, after the conversion I've seen it up to 300A and I haven't really pushed it yet.

The new batteries are 48V, 30ah, so I have a total capacity of 120ah right now.  Can't tell you the range under the manufacturer's flat, paved, medium speed, 2wd conditions, but I did do some distance with two people (~400lbs total) in 4wd low over bumpy and very hilly terrain.  I estimate I would have had a maximum range of about 12 miles under those tough conditions.  That seems more than enough for my purposes, but if I wanted to invest in it, I could add another four batteries for a total of 240ah.  The batteries and cables were still cool to the touch after that trip, by the way.

As expected, they're expensive (4 battery bundle is ~$5300 USD), but the setup is so much more capable now and the UTV plus batteries are still much less than the Polaris lithium version UTV - even if I did add another four batteries.

I could include pictures, but since the batteries have the same outer form, there's actually not much to see other than four empty spots.  The top hold down brackets of the inner four batteries ("H" shape) don't quite work with the buttons/lift brackets of the new batteries, but since I only had four to deal with, I just used the straight hold down brackets from the outer batteries and it works just fine and doesn't move.

Link to comment
Share on other sites

  • 4 months later...

John- I have not had any error codes since upgrading to Lithium. Well, not true- we live on the top of a hill, and if the battery is fully charged, I will sometimes get the "overcharged" code by the time I make it to the bottom of driveway. Have to cycle the buggy off/on again.

I did use the charger that the battery manufacturer included, and removed the Delta IQ charger. I wish I could reuse the charger, as it is a quality unit. Since I changed the charger, I moved the 110v inlet charge cable to the molded-in gas cap area- no more having to open the glovebox to charge.

Still extremely happy with the upgrade. Winter performance could be better, but UTV is left outside in the elements, so I can't ding it for that. I have no current plans on increasing storage by adding more battery packs. I can run around my neighborhood and woods all day with elevation changes of 800 feet from mailbox to neighbors' place, and not feel any drop in voltage. The UTV feels like it has the right balance of weight and range with the 120AH packs. Wife wishes it had more gusto, but she is a lead-foot! (It would take a new motor and some high voltage setup to make her happy!) 

I've still had no maintenance other than adjusting the parking brake tension every now and then, changing the brake fluid, and lubricating all the grease joints. Brake pads are still within reason, because I rely on regenerative braking on downhills (tho, wife runs it full throttle downhill, go figure!) Switched out the scratched and yellowed windshield this week, too. 

Hope this helps!

-Gary


Link to comment
Share on other sites

  • 6 months later...

I'm taking to a a supplier who has a single unit that outputs 51.5v and 105ah (https://lithiumgolf.com.au/products/amplus-series-51-2v105ah) for around $3500. 

There is also a 150ah version available.  For these units they claim up to 500ah max discharge for 10 seconds, but i would probably need 250-300ah for 60 seconds to get up the hill to our house. I'm still struggling to get my head around one large Lithium being able to replace x8 AGM's, but is this possible? I know there will be an almost 200kg (around 450lbs) weight saving which is very substantial, but can this battery really have the same output as x8 260ah batteries


Link to comment
Share on other sites

On 3/7/2024 at 8:46 PM, BuggyBoy said:

I'm taking to a a supplier who has a single unit that outputs 51.5v and 105ah (https://lithiumgolf.com.au/products/amplus-series-51-2v105ah) for around $3500. 

There is also a 150ah version available.  For these units they claim up to 500ah max discharge for 10 seconds, but i would probably need 250-300ah for 60 seconds to get up the hill to our house. I'm still struggling to get my head around one large Lithium being able to replace x8 AGM's, but is this possible? I know there will be an almost 200kg (around 450lbs) weight saving which is very substantial, but can this battery really have the same output as x8 260ah batteries? 


That link doesn't show the full technical specs of the battery, so I can't tell.  In particular, I would want to know the dimensions to see how much you would have to modify the trays (and vertical space), and for output what is the max continuous output (amps, not amp-hours like you wrote).  Together, the Discover dry cells supposedly only put out 100a continuous but they do have a combined capacity ah rating of 170-200ah.  I went with the ReLion Insight 48V batteries because they individually have 100a max continuous output rating, and with four of them in parallel I get to the 400a max of the motor.  In theory I could have replaced all 8 of the dry cells with a single battery in the same form factor of the Discover batteries, but that would have only given me 30ah of capacity.  Using four gets me up to 120ah and 400a continuous output.  To answer your direct question, yes a single lithium battery could replace the 8 dry cell batteries, but you also have to look at continuous output (amps) and storage (amp-hours).

Link to comment
Share on other sites

Join the conversation

You can post now and register later. If you have an account, sign in now to post with your account.
Note: Your post will require moderator approval before it will be visible.

Guest
Reply to this topic...

×   Pasted as rich text.   Paste as plain text instead

  Only 75 emoji are allowed.

×   Your link has been automatically embedded.   Display as a link instead

×   Your previous content has been restored.   Clear editor

×   You cannot paste images directly. Upload or insert images from URL.

  • Similar Topics

    • By joeam
      I have a 2018 TW450E that runs in my yard and slow good just will not go down the road seems to be running out of fuel where should i start? I have replaced both fuel and air filter drained gas and tried a small auxiliary tank same issue i have ordered a new vacuum fuel pump to try next anyone in Texas that works on these?
    • By Hugh
      My 2018 Hisun sector crew engine cut off after about 15 minutes run. There is no indicator of what is wrong, no error code just die and won't restart until it cool down. I notice that the fan is not running but the temp indicator is on low temp, no overheat indicator. I checked the radiator fluid, it is cool to touch.
      Cooling fans are working, I can hear it running once awhile if I can get the engine warm up enough.  Thank you for all the help.
       
      Hugh
    • By nods
      Less than 40 miles can barely start. Dealer is working with Hisun on a number of other issues on this UTV. Can not get clear info on the meaning of these E codes this is getting. Anybody have some clear info for me?
    • By MJG
      Hello, 
      I found an 08 Renegade for sale and looking to purchase it.  I haven’t heard too much about these machines and any insight would be much appreciated.  Are they good machines?
    • By AlphaSerenity
      Hello,
      Before I invest $10k+ into a brand new UTV for the farm, I want to get my feet wet with a fixer upper and learn the mechanical side of things. I acquired a 2022 Hisun Axis 500 (Lowes-specific model) from an auction for $500. It has only 200 hours and 120 miles on the engine. It looks like the previous owner used it for ranch work and didn't drive it on trails, deep water/mud, or anything too crazy.
      While it runs and moves, it has some problems. It struggles to accelerate up any incline in high and low range and sometimes stalls when I let off of the throttle or change gears. When I apply throttle in neutral, it sounds like it is struggling for fuel/air and pops. When I decelerate, there is a grinding sound coming from the clutch, which I've read to be related to the one way bearing and is semi-common. The last thing I've observed is sometimes the speedometer display sometimes will show a much higher value for a few seconds after barely touching the throttle. Based on the documentation, if a problem is detected from the sensors, the instrument panel display should have an error code rendered on the screen in place of the time, but this isn't happening. Here is a video showing some of these issues (engine is exposed with console removed):
      https://www.youtube.com/watch?v=FFAkO5TaGps
       
      Here is another video of the clutches in action:
       
      I've done some research, but information on this specific unit and sister units is limited. There does seem to be transmission and clutch issues reported. I still need to check into the head gaskets. I don't have the equipment to test compression right now, but I do plan on ordering what is needed soon. I do have an order in place for some cables to read the diagnostics from the computer. There is a shop two hours away from me that works on Hisun products, but I am hoping the problem can be identified and is something within my ability to handle. Below is what I've already investigated.  I am leaning towards the primary clutch needing replacement right now.
      After getting it home and unloaded, I did the following maintenance/checks to it prior to operating it further:
      Changed the engine/clutch oil (and filter) and gear oils using manufacture recommended viscosity Changed the air filter and checked for cracks in the air intake flow. Verified good suction. Cleaned the throttle body Changed the spark plug and verified the gap was within spec (0.6-0.7mm) Changed the coil and coil wire Changed the fuel lines, fuel injector, and verified the fuel pump was outputting the correct initial prime pressure for ignition and continuous pressure after ignition. Also completely emptied the fuel tank and made sure octane 91+ fuel is being used per manufacturer specs. Ran seafoam through system too. Cleaned the spark arrester and verified no cracks or gaps in the exhaust flow Changed out the O2 sensor Checked all wired connections to ensure they were secured and no breaks were visible Checked the belt for tightness and for any signs of wear and tear Verified 4WD and the differential lock function as expected - still hesitates and struggles uphill Verified the fan gears in the shifter are not corroded and working as expected ECU was reset after replacing sensors and fuel-related parts  
       
      Thanks!
×
×
  • Create New...