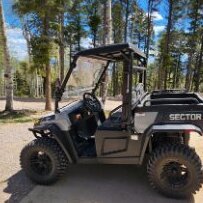
1999 Kawasaki mule 550 rear brake drum issue
-
Similar Topics
-
By Jason S
Good afternoon,
I have a 2022 Bobcat 34XL. Over time, I have to press harder and harder on the brake pedal before the ignition will fire. Now I have to practically stand on it with all my weight to get it to start. Does anyone know if there is a spring or something that might need replacing, or have had this issue before? I don't have any schematics of the brake sensor/assembly.
TIA
-
By Smith5961
2020 550 Coleman. have a fault code 118 And I’ve replaced the sensor I have spark but still doesn’t crank
-
By SIO
Does anyone no how to to adjust these shocks. never had shocks with the fast and slow adjustments. But the main problem is it rides ruff. My bike came with the shocks set at 7 1/2" from center of nut to top of spring. The book calls for 5.5" front and 4.7" rear and they say max. Just want to make sure before moving them that far.
-
By hdtran
That's the question! Or, if you want to add details:
(a) How do you use the UTV? (roads? off-road to get to trees? etc.)
(b) If you are wearing a helmet--how frequently? What type of helmet?
My own answers: (a) Most of the time off-road to get to downed trees, cut the trees to logs and haul the logs back for splitting. (b) Very rarely, a ski helmet and not a motorcycle helmet.
-
By Alien10
A while back I was looking at an auction UTV plow and the mounting of it. Looked like it had an "H" bar with two pins that hooked into brackets on the front frame of the UTV. I have a bunch of 1/4" x2" angle iron, and some 2"x1/2" flat stock in the barn. I was thinking of welding up a bolt on implement mount that would provide 2 holes about 14" apart, that pins could be used to hook up an "H" frame for a plow or even a straight bar across with pins to hold it in place. The angle iron "A" would utilize the existing bumper mounting bolts front and bottom, and have the two channels "B" with holes for individual pins or one large bar across. Those channels would be welded to the ends of the angle iron.
Anyone ever try this for a front mount? It would be close to this one that is for sale on the net. It is supposed to fit a KFI plow mount.
-


Recommended Posts
Join the conversation
You can post now and register later. If you have an account, sign in now to post with your account.
Note: Your post will require moderator approval before it will be visible.