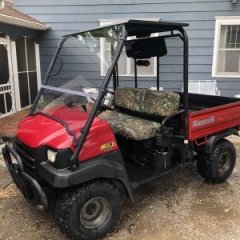
Quantcast
Jump to content

3010 valve spring question


GDS

Recommended Posts

I pulled the valve covers off the mule to adjust the valves. They have been tapping loudly. The two exhaust were correct but the 2 intakes were around .023. But the question is this As I was adjusting I found I could easy open the valve by lightly pressing. Should they should be stiffer than that?    

Link to comment
Share on other sites

On 5/20/2020 at 7:55 AM, GDS said:

I pulled the valve covers off the mule to adjust the valves. They have been tapping loudly. The two exhaust were correct but the 2 intakes were around .023. But the question is this As I was adjusting I found I could easy open the valve by lightly pressing. Should they should be stiffer than that?    

no the spring tension sound about right...


Link to comment
Share on other sites

Join the conversation

You can post now and register later. If you have an account, sign in now to post with your account.
Note: Your post will require moderator approval before it will be visible.

Guest
Reply to this topic...

×   Pasted as rich text.   Paste as plain text instead

  Only 75 emoji are allowed.

×   Your link has been automatically embedded.   Display as a link instead

×   Your previous content has been restored.   Clear editor

×   You cannot paste images directly. Upload or insert images from URL.

  • Similar Topics

    • By Travis
      View File Kawasaki Mule 550,520,500 Complete service manual
      This is a complete service manual for the Kawasaki Mule 500,520 and 550 models.
      Topics  covered include Brakes, Steering, Electrical system, suspension and fuel system. As well as engine repair procedures and Transmission/Final Drive procedures.
       
      ********************************************************************************************************************************************************************************************
      If you need more information about the engine this manual linked below is chock full of information.
      Thanks goes to @cliffyk for getting these files all  into one PDF format for uploading.
      Submitter Travis Submitted 04/18/2021 Category Kawasaki  
    • By moonrover
      Mine is overheated/burned/melt at connection with its wire connector, parts are ordered to replace both them.  This seems to be a common issue, and some of you already replaced it. I right now just connect the wires, so the fan runs  all the time whenever the initiation is on, but it's better let fan runs as needed with a working temperature sensor/switch. 
      Question: Does some coolant come out by removing the switch/sensor from radiator?  Or, is the threaded hole all the way inside radiator?   If the answer is yes,  I want to drain or extract  some coolant to make its level below the sensor before replacing it, so I don't make a mess with coolant spilled out 
      Thank you.  
    • By Jon C
      Hello to anyone who reads this. I am Jon and I own J&M Outdoor Power, a very small, small engine repair shop. I was approached by Coleman about 6 months ago to become one of their Warranty Centers.
      I recently received 3 different UT400's and a UT500 all with similar issues. These units range from 2 months to 2 years old. Customers state that the unit(s) was/were running fine, then heard a pop and a loss of power, two would no longer start. The two that would run would not achieve normal operating speed (around 20mph I would say) without redlining the RPMs. I quickly found that the Valve lash on each unit had become too large on some(both intake and exhaust) and too tight on one(just intake). 
      After setting the gaps to .005(I found multiple different people suggesting bigger and smaller gaps, but no definitive Coleman Spec number yet) every unit starts, runs, and achieves top speed without issue.
      I don't know how many others have come across these issues, and I wanted to get something out on the web for others in the same predicament. 
      Please let me know if you have had similar issues.
      Edit: I realize that this will not be a fix all solution for this issue, as the oil level and condition should be verified before moving to the valves. Many times improper oil conditions will cause valve lash to change. These units all have good oil and proper oil changes.
    • By aefron88
      Since I've seen some questions on this I took some pictures and will provide instructions on a valve adjustment for the UT400. This should be the same for the 550's and other various Coleman/Hisun single cylinder models with the cylinder slanted aft.
      I have seen several people ask of it is really necessary, and read several reports of valves being out of adjustment from the factory. My valves were .004" intake, and .010" exhaust with about 5 hrs on the machine.  I've seen different numbers thrown around for factory spec, but I decided to go with 0.005".
      This is called valve lash. What is is is a gap between the rocker arm and the valve then the camshaft isnt opening the valve. Why does it matter? If it's too large the valve doesn't open all the way, if it's too small the valve dosent close. This can cause valve damage (overheating) as well as loss of engine power (burned fuel is going out exhaust rather than pushing the piston dow).
      Tools required : 5MM Allen wrench, 10MM box wrench, needle nose pliers, flat feeler gauge set, rags
      First you need to remove the fan cover on the passenger side. There is a cooling vent hose on the back side, remove the hose clamp and slide it off. From there there are 4x 10mm bolts holding the cover. The forward ones can be accessed from under the seat.
      Next remove the spark plug from the drivers side. Carefully wiggle the spark plug wire off. Grip it as low as possible and give it a little twisting motion as you pull it off to help free it. Its a tight fit for a socket, but there is a sheet metal wrench in the toolkit that fits it. Unscrew the plug and set it aside. This allows you to spin the motor over freely with no compression to fight. When you reassemble this is a good opportunity to switch to an NGK iridium plug for better performance/less fouling DR8EIX)
      Next you need to remove the intake and exhaust valve covers. The intake us the forward one. There are 3x 5MM Allen screws to remove. The Exhaust is the rear with 2x 5MM Allen bolts. Both covers have O-Rings instead of gaskets and are reusable. When you remove the rear be careful and use your rags as there will be oil that drips out.
      Next up we need to spin the motor over to top dead center. Grab each rocker arm and give em a little wiggle up and down. Spin the engine over by grabbing the fan with your other hand. Spin the engine over until both rockers have some wiggle and are loose.

      Once both rockers are loose slide the feeler gauge in like shown above. Try different feelers as needed to determine your starting spec. You should feel some drag but still be able to move the feeler without too much force.
      If you need to adjust, use the 10MM wrench to slightly loosen the locknut, then with the correct feeler gauge in place, tighten the top square nut while wiggling the feeler in and out. Once you have it right you need to tighten the 10mm lock nut without moving the square head bolt. Once the lock nut is tight recheck the clearance.
      That's it, button everything back up and make sure you have it all reassembled before running it again.
      If you find this helpful give me a thumbs up or comment. If you have any questions or need more help let me know. If there's interest maybe I'll do some more of these
    • By Timpiker
      My UTV is a few years old and gets very little use.  I just noticed the drive belt slapping the plastic guard and making some noise.  The manual tells me how to replace it but not how to tighten it.  Apparently, there is no adjustment.  Does anyone know if there is an adjustment?  Is the belt supposed to have a lot of slop in it?
×
×
  • Create New...