
Quantcast
Jump to content


Recommended Posts

Posted

PREFACE


I think my stator (alternator) may be giving up on me... Barely maintaining a constant 12.5 volts.. Checked all connections. No corrosion or melted spots.. I unplugged the leads that come from the Stator at the engine, both are only putting out around 12 to 13 Volts V A/C.... Whereas it should be 24VAC+ at idle.

Manual calls for .2 to .4 ΩOhms maximum across the leads, My meter was showing .7Ω..


EDIT 8:00PM

I scraped off a bit of the insulation behind the stator wire plugs to rule out a bad connector (not likely, being both of them) and from the copper wires to ground, still only 12 volts AC or so... Can't complain,  it did it's job for 20 years.

And this is for you Joe Breaux "AT LEAST IT AIN'T A MASSIMO"

:rolleyes:


Posted

i went and got my dads good ol Klein tester this morning, it would occasionally show from 24 to 28 volts at idle, then drop down to about 15 volts, then about 10 volts sometimes lower, it did the same on both wires. the voltage really fluctuated.

i then checked voltage at the A/C stator wires where they go into the regulator plug, 4 volts A/C Max... of course that voltage fluctuation  might be the symptom of the component going out  i guess. i'd rather spend $7  and run 2 new wires to the reg from the stator, than spend $80 on a stator i didn't need.

One thing i want to try is making a new "harness" since those two stator wires just go straight to the rectifier, get some 14 or 16 gauge wire and go from the Stator plugs to the regulator to rule out any in between issues.

  • 2 weeks later...
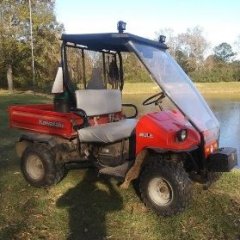
  • Travis changed the title to Kawasaki Mule 550 Charging Coil replacement
Posted

Tools you'll need

  1. Socket Set (8mm for ignition coil, 10mm for fan shroud, 12 MM to remove control panel cover to access a fan shroud bolt, 12mm, long extension and U-Joint adapter to remove starter, 12MM to remove exhaust pipe nuts from head, 10mm open end to remove nut and bolts for exhaust pipe mount, ,7/8 or 22MM socket to remove flywheel nut, Large
  2. Large phillips head screwdriver for stator screws
  3. Three Jaw Puller
  4. electric,battery or air impact wrench to remove flywheel nut
  5. Business card or .012" feeler gauge to reset ignition coil air gap
  6. a can of Liquid Wrench.... if you're flywheel nut has been on awhile i advise you spray it with liquid wrench or your favorite penetrating fluid a for several days in a row prior to work.

          7.    2 or 3 pound hammer. (large hammer)


Let's get started.......

First, remove the fan shroud screws (10mm), there are 6 in total... 2 on the bottom corners, one by the oil filter, 2 on top, and on on the backside facing the trans/rear end...  you will need to remove the throttle control cover, with a 12mm and you may need to drill out the tamper preventive rivet, to access a screw.

now that they're loose, take a 12mm and loosen the exhaust pipe nuts on the head and remove the lockwashers, next use a 10mm socket and open end wrench to remove the tailpipe flange joint at the muffler flange joint, and the support bracket. you have to wiggle and wiggle it around to remove the exhaust pipe, there is no good way to do it... now remove the fan shroud, you have to wiggle and wiggle it as well. as this point i would remove the starter, with a 12mm, and for the bottom bolt a 12mm on a long extension with a Ujoint adapter.

next remove the ignition coil, two 8mm screws are holding it on, don't forget to remove the kill wire. Now use a 7/8 or 22mm socket to remove the flywheel nut. a large impact wrench comes in handy here. if you don't have an impact, remove the spark plug and rotate the engine to where the piston is at the bottom of the bore, and insert some clean rope or cord into the bore, now loosen the flywheel nut... the rope will act as a piston stop compressing it against the cylinder head. Now i''d recommend removing the cooling fan with a 10mm socket. 3 screws hold it on. easy.

now if the flywheel didn't pop off the taper on its own, time to get the 3 jaw puller, it is critical that the jaws be fully seated around the flywheel as not to damage the ring gear teeth. that is why i recommend removing the coil and starter. i usually thread the nut back on the shaft flush with the top of the threads to prevent any deformation of the threads., now fit the puller. use a adjustable or 15/16 wrench to tighten the puller ram. as soon as it gets tight, use a large hammer and pop the hex end of the puller a few times, tighten the puller again and give it a few good whacks. don't be afraid.

keep doing that until the flywheel pops off. take note of where the key is... it shouldn't fall off the crankshaft so don't worry too much about losing it. now that the flywheel is off  you can see the stator. 4 phillips head (technically JIS i think) are holding it on.. they aren't terribly tight. just snug.

i put the screwdriver into the head, and use a hammer to hit the end of the driver a time or two to make sure the driver is fully seated to prevent the heads from stripping.

now that the 4 screws are removed, take off the old stator, and unplug it from the harness. there is a small clamp towards the top of the engine block that keep the wires out of the flywheel, bend it back to pull the wires out. the stator should just pull right off..

I'd clean up the stator screws with parts cleaner and compressed air, as well as blow out all the trail dust from off of the flywheel and on the engine block. inspect the oil pump cover and shaft seal for leaks. also blow out the cylinder cooling fans to clear out any dust. it will cool better.

now get your new  stator, (59031-2097) it kind of fits on to the casting of the block, and reinstall the 4 screws. there is no published torque spec for these screws, so i  did as much as could with my hand driver, and then used a  wrench on the hex portion of the screw driver and went about3/16 of a turn more. make sure the stator wires fit in the groove of the casting and secure them behind the clip/guard.

align the flywheel keyway and  the flywheel key on the crankshaft and install the flywheel. feel free to clean up the shaft with some sandpaper if needed, DO NOT put any sort of lubricant on the shaft taper, you can very well  crack the flywheel when you go to tighten it.

reinstall the washer and nut, torque to 64 ft/lbs. or if you have a 1/2" impact thats about 4 "tat tat tat tat's"

reinstall the cooling fan, only goes on one way. reinstall the starter and ignition coil, gap the coil to .012" or a business card will work fine... there is very little room to work with your hands gapping the ignition coil, as you'll see in the video.. don't forget to reinstall the kill wire.

now reinstall the fan shroud, and exhaust pipe.. plug in the stator wires, back to the harness, doesn't matter which one.

after making sure all connections and necessary hardware is tight, FIRE IT UP!

set your meter to DC voltage, battery should read anywhere from 12.5 to 12.7 at idle, and go up to about 14.5 volts at WOT., but not exceed 15 volts. should hang right around13.5 at mid range RPM.


NOW WHAT I DID different:

i put in new stator wires . i nullified the stator wires in the harness. they're just there now.... i purchased Name Brand bullet connectors, heat shrink and solder. and 14 gauge  (I Believe the OEM are 16 gauge) Copper wire. (southwire on amazon) and some 3/8 PVC wire loom. cut the 2 wires to 4ft in length, on one end i put the female bullet connectors, and the other spade connectors for the regulator. now awhile back i put a pigtail on my regulator since didn't like how tight the wires were and pulling...

the A/C input on the regulator are the on the back left and back right spots on the regulator... what i did was crimped the spade connectors on the wire, soldered the wire to the connector, and then when i plugged the two wires together, i soldered them together as well as heat shrinked them. all connections stayed cool while running. which is good.

6/28/21


VIDEOS TO COME..........


Join the conversation

You can post now and register later. If you have an account, sign in now to post with your account.
Note: Your post will require moderator approval before it will be visible.

Guest
Reply to this topic...

×   Pasted as rich text.   Paste as plain text instead

  Only 75 emoji are allowed.

×   Your link has been automatically embedded.   Display as a link instead

×   Your previous content has been restored.   Clear editor

×   You cannot paste images directly. Upload or insert images from URL.

  • Similar Topics

    • By Mountainman
      Radiator fan on 2018 textron havoc won’t come on
    • By Hoppy one
      I replaced the stator on our Bennche 500 because it was not charging. It ran as long as you kept the battery charged. I replaced the stator now it’s not firing. The only problem I found was a wire in the new stator for the crank position sensor was in the wrong place in the plug. I switched it around but still no fire. Putting a meter on those wires and cranking the motor showed no voltage from the crank position sensor. Something I did or a bad “new “ part? Thanks for any ideas.
    • By Alex
      If you’ve been looking for a chance to score a brand-new UTV, Polaris just launched one of the most unique giveaways we’ve seen in years.
      To celebrate America’s upcoming 250th anniversary, Polaris has announced its Celebrate American Heroes Giveaway, offering one lucky winner a custom-built Polaris RANGER CREW XD 1500 NorthStar 1776 Edition along with an all-expenses-paid trip to Nashville, Tennessee.
      The giveaway isn’t just about winning a side-by-side. Polaris is encouraging people to nominate someone they consider an American hero—whether that’s a veteran, first responder, teacher, volunteer, tradesperson, community leader, farmer, healthcare worker, or simply someone who makes a positive difference every day. Entrants can nominate themselves or someone else by sharing their story and submitting a photo.
      What’s Included?
      The grand prize is a highly customized RANGER CREW XD 1500 NorthStar 1776 Edition featuring:
      Exclusive 1776 commemorative graphics and badging Custom American-themed design package JBL 4200 audio system 50-inch LED light bar Rear winch Additional factory Polaris accessories All-expenses-paid trip for the winner and a guest to Nashville, Tennessee to receive the vehicle in person at the Polaris Dealer Meeting. According to Polaris, fewer than 100 of these special-edition 1776 models will be produced, making it one of the more unique RANGER builds we’ve seen from the factory.
      Why the RANGER XD 1500?
      The RANGER XD 1500 NorthStar sits at the top of the Ranger lineup and is designed for serious work and recreation. With its enclosed cab, heating and air conditioning, premium comfort features, and heavy-duty capability, it’s become one of the most talked-about utility side-by-sides in the industry.
      Whether you’re using a UTV on the farm, around your property, hunting, trail riding, or for work applications, the XD 1500 is one of the most capable utility machines Polaris has ever built.
      Entry Information
      The giveaway is open to eligible U.S. residents 18 years or older. Participants must submit their nomination story and photo through Polaris’ official entry page. Polaris is accepting entries through early July, with the winner receiving the vehicle at a special event in Nashville this August.
      https://www.polaris.com/en-us/off-road/sweepstakes/celebrate-american-heroes/
    • By AaronD1982
      Next problem with charging system to tackle, any help would be appreciated.
      New starter solenoid....check
      New Voltage Regulator...check.
      Dynamic test to Stator.....bang...pulling like 2 Volts AC
      Problem: Without pulling the part out and stranding the vehicle at the shop forever.... I am trying to find the correct stator or at least one that might not be exact for the Massimo Buck 400S, but fit and connect and do the job if that makes sense.... if anyone has any ideas, please shoot them my way.
    • By lmarkie
      I swapped out the Subaru motor for a Predator 670cc. If I remove the heat shield around the muffler, The stock muffler sits in there just fine with 1" to spare.
      Only problem is the exhaust exit is toward the back seat instead of out the back.
      Do you all think that the stock exhaust would be okay (just as effective) if cut a hole and welded a pipe on the reversed (opposite) end? Of course, plug the old exit end. Other option I thought of was to roll a tube 180° with a 7" center line radius and finish extention of 12" or so.
      Any thoughts?
×
×
  • Create New...