
strike250
-
Posts
208 -
Joined
-
Last visited
-
Days Won
27
Content Type
Profiles
Events
Forums
Gallery
Downloads
Community Map
Posts posted by strike250
-
-
My site is up and running now, check it out! www.250utv.com and be sure to come back here for lots of up to dates on tech articles and how to do information.
Matt
-
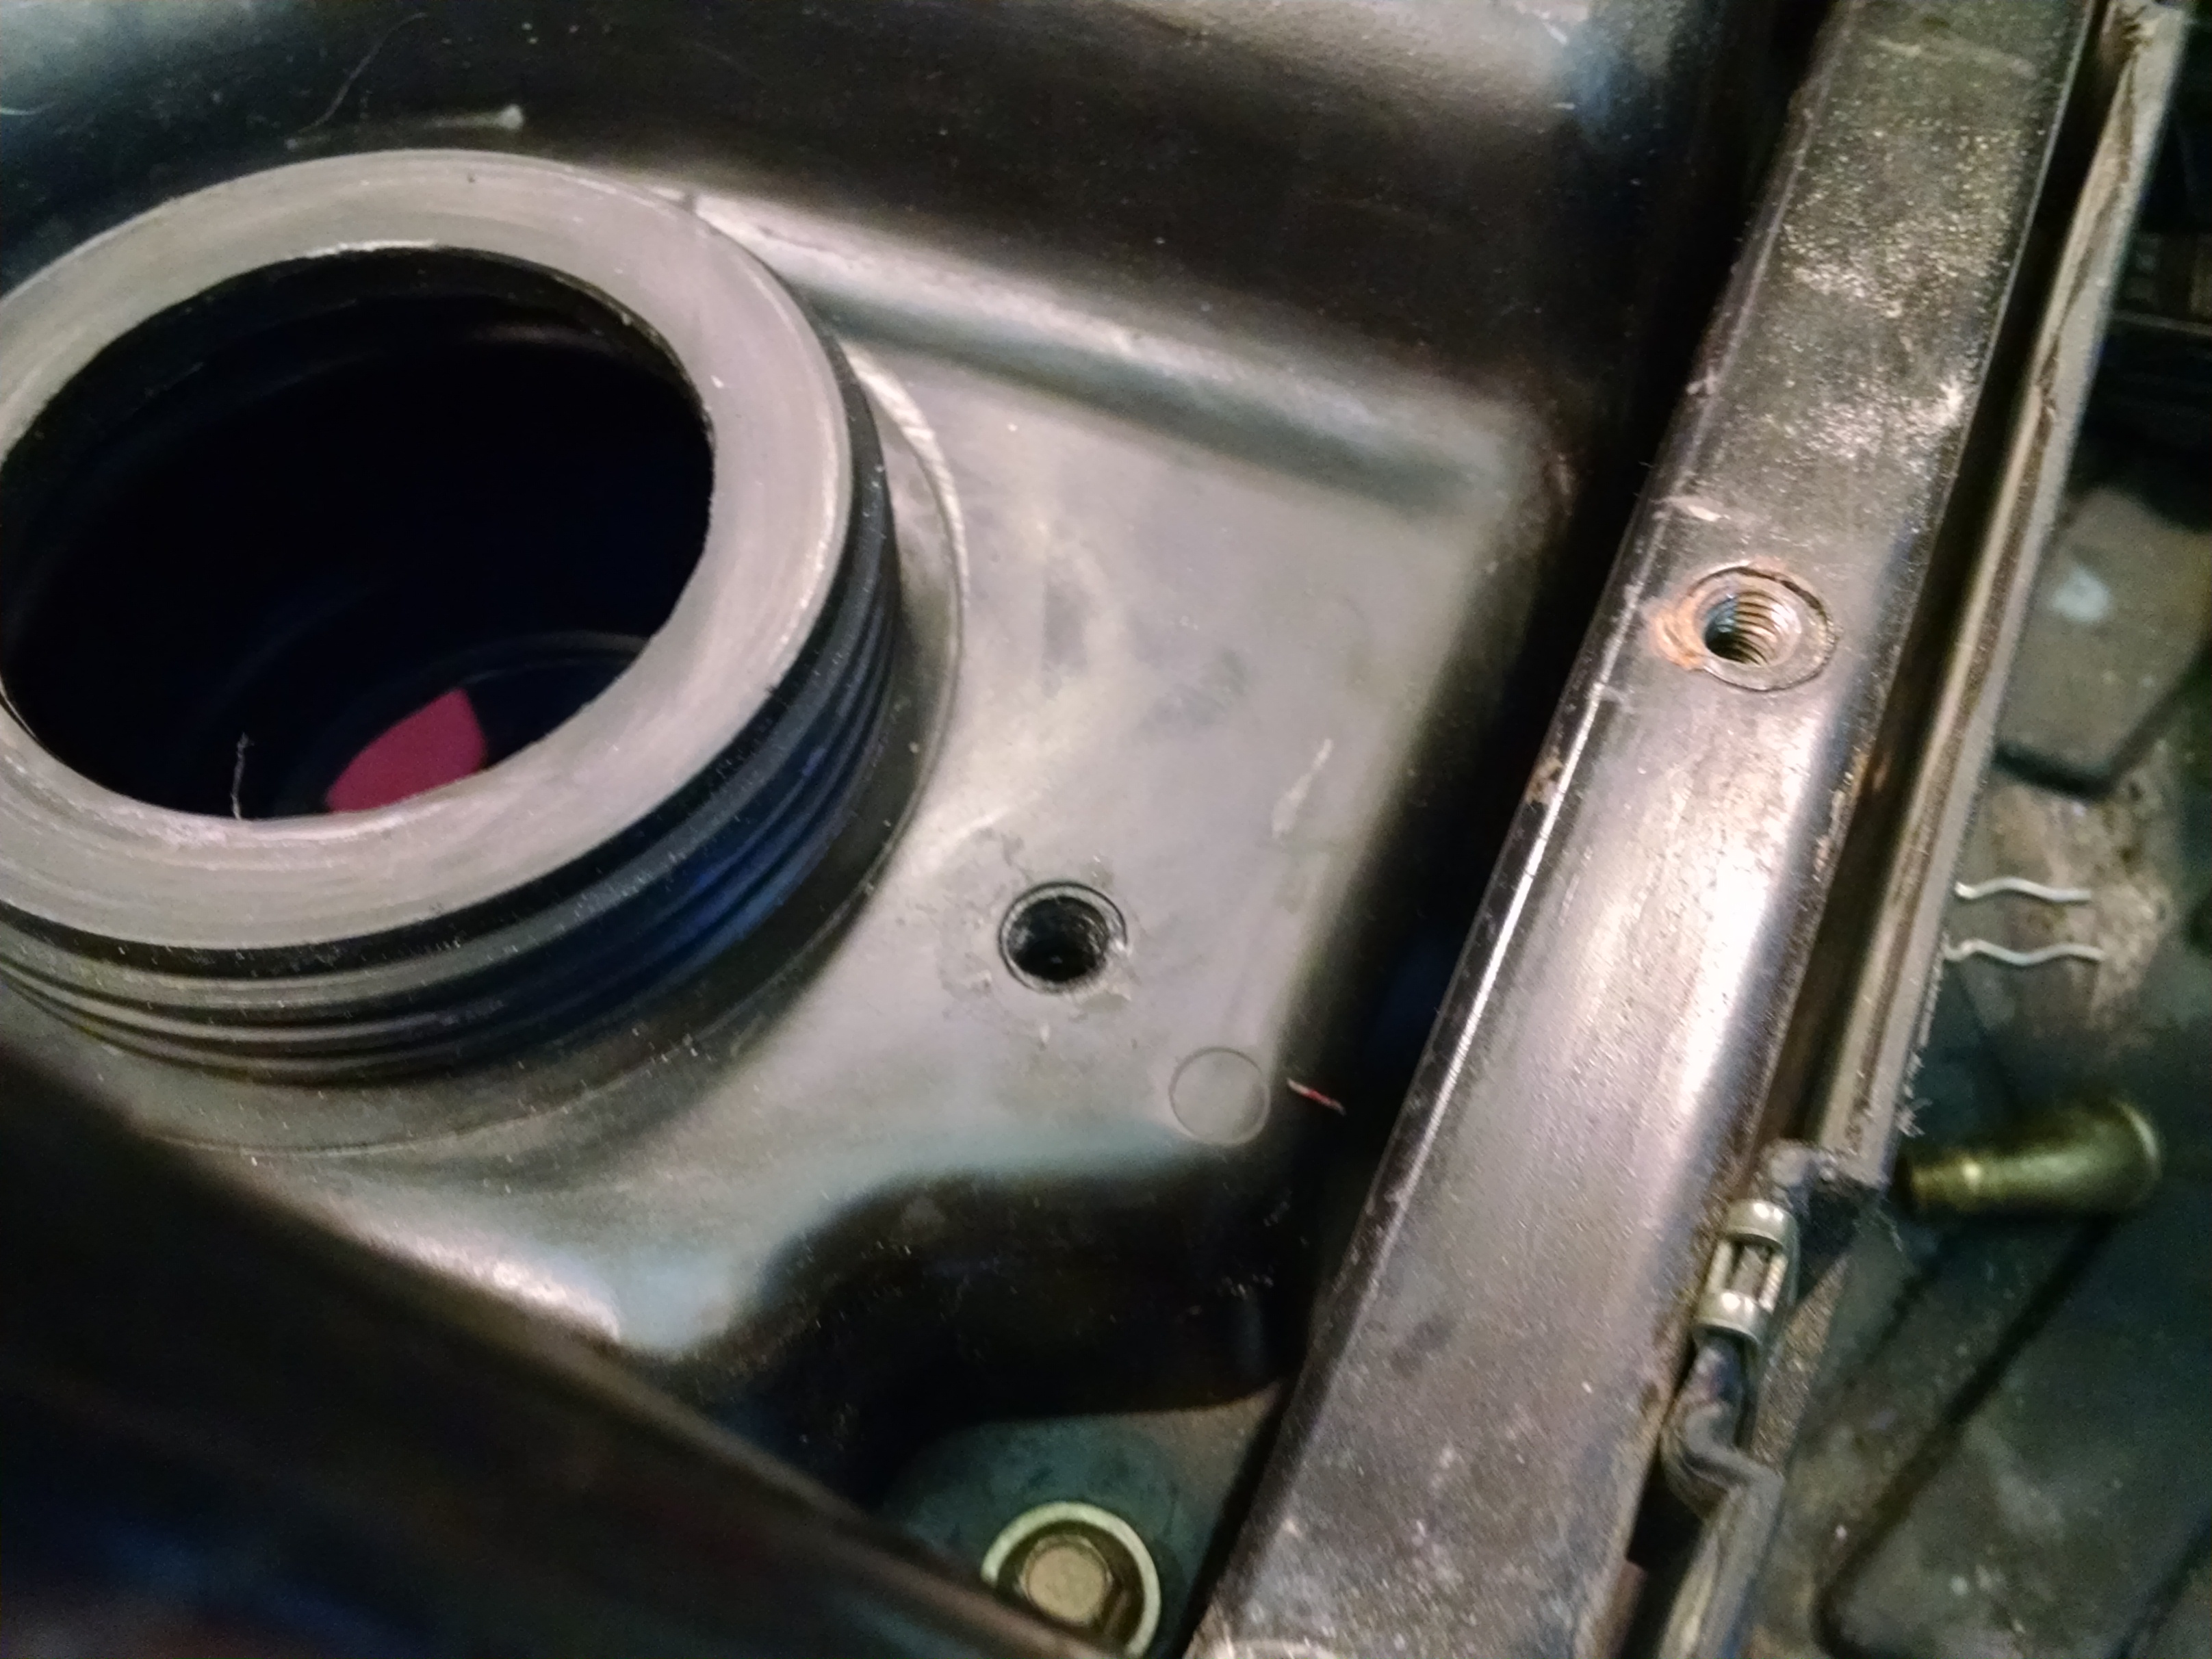
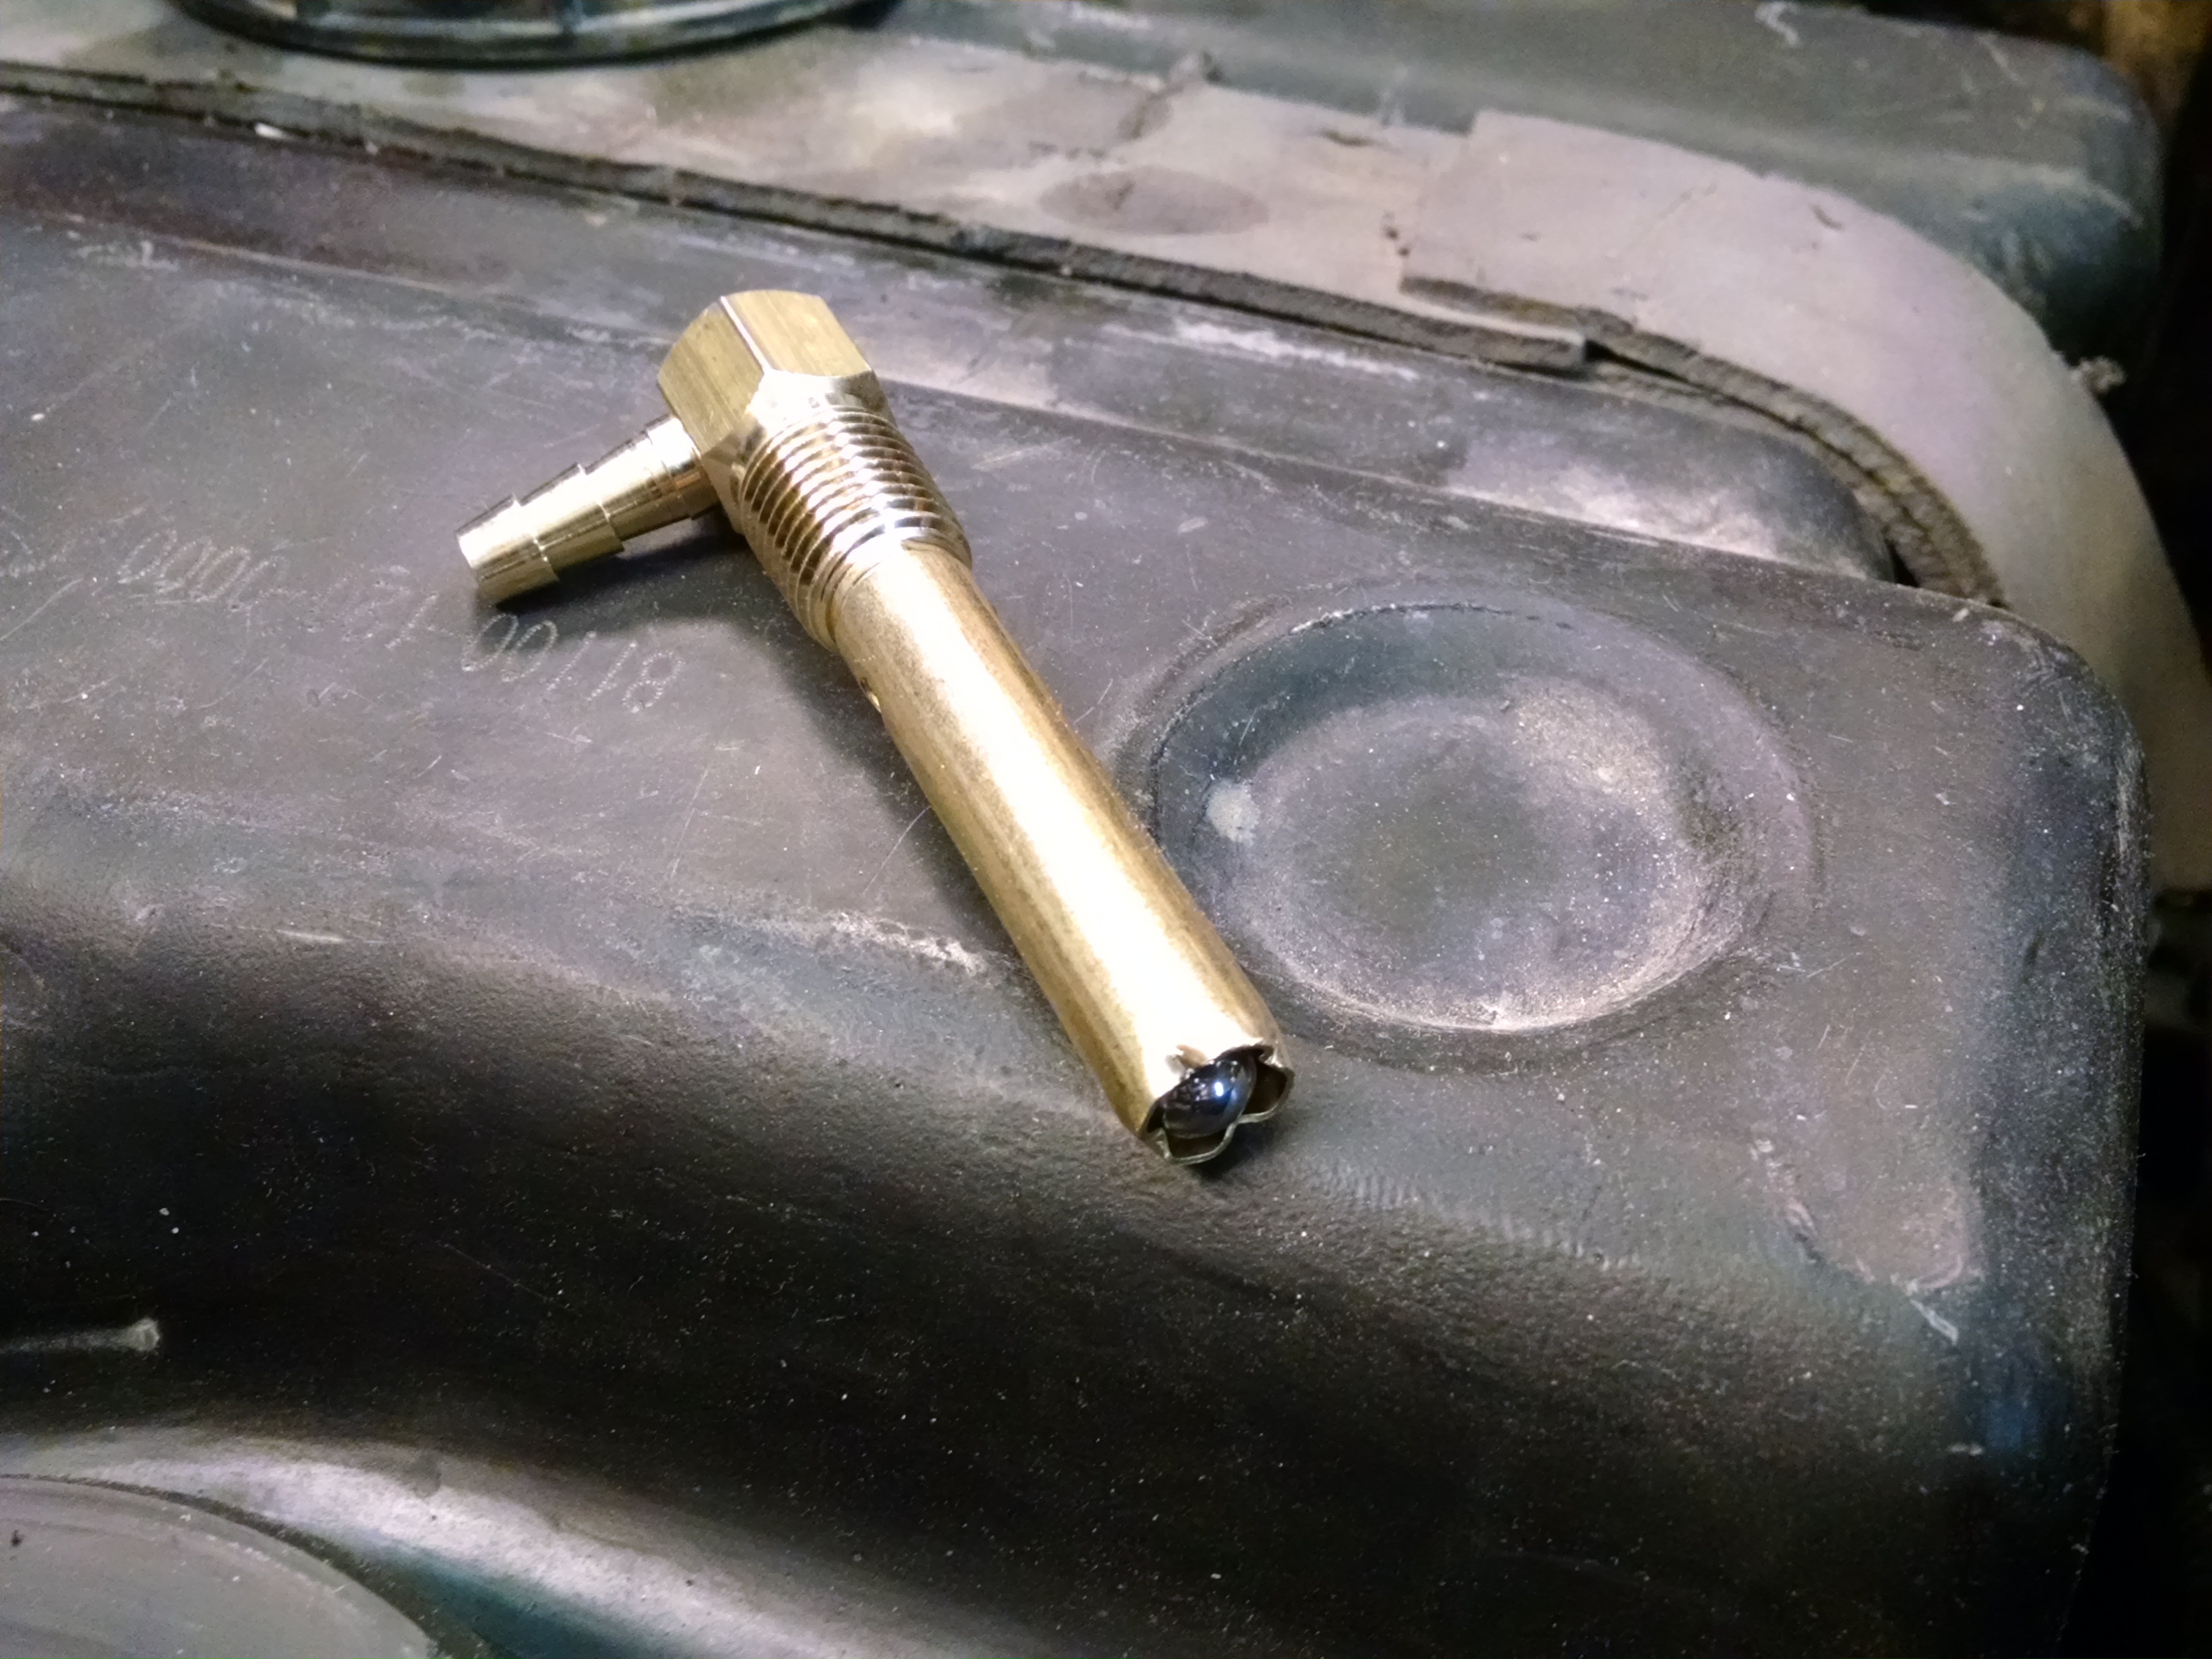
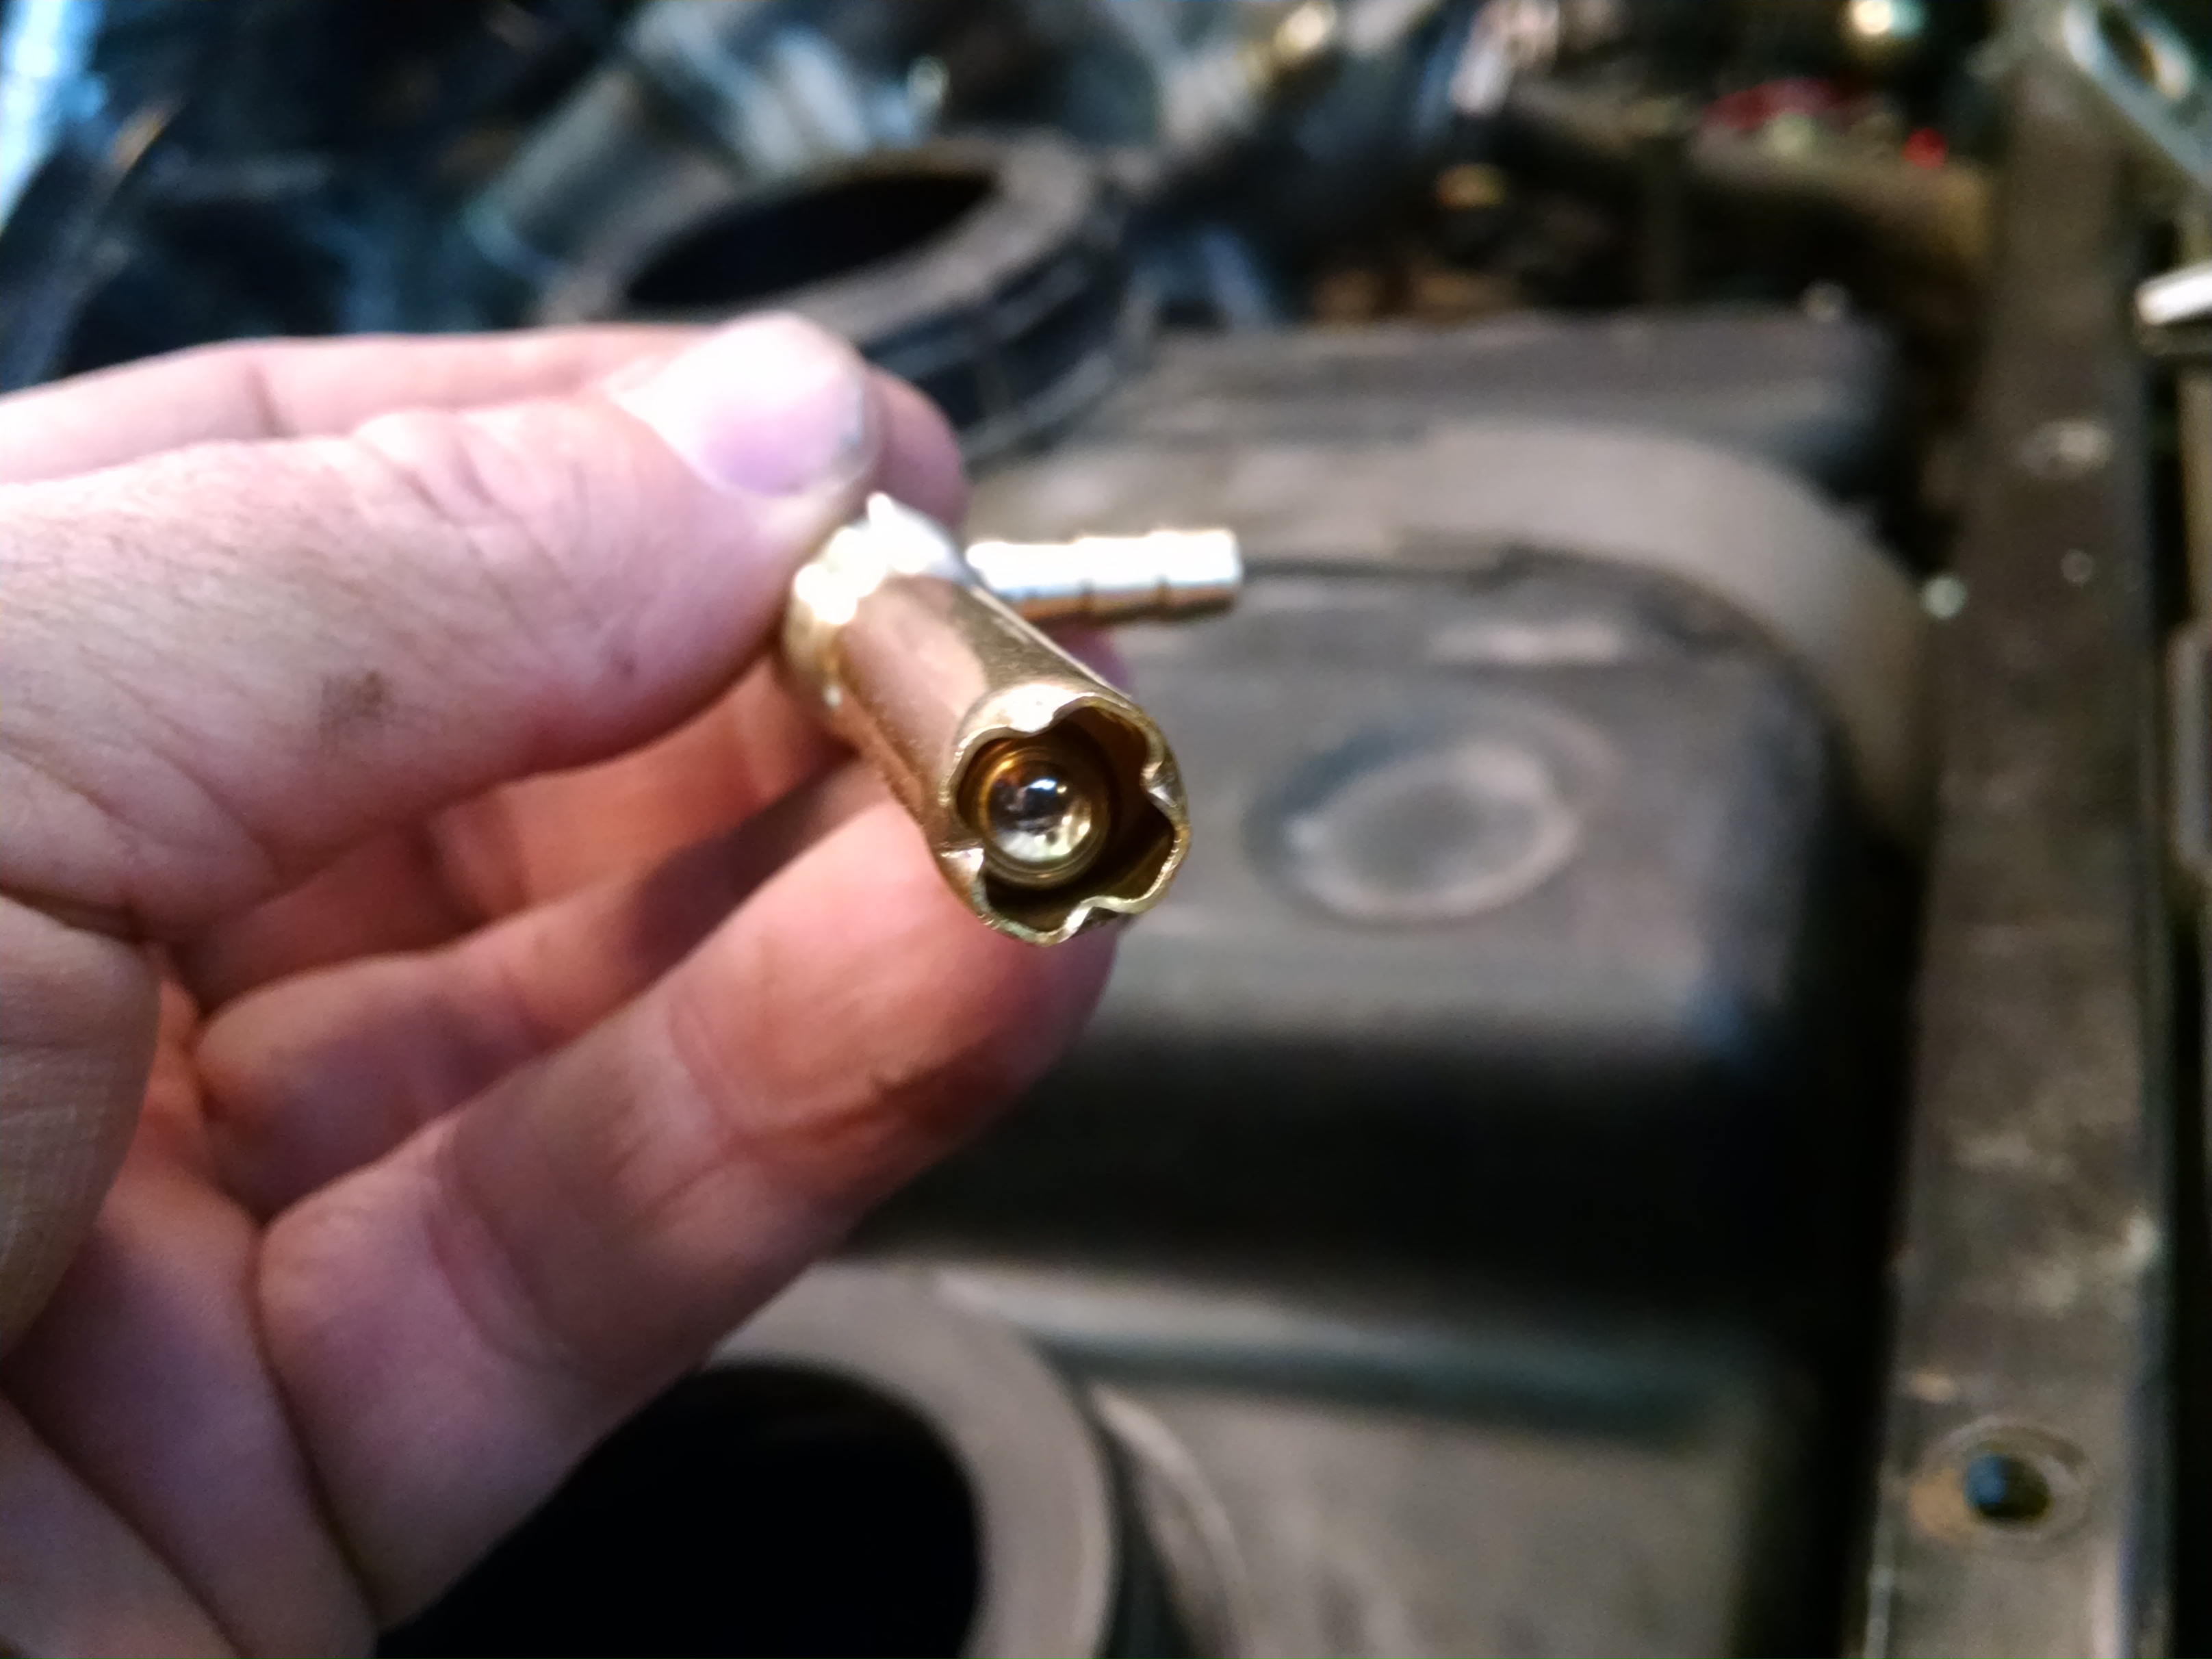
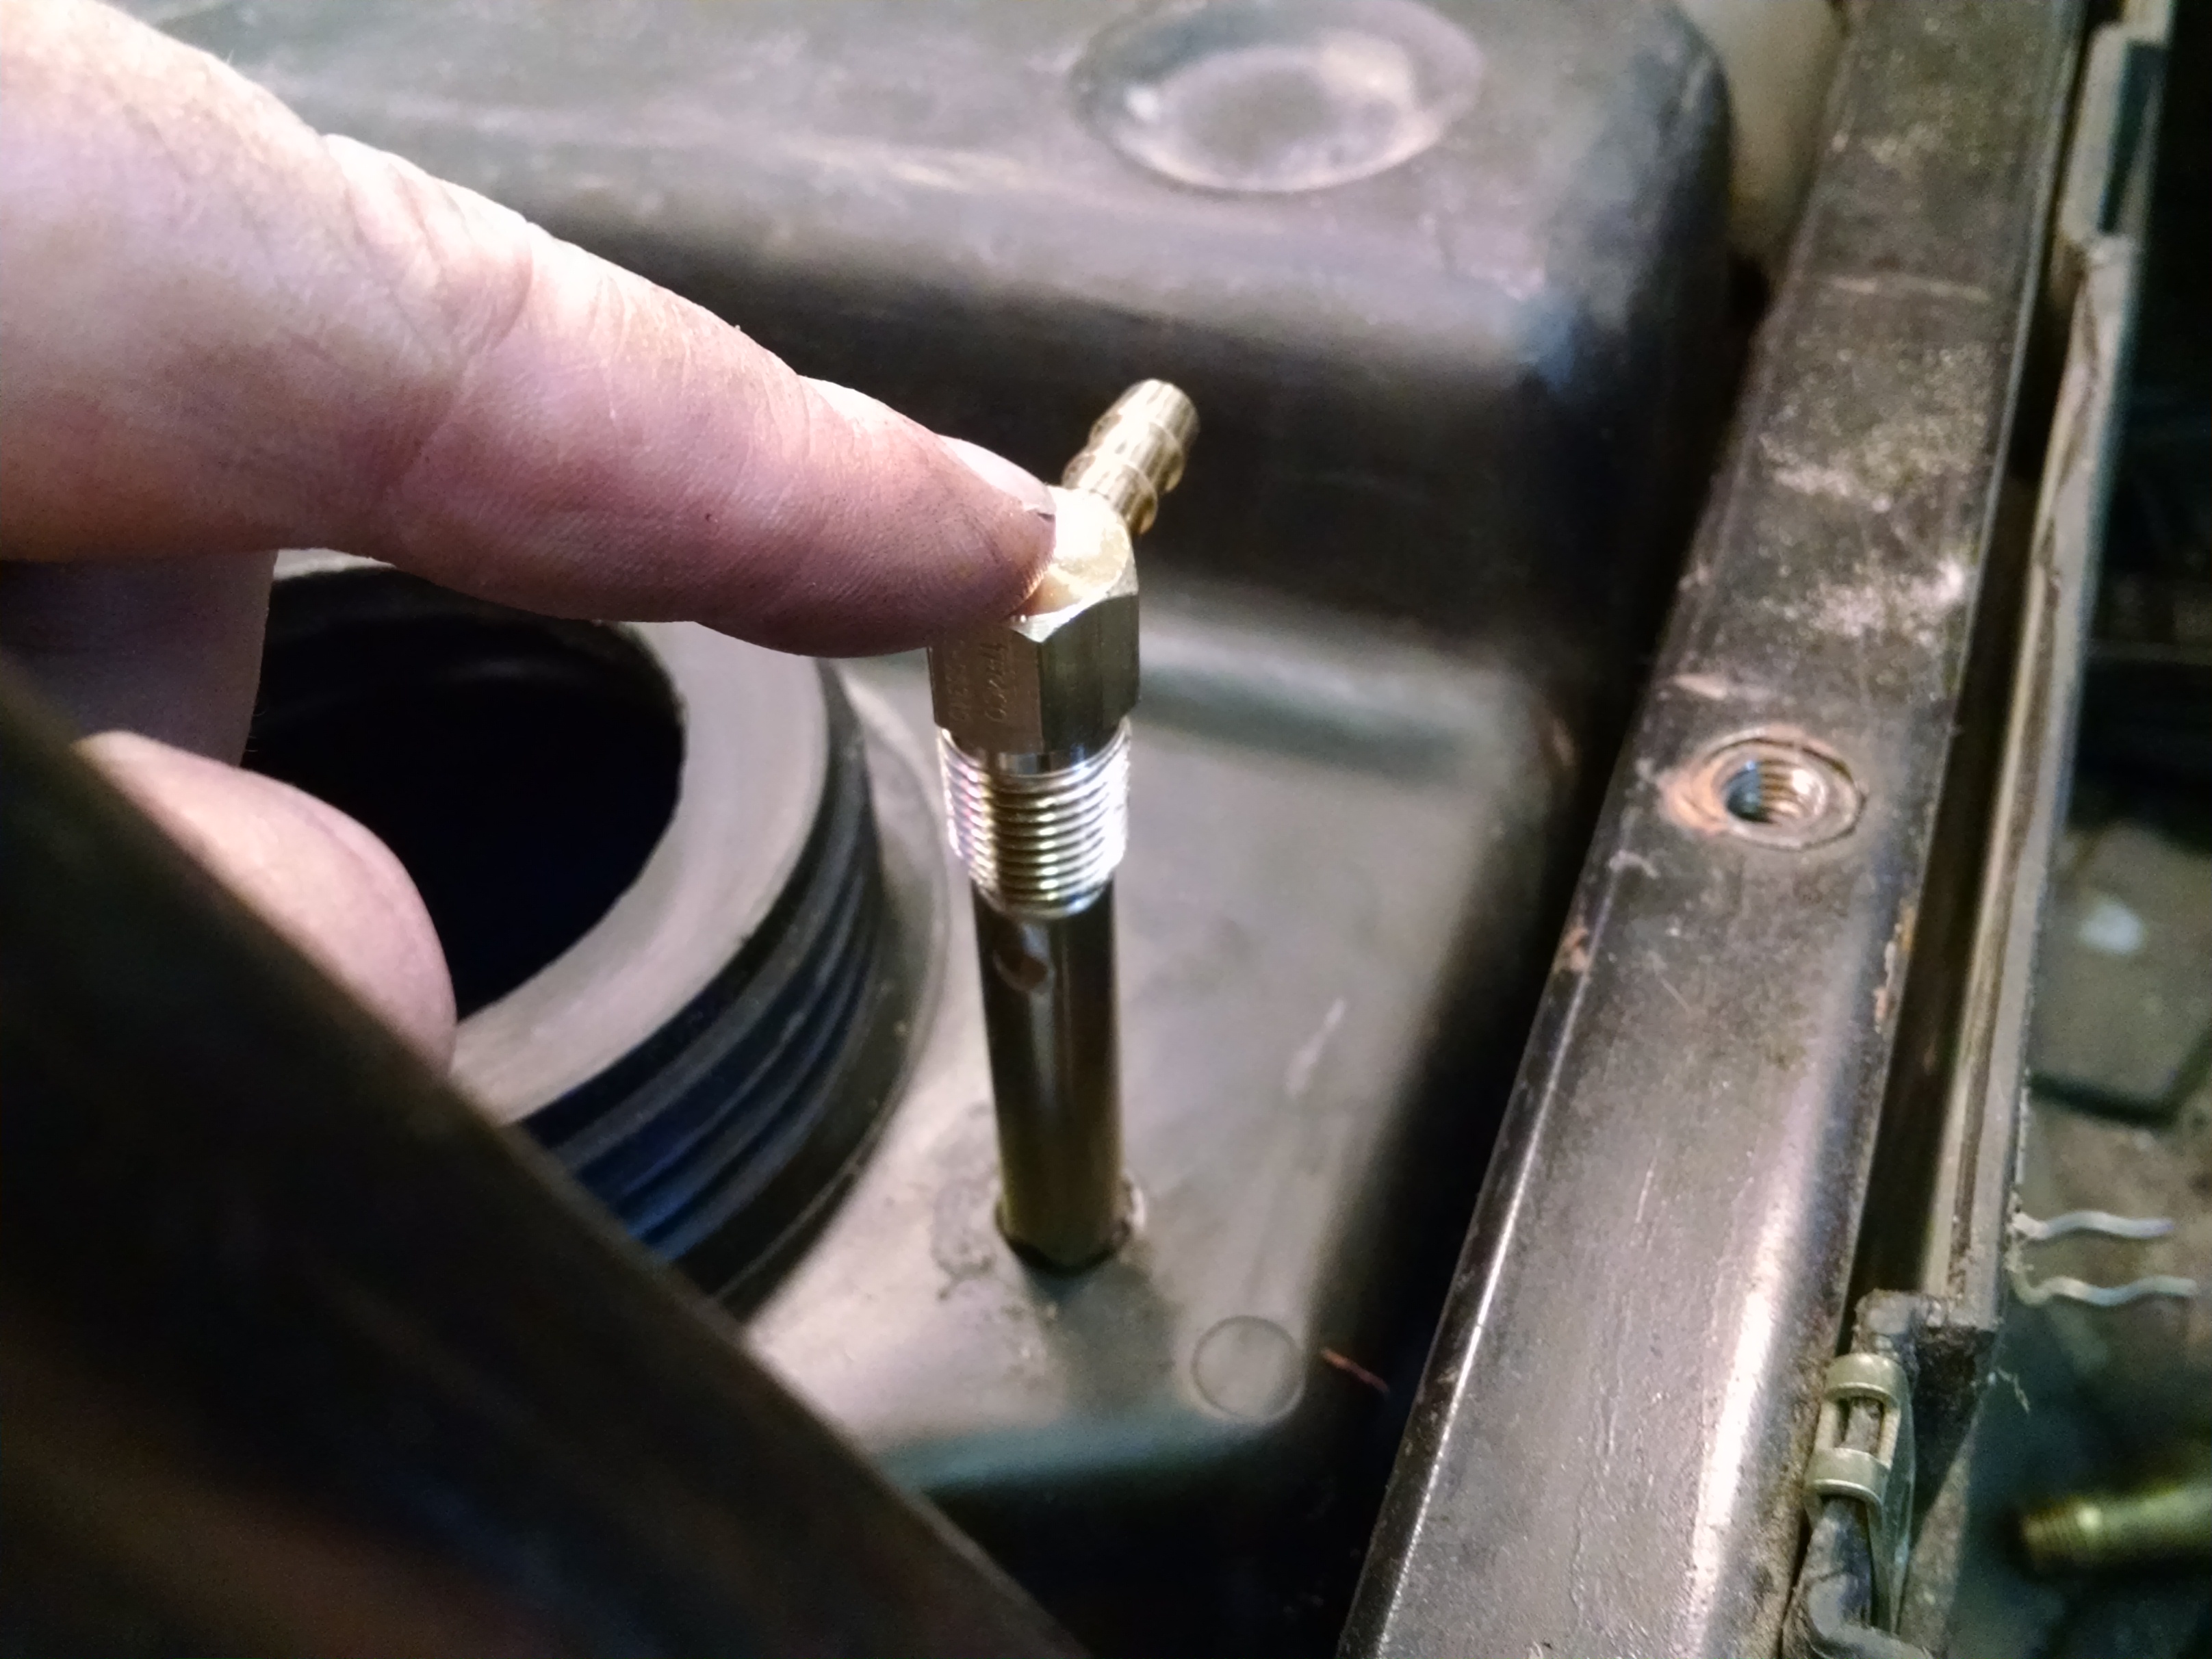
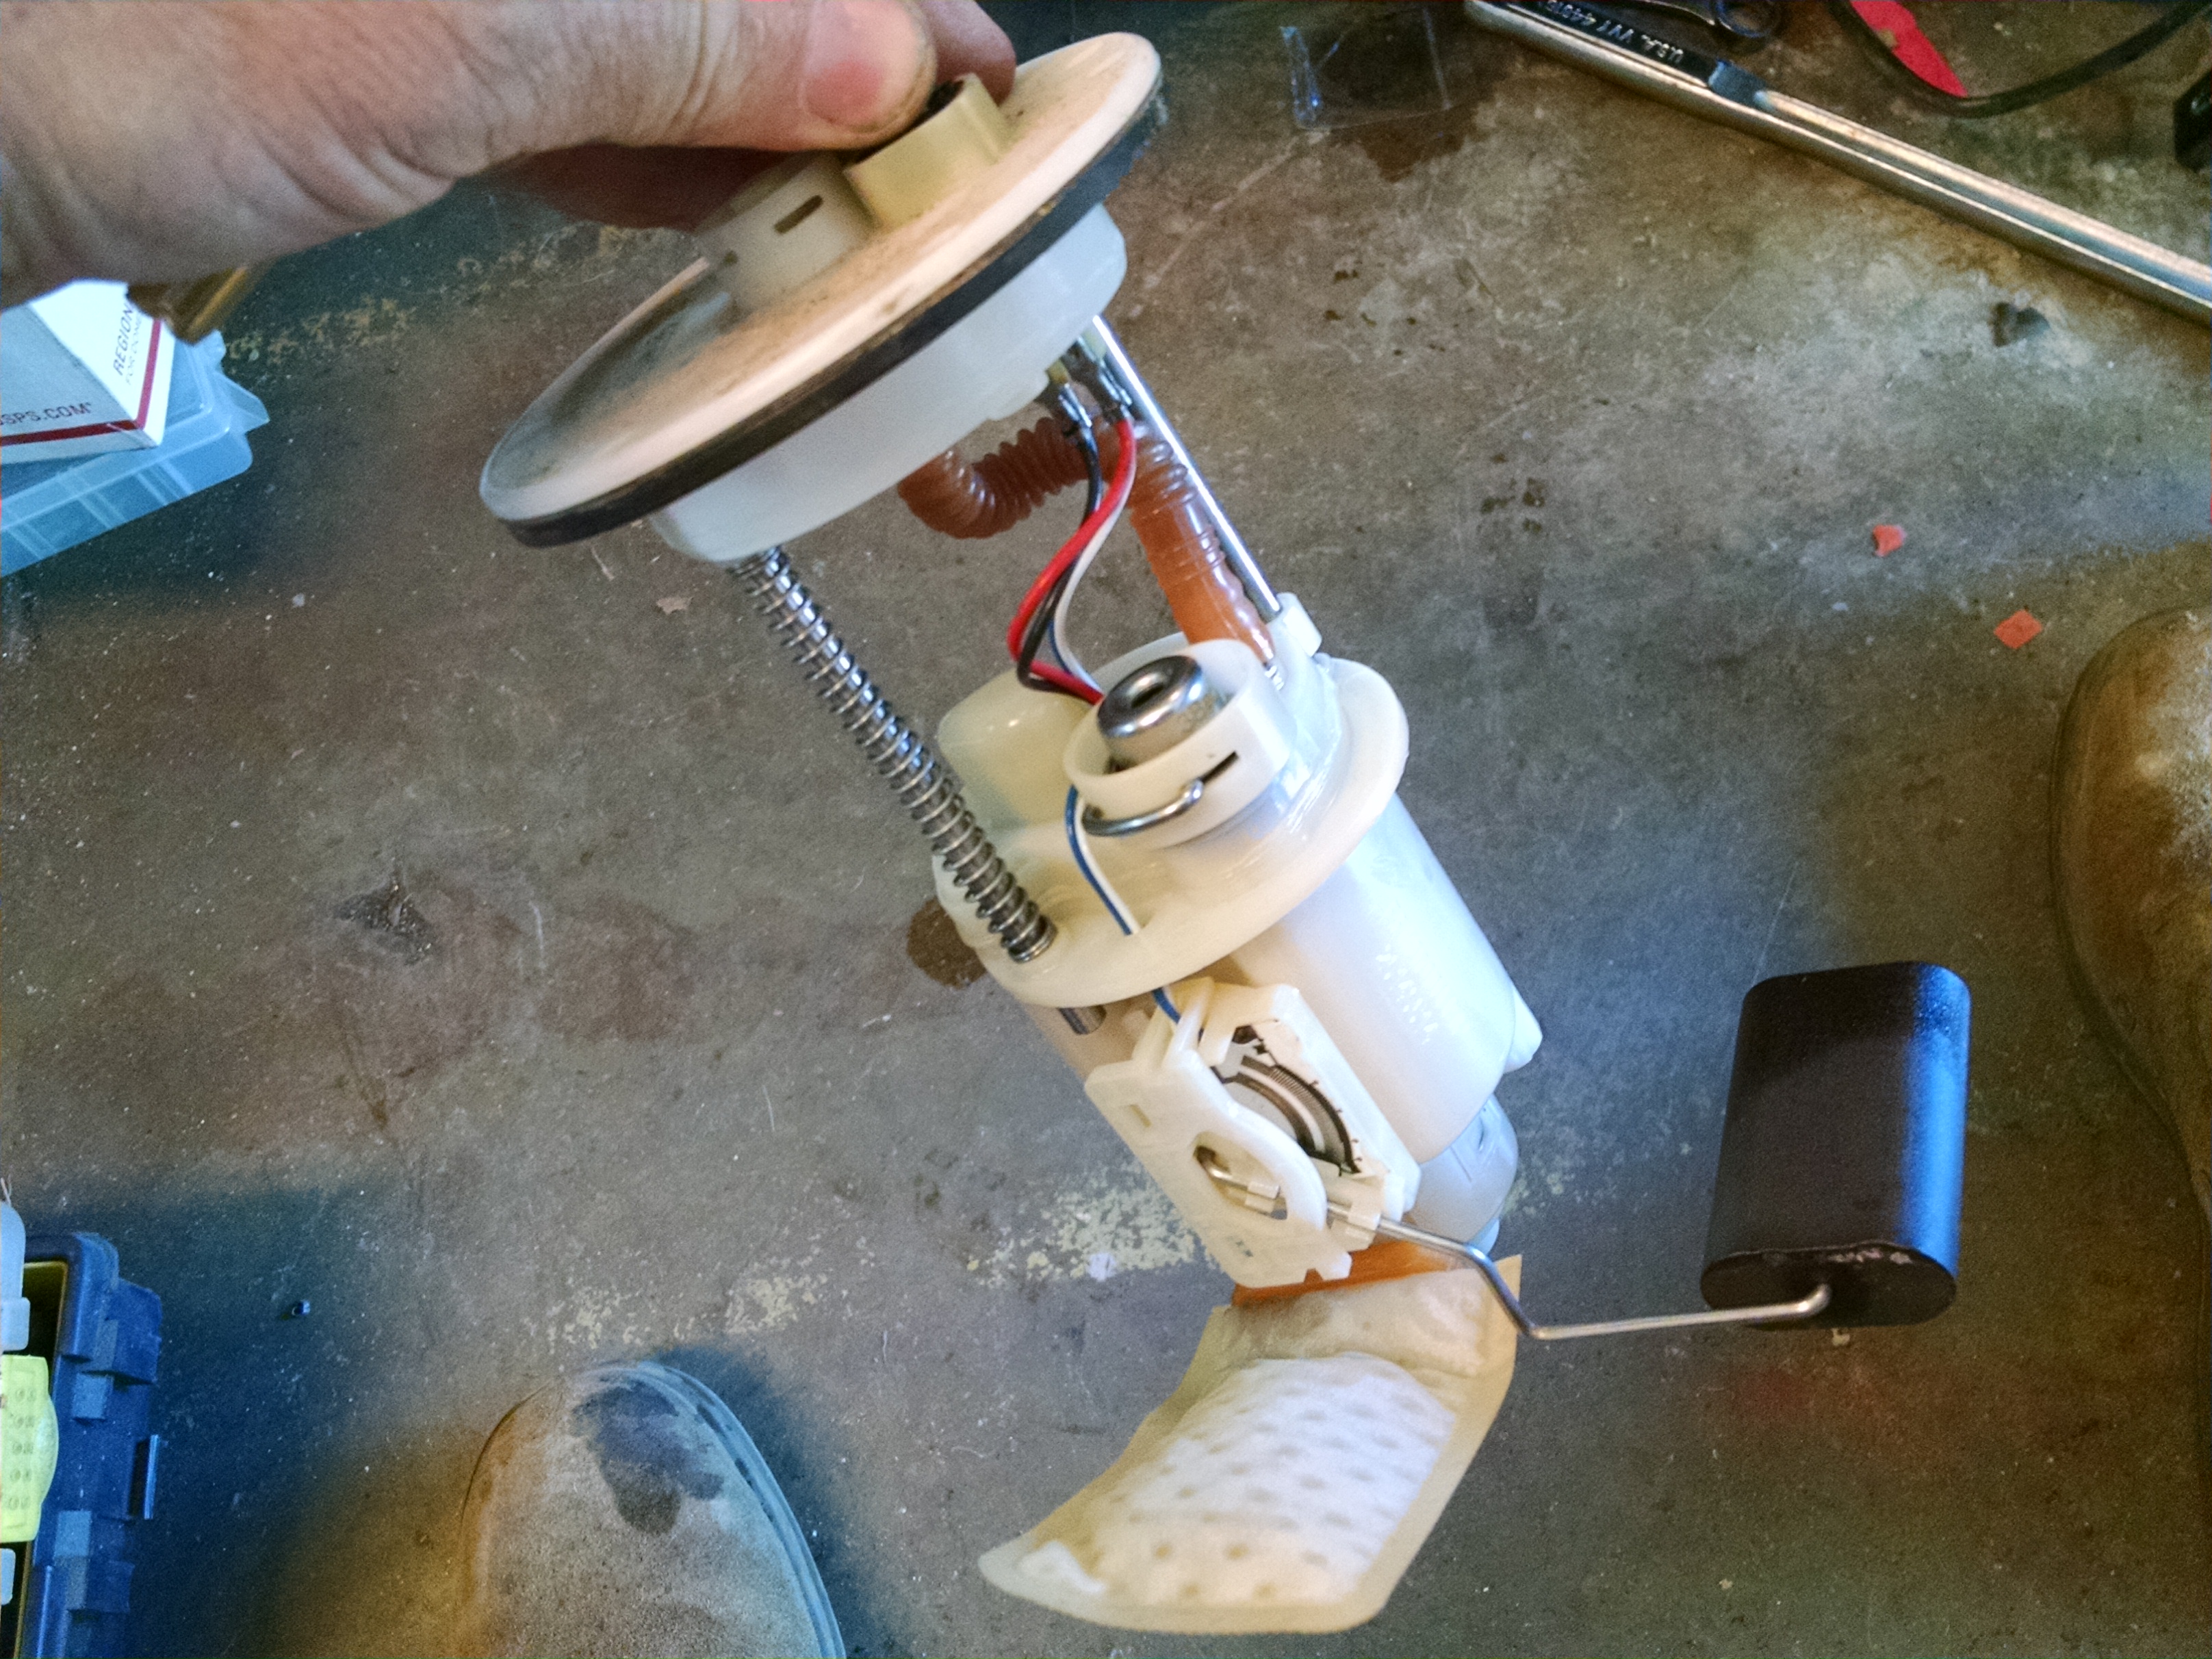
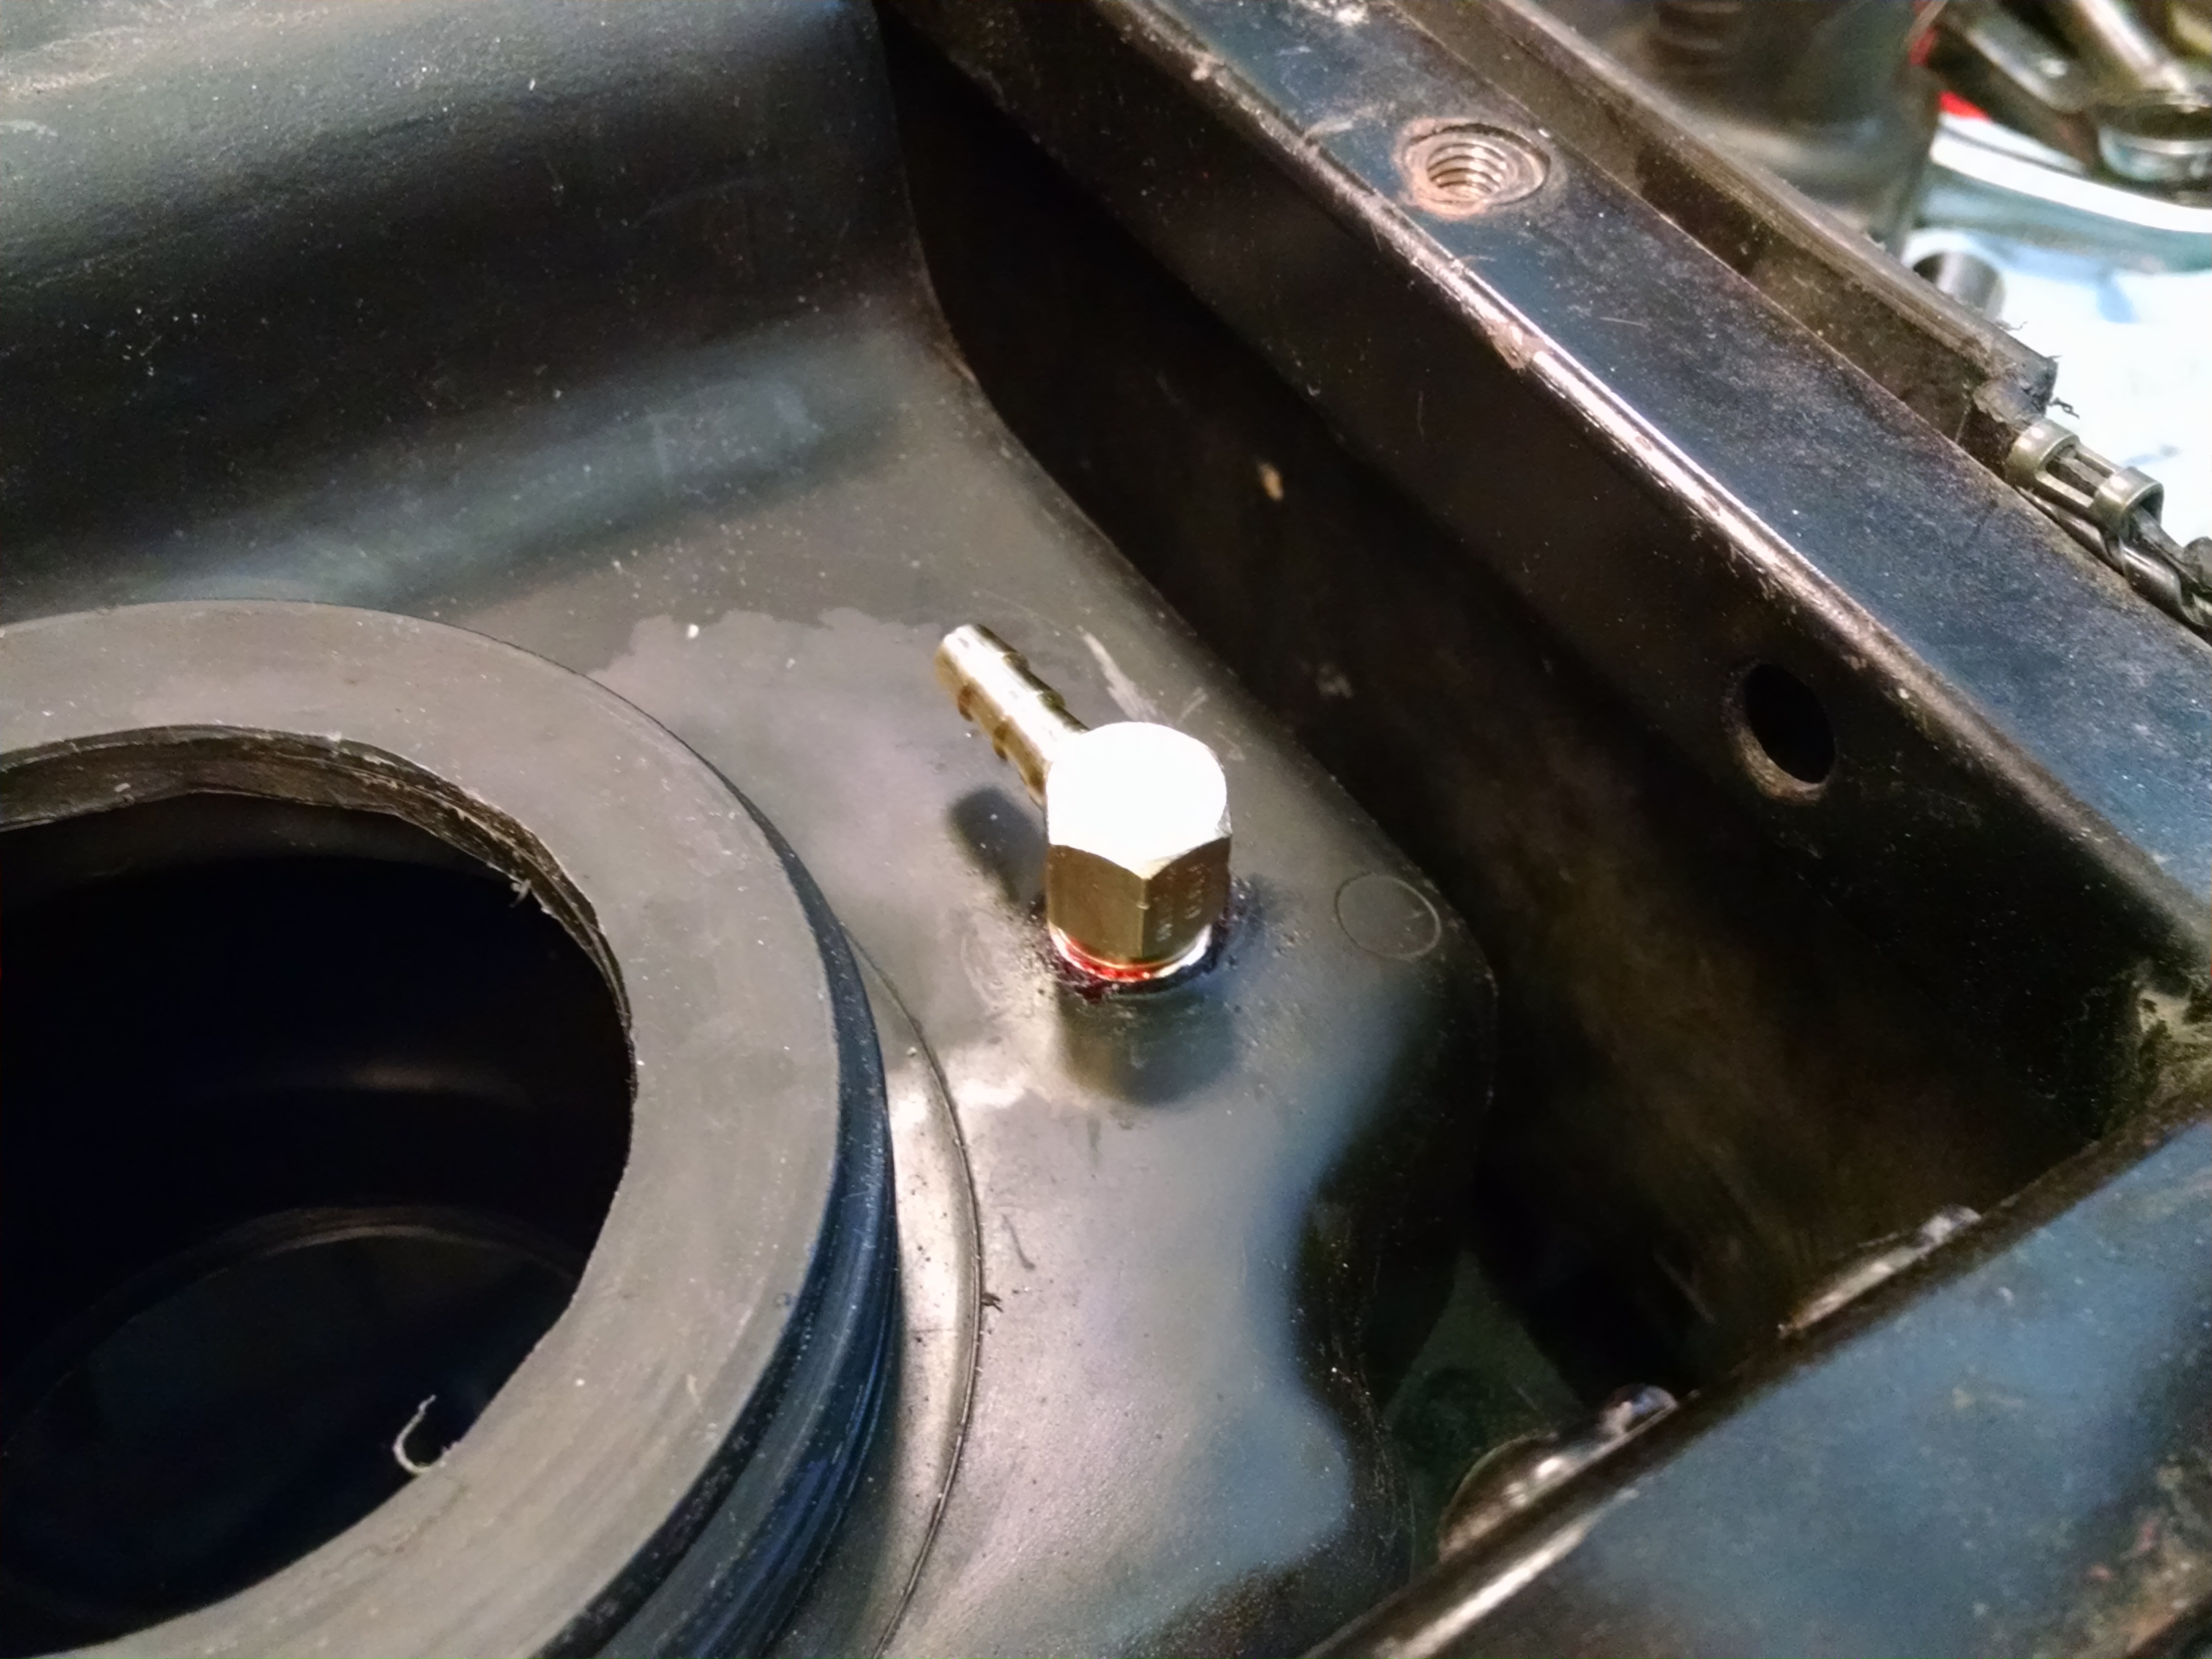
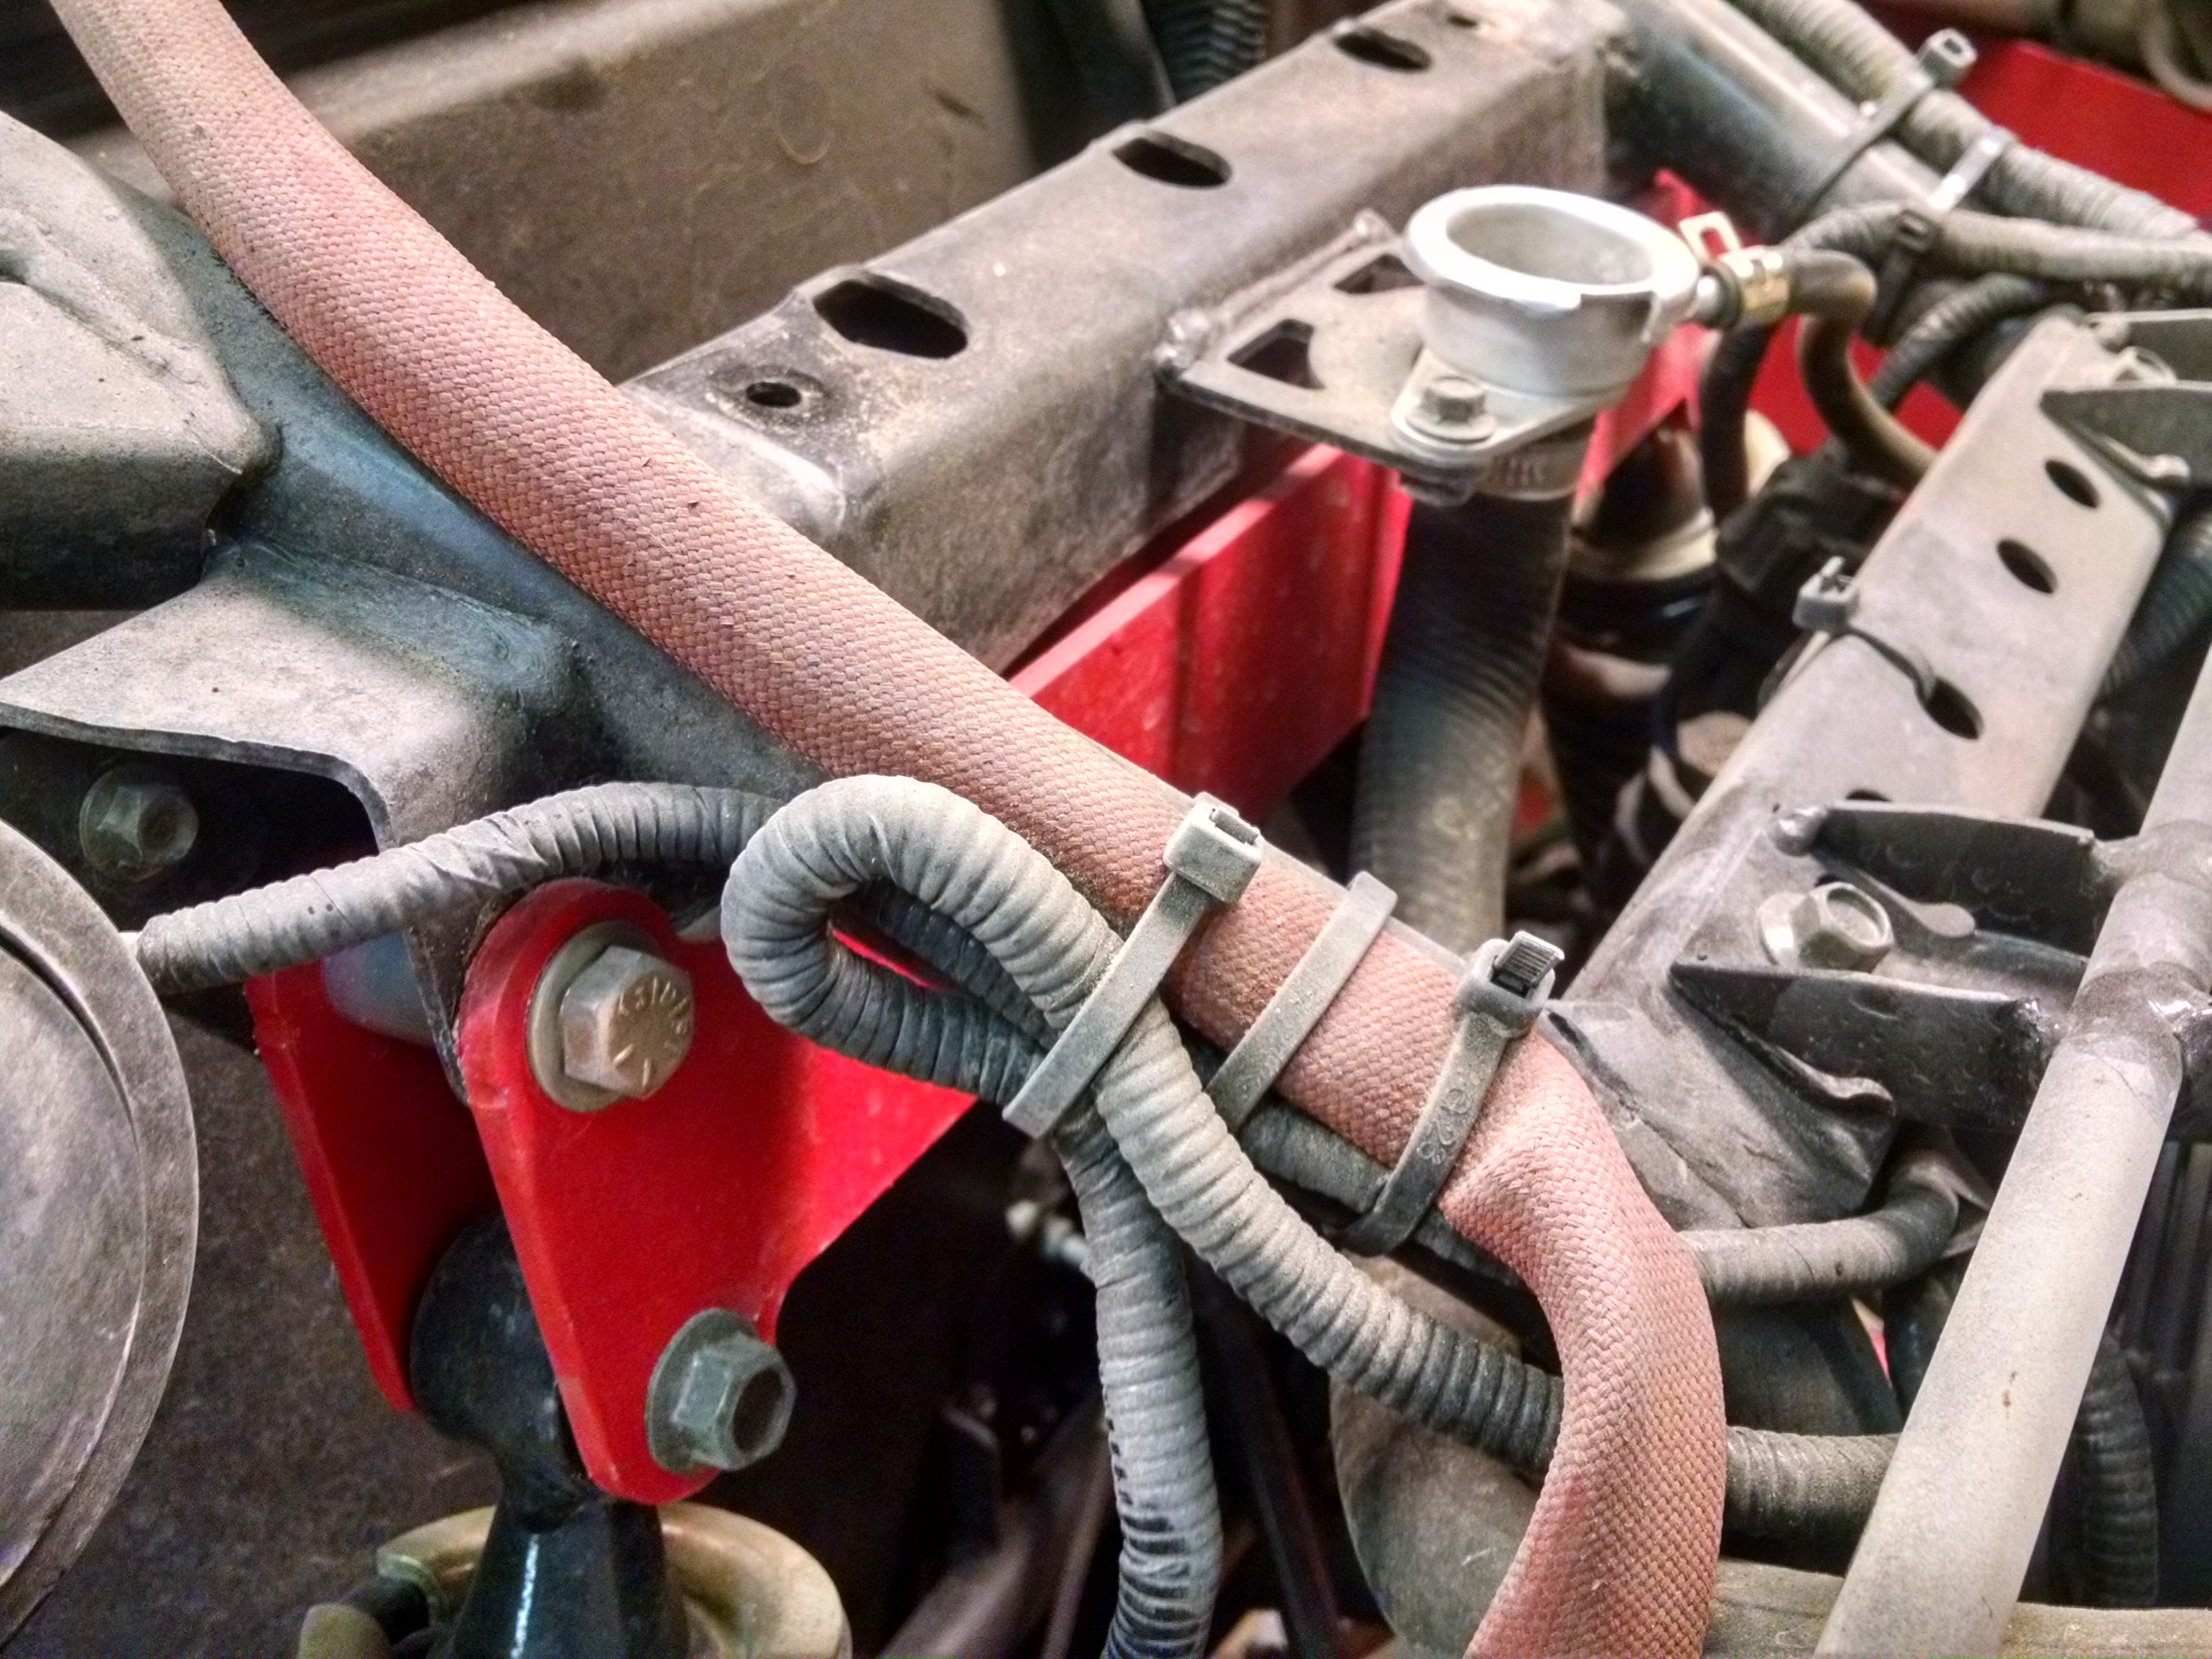
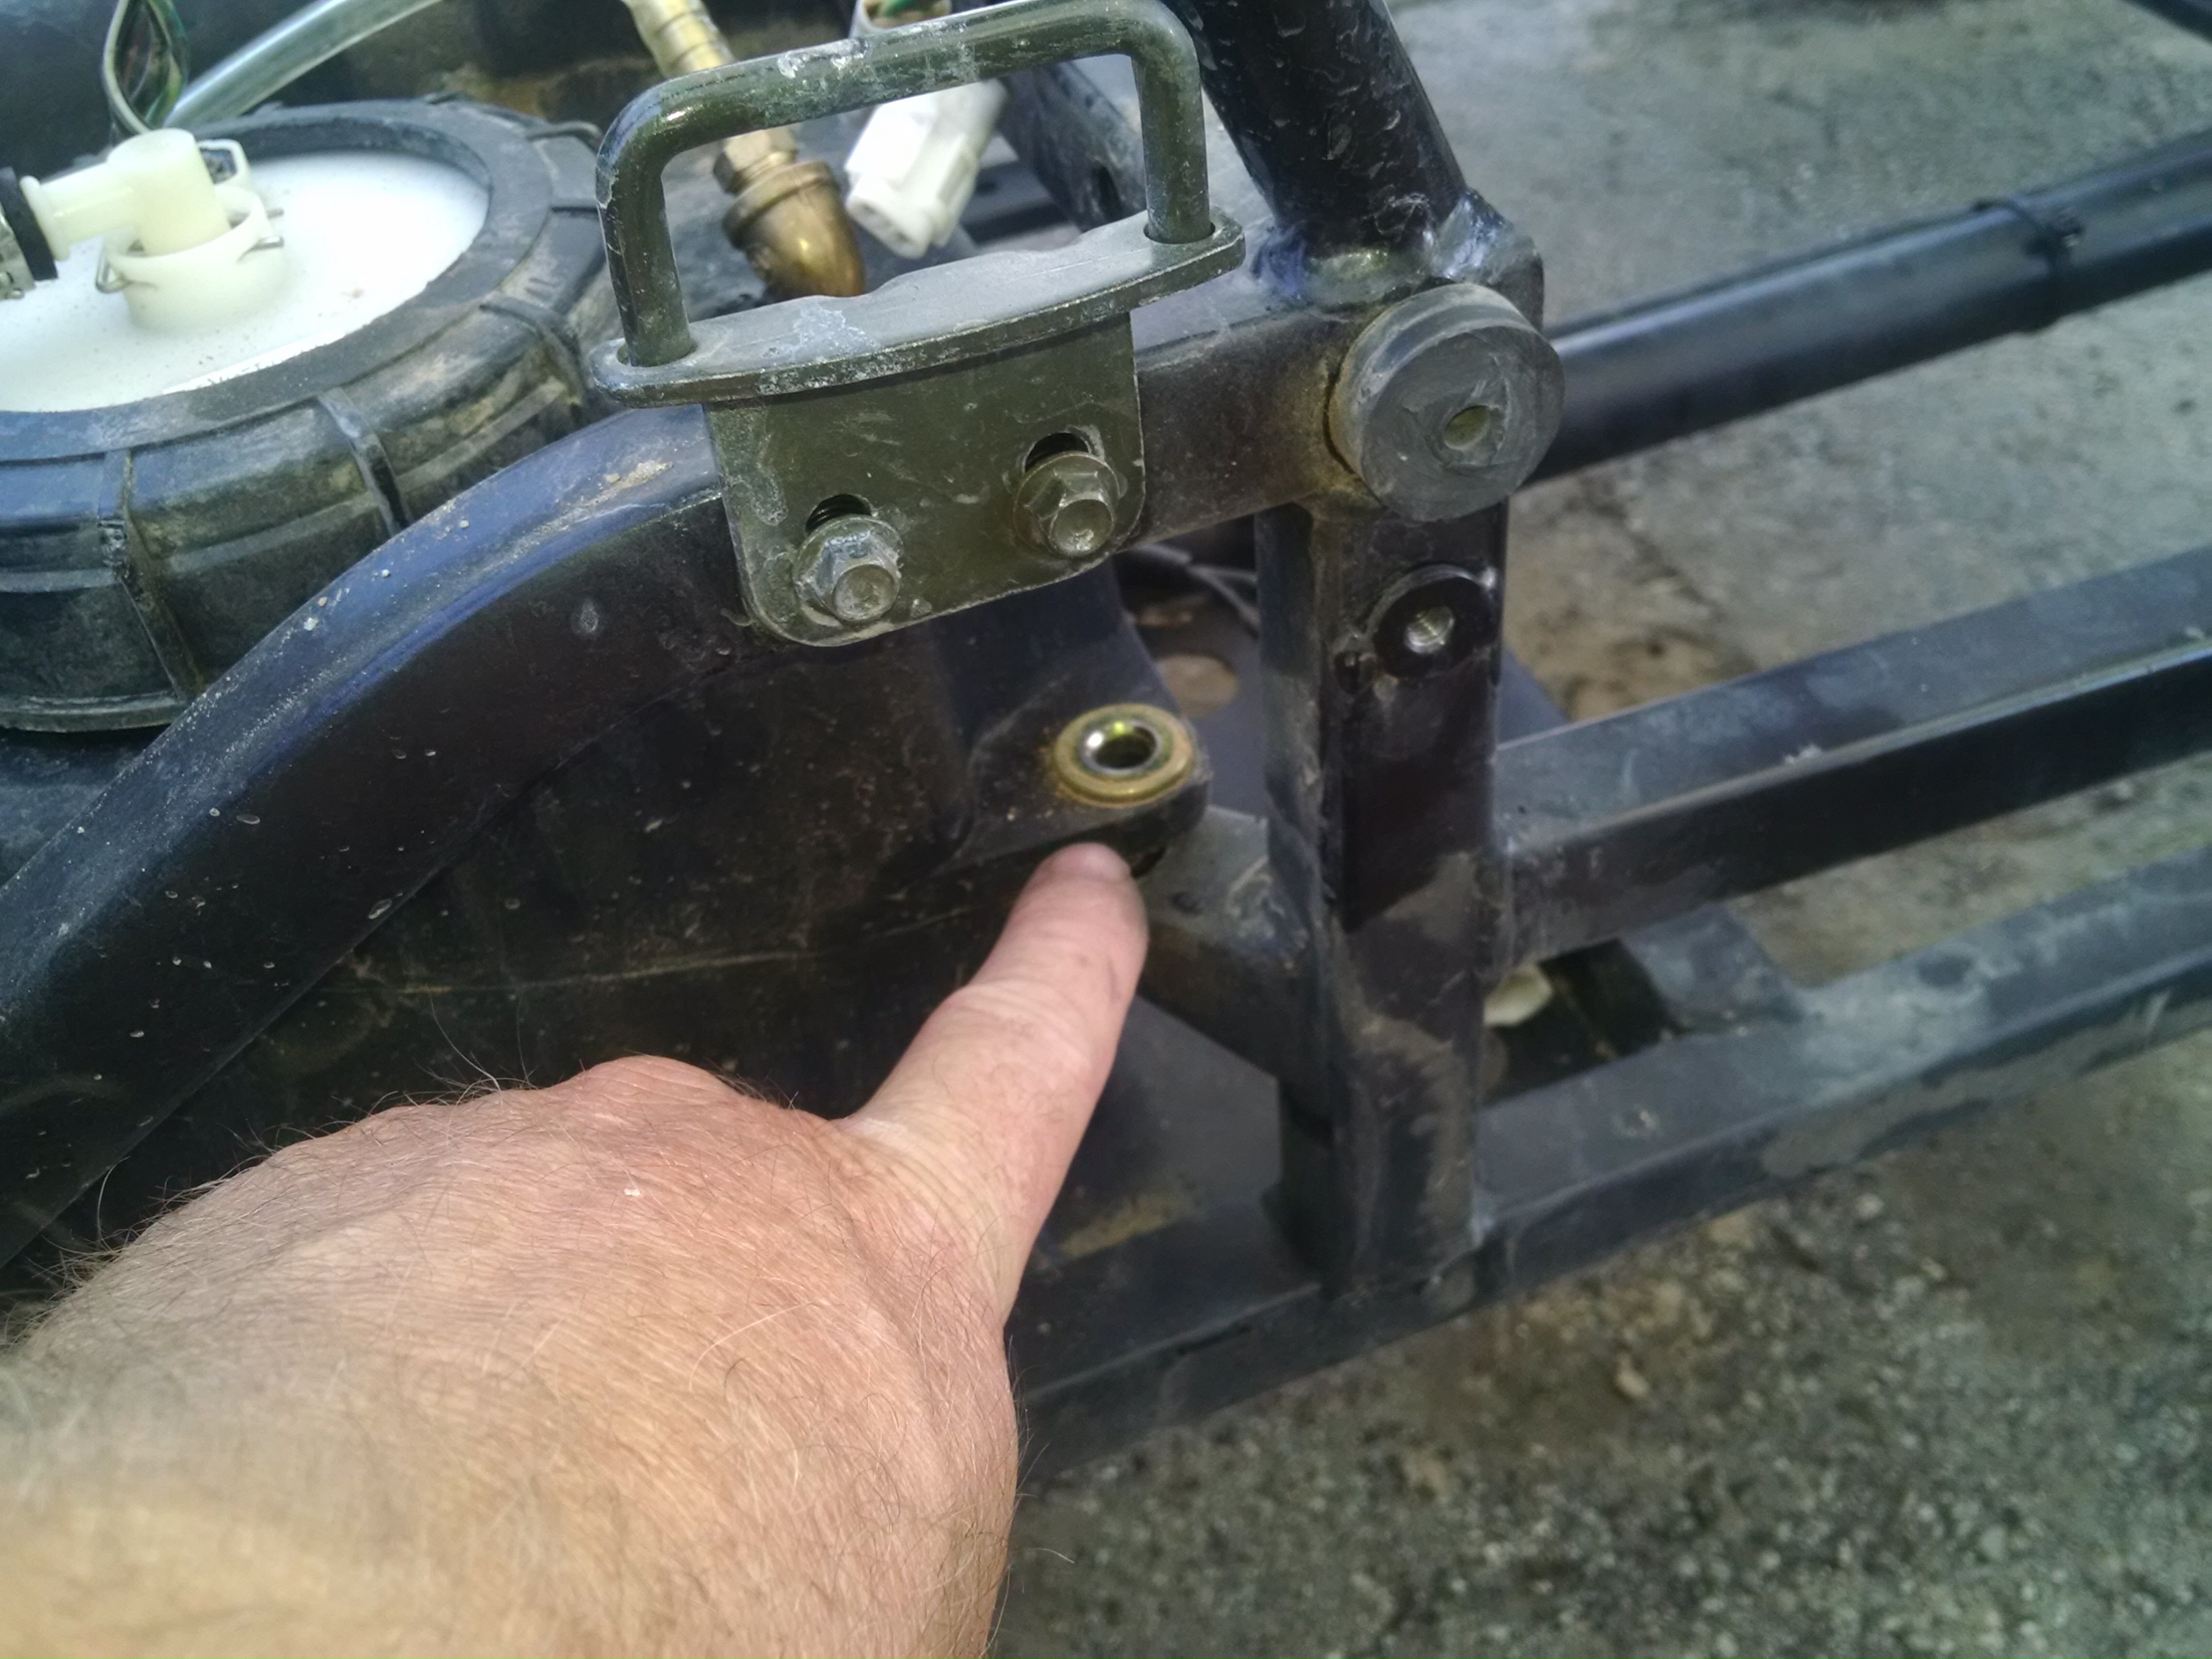
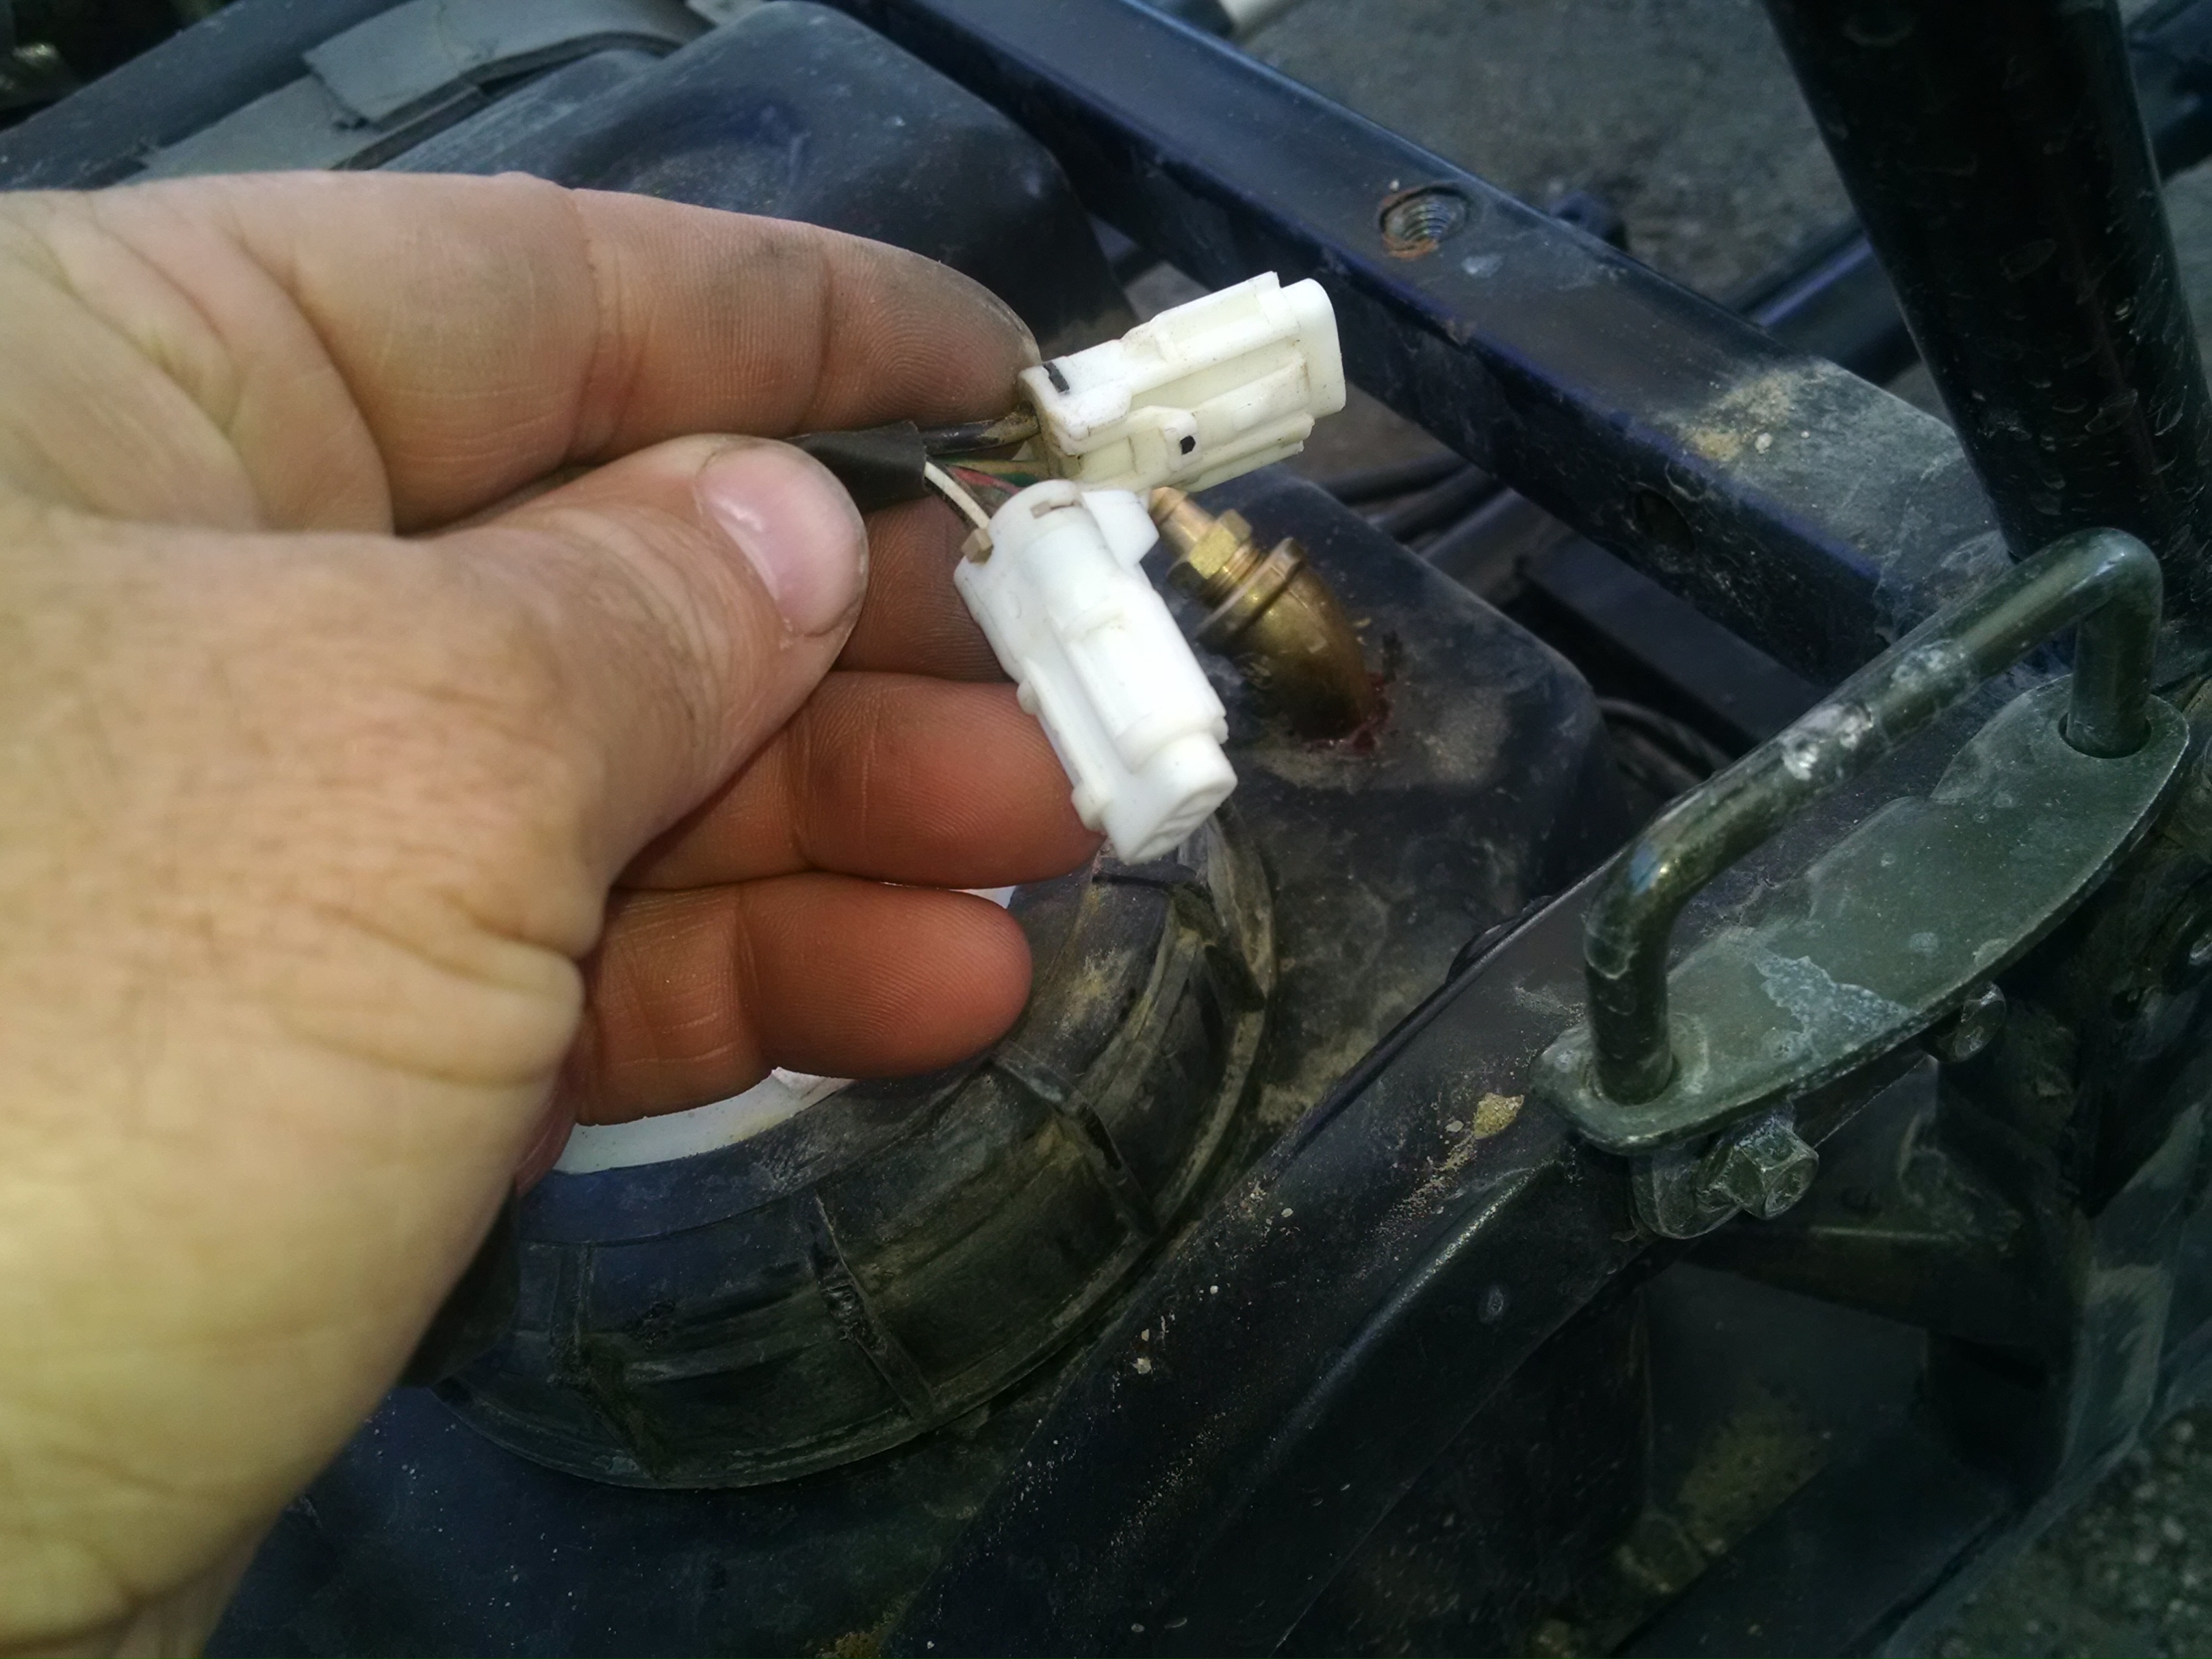
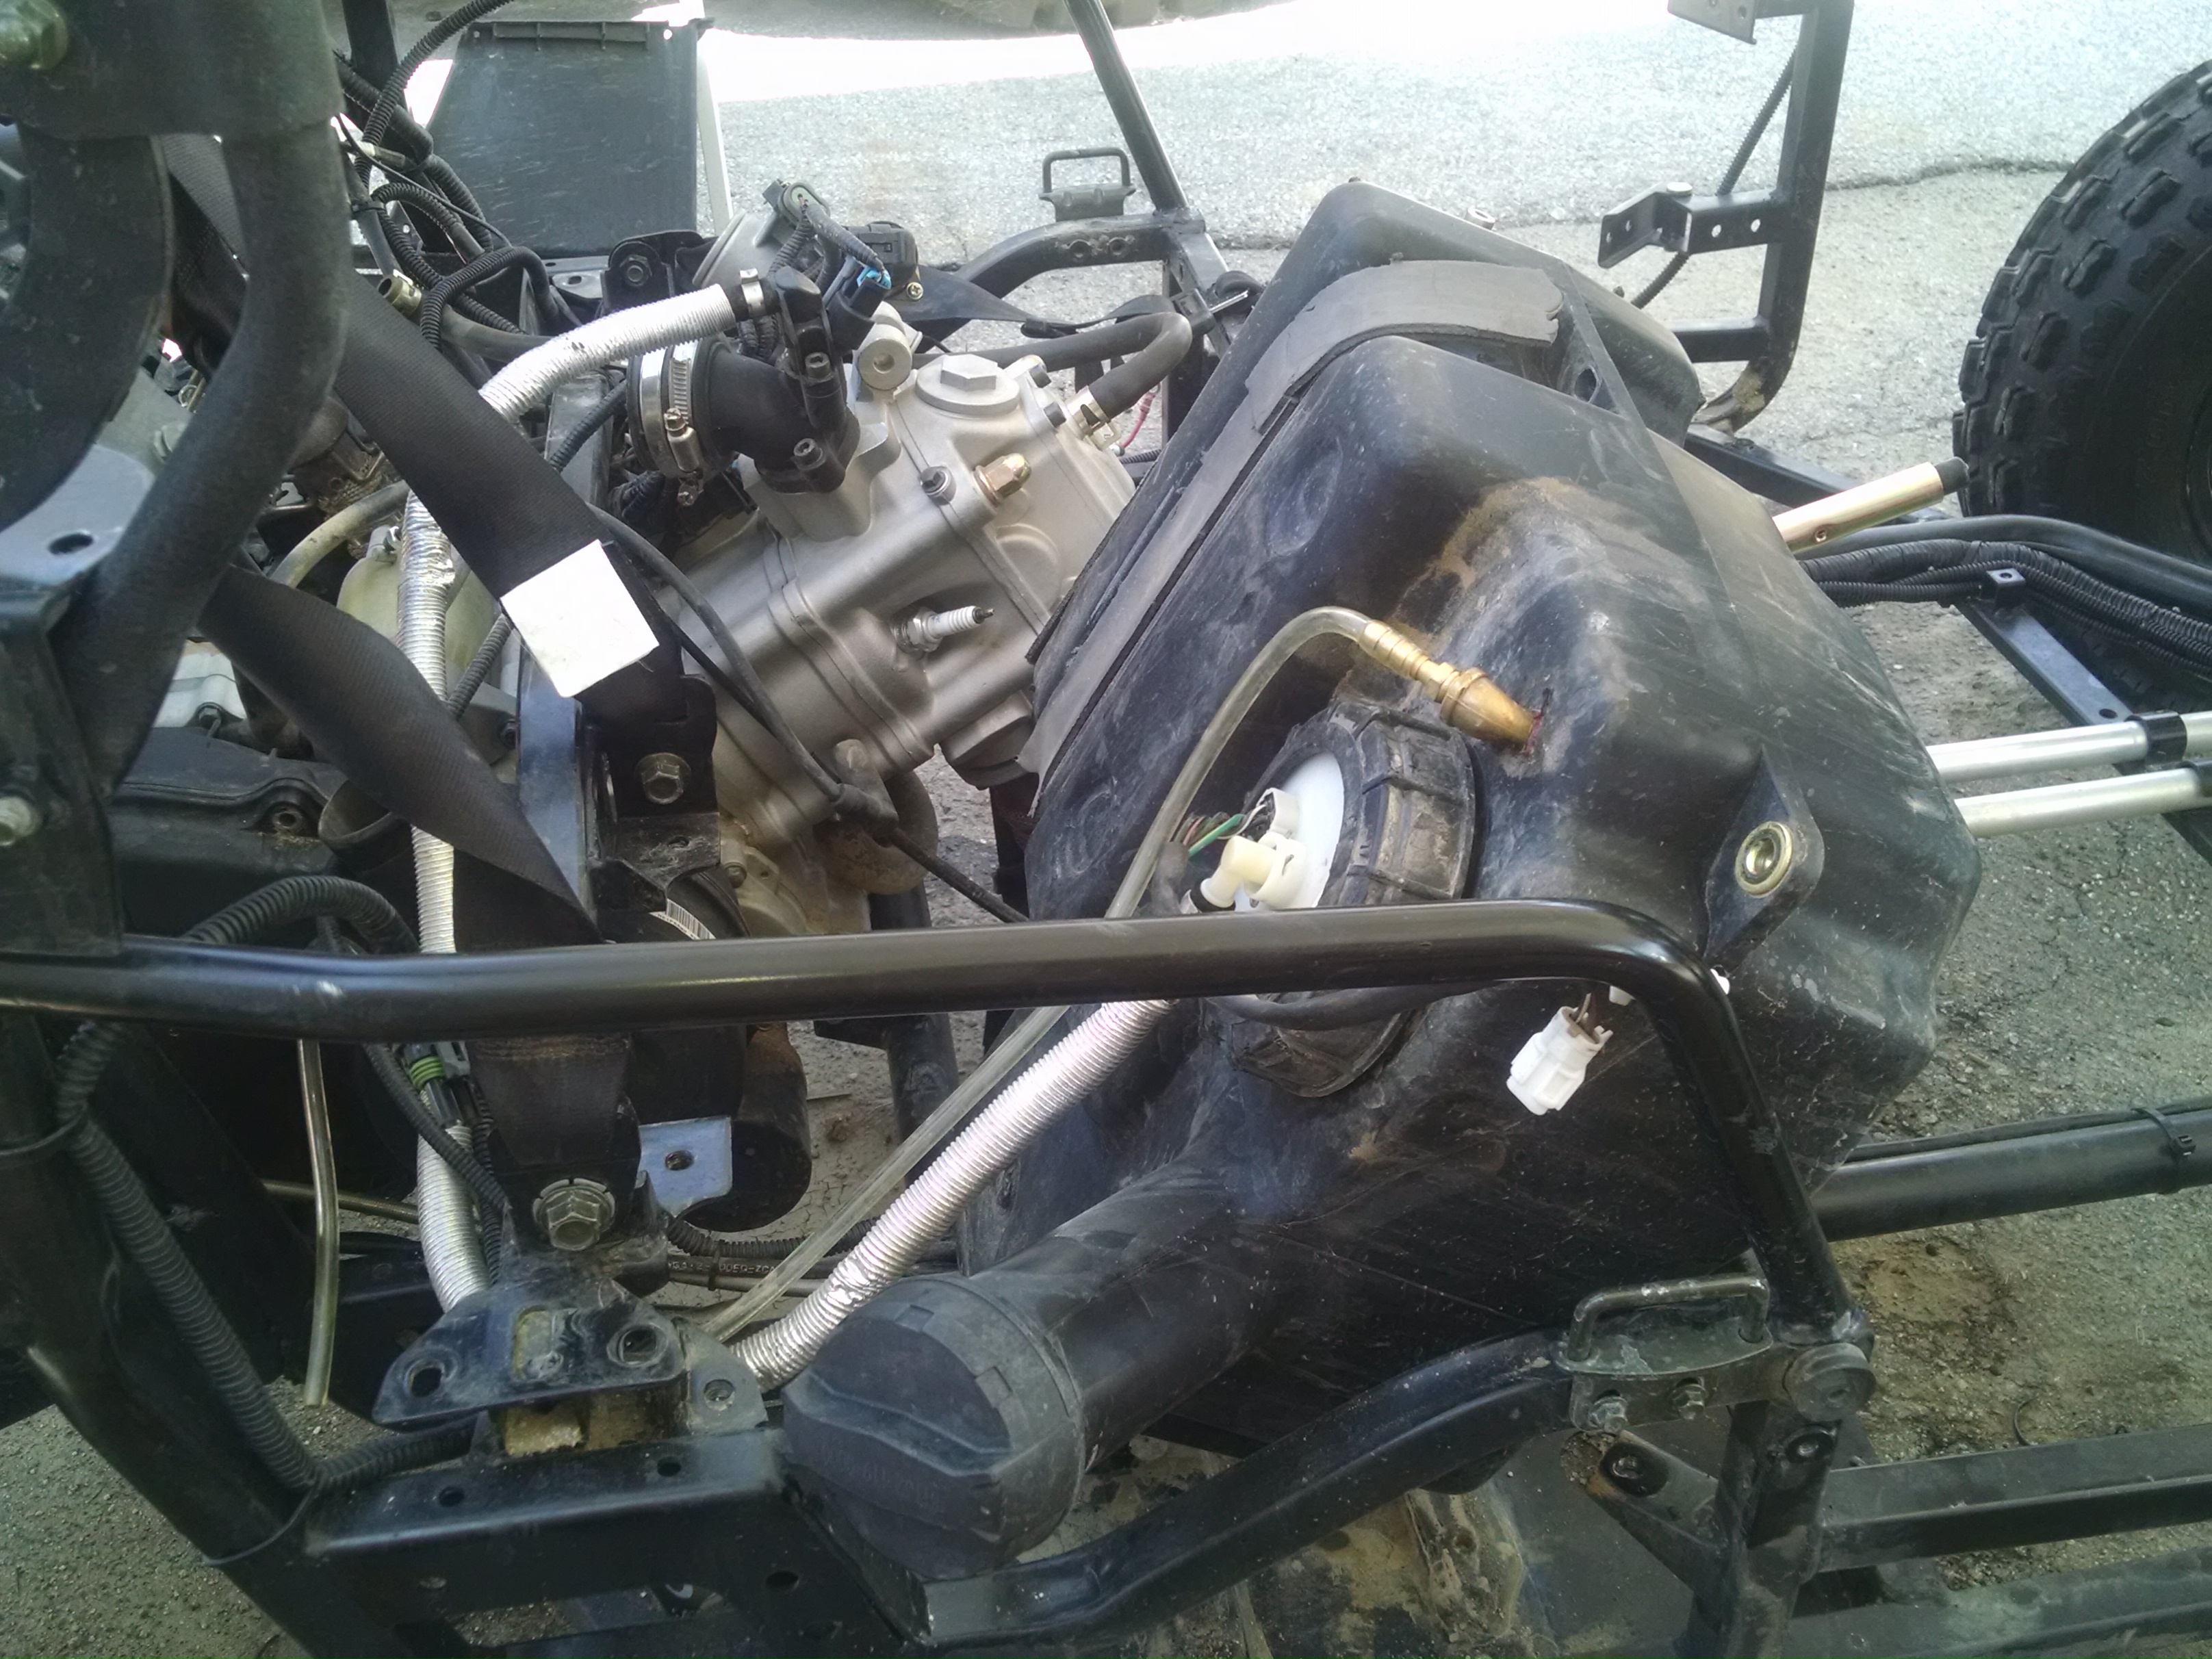
Hello once again, this time I want to bring to your attention a problem that I found out the hard way. On one of our previous trips to Dumont Dunes, my son had the great opportunity to roll his Hisun Strike 250 at very low speeds, no damage to him or the vehicle and it landed up right as well. but one thing we noticed was that fuel had poured all over the passenger!!!. Once we got back I looked at it and found the fuel tank vent was of such poor quality that it broke at the fuel tank. Not sure if it was from the roll over or just from being made from poor quality plastic. Well, I found a great long lasting repair and wanted to share it with you all. It is something that is found is pretty much most off road race vehicles. I installed a roll over valve in place of the fuel tank vent. I am including some pics to show you. In the event we roll it over once more, the vent valve will automatically shut off the flow of fuel. It has a ball valve in it and when upside down, it blocks the flow of fuel so that it can't pour out all over the persons in the vehicle and have a potential fire! It is gravity controlled. The valves are low cost at about $15 or so. Cheap insurance when it comes to safety for sure. I cleaned out the hole where the previous fuel tank vent was. I removed the fuel tank pump/filter assembly. I then drilled out the hole just smaller than the ball check valve. I was able to reach into the fuel tank to catch any plastic that the drill might push into the tank as well. I used a fuel resistant sealant on the threads as well. I used a 1/4" NPT thread fuel tank check valve with a 5/15 hose barb. This is a much better product than the OEM product. I would recommend every one install one of these for safety if they get a chance. Or at the very least inspect your fuel tank vents. No one wants fuel leaking on them in the event of a roll over.

-
 1
1
-
-
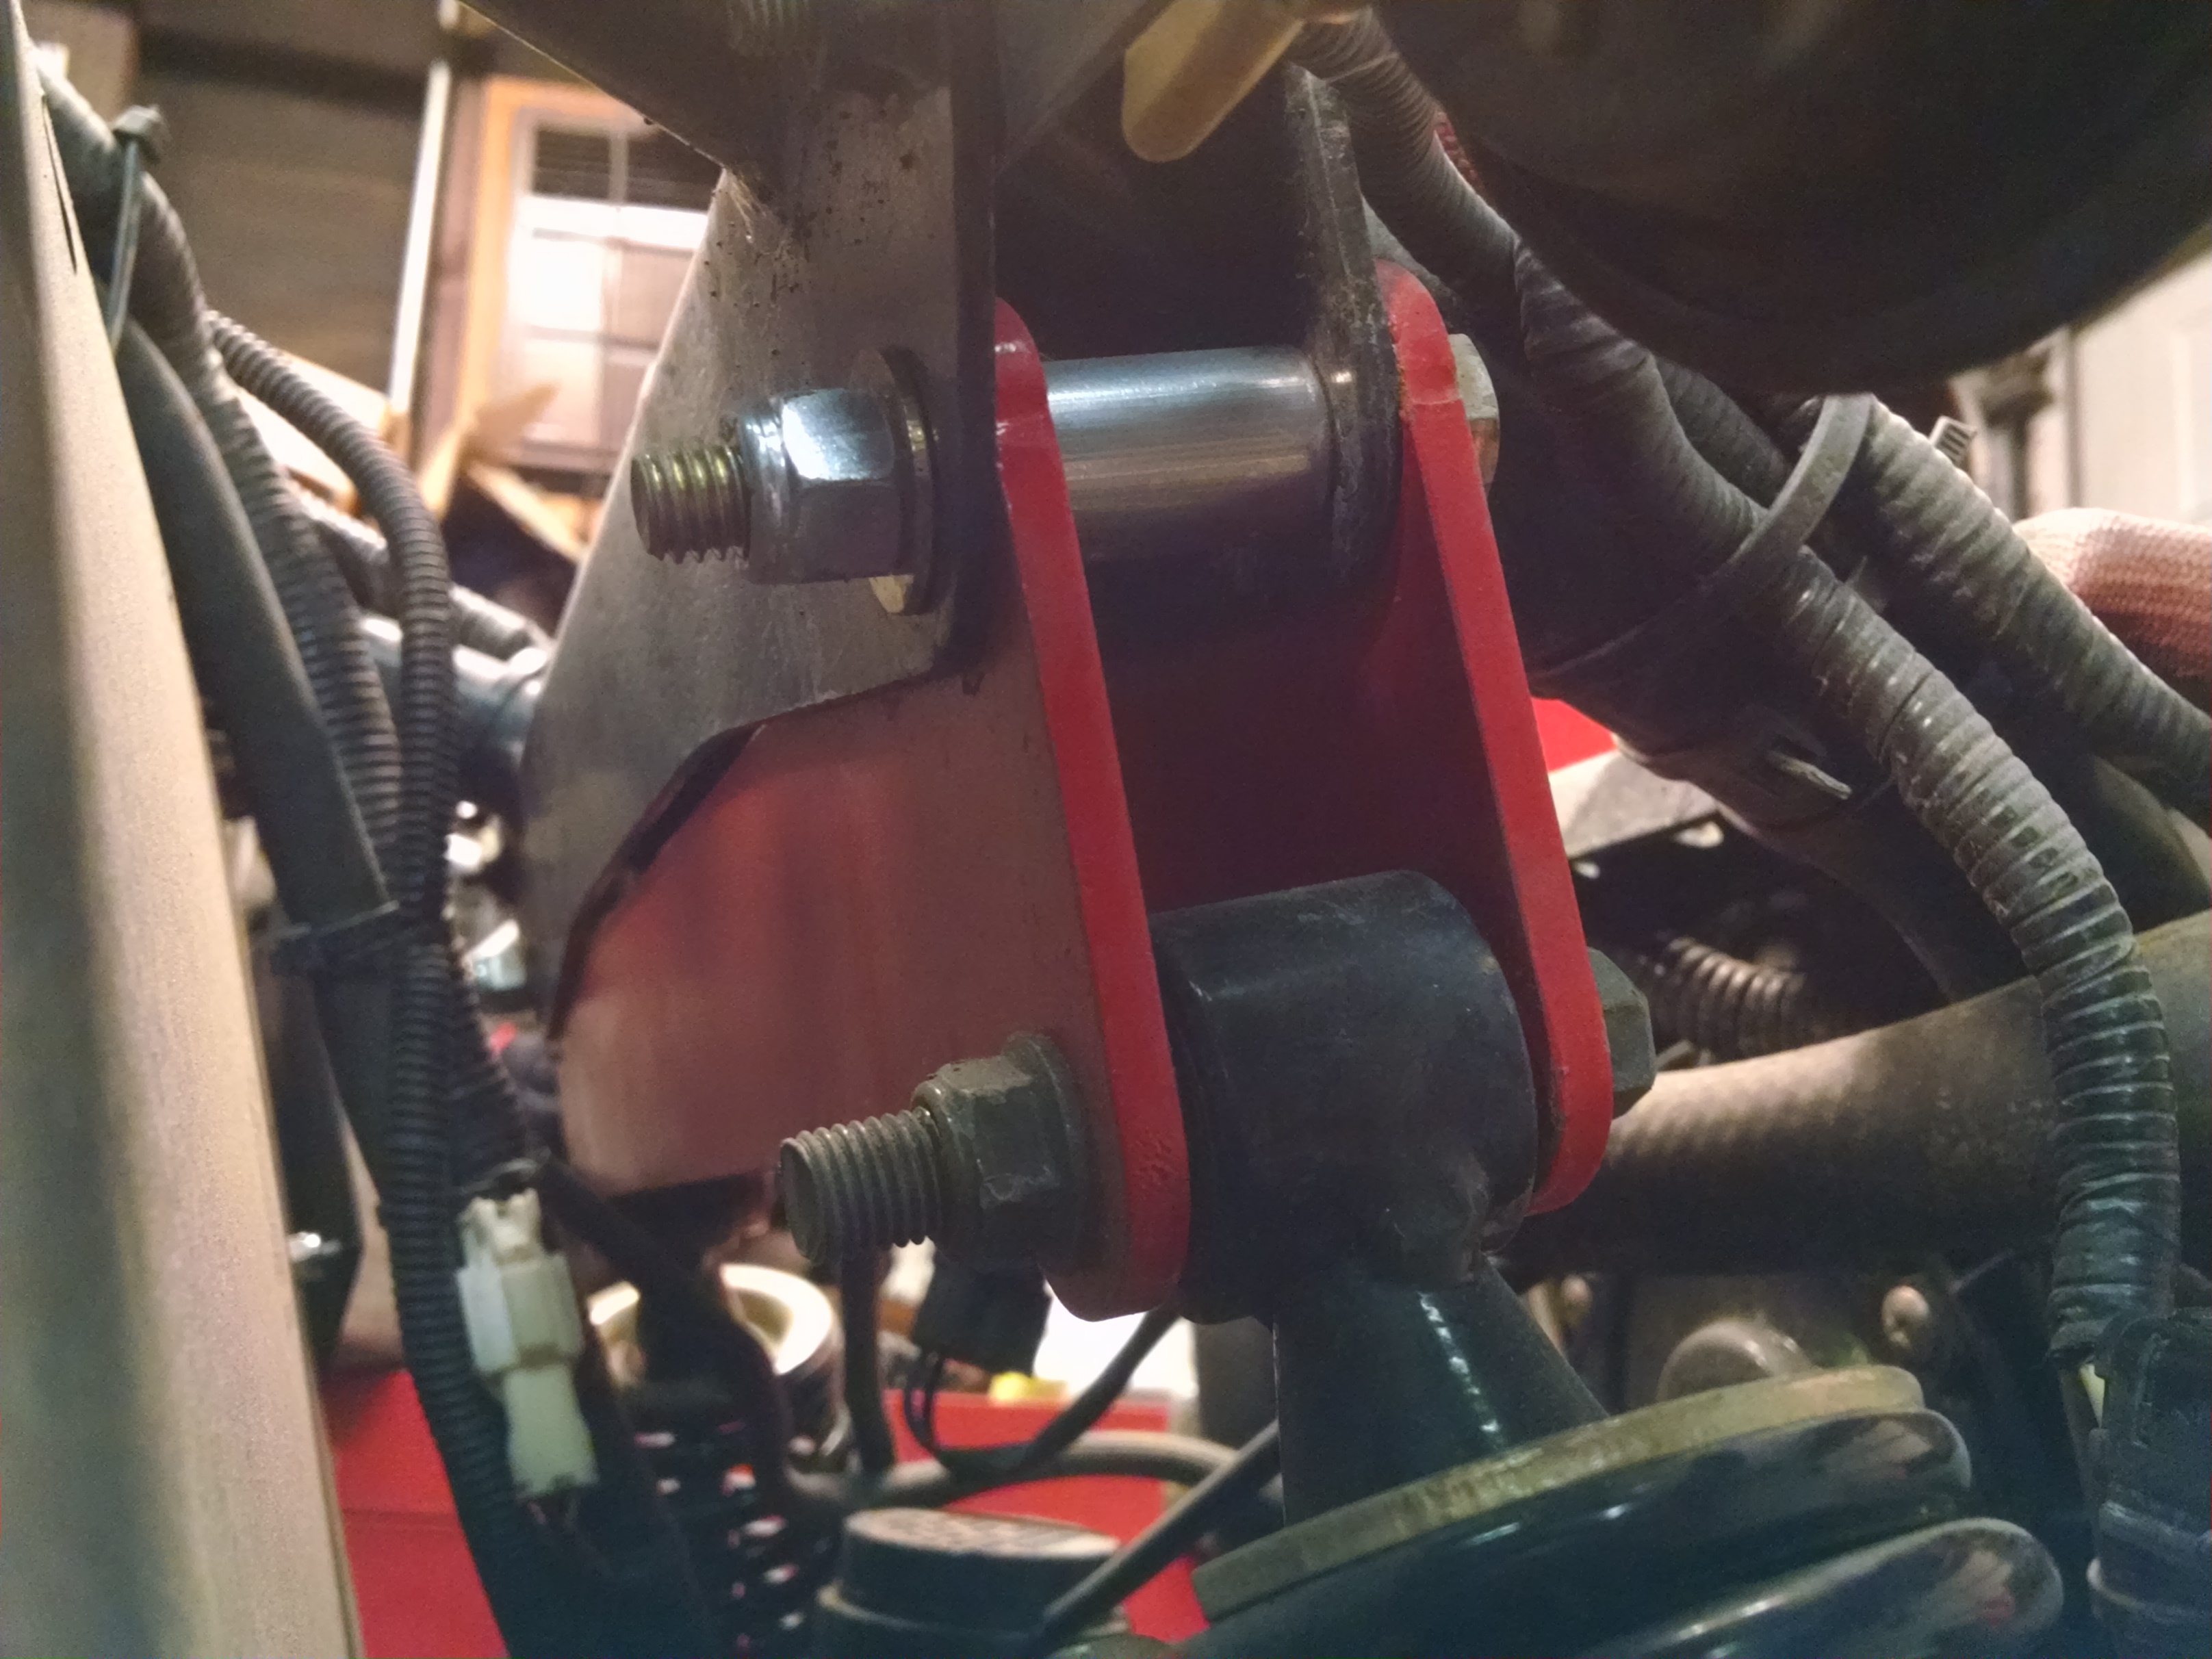
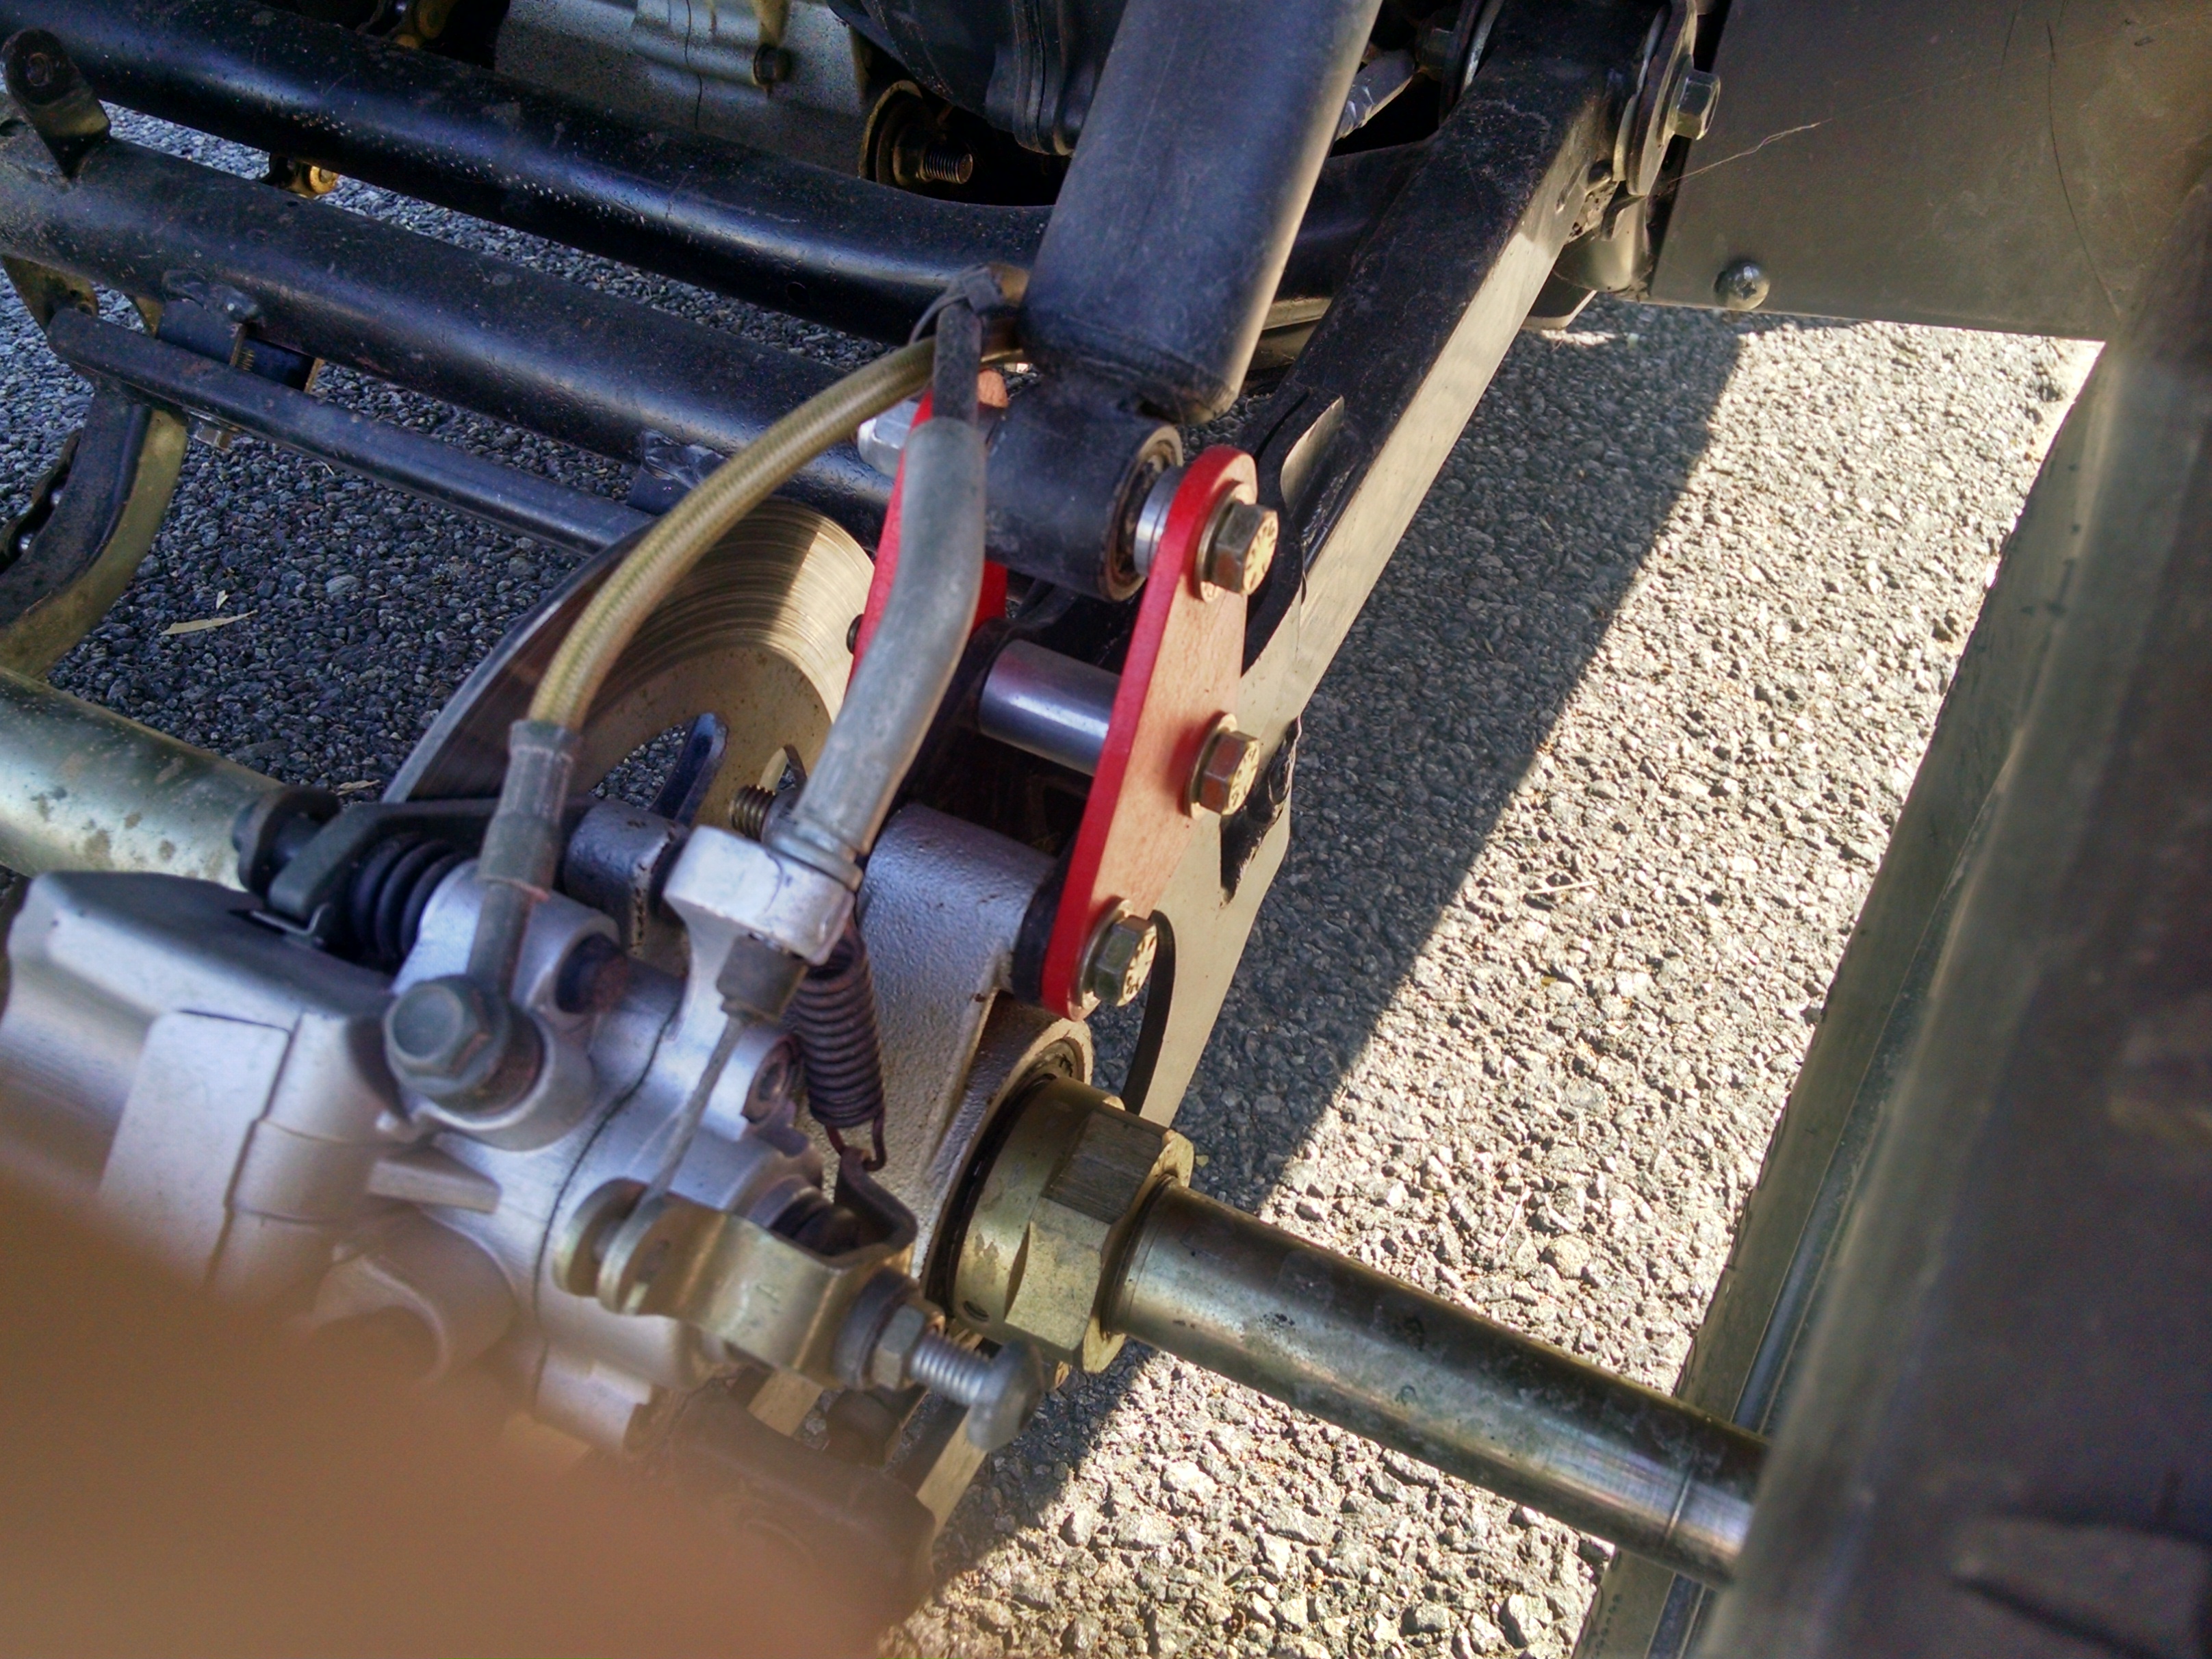
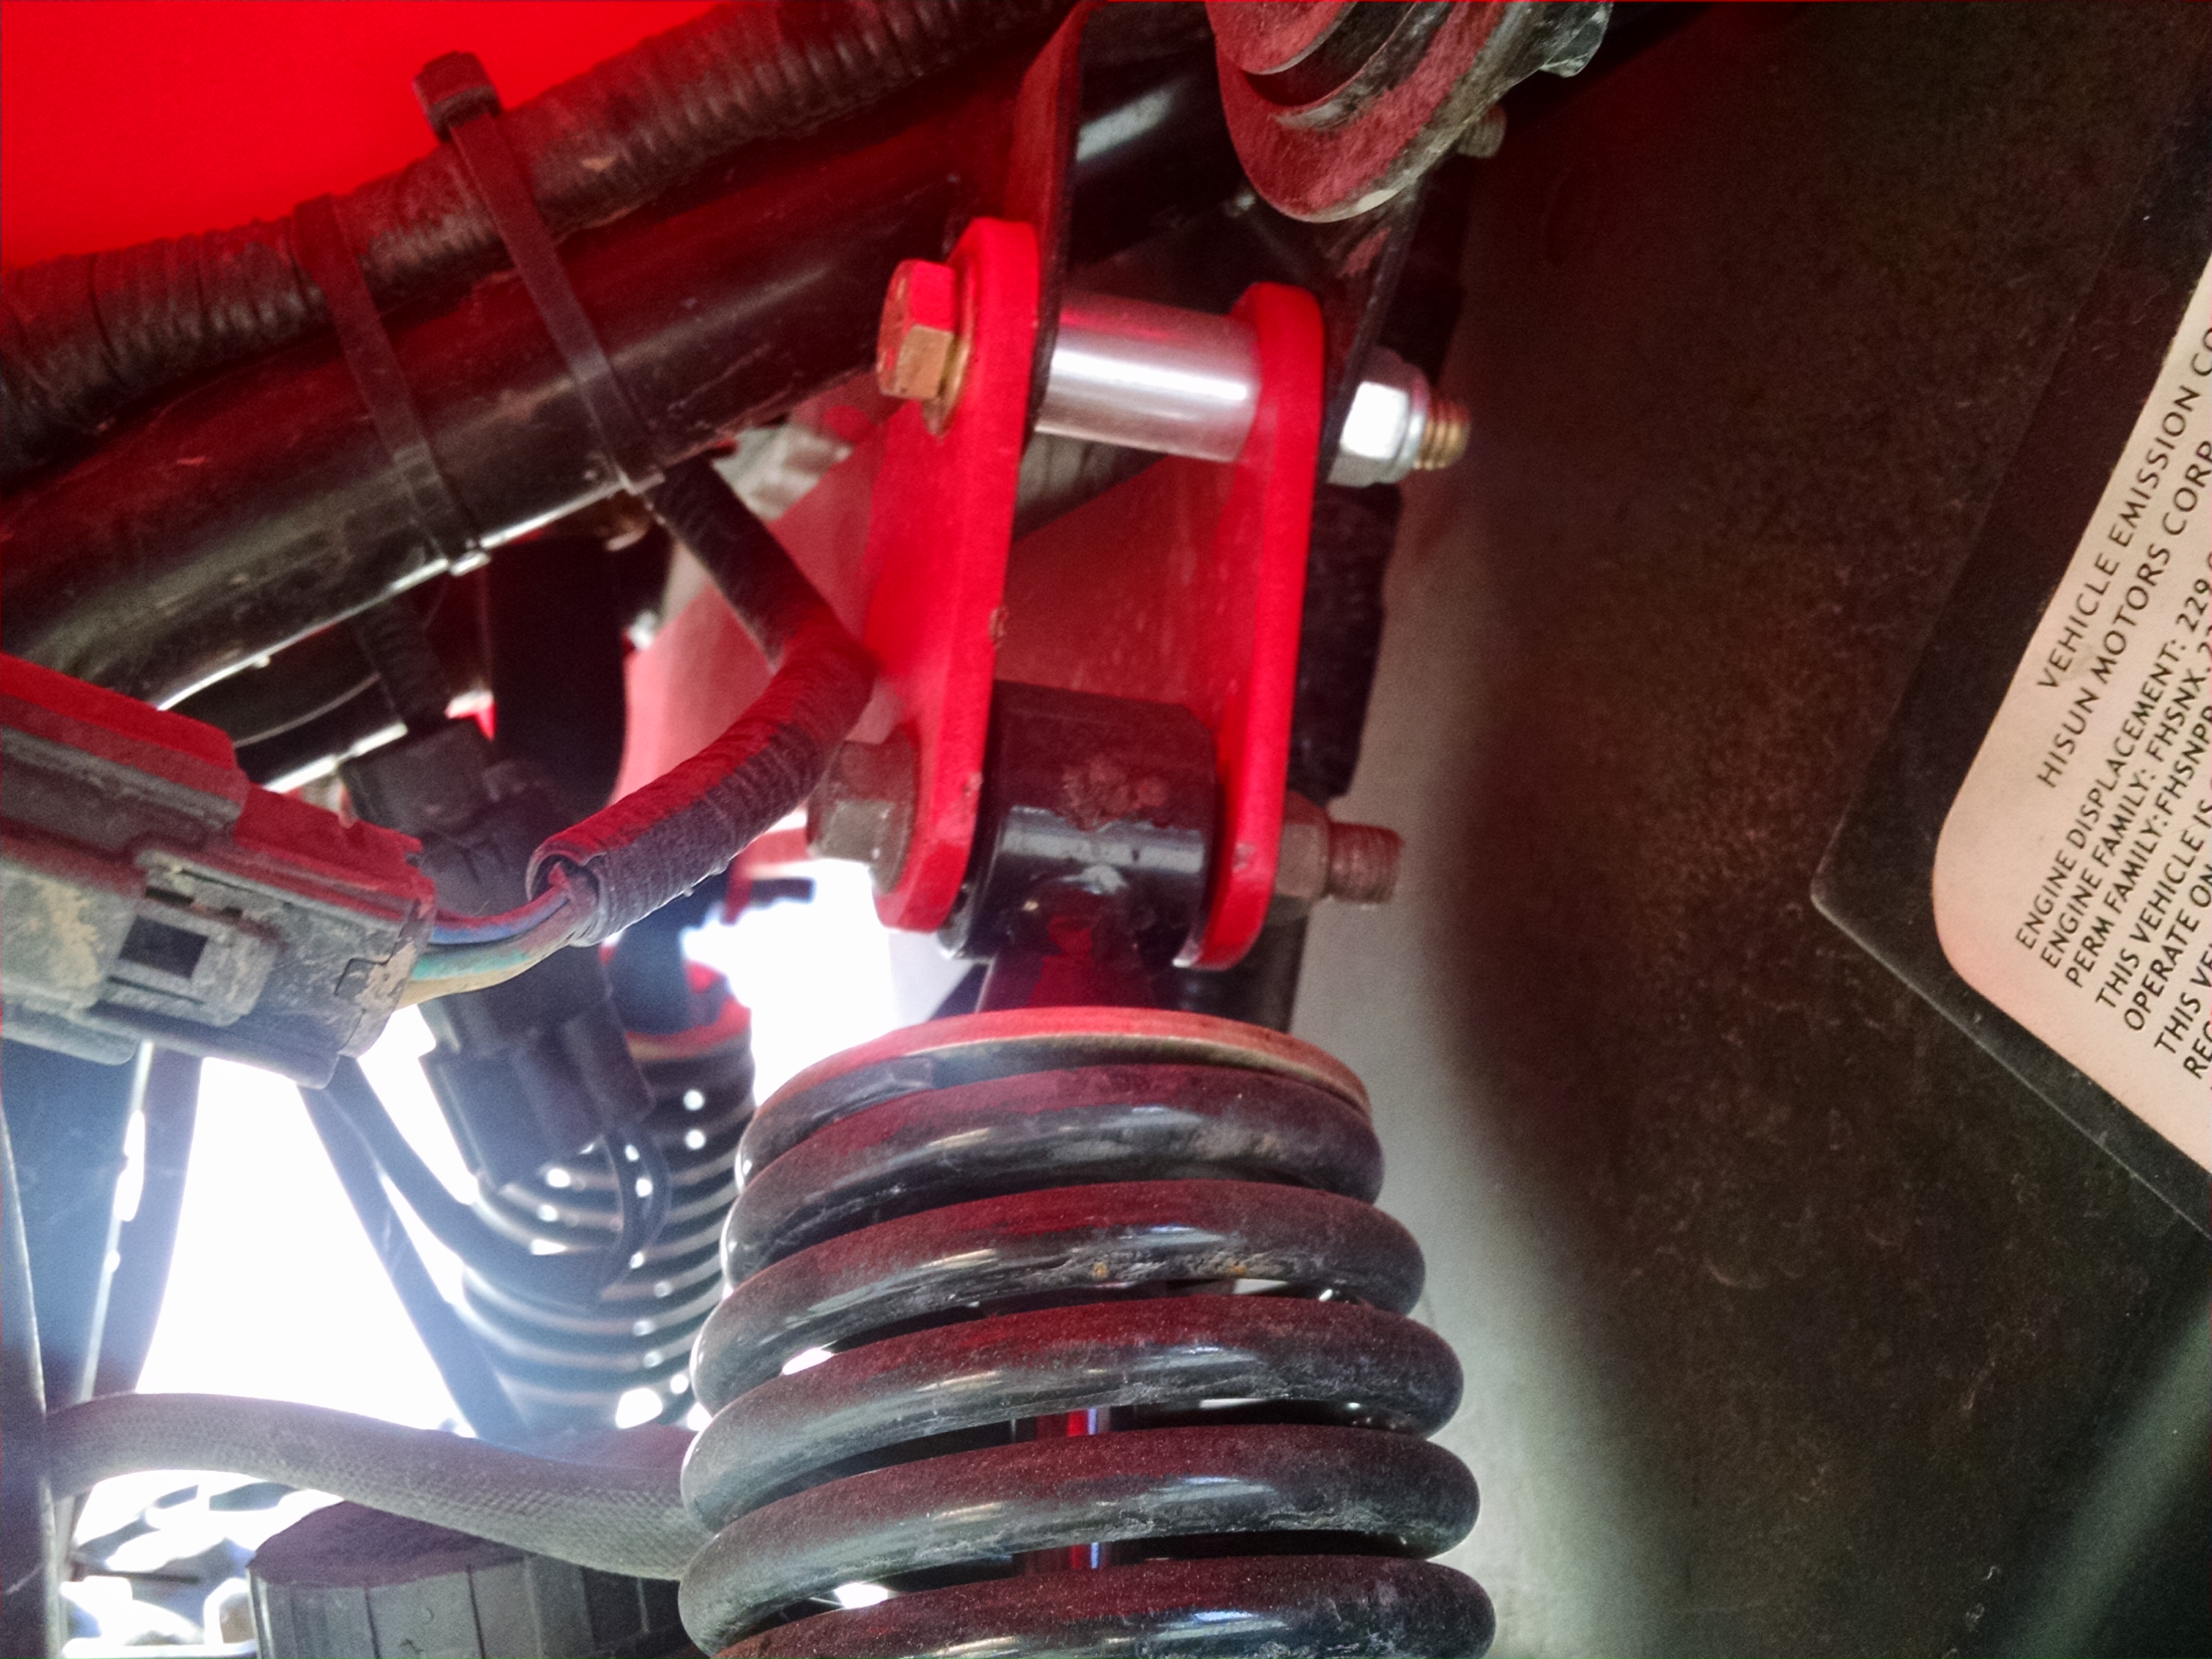
I wanted to update some pics of the lift kit for you, more so the front lift kit area. So you can have a better look at it. The kit comes with all mounting plates, bolts, nuts, spacers and everything needed to simply bolt in. No drilling required. Powered coated in red for protection. Only $59.99
-
With my unit, I am able to drive it into my dually with my 200 lbs fat but in it up the ramps, it did struggle, but it made it up the ramps into my truck under its own power. Sorry again to hear about yours.
-
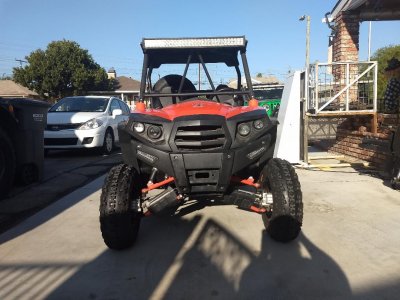
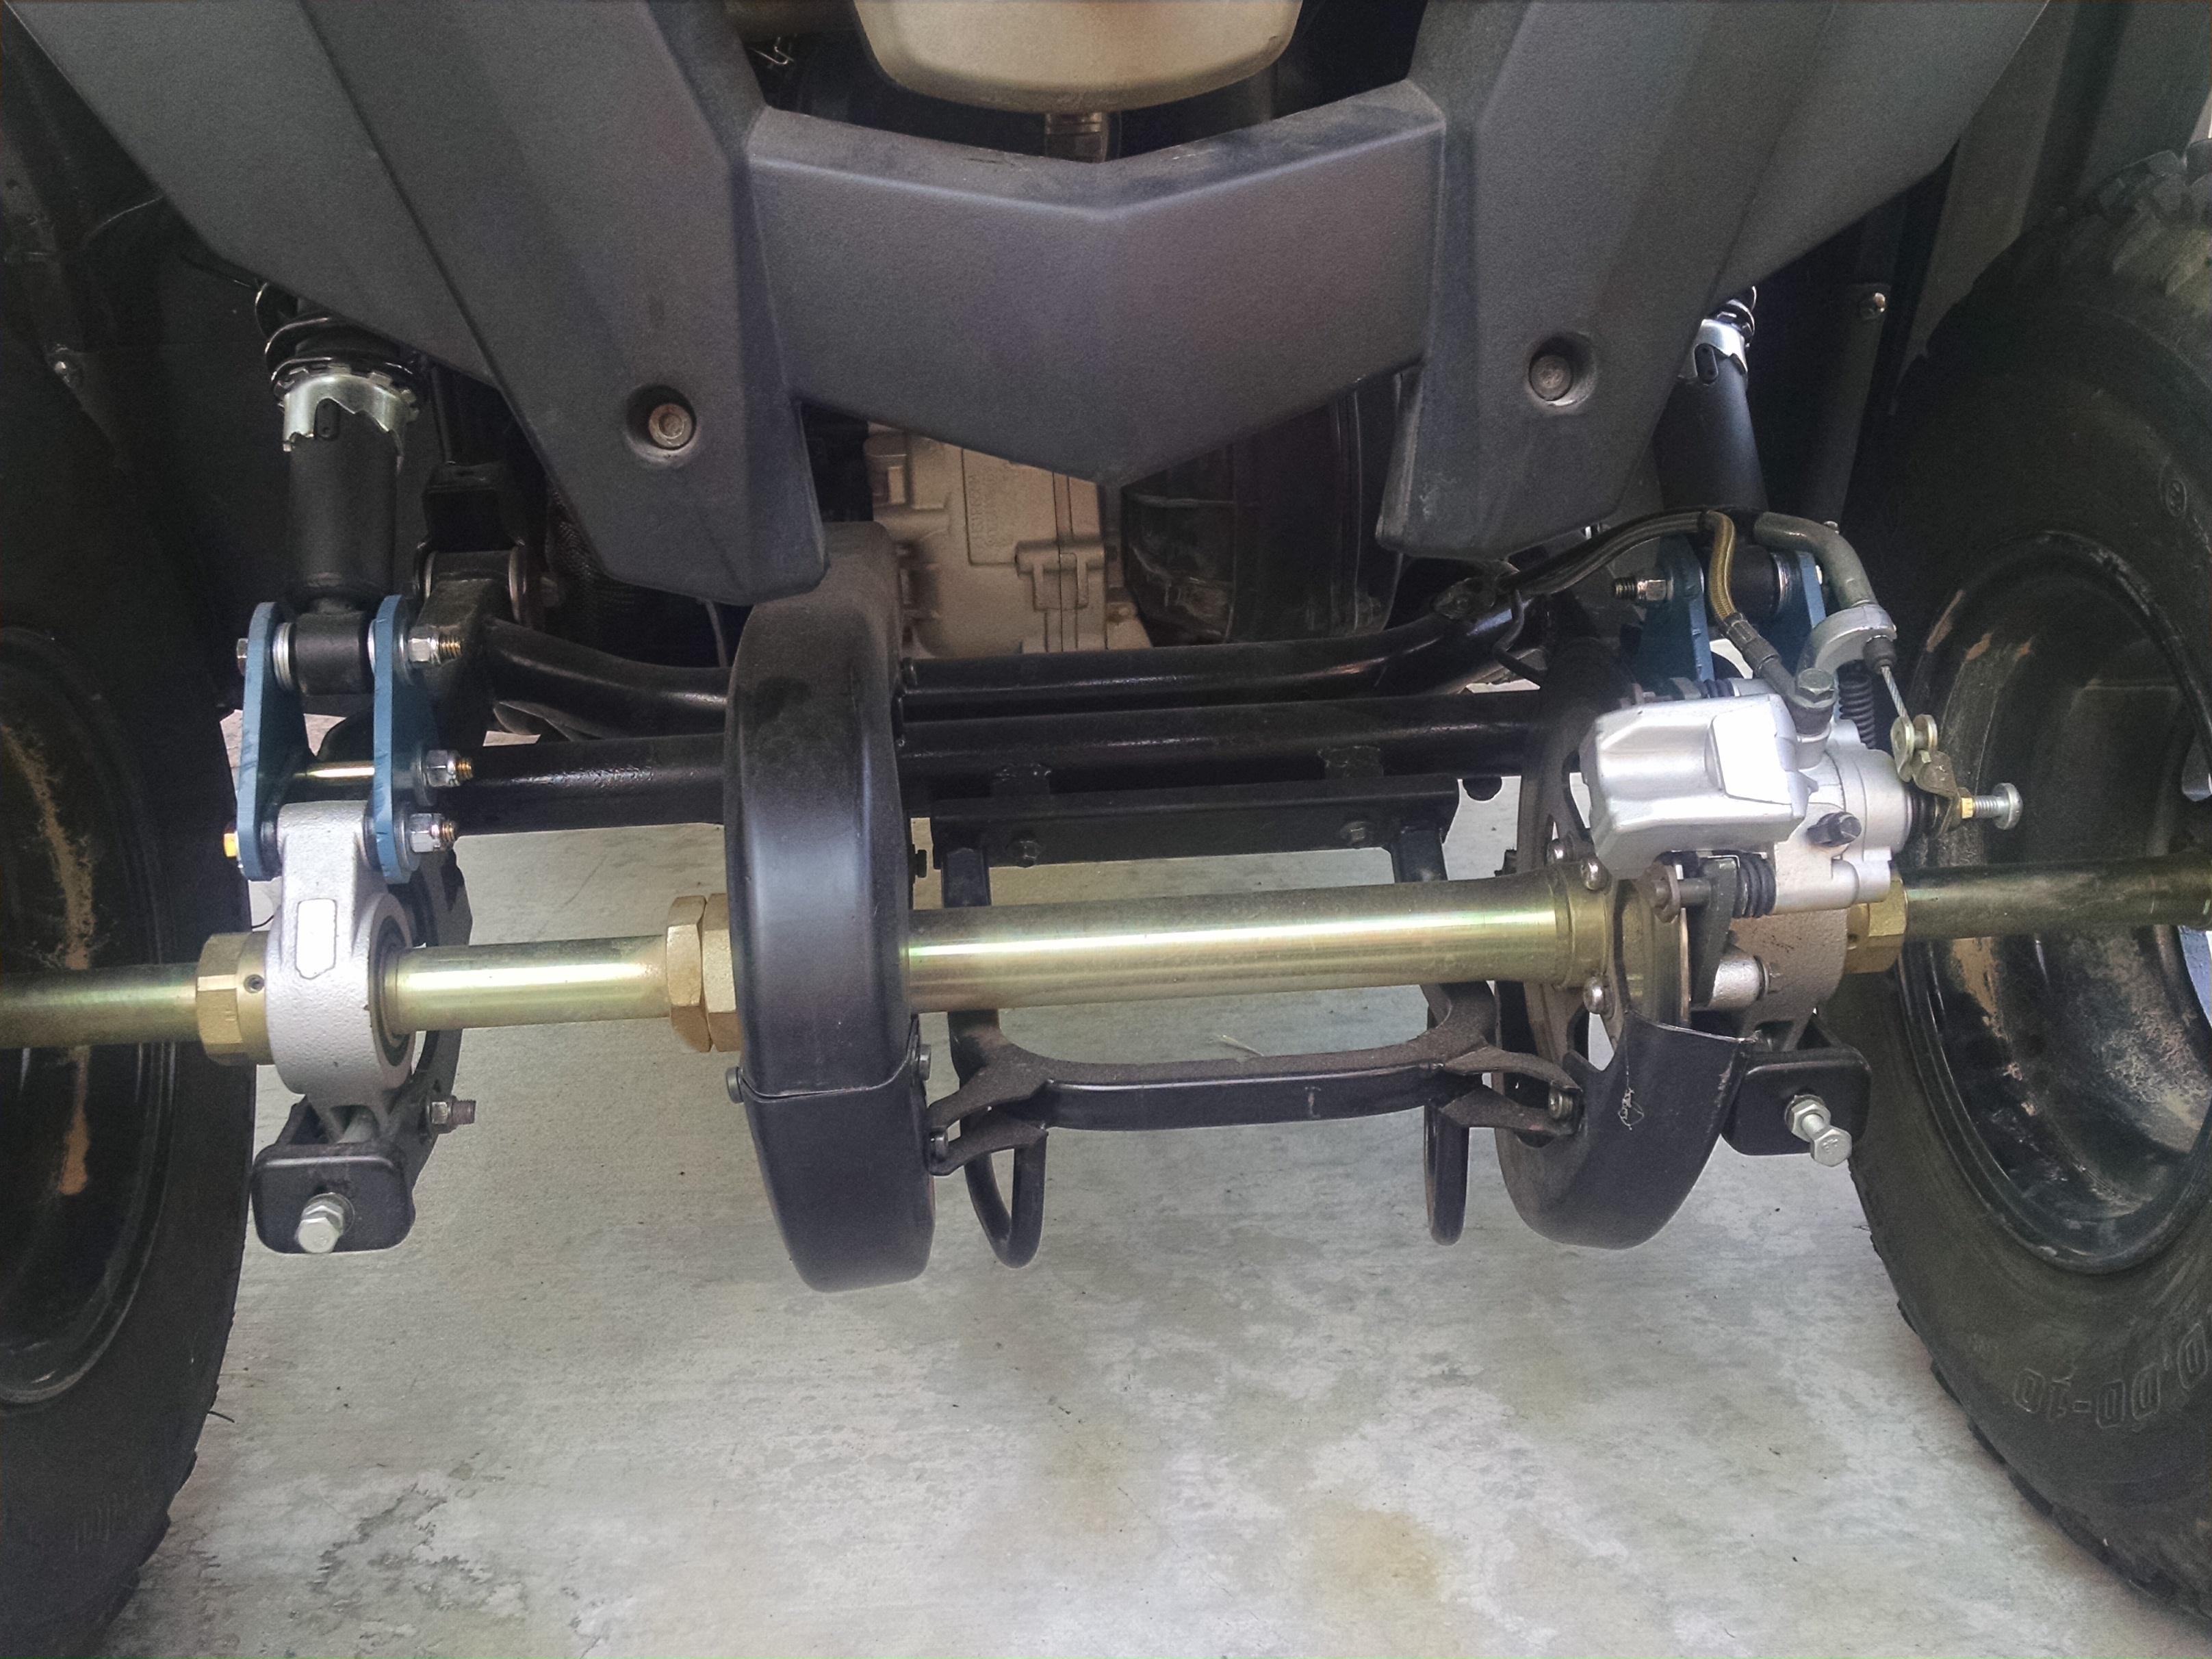
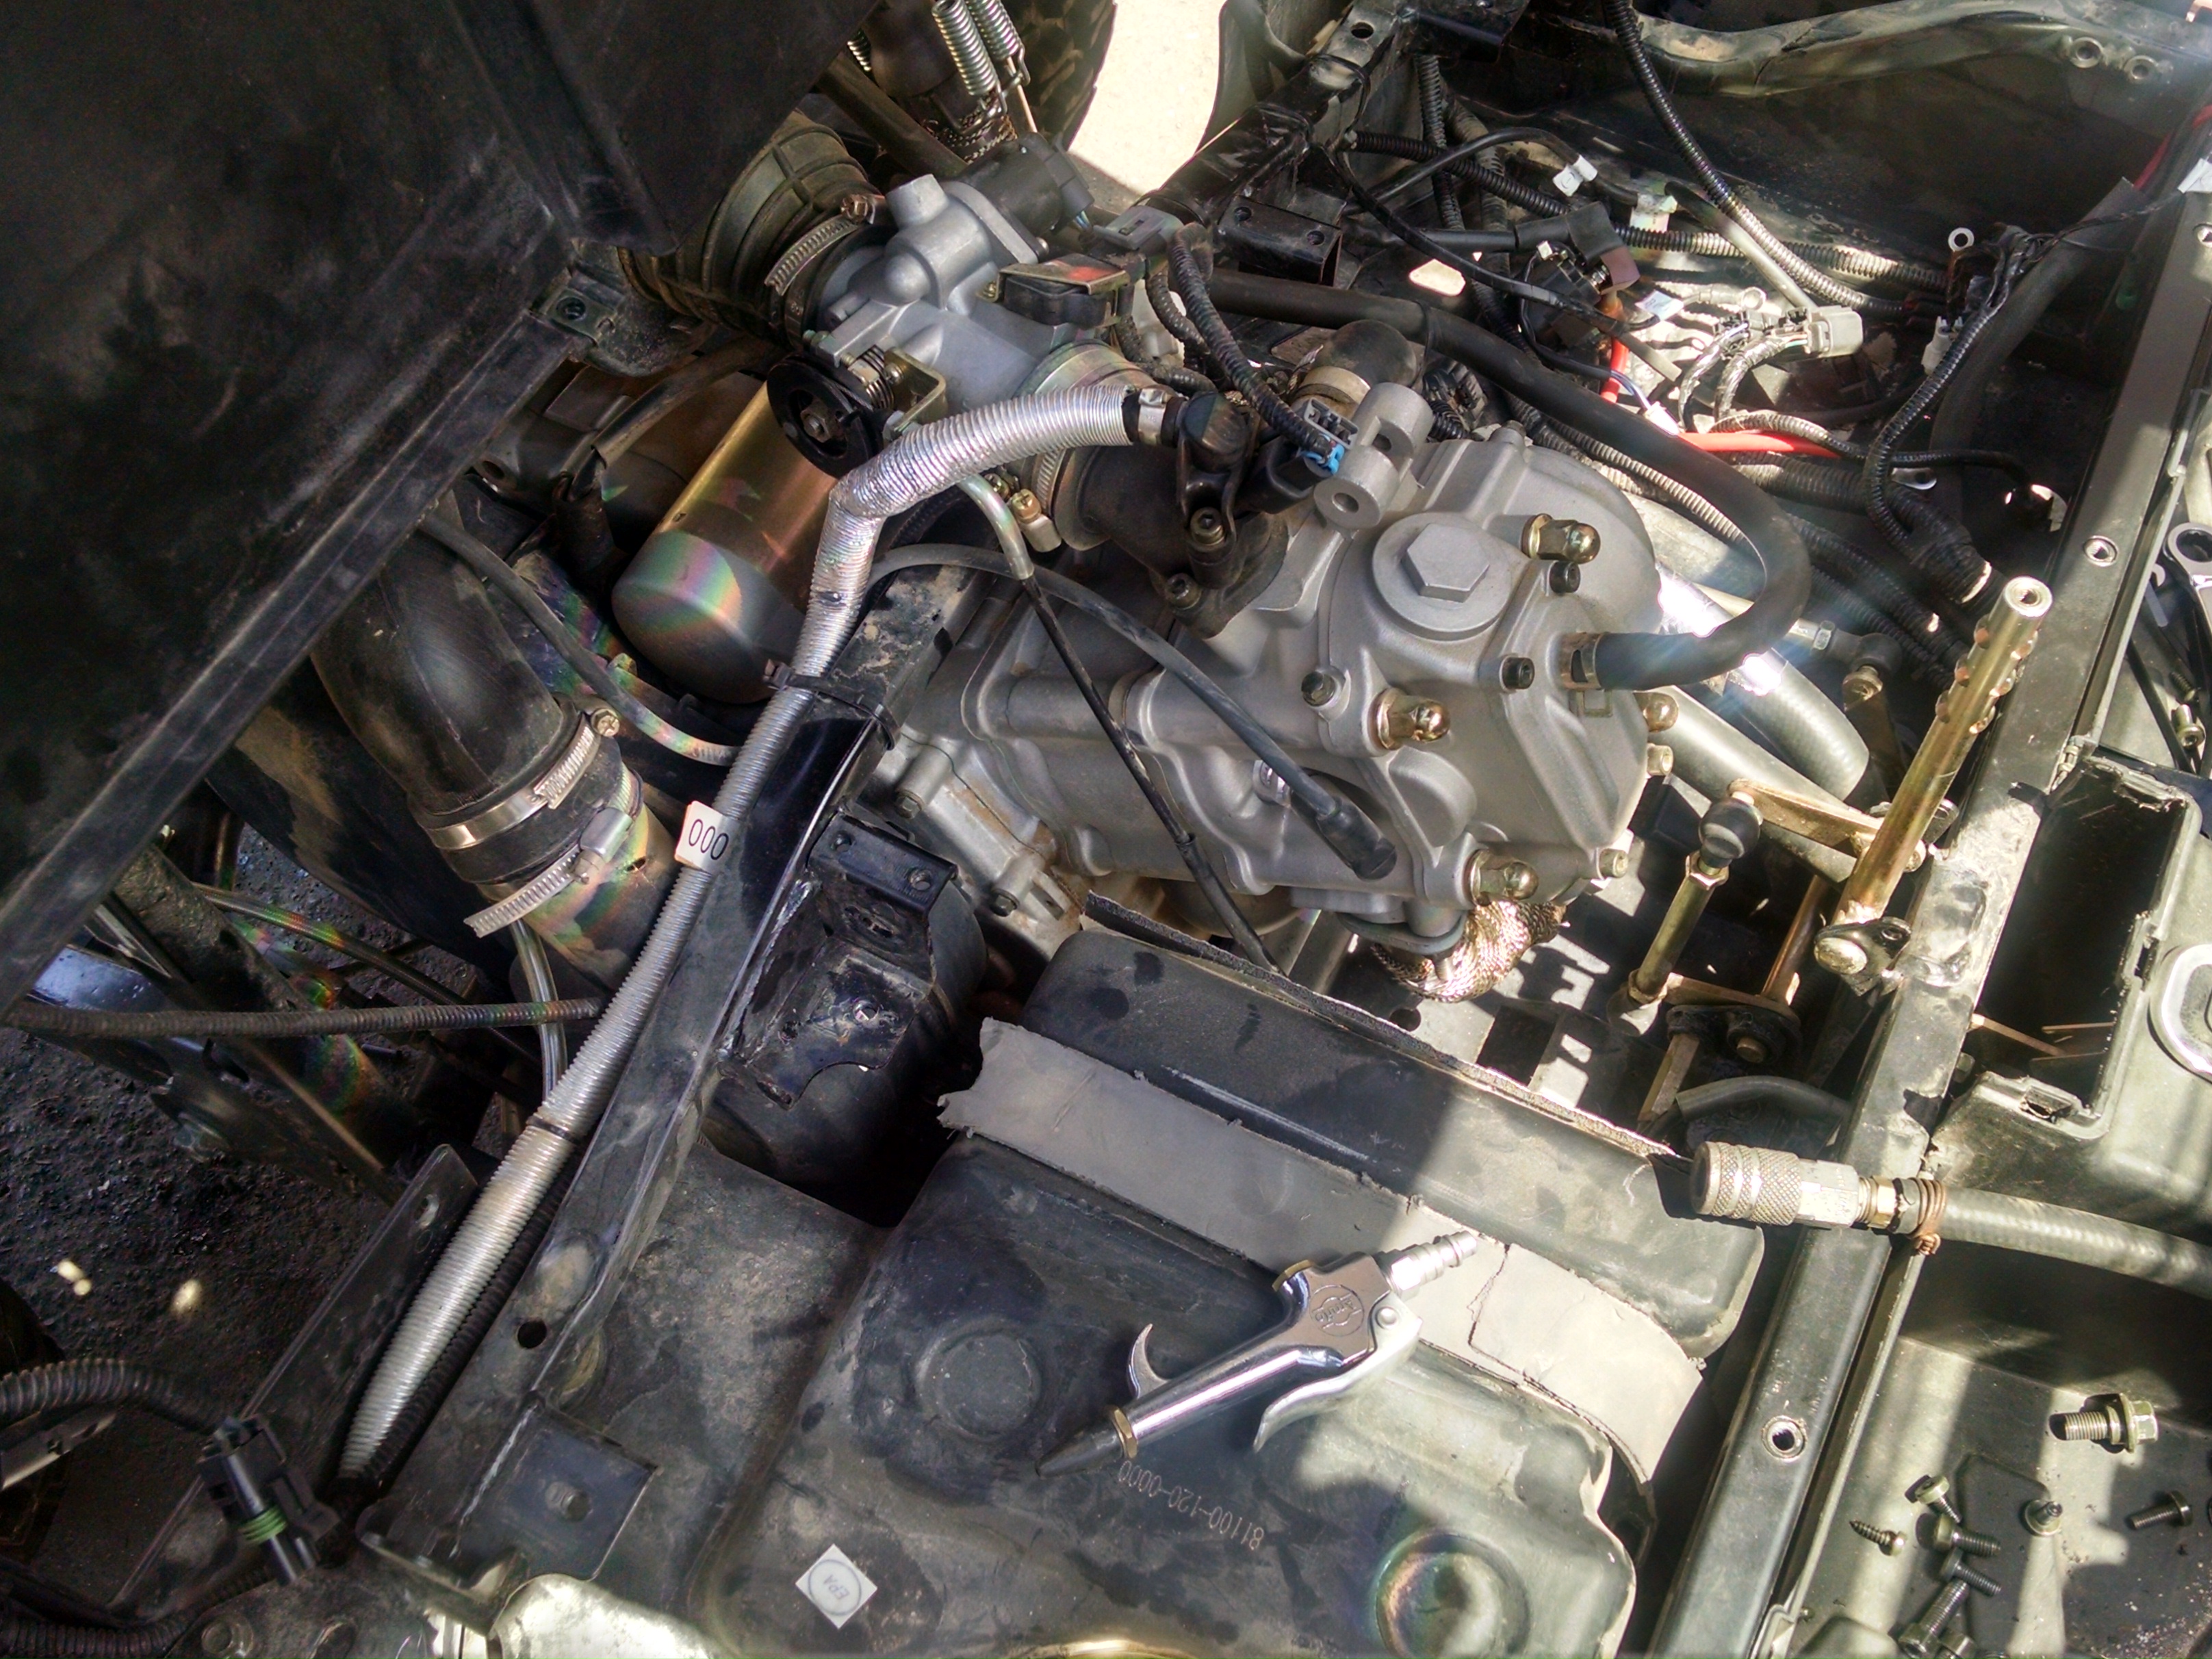
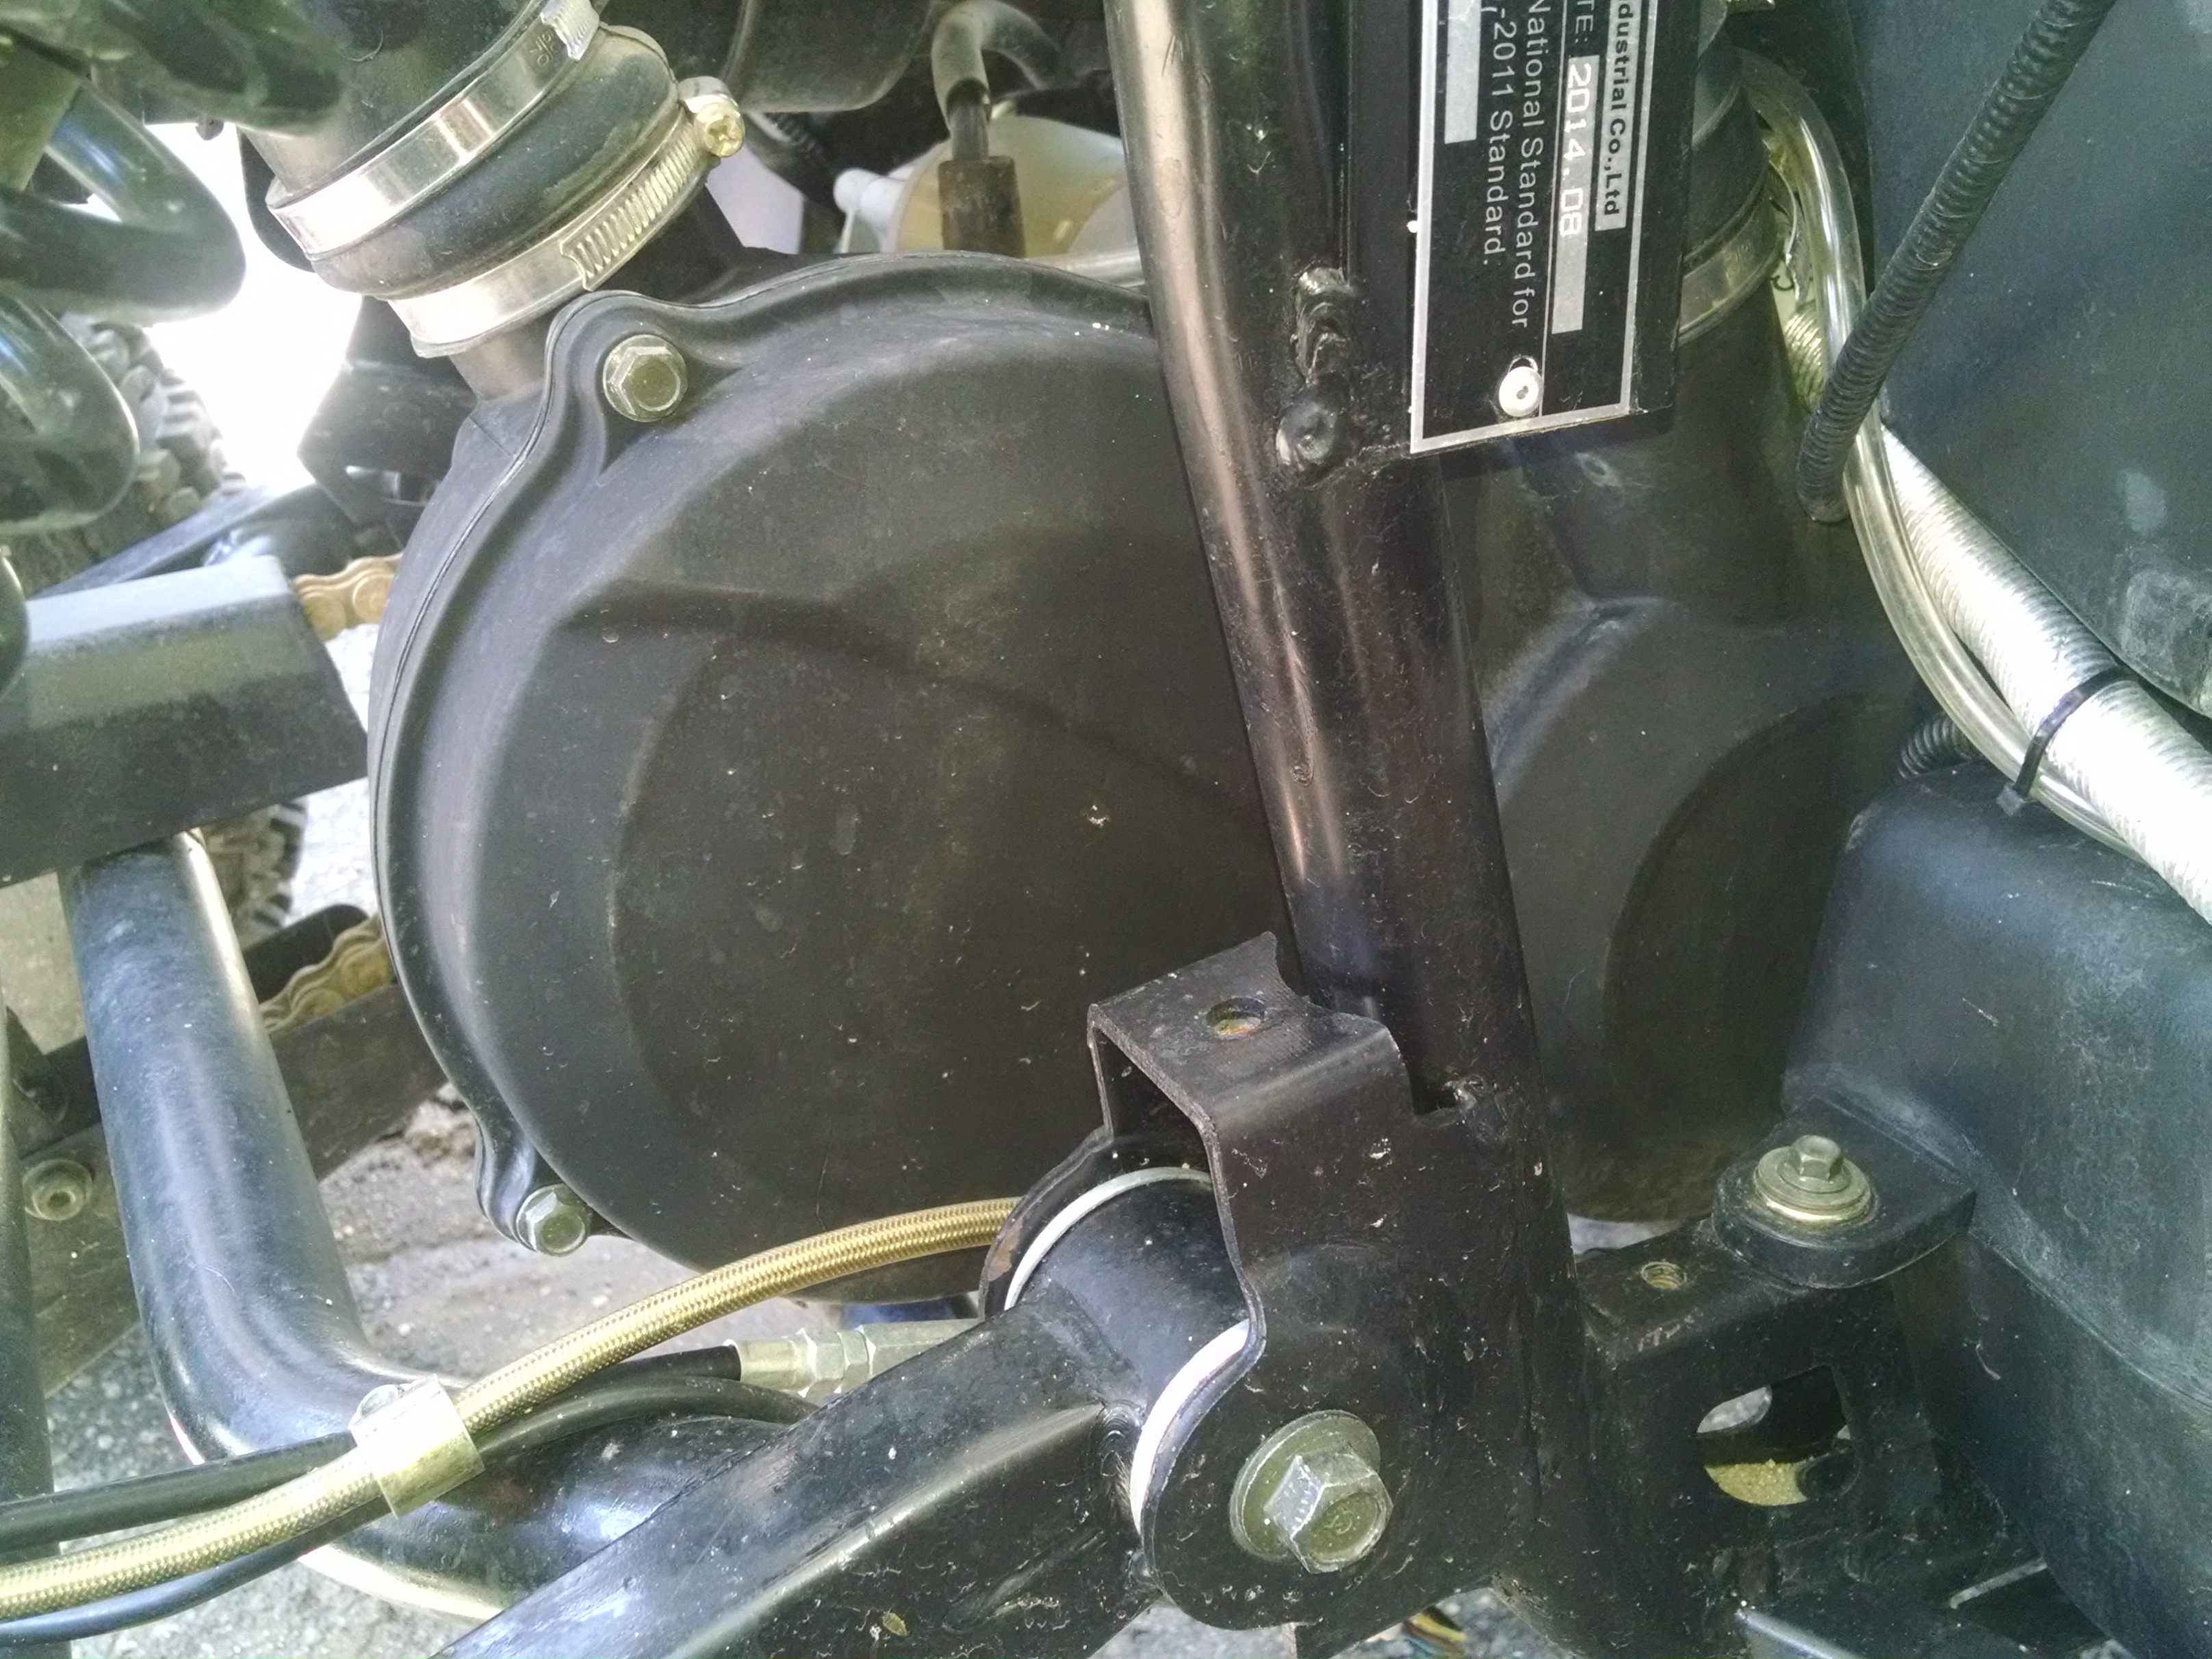
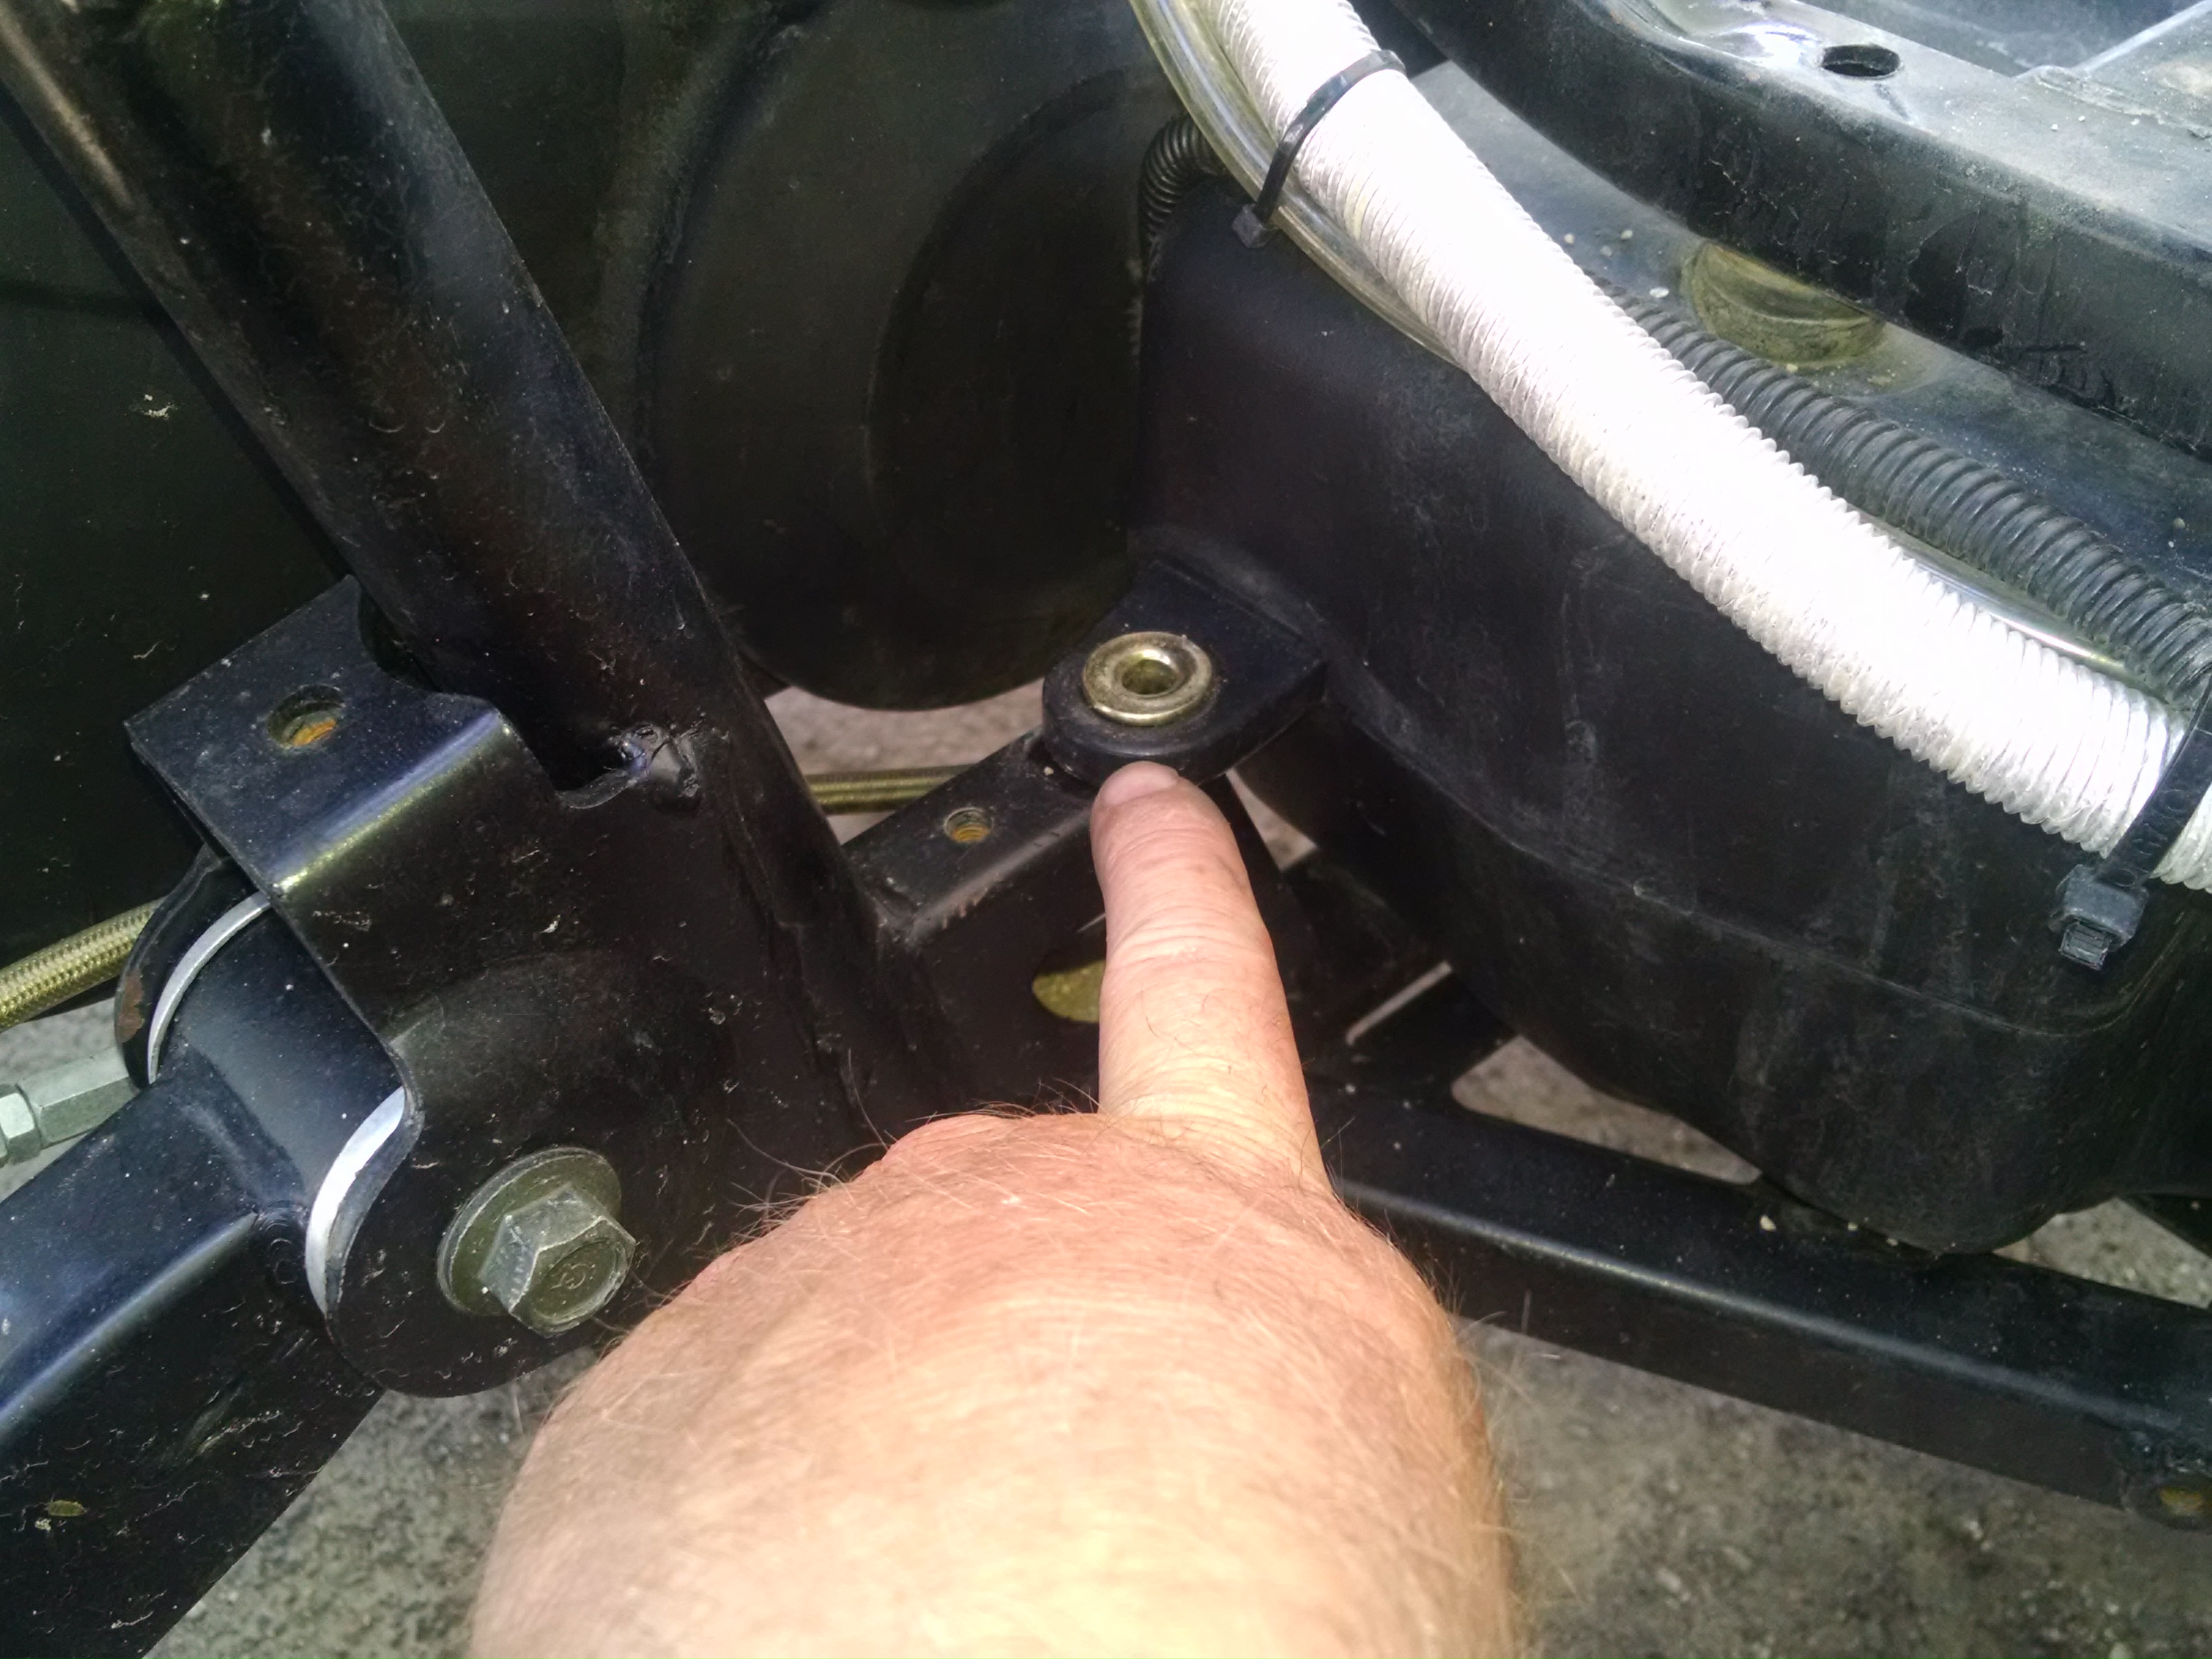
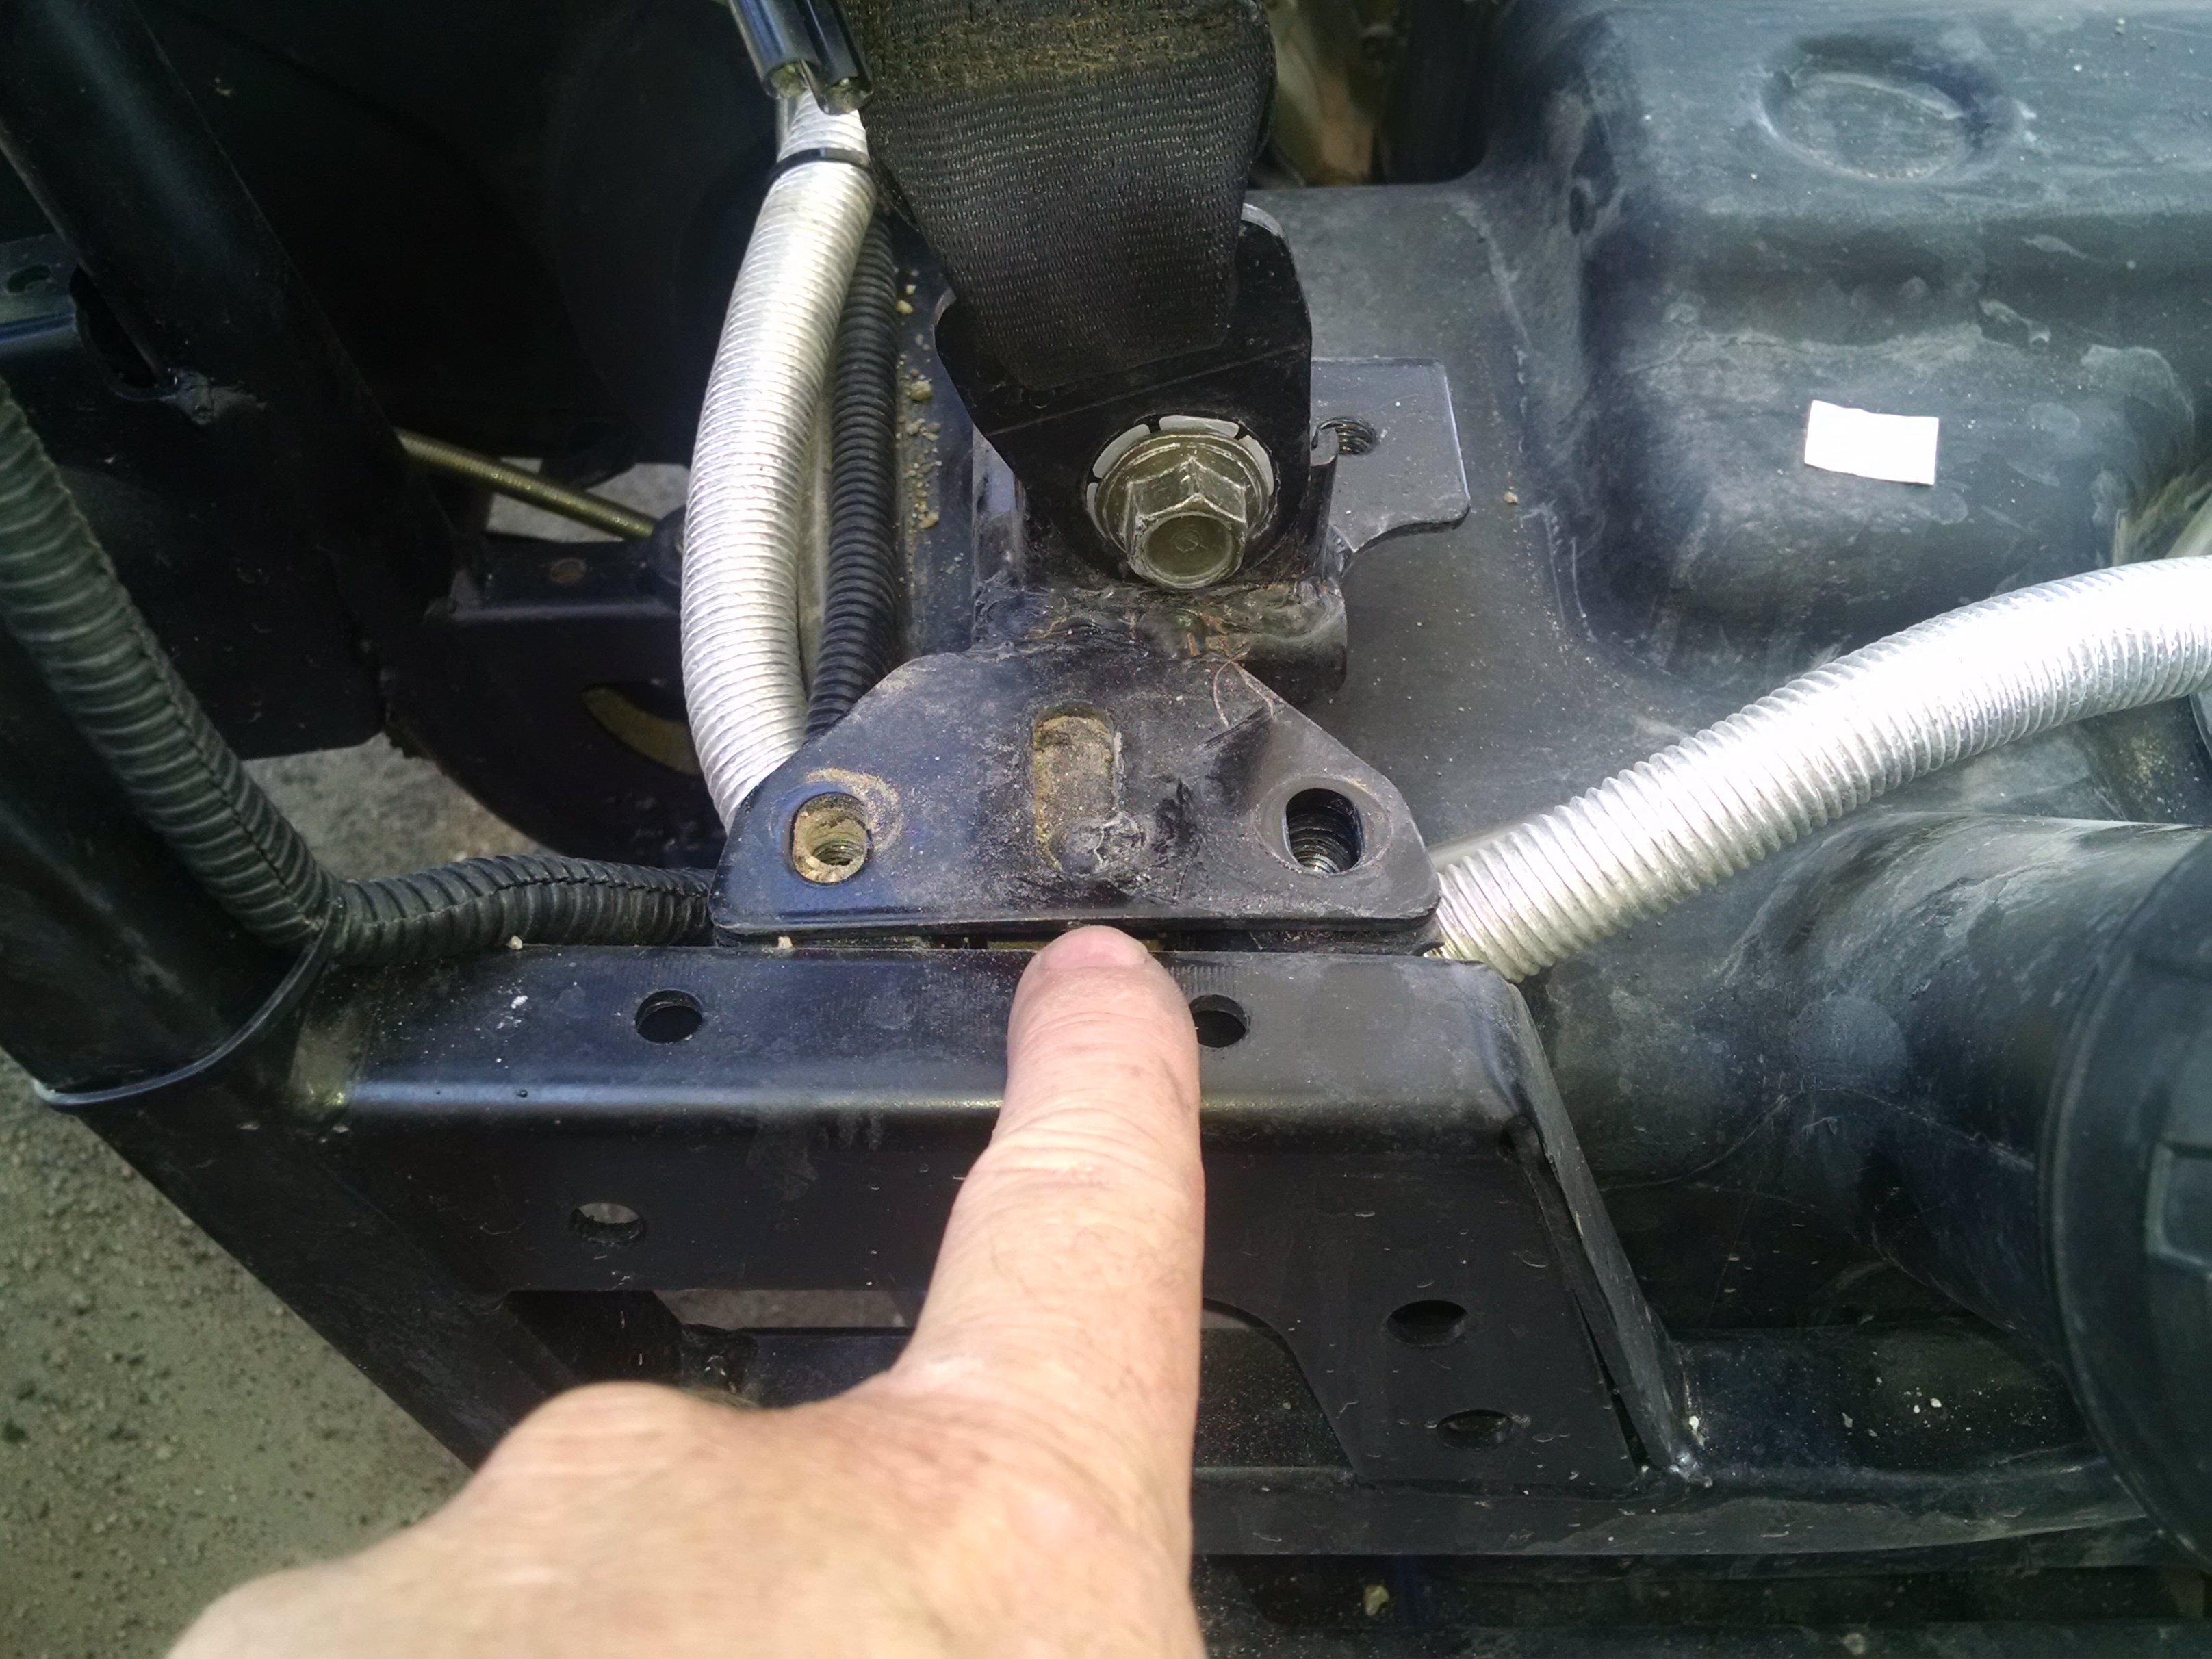
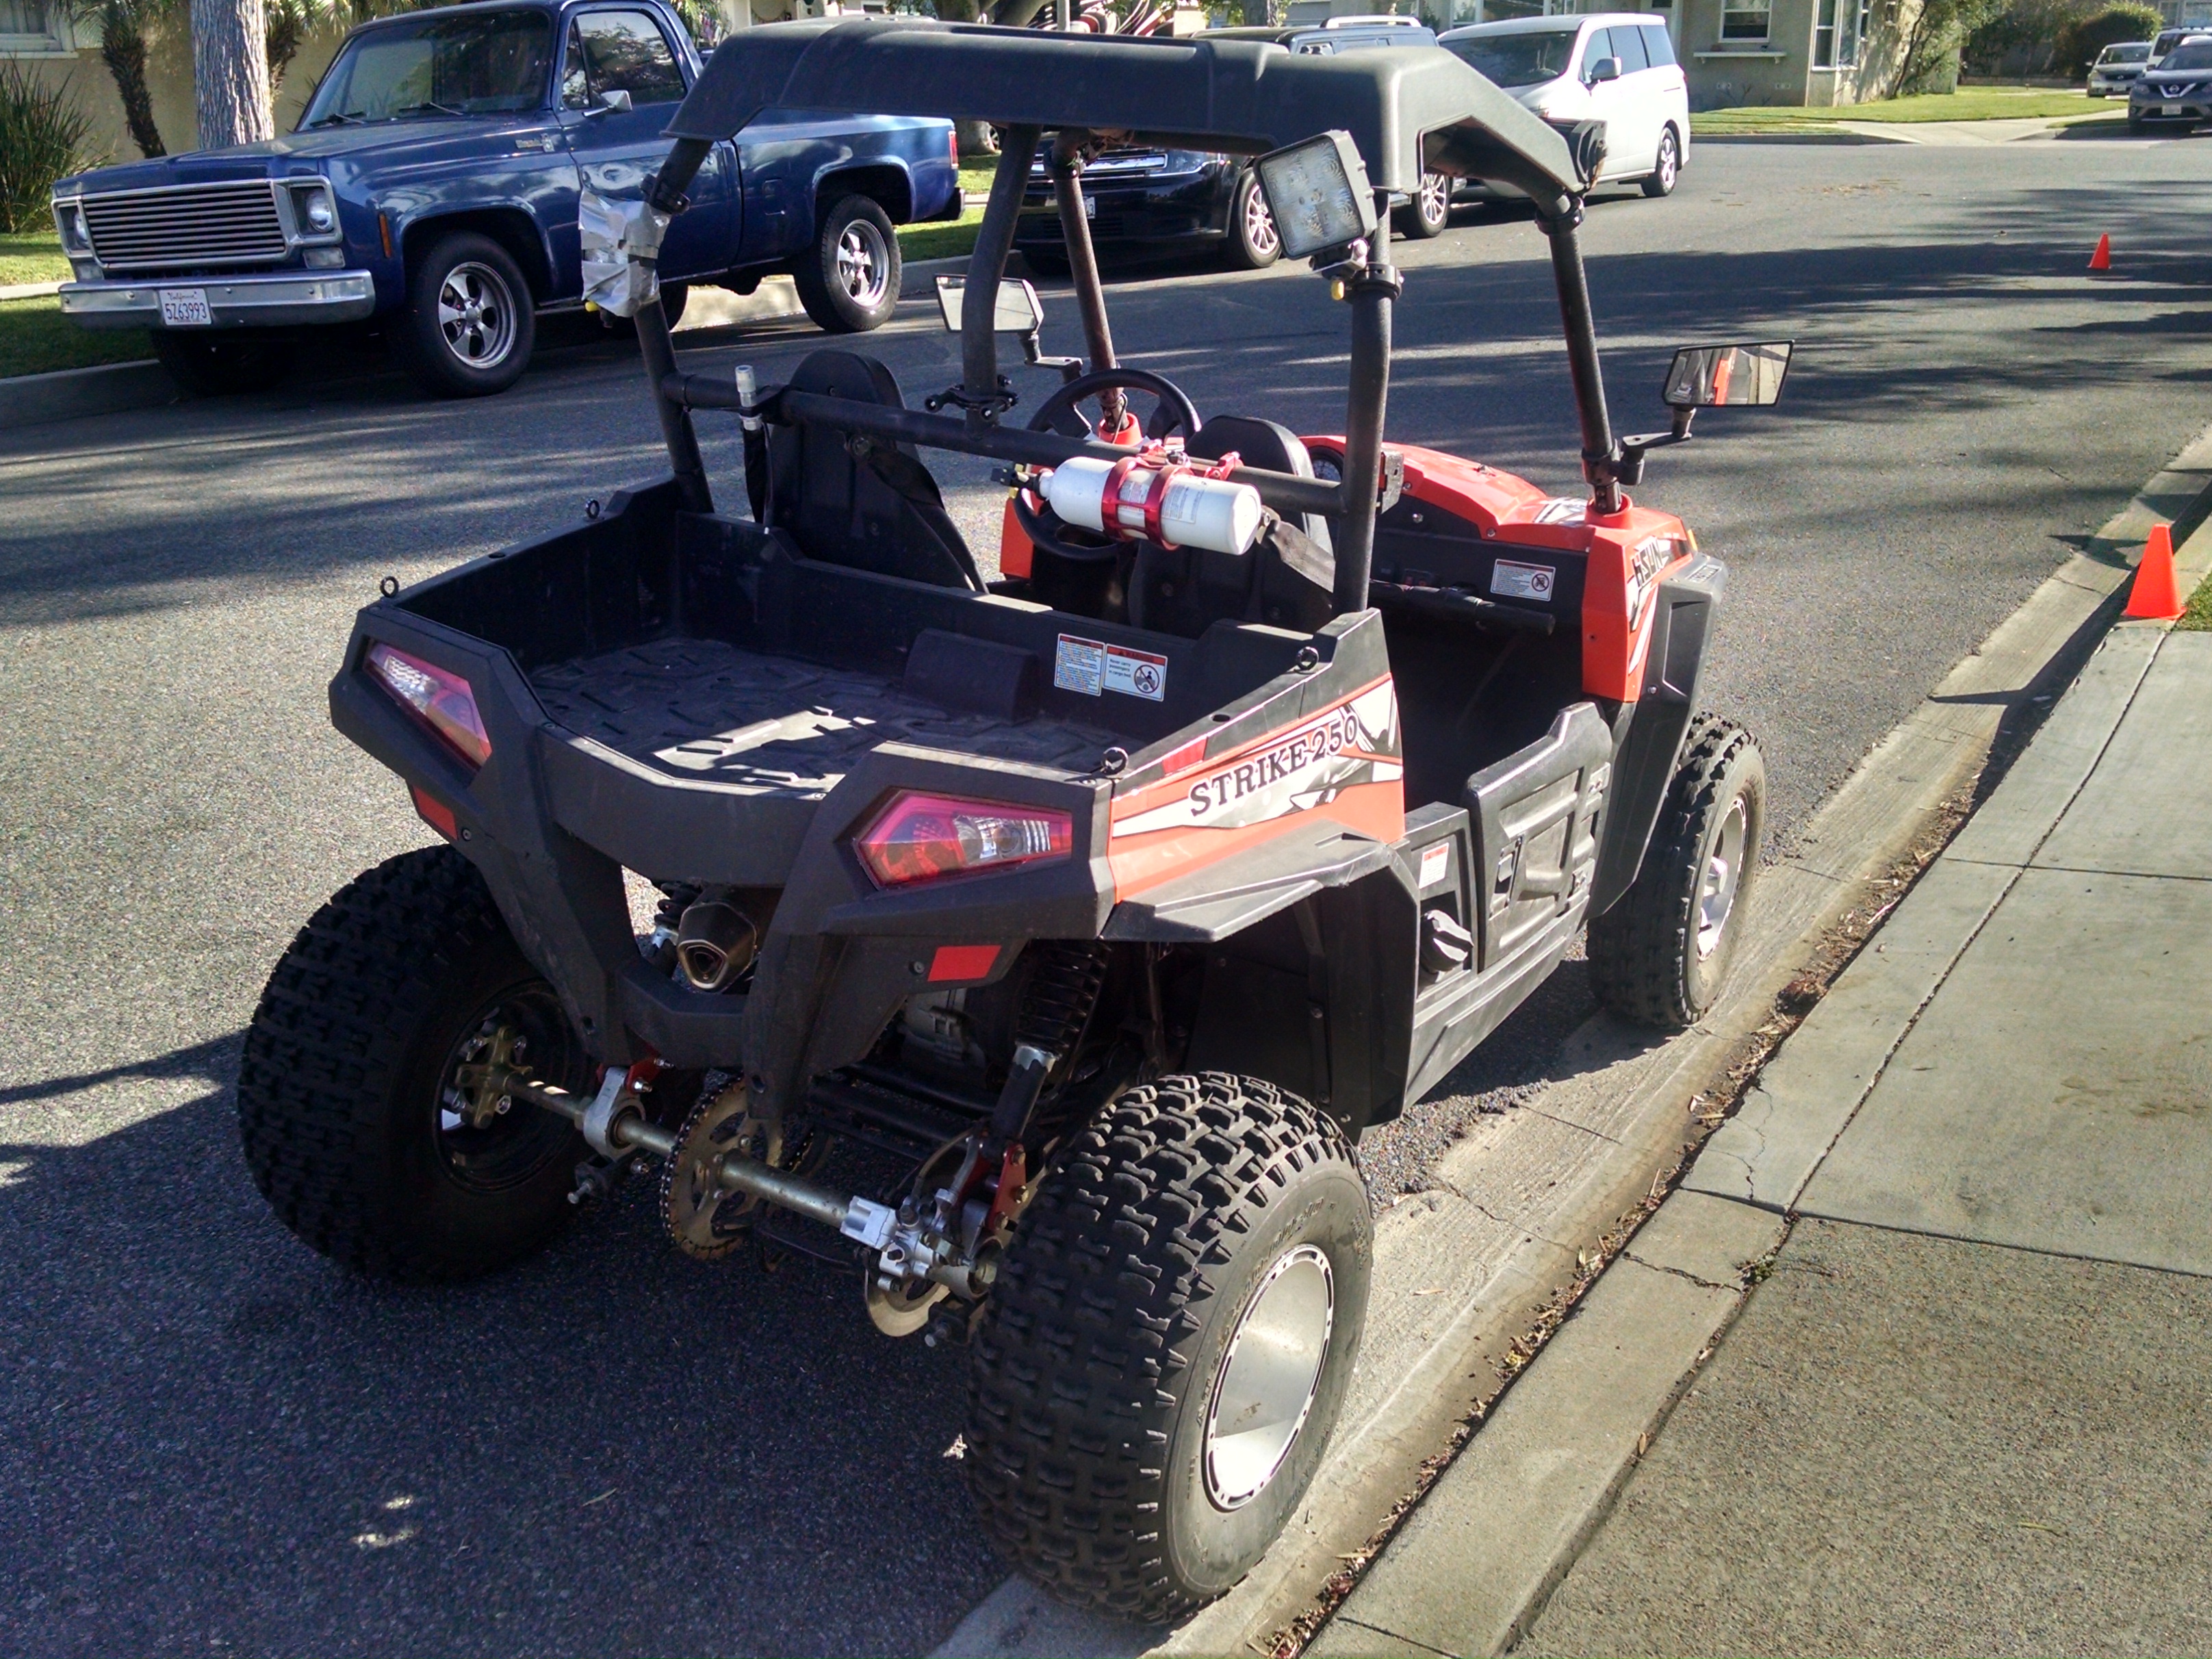
Hello there and hope you're having a great time with your new unit. As to the problem of having a trailer hitch, it has to do with where to mount it. As you have noticed, these units have a solid rear axles. Due to their mounting there is no frame area available to mount a traditional trailer hitch. I have had these units down to the chassis and there are really no great places to mount it to. The rear axle is exposed and does not have a housing. The swing arm is about your only option here. You would have to fabricate a bracket from one side of the swing arm to the other and that also perhaps has a strut in the center to attach to the swing arm as well for support. Then you might be able to bring it out rear wards and have your trailer hitch then. I happen to be a mechanical engineer as well so this is just my 2 cents. Is it impossible? no, is it available currently? no. Any good welder and fabricator can make it happen though. Probably some good ol 3/8" plate and you're there. As you can see from the pic below, not a lot of area to mount one to. But there are lots of mounting areas at both swing are to axle points. Matt
-
Well my unit is well out of warranty, but most of my problems have been minor. Mostly loose nuts and bolts and the main gauge is not working properly. But like any manufacture they all offer very limited warranty due the off road nature of them. Lucky me I am a master mechanic and happen to be able to repair most of the problems myself. I really don't have a dealer near me that makes it easy to take it to. Having to do a lot of the repairs myself has also taught me alot about the Hisun UTV's. Overall I am happy with the product and performance. I knew going into it what I was getting into and really have no regrets. Glad you were able to work things out. if you ever have any questions, let me know and I'll be happy to help you out.
-
2
-
-
I can totally understand your frustration, believe me. But I bought the brother to the the Hisun Strike 250 and have had nothing but good times. Great no, but lots of fun times. You have to remember every manufacture has good and bad products. This goes for cars and trucks as well. I have heard of Honda Accords breaking down the day they were bought, and don't forget the bug money name brands $25k plus UTV's out there burning down in the dunes just after a few days or weeks. I do not work for Hisun, nor am I getting any kind of benefit from this. This is just my 2 cents. I have owned over 50 different makes and models of motorcycles, UTV's and ATV's. I knew going into this purchase that it was a Chinese version, but bang for the buck, It just couldn't be beat. I took it home and from the start I took it down to the chassis. I found a lot of loose nuts and bolts. I also found a lot of things I thought the factory should have done differently, like route the wiring in places and so forth. What this did was make me very aware of the shortcomings of this unit, and accept them. It also made me aware of what this unit was capable of once it was properly maintained. After going over the entire unit, we have had pretty much trouble free fun with every outing. I have replaced many bolts with higher quality ones, and made some mods that I knew to improve the performance and operation of the unit. I think your unit had a big quality control issue from the factory, and it was not the fault of the dealer like you said. The units come pretty much assembled less wheels and a few bolt on items. The dealer un-crates the unit, bolts on the items and fires it up. I believe you might have had a linkage issue or perhaps a clutch issue. Both of which are repairable, but in your situation I can understand the frustration. Keep in mind as well, all off road makes and models have very limited warranty due to the harsh conditions they are ridden in. This is no excuse for how yours ran at all, and it should have given you some fun prior to crapping out. I hope you were able to find something that your young ones enjoy and are pleased with it. With any make, keep up the maintenance and you will have endless weekends of fun for the family. Matt
-
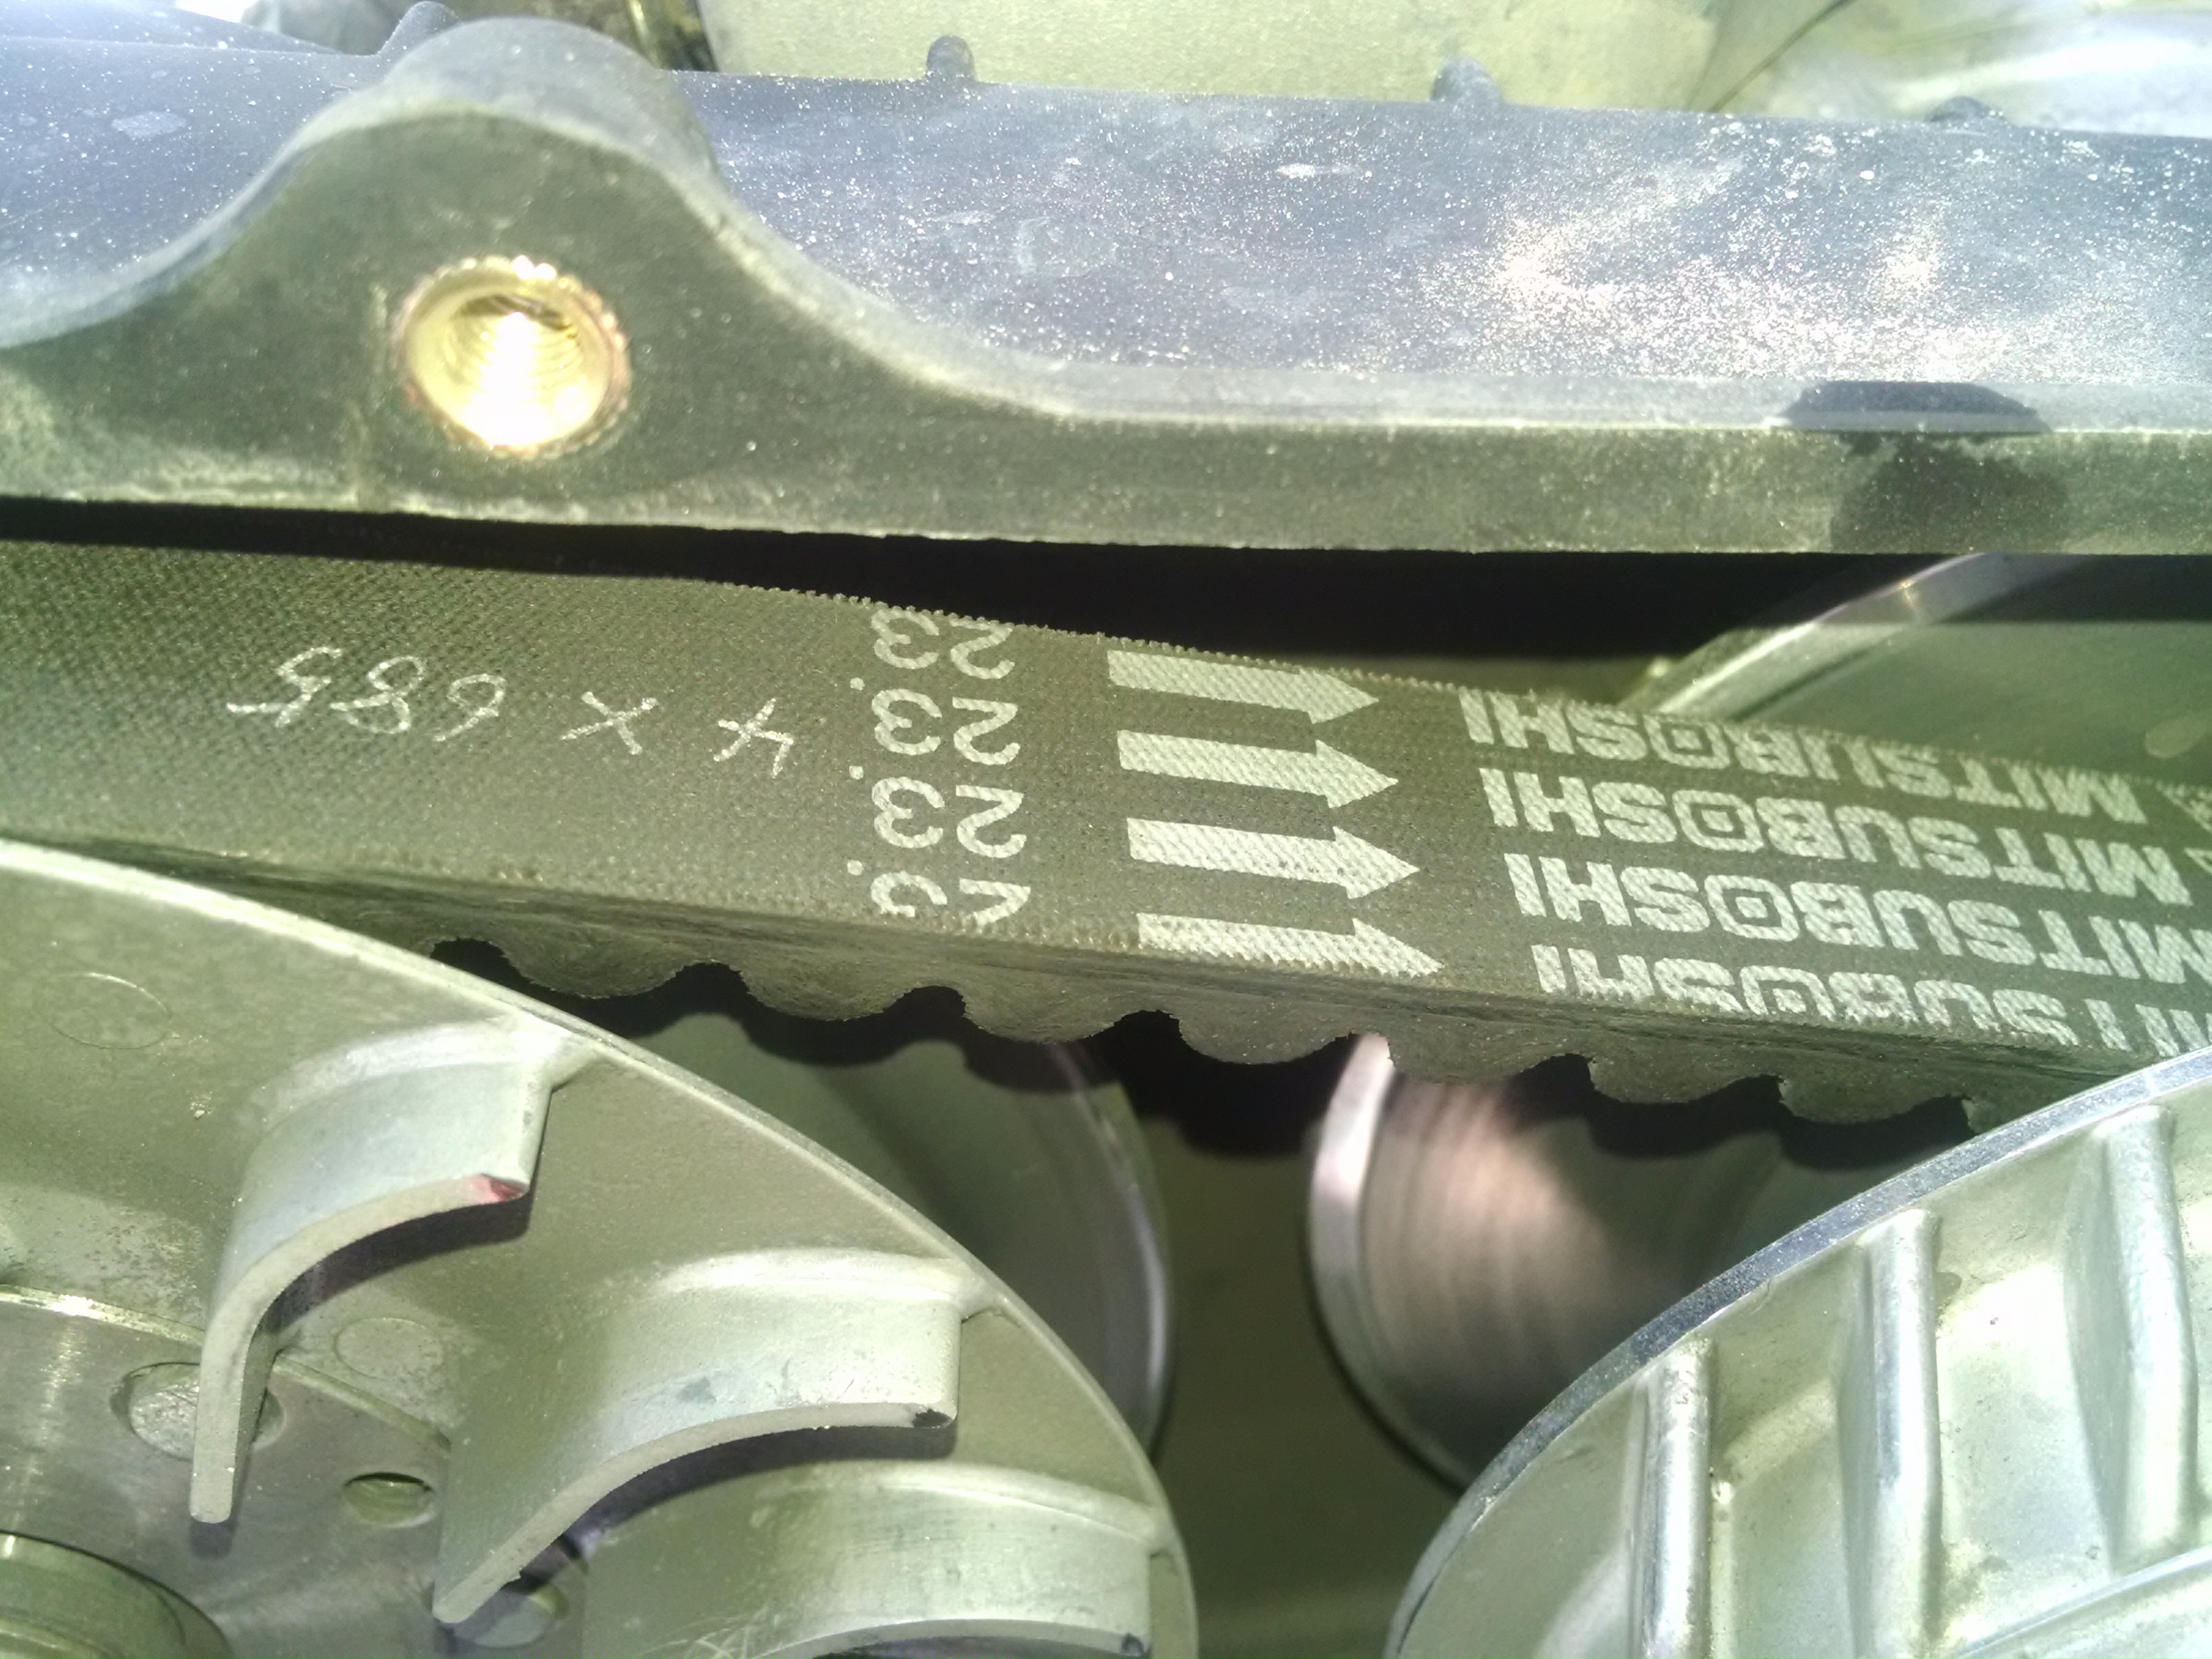
Hello there,
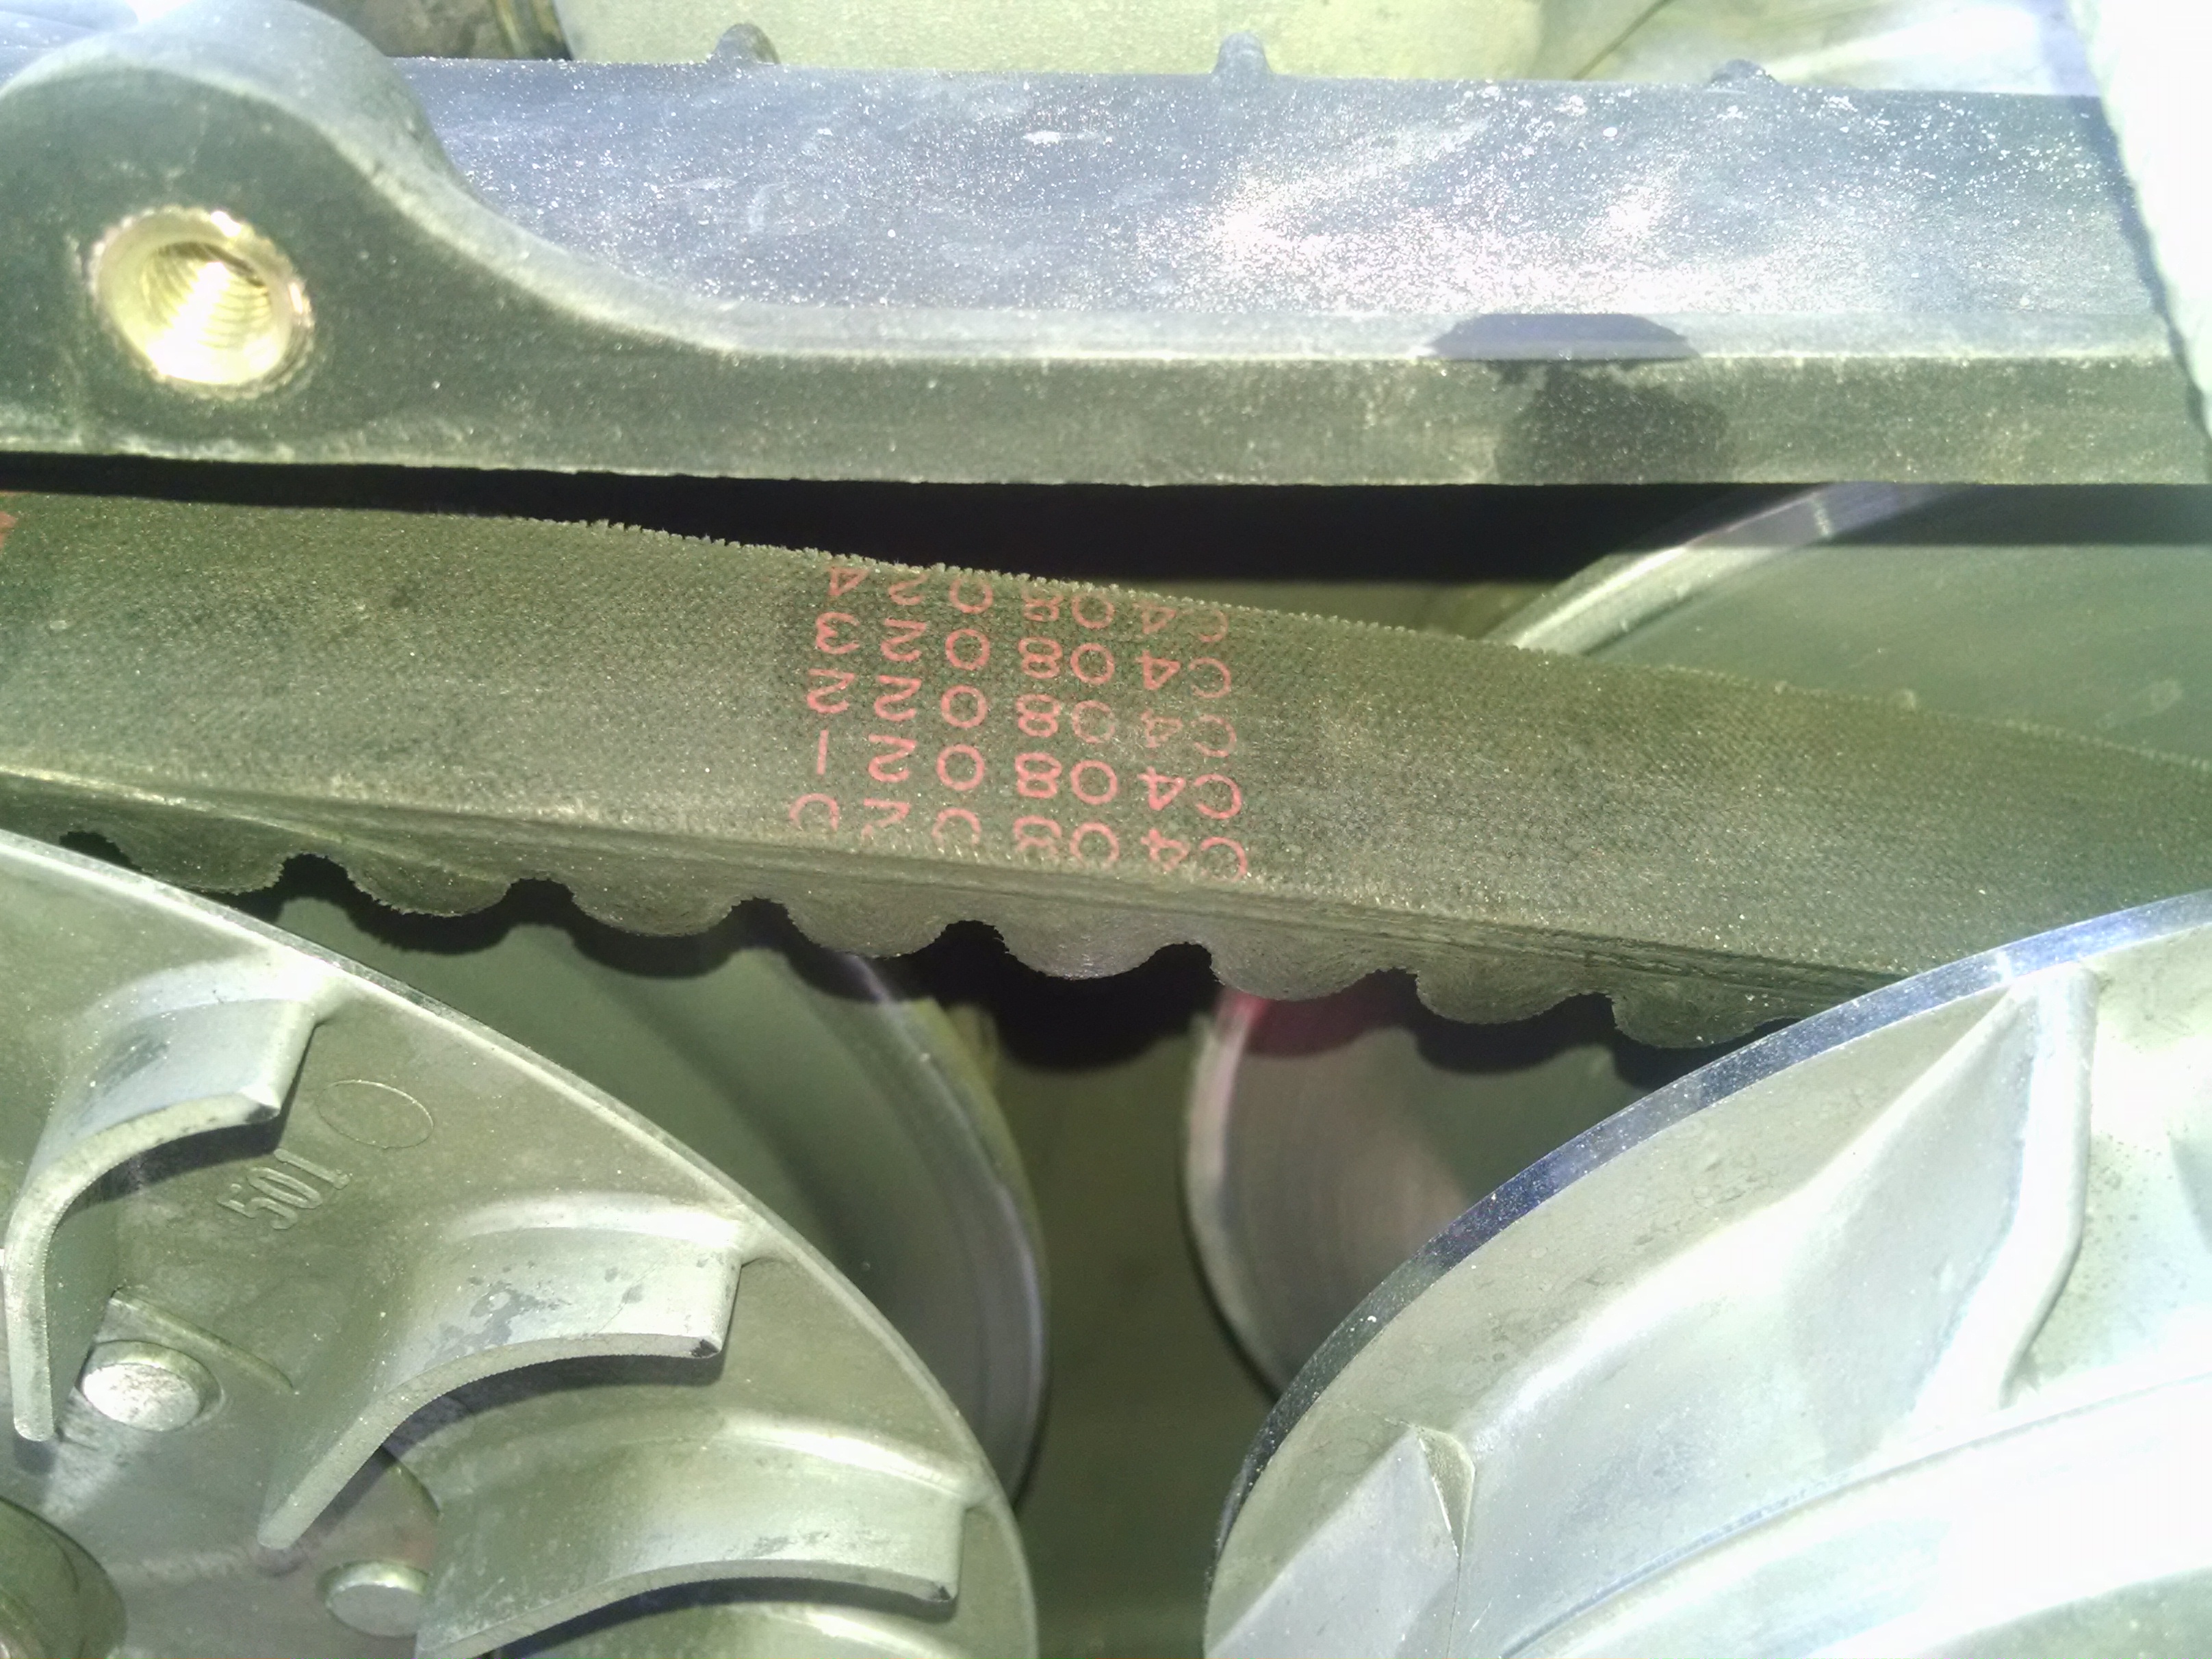
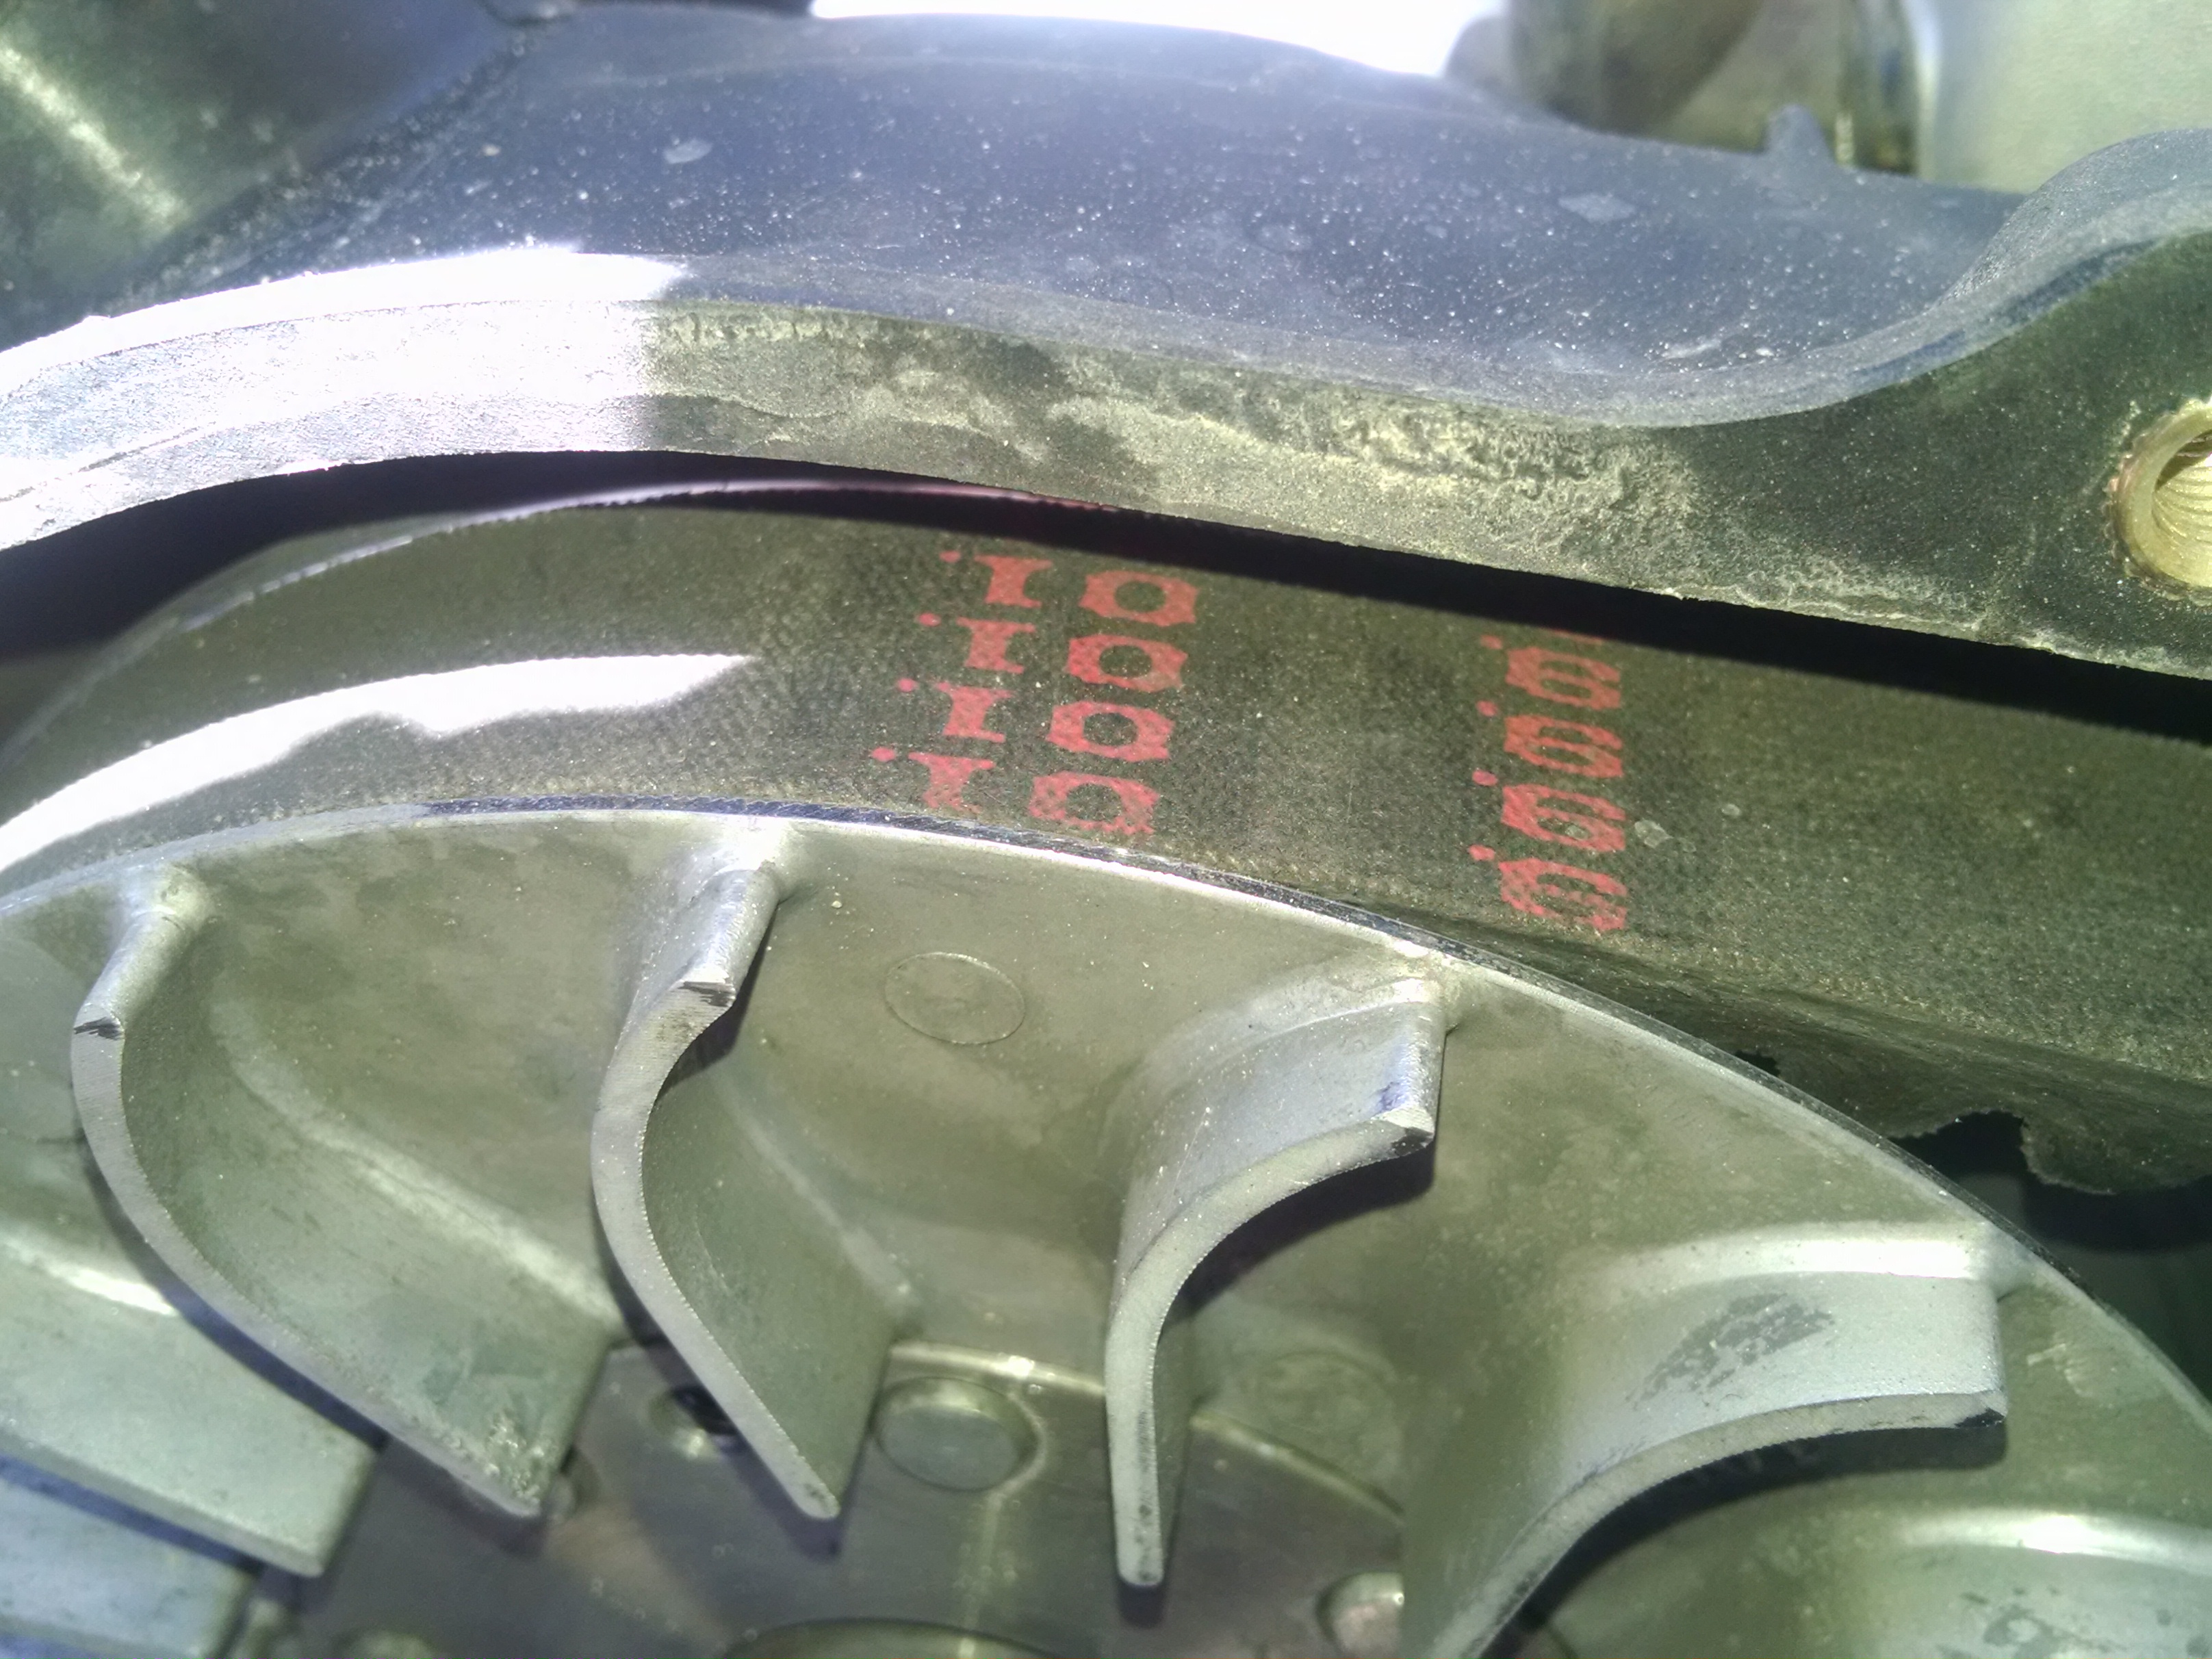
Here I hope to help those who have not yet replaced their CV belt on the Hisun Strike 250. I have done this and found the short cuts for you. It is not a 5 to 10 minute job, so if you ever find that you need to replace the belt, get ready for some work.
1.) First off remove the seats, they are easily removed by sliding them forward until they simply come out of the tracks.
2.) Second, remove the seat track brackets and put them aside, this is to access the lower cover and battery box.
3.) open the battery cover and disconnect the battery. You should remove the battery at this point and place it in a safe area.
4.) you will need to remove the two covers on the right and left inner rear fenders. They are forward of the rear wheels and they will give you access to some vital areas. They are held in by some phillips screws and at least one 10mm nut.
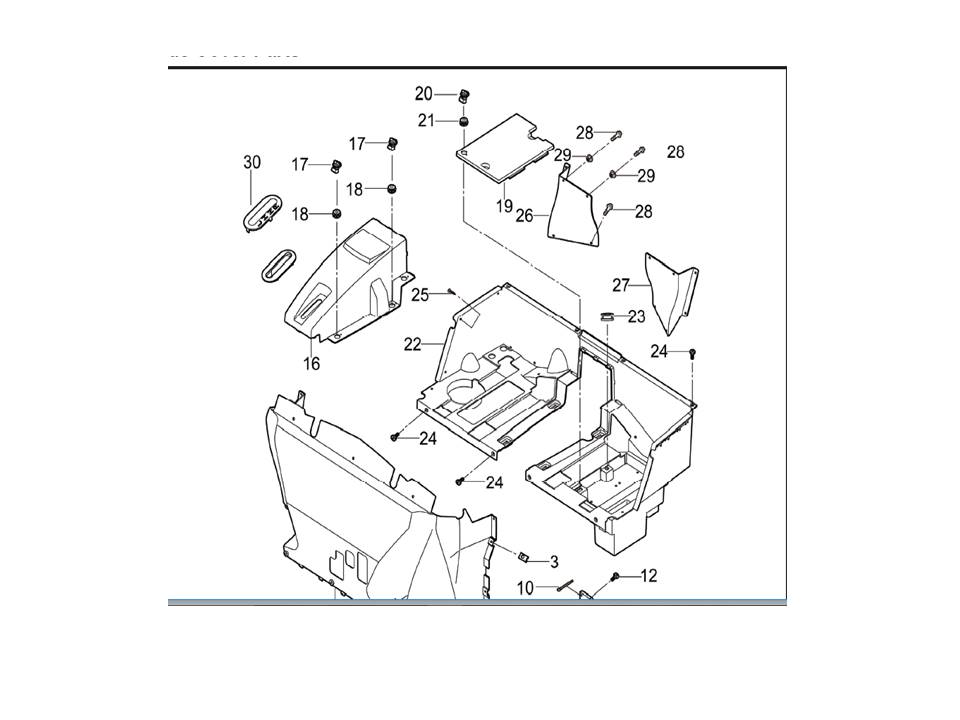
5.) pull the battery wires out of the battery trey, also at this point disconnect the ECU and the regulator. The reason for doing this is that you will have to remove the large plastic cover under the seats and engine. Don't forget to remove the engine cover, it is held in place by two plastic turn screws. I have included a pic of the plastic area for you to better understand. Item 19 is the battery cover, Item are the two rear plastic covers by the rear wheels that need to be removed. Item 16 is the actual engine cover, and item 22 is the large plastic lower cover that needs to be removed to gain access to the engine, cover and fuel tank.
6.) you will need to undo the lower 4 point harness points and simply flip the seat belts back into the rear cargo area.
7.) USE CAUTION WHEN REMOVING THE LARGE LOWER COVER!!! it is brittle and will crack or break with little effort. ( trust me I know ) After you remove the large lower cover and wipe the sweat from your brow lol. you can now gain access to the engine, the clutch cover and all the needed parts to remove the CV belt.
8.) You will now need to remove the cross over bar that the seat belts were connected to. It is held in place by two 10 mm bolts on each side. Note: you will have to fiddle and find a way to get it out from behind your intake. I simply removed the two bolts holding my throttle body down and then covered the intake tube to prevent anything from getting into the engine. I had to also remove the throttle cable as well. You will need to do this in order to get the fuel tank out of the way. This is the ONLY way to get to the CV belt cover. I have tried many ways.
9.) The one thing I did do at this point, is take the large lower cover and cut it in the middle. This did a couple of things for me. It make removing and replacing it easier, and it also make it so I only needed to remove one side at a time if I so needed. It has not caused me any problems since. I cut it right along the edge of the center on one side. Just my 2 cents here.
10.) At this point, you'll need to remove the two bolts holding the fuel tank in place. Take care to understand, if the tank is full, you might have to remove the right side cover, as you cannot remove the fuel tank with the fuel cap on as the hole is not large enough. And pulling on the plastic might end in a broken part. You will not have to disconnect the fuel line, as you are only pulling the fuel tank up and out enough so that you have access to the clutch side cover.
NOTE: take pictures if you are not real sure of how things go back together. This always helps.
11.) go under and remove the skid plate covering the rear engine area. this will give you access to the lower bolts needed. This would also be a great time to do an oil change, as you are already there.
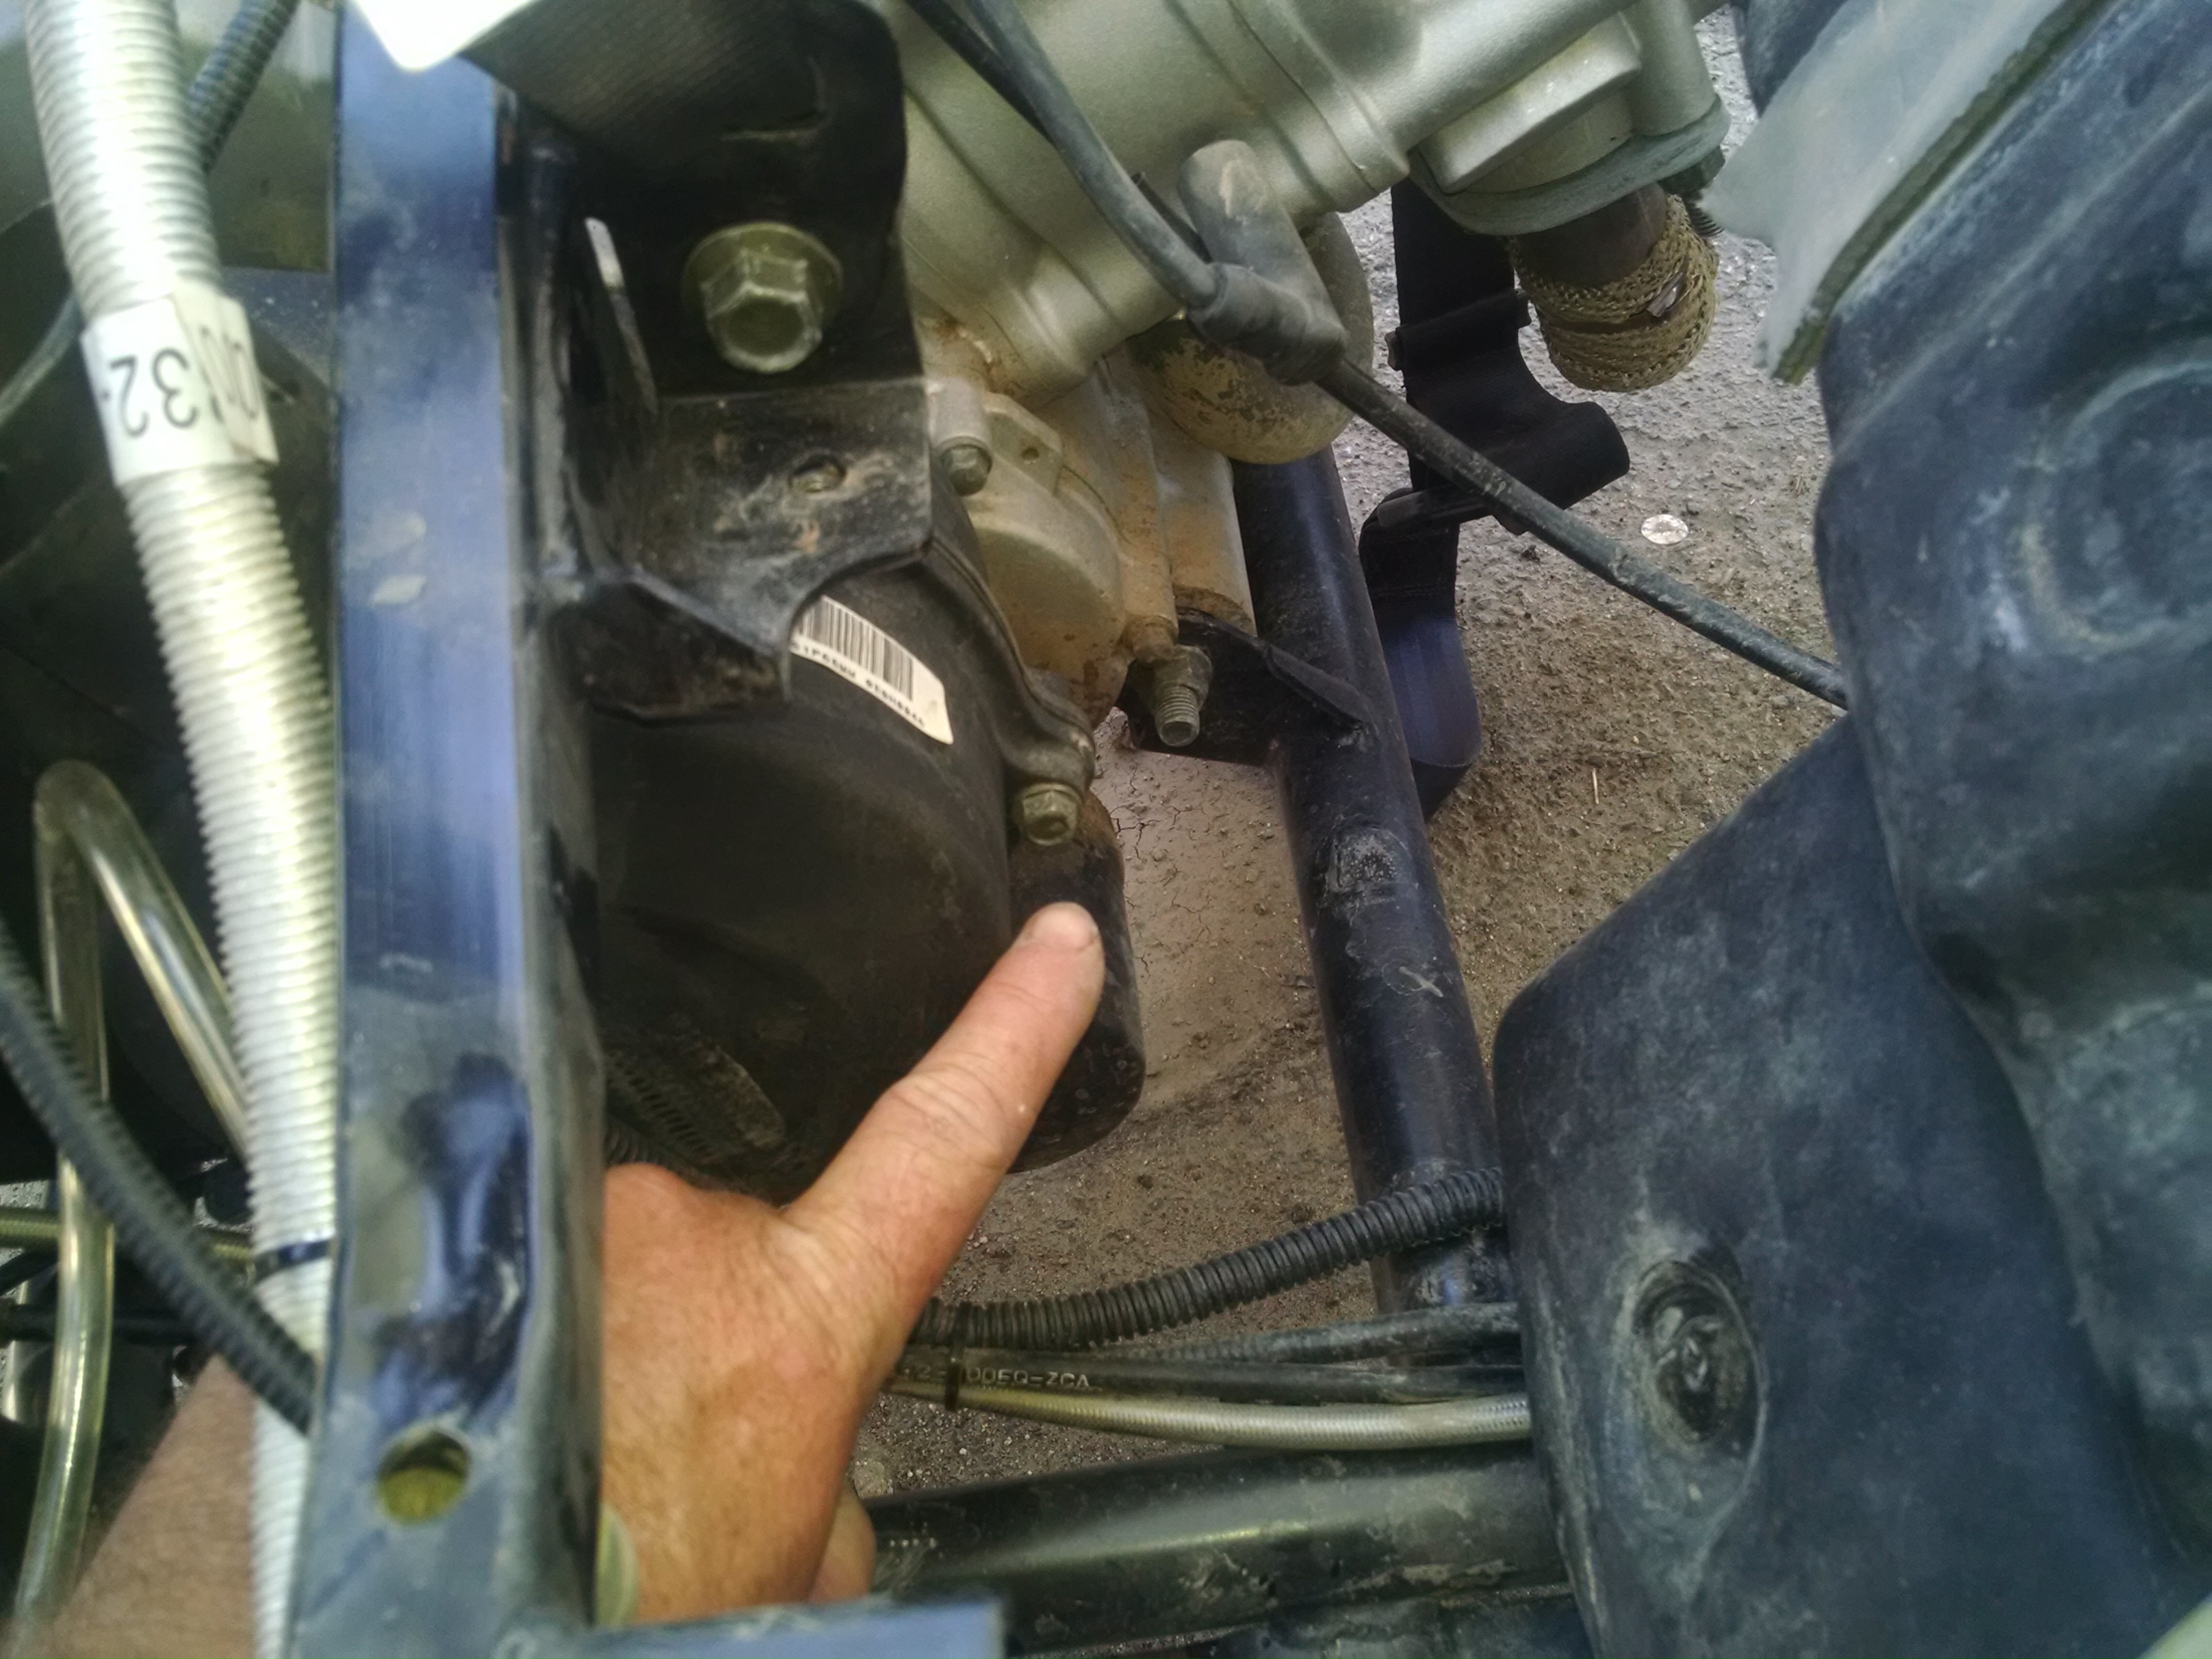
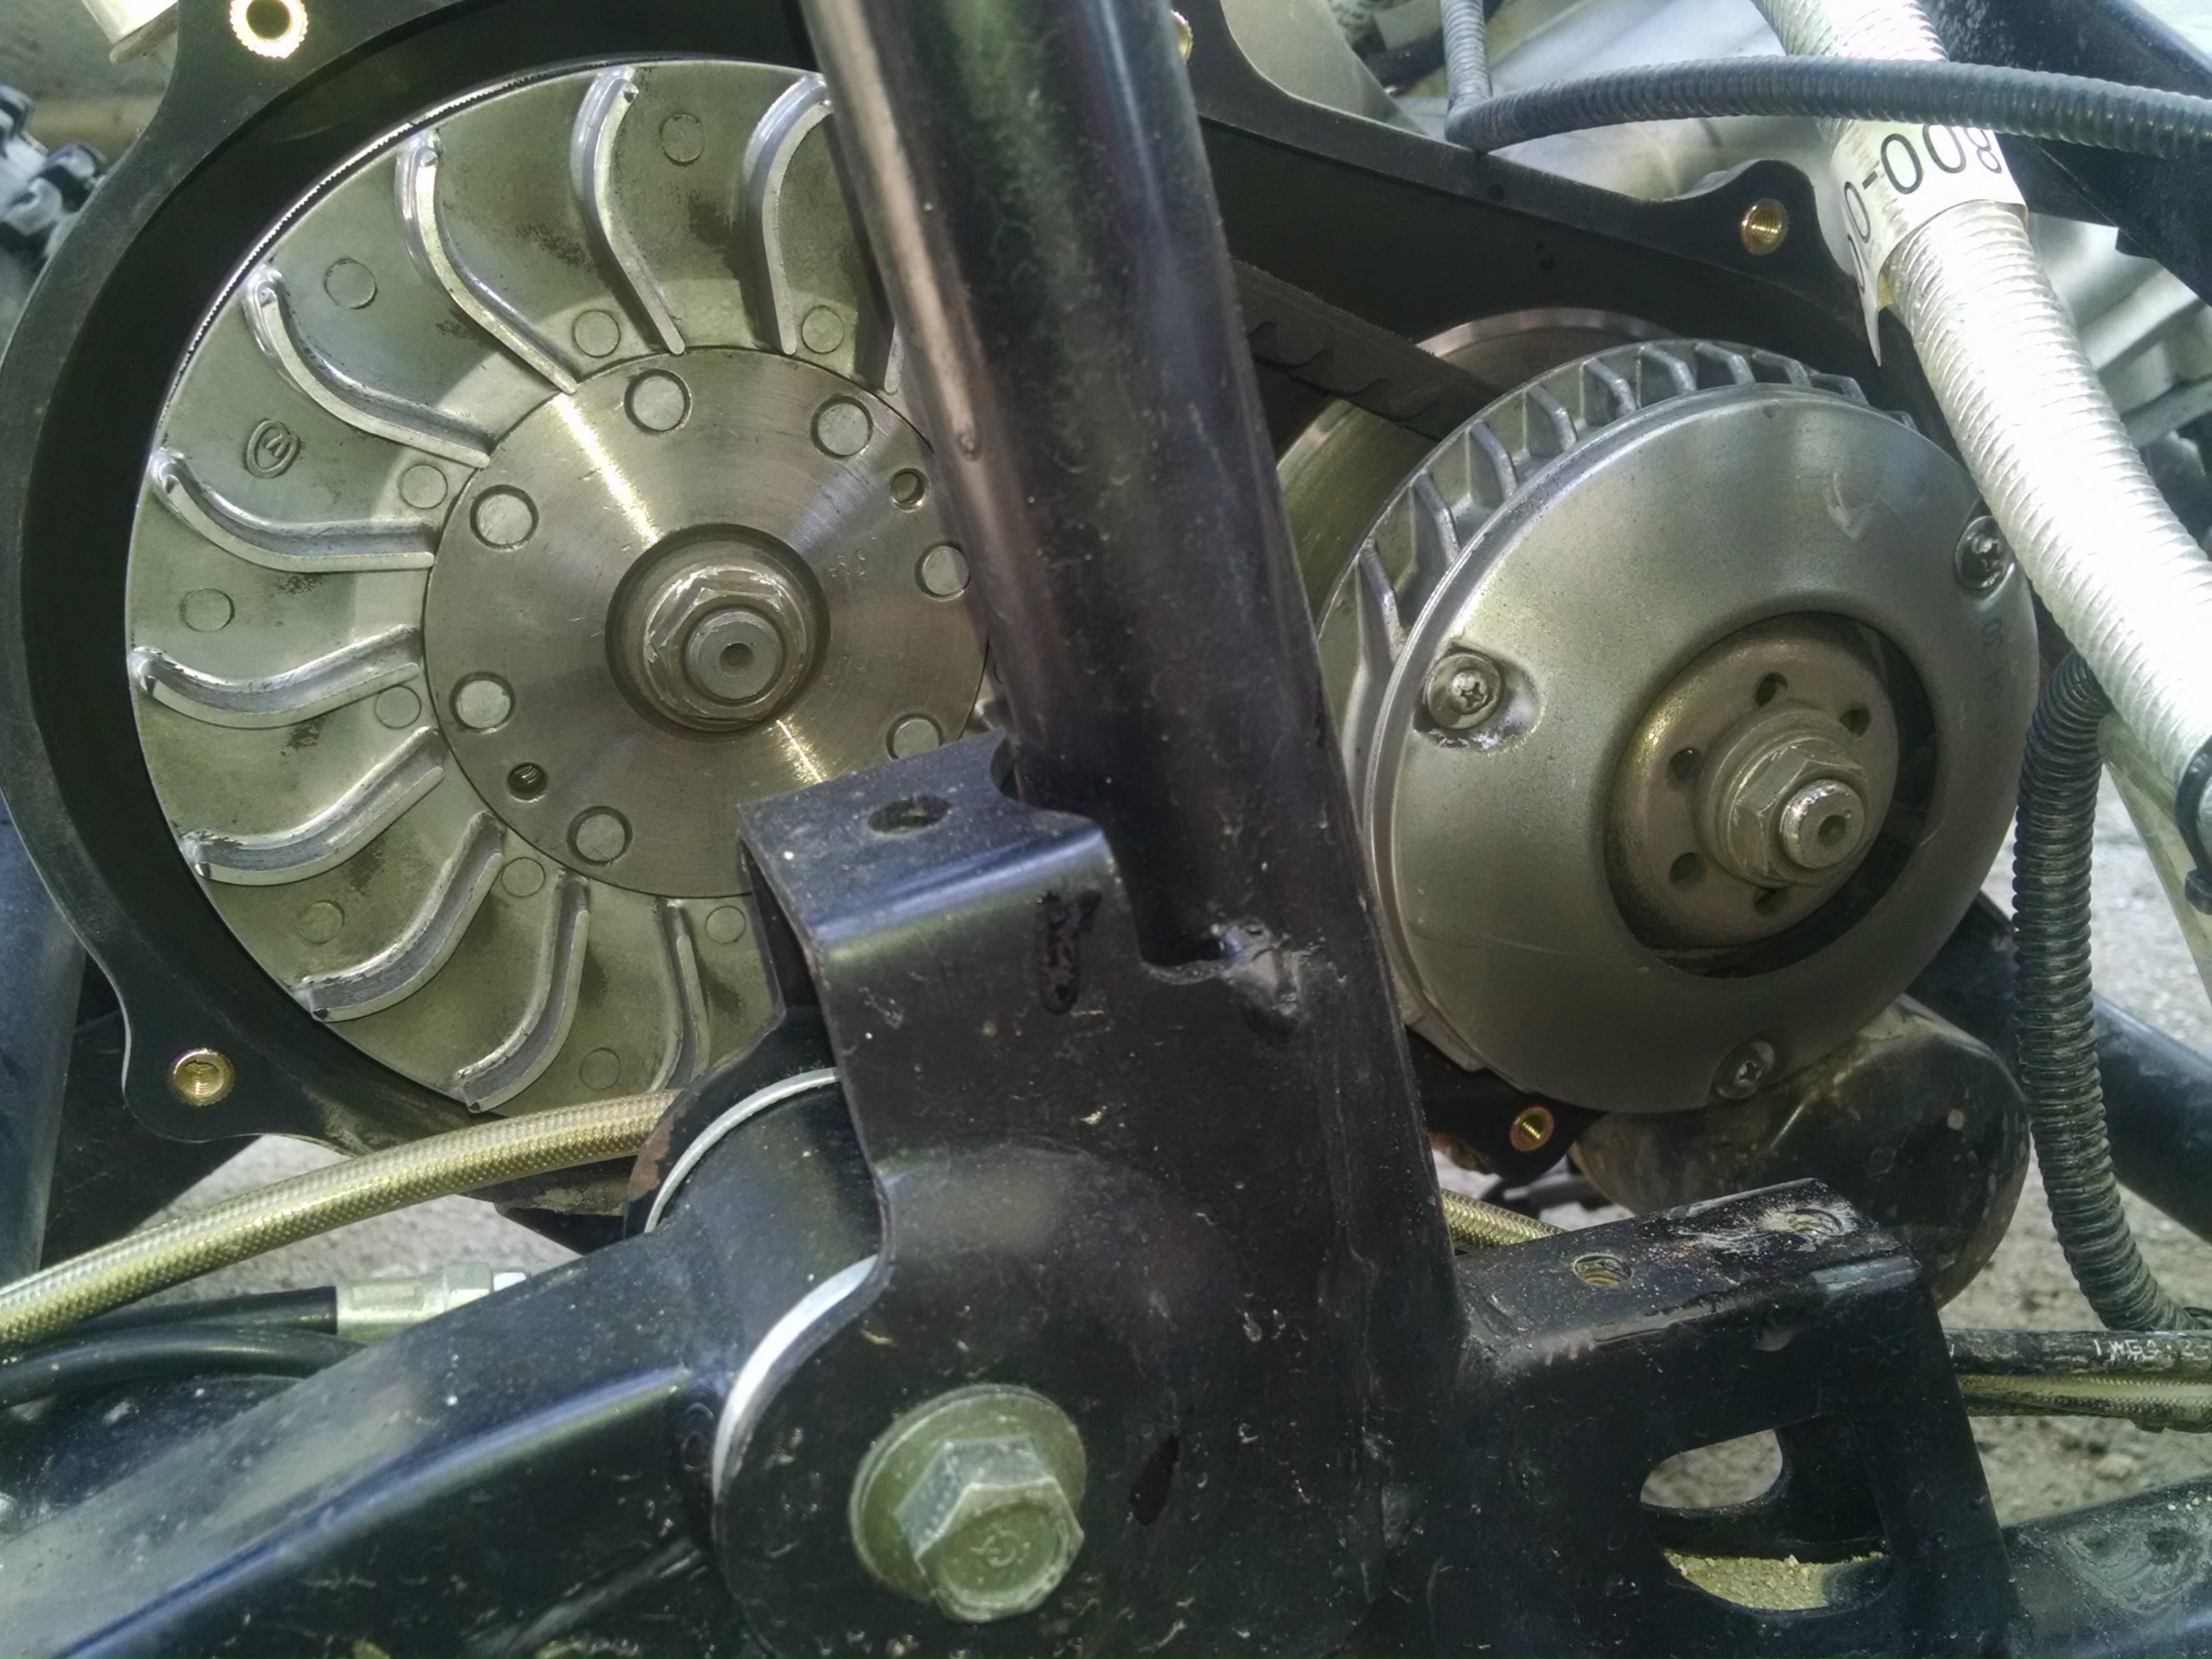
12.) With the fuel tank up and out of the way, you know have access to the right side clutch cover. FINALLY! You can now remove the 10mm bolts holding it on.
13.) Now, following the factory manual, you will need to insert two 6mm threaded bolts and screw them down on the rear clutch face. There are two threaded holes on the face. This will force the clutch open and allow the belt to relax in its position. Now, with it loose, the manual says you can simply slide the belt off and replace it with a new one after inspection. I have found that this is not the case at times. I have had to at times remove the forward clutch assembly. As it is easier to access the 17mm nut than the rear one. Once I pull the front clutch off, the belt came right off! WHEW!!!!!!!
14.) Now, just replace the belt and do everything in reverse lol. I know it sounds like a lot of work, and believe me, it is. But it does a couple of things here. One, you won't need to replace this belt very often as there is not a ton of torque on it. Second, it gives you a great knowledge base of your unit, and having this is great when you are out and something goes wrong. Third, if you find anything loose from the factory or not in spec, now would be the time to correct it, now when you are stuck in the dunes or in the back woods. All in all it will take a couple of hours to knock it out if you know what you are doing. I would plan on an nice Saturday or Sunday to get this done as it does require your time and energy.
I will post some other how to files soon, if there is anything you would like to see, just let me know and I will try to do that first.
Matt
-
1
-
-
Hello there again,
Just some more advice to those owning these fun machines. We rolled our unit during testing out at Dumont dunes, no one was hurt and the unit was pretty much un damaged. But some things to watch out for that I have learned. One; after being upside down, check the oil level, some oil can leak out of the crankcase vent tube casing the oil level to become low. This in return can cause damage to the engine due to lack of proper lubrication. Second; Oil can leak back into the CV belt cover since they share the shame ventilation tube as the intake, and as oil can return into the intake after a roll over, it can in reality seep back into the CV belt case. this would cause the belt to become saturated with engine oil. We noticed our unit smoking some after being rolled over. Upon inspection, we found the CV belt to be wet with oil. As a result we needed to replace the belt early. Also it might cause your clutch pads to become wet with oil, thus causing the clutch not to work well. I found a lot of burnt off clutch material on the CV rear cover only after removing the entire clutch assembly. So, as a person who has already experienced this first hand, I am just saying to check things if you ever do roll it over, it will save you time and money later on. It is not easy changing the belt, trust me.
-
 1
1
-
-
Another spot to check out is the OEM chain, it is not the best quality. I understand during manufacturing you make thousands of these things. To meet certain price points you have to use a quality that meets your requirements, but is not always the best due to price. I would recommend replacing it with a nice O ring chain. A good quality chain will make your sprockets last longer as well.
-
1
-
-
Hello there, just a note to those owning these fun machines. Remember to remove and lube the front A arm bushings. They are plastic from the factory and are pretty dry if any lube at all. To make them last, I would take them out and lube them up well to make them last and work well. I am trying to source some aftermarket bushings, and think I have found a source, but working out the details, so in the mean time, R&R those plastic things sooner than later, or you'll regret it.
-
Hello there, We are doing some serious R&D on the Hisun Strike 250. We currently have a 2" lift kit available, exhaust system, clutch replacements, and advice like no other. We have taken this unit down to the frame and replaced almost every nut and bolt. So we know this UTV. Please feel free to ask any question about this and it's sister units UTV's.
We have complete clutch OEM assemblies available for $ 199 for both items, compared to the factory of 190+156 for both items. (plus shipping)
We have brake pads available for $19.99 front or rear per wheel.
We have CV belts available for $99.99 (plus shipping) currently out of stock, but back soon
We have 2" lift kits available (bolt in!) for only $79.99 ( plus shipping)
We have exhaust systems available for $249.99 (plus shipping) currently back ordered so get in line!!!
Advice is always free!!!!!!!
We will have our website up and running next week.
-
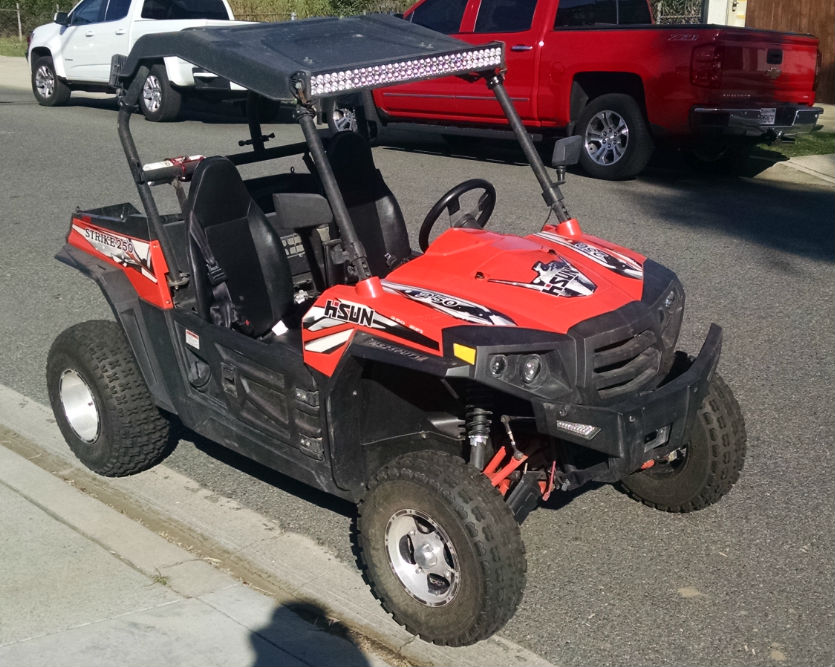
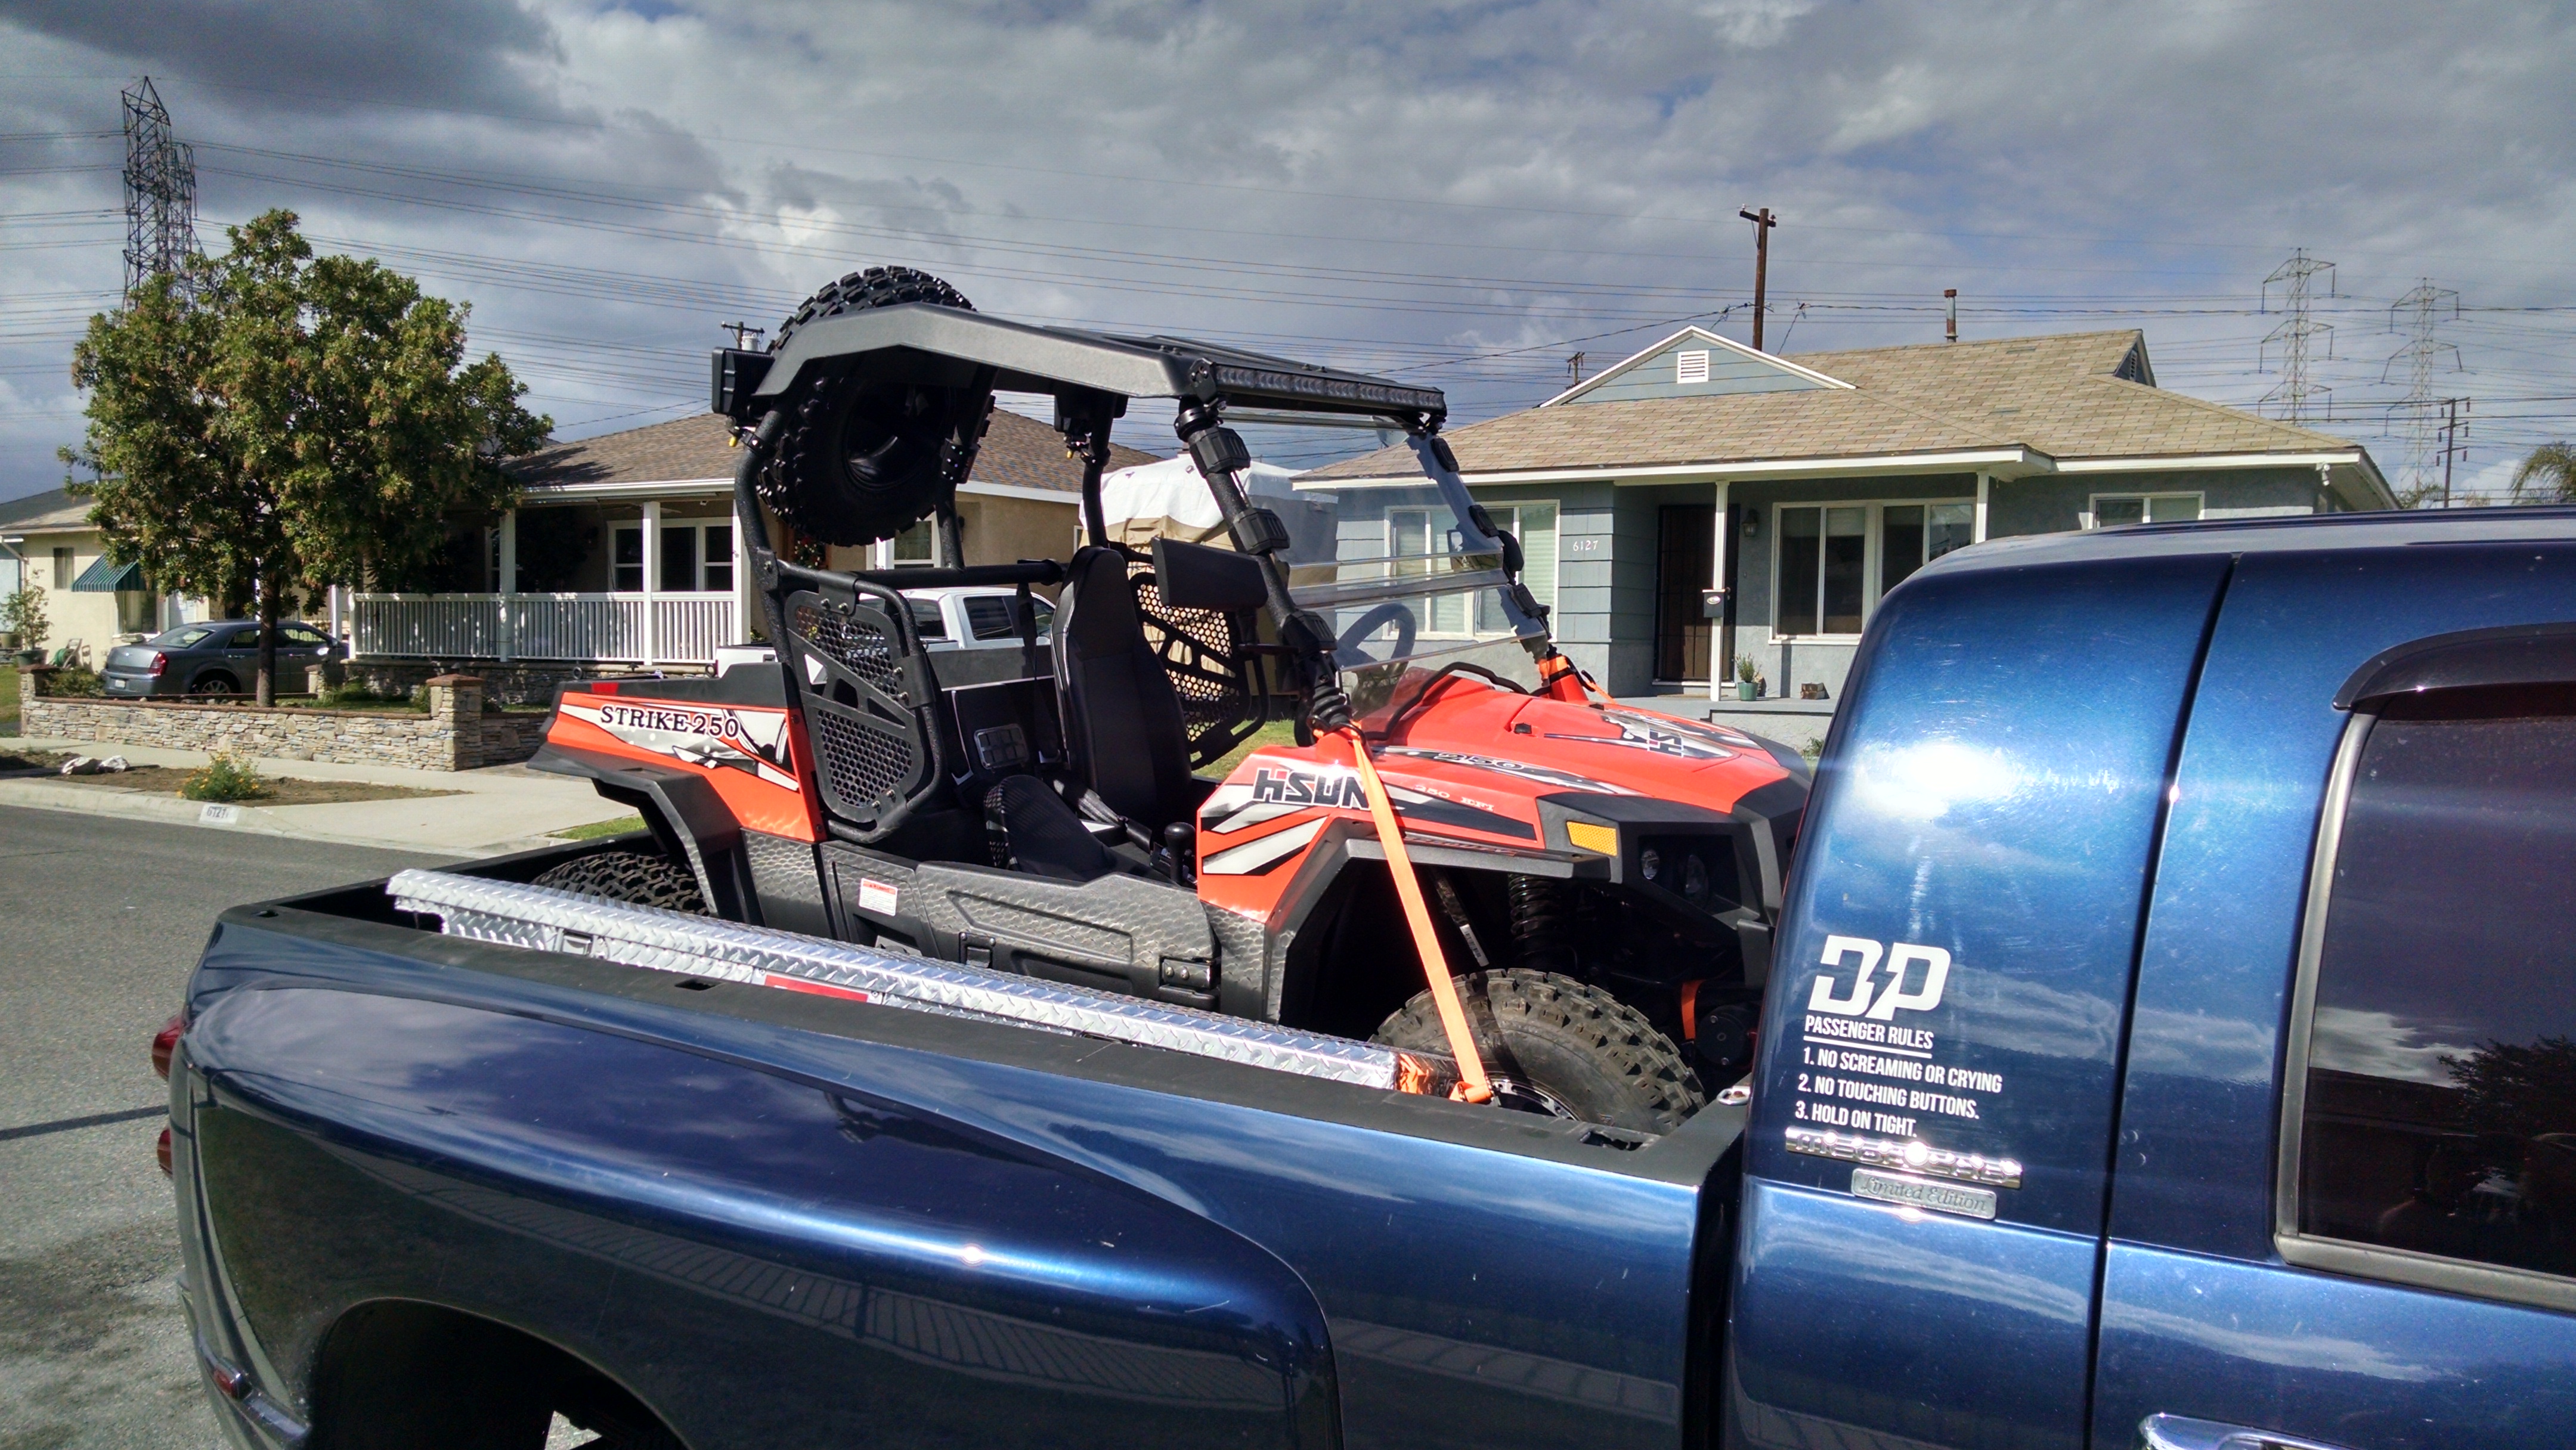
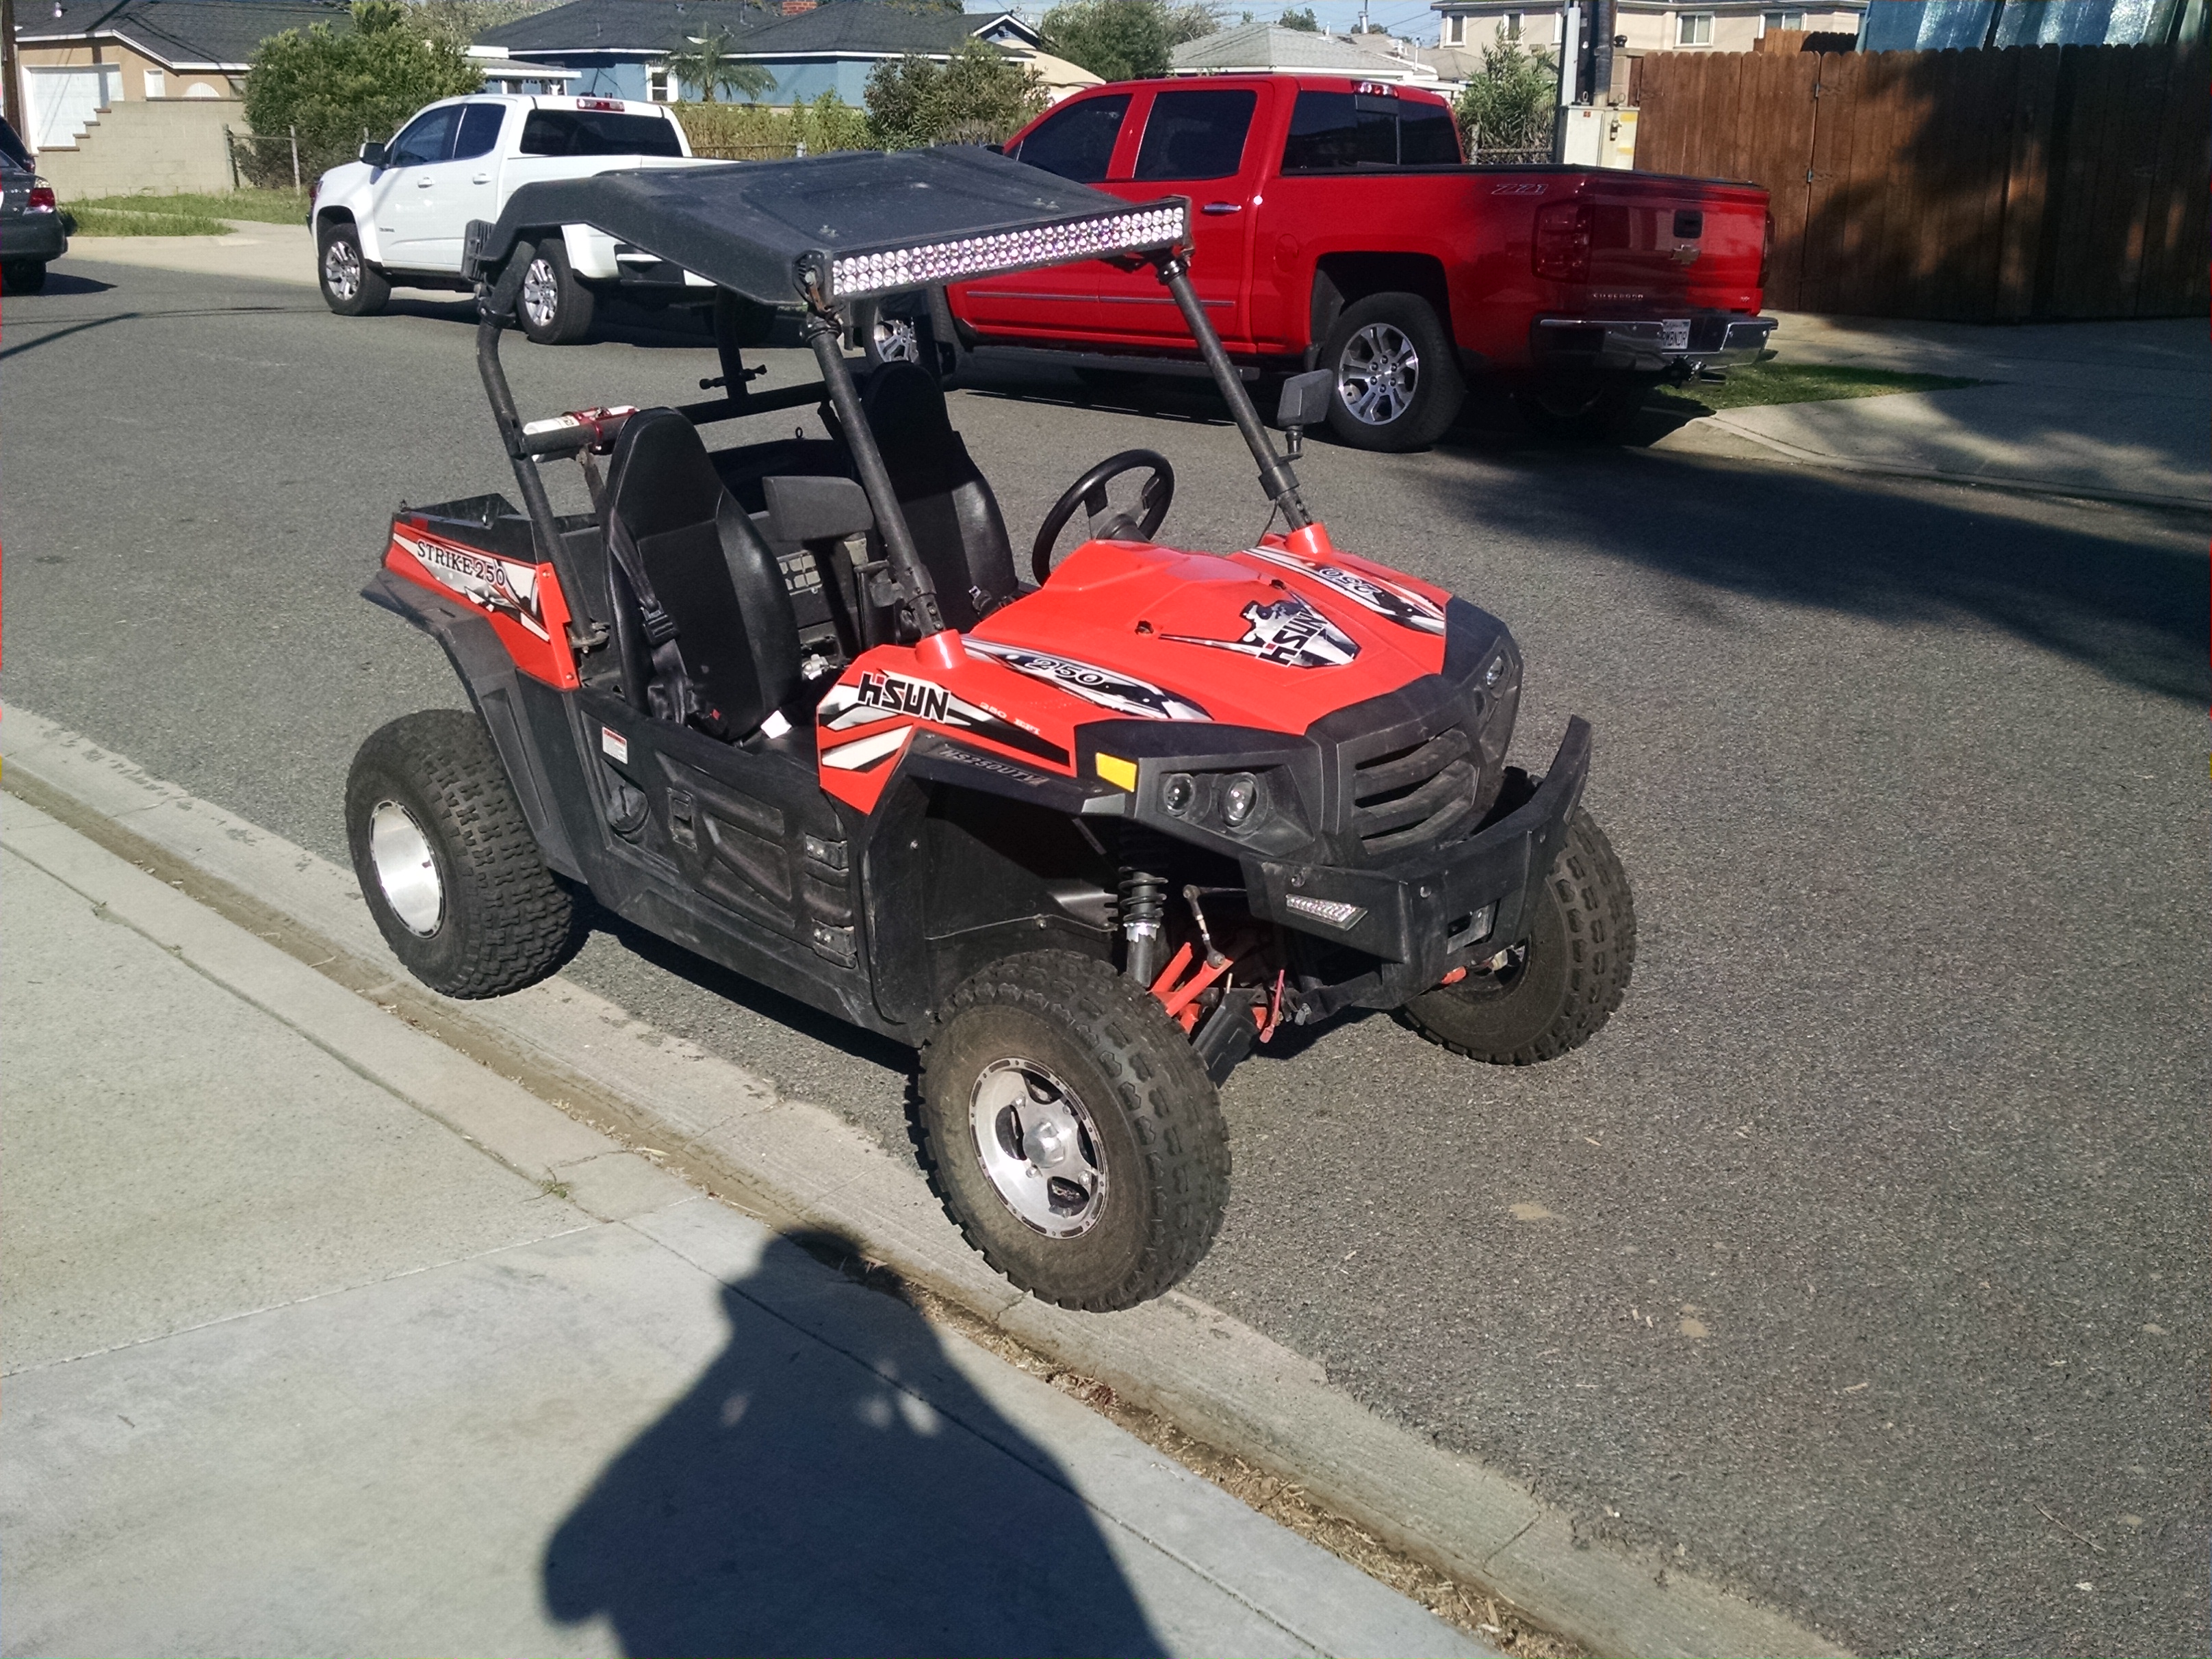
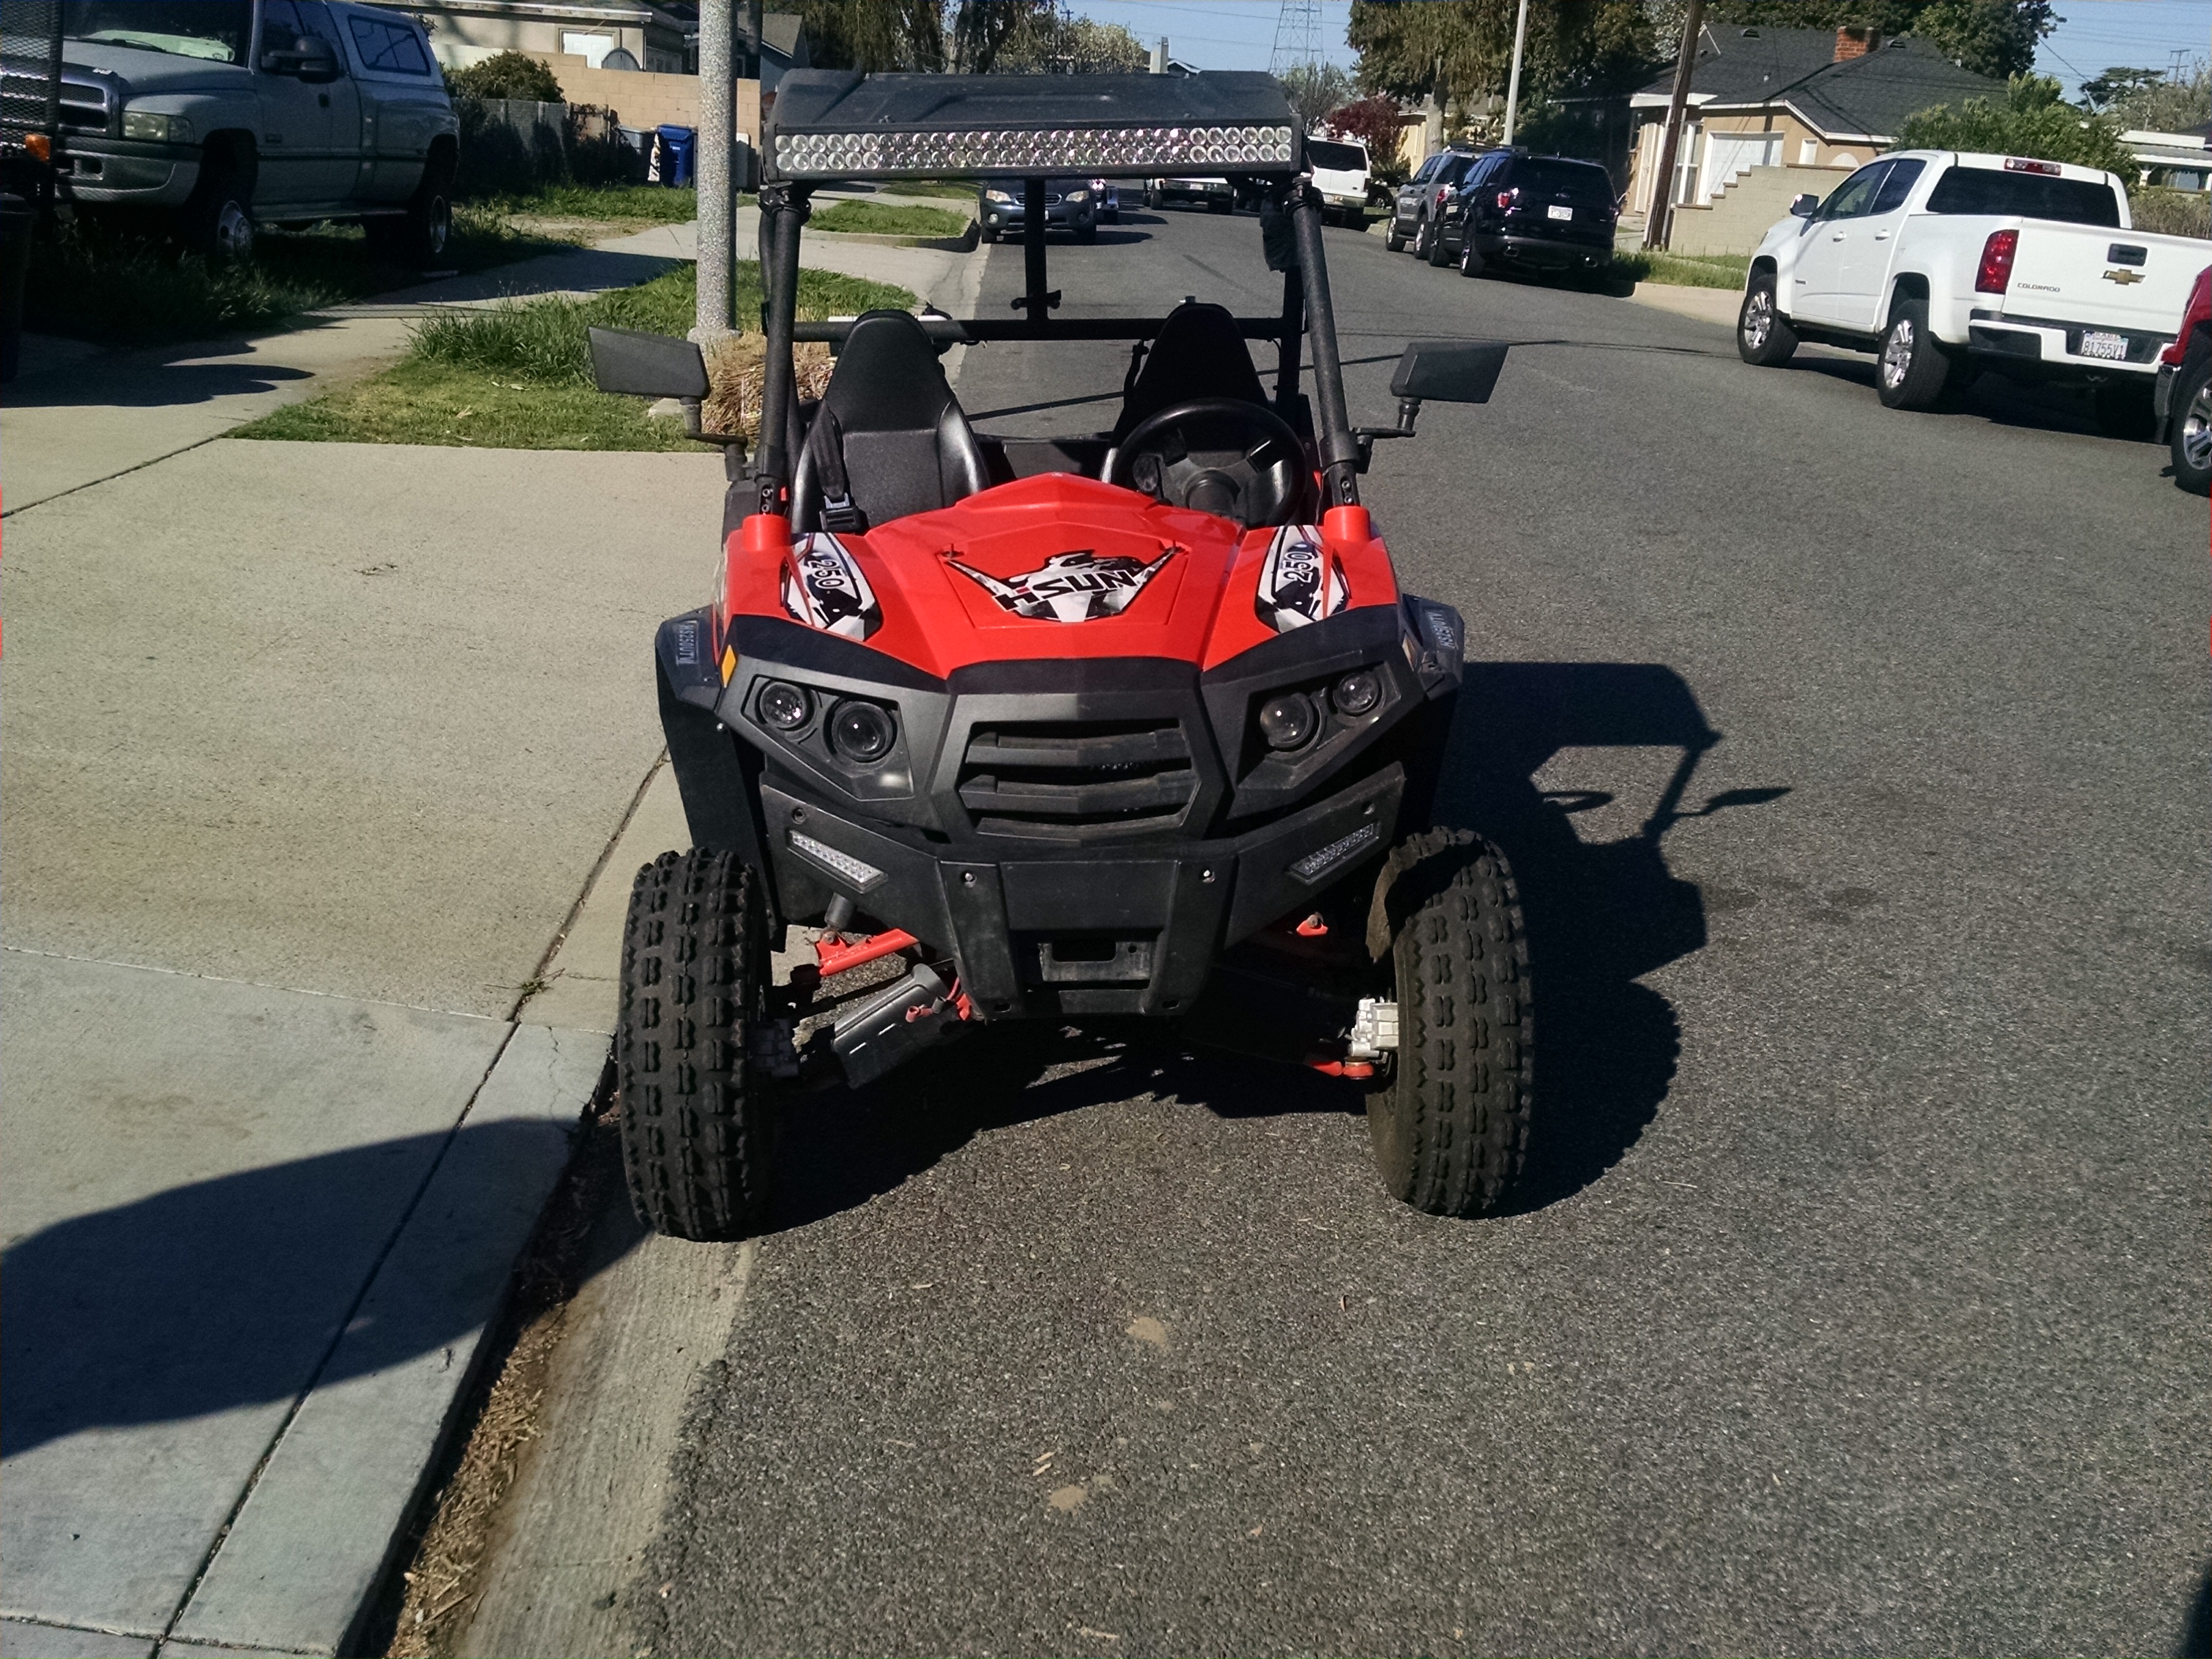
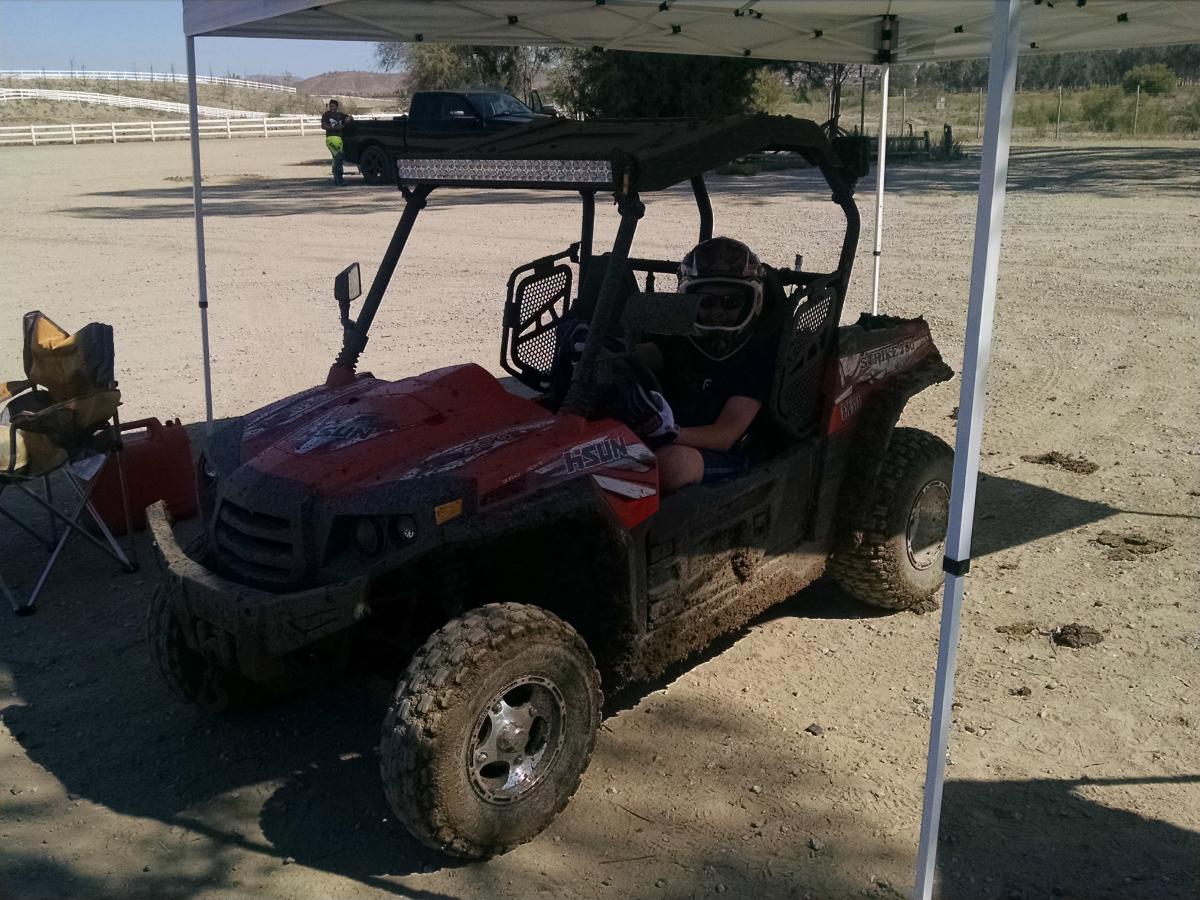
Here are some new pics of our test Hisun 250. with the 2" lift kit and our exhaust kit installed. Our Hisun hauls butt. It sounds great and seems to run just fine. I know there are haters out there, and that's fine. I have taken this down to the frame and down to every nut and bolt to research everything about this unit. I know all the good and bad things about this unit, probably more so than most dealers as I have done so much R&D on it. I have had the engine out of it a few times, and have gotten it down to just a couple of hours now. I know all of the parts that are compatible with Japanese UTV/ATV units. I have replaced many parts with more reliable parts, but I have to tell you, for a chinese UTV, this thing has not really let us down. We have tested it in many of the off road parks here in Southern California including Pismo Beach, Dumont Dunes, Glamis and more. I understand the suspension fundamentals as well as the limitations. I have done extensive research on the rear suspension to look at independent rear IRS compared to the OEM solid rear axle. If you have any questions, please feel free to ask. With the right parts installed, this unit has a lot of potential to unleash. I have ridden this unit with myself, weighing in at 200 lbs, and another adult at the same weight and it just doesn't die.
We will be selling the lift kit and exhaust system soon, as soon as we get our website up and running and place things in the correct place on this forum.
Matt
-
1
-
-
-
Here is a pic showing the washer that needs to be bent down over the end of the shaft that secures the nut to the front sprocket.
-
I am assuming you are talking about the front sprocket? You stated the shaft was stripped? There should be a lock washer on it, preventing the nut from backing off. It sounds like the locking washer is not there, this would cause the sprocket nut to become loose for sure! Regardless of what loctite you used. I have some contacts at Hisun, let me know if you need some assistance here, I can make a call for you. Matt
-
Do you have a OEM service manual? It is available for free if you need it to help you work on it yourself. Was it the front or rear sprocket?
-
One of the problems I have found on the Hisun is that the threads are very loose. I mean that even when the bolt and nut are correctly torqued, they can work themselves loose due to the poor tolerances on the threads. Some of the things I have done to overcome this is to replace any bolts that do come loose with a higher quality screw, nut, bolt etc. Using blue locktite should be more than enough to secure it, unless they didnt torque it properly. I took mine down to the frame and put it back together, I found a lot of loose nuts and bolts. I replaced most of them with higher quality stainless steel replacements. But overall, I am still happy with my purchase. I have yet to find a vehicle that didn't need some kind of tweaking here and there.
-
Hey there, new member here, just looking for information and tips. I just purchased a Hisun strike 250 for my young son. We have taken it to elsinore mx park here in so cal and he had a blast. I know I am going to get a lot of feedback regarding this, but I have to tell you, for the money, and his age, I can't complain. It always starts, is a blast to ride, and yes, I can fit in it at 6.1 and 195lbs. Have we had any issues? sure, but about the same about as any other vehicle, so I can't really complain. We couldnt find any aftermarket parts for it, so we engineered our own 2 inch lift kit for it, and it worked great. We have mounted additional lights on it as well. Some of the things we did notice are that the shift linkage seemed to be rubbing the exhaust pipe, and so I modified the shift linkage, and now that problem is gone. I also noticed that the factory plastic is very brittle, meaning it will crack if not handled properly. The quality of the OEM nuts and bolts are very poor, they seem to strip out very easy. So, we are replacing what ever bolt we remove, with a higher quality version. The battery is not easy to access, and in a pinch, that could be a problem, as tools are required to get to the battery. If you were to need a jump out in the boonies, you might be stuck. Also, the factory 4 point harness is hard to adjust, so we might have to replace them with aftermarket versions. Aside from that, he has not really had any problems with it. Granted it is not a larger 500 or 900cc UTV, so the load and demands on it are less. I do wish it had more power, but since he's only 9, I am good for now lol. It never quit on us, ran great in 106 degree heat, and handled the muddy track with ease. Another plus, it fits in the back of my truck bed with the tailgate up lol. Just my 2 cents.


hisun strike 250
in Hisun UTV SxS Forum
Posted
Hey there, good to see folks doing some research on things prior to making a purchase. As to the topic of ground clearance, I think you might be a little surprised to find that the sector and the strike use the same wheels, shocks and suspension, so for them to say the sector has 8" of ground clearance I would say is a little 'white lie'. They use a different chassis, but share the same part numbers on many other items, like suspension front and rear. As for the power, with the throttle stop removed, it will do upwards of 48 to 50 mph with me weighing in at 200 lbs in it. as for going uphill, depends on the angle of the hill, and the condition of the trail. They are great for fire roads, but from a standing stop up a rough steep hill, you might be a little disappointed. It just doesn't have the torque required to do that kind of work. They are great for play and easy roads and trails not so much for serious off-roading. Me and my wife have both been in the strike 250, but the seats are bucket seats and are form fitting style, the bench seat in the sector might be more comfortable for two adults with room to spare. The sector is easier to get in and out of compared to the strike as well. The strike doors can be a challenge at times to open. If it were just me and my wife, I would have gotten the sector over the strike, but my young son drive the strike like crazy, so he got to pick it out and we end up driving our jeep wrangler. I have not driven the Trailmaster challenger yet so I cannot comment on something I do not know. I can only comment on what I do know. But from what you are telling me in your post, I think you will like the sector over the strike. Same engine, suspension, just different seating position. I do know the Trailmaster and the Hisun UTVs both have solid rear axles, so I think the ride will be very close. The Trailmaster uses bucket seats as does the Hisun Strike, so take that under consideration compared to the Sector and see which you would like better, remember you are the one riding in it. I looked at it on some videos and it looks okay, but I just don't know from first hand knowledge.