Dale Stansbery
-
Posts
39 -
Joined
-
Last visited
-
Days Won
5
Content Type
Profiles
Events
Forums
Gallery
Downloads
Community Map
Everything posted by Dale Stansbery
-
Coleman or Hisun 550 SxS hitch receiver
Dale Stansbery replied to Alien10's topic in Coleman UTV SxS Forum
They make a clamp to tighten up a hitch in the receiver. It may work on the other end if there's room. I have the same 550 setup, but can't get to it to look for now. Amazon.com: Hitch Anti Rattle Clamp for 2” and 1.25” Receivers - Carbon Steel Trailer Hitch Tightener with Rubber Shims - Black Powder Coated for Noise & Vibration Control - Easy Install : Automotive -
Coleman 550 front couplings and splines
Dale Stansbery replied to CaseyNolan's topic in Coleman UTV SxS Forum
refer to the service manual. I'll try to upload a copy. 550cc & 750cc Utility Service Manual(1).pdf -
I need to know if anybody is smarter than Chat GPT?
Dale Stansbery replied to JBF's topic in UTV General Discussion
Did the lights come with any instructions? If not, go to their website where they will have instructions, I looked. They also have a support phone line, that would be your best resource. They apparently have a wide selection of lights and may have various wiring options. -
You've answered your own question. The pressure is way too high. It's only running on that portion of the tire and the fronts wear faster than the rears because they take a beating from steering, especially on hard pavement. You must also have a very hard ride. Get the pressure down to the recommended level.
-
Try this link, it will contain wiring diagrams. He may see this post and reply, he's a great resource on this site.
-
Do you have any mechanical experience? The fluids were probably drained because the head gasket was blown. The engine may be fine, just needing a new head gasket. Drain it all again, oil and antifreeze and pull the head and see how it looks. Get a new gasket and put the head back on noting the torque requirements. I do recommend taking the head to a trusted machine shop and have them check the flatness of the head before re assembling. They can plane a couple thousands if necessary to flatten it.
-
Download the service manual, this may not be for the exact year you have, but should get you close.
-
Inspect your engine closely, if it's a spin on you should be able to find it. It will probably be in a tight spot and may be difficult to locate at first. If it's anything like my Outfitter 550, you'll want to get a replacement filter with a nut molded on top so next time you can remove it easier next time. From ChatGPT: The Hisun Axis 550 UTV utilizes the HiSun 503-01156 oil filter. This filter is compatible with various Hisun UTV and ATV models, including the Axis 500, 700, and 750, as well as models from Massimo, Coleman, Cub Cadet, Bennche, and others. Hisun Parts Central+8Walmart.com+84atvparts.com+8 Recommended Oil Filters for the Hisun Axis 550 Here are some suitable oil filter options: Budget-Friendly HiFlo Premium Spin-On Oil Filter (HF303) Price not available Go to merchant High-Quality Replacement Chikia Oil Filter Replacement for Hisun UTV/ATV Price not available Go to merchant Value Pack SUONE 2-Pack Oil Filter for Hisun UTV/ATV Price not available Go to merchant The Hisun Axis 550 UTV utilizes the HiSun 503-01156 oil filter. This filter is compatible with various Hisun UTV and ATV models, including the Axis 500, 700, and 750, as well as models from Massimo, Coleman, Cub Cadet, Bennche, and others ChatGPT chooses products independently. Learn more
-
Can’t figure out what part I’m missing
Dale Stansbery replied to Grant's topic in AXIS Off-Road UTV SxS Forum
Does everything seem to function OK. Just a guess but it may be an unused connector for an unused option. -
I bought generic cover from Amazon that was designed for SXS UTV's. It has tie down anchors and straps. I used it for 2 winters and it worked well. I subsequently found space in my machinery shed for it.
-
Hisun Strike 550 oil dip stick
Dale Stansbery replied to Mark in Idaho's topic in Hisun UTV SxS Forum
If it's like the outfitter 550, pull the center and right side access panels under the seat for best view and access to the dipstick. Unfortunately the aftermarket dipstick extension tubes won't work since they extend up under the non removable portion between the access panels. -
parts for massimo, hisun,etc in florida?
Dale Stansbery replied to sxr951's topic in Hisun UTV SxS Forum
Bolt M9x109, for instance this head bolt is available at Motorcycle Doctor. -
parts for massimo, hisun,etc in florida?
Dale Stansbery replied to sxr951's topic in Hisun UTV SxS Forum
Did you take a look at the parts diagram?...https://alpha-sports.com/massimo_parts.htm?q=massimo-parts I suppose there may be a unique situation that only a 1 off bolt or screw may work, but everything I see on the parts diagrams are standard metric bolts. They are after all trying to minimize costs, and creating unique hardware hardly seems productive. -
Changing the Display to MPH from KPH
Dale Stansbery replied to russnropes's topic in Massimo UTV SxS Forum
Since you mentioned TSC, I assume you're talking about a Coleman. If I recall, both scales are on the screen, but I'd have to look again to be sure. -
Make sure it's not in 4-wheel drive, it gets much stiffer to turn on pavement or solid ground. Also, make sure your toe in isn't way off.
-
2013 UT 500 won't go into reverse.
Dale Stansbery replied to lonerider98's topic in Coleman UTV SxS Forum
I imagine my 550 linkage is similar to your 500. I have to be sure my engine is at complete idle, and sometimes have to press hard on my brake to get it to shift into reverse. Now it may be the adjustment is a little off, but so far the above steps has allowed me to get it into reverse. -
Hisun 750 clicking sound under the seat
Dale Stansbery replied to Paul409's topic in Hisun UTV SxS Forum
Nods may be correct, but a weak battery can cause the problem, as well as dirty battery terminals, or a weak or dead charging system. I'd first test the battery voltage and if it's less than 12.6 volts, then check the battery terminals for corrosion/looseness, then charge the battery. Start it and check the output of the charging system for >12.6 volts, ~13v+. If it won't start at this point and you're still getting clicking, you'd need to test the solenoid and circuitry to the solenoid from the switch. -
Hisun Strike 250 complete electrical failure
Dale Stansbery replied to Cody Brown's topic in Hisun UTV SxS Forum
Sounds like a loose connection somewhere in your primary 12 volt supply or ground. Do you have a service manual with a circuit diagram and a good volt meter? I'd start at the battery, test for 12 volts from the positive terminal to a ground somewhere on the engine or frame. If you read 12 volts, your ground is probably OK. Then start testing from your battery ground to the ignition switch to see if you're getting 12 volts there. Someone with other ideas will hopefully chime in. You'll need a wiring diagram to check much further than that. Looking at the diagram for my 550, it looks like the horn is hot all the time, yours may be also, does it work with the key off? -
2021 Coleman Outfitter UT400 - I think I was scammed
Dale Stansbery replied to Rainman's topic in UTV General Discussion
If you look at the Hisun parts catalog (Alpha-Sports.com) it shows a cap for a carb engine and a different one one for an EFI engine. I'm certain they can assist you in getting the correct gas cap. It sounds like you have enough time invested now with the 400 that you should just fix it and enjoy it. Unless it had an excessive amount of hours on the hour meter or you find something major wrong, I think you did OK on the price. I bought a 2021 (in 2021) outfitter 550 and love it. -
I sounds like it could be a loose or corroded terminal. When you start the engine, does the speedo kick up every time? I have 2021 Coleman 550 with low hours and the speedometer quit working while I'm driving. But,it kicks up to max and back down when I initially start it. I think that's telling me that electronic control unit is going through a test sequence at start up and the dash component is fine. I have a replacement sending unit but haven't installed it yet. Don't assume that your new sending unit is not also faulty. I don't know if there's anyway to test it unfortunately. Another thing I haven't explored are error codes and if they could shed any light on the problem.
-
Coleman Outfitter 550 Adjusting Toe in
Dale Stansbery replied to Dale Stansbery's topic in Coleman UTV SxS Forum
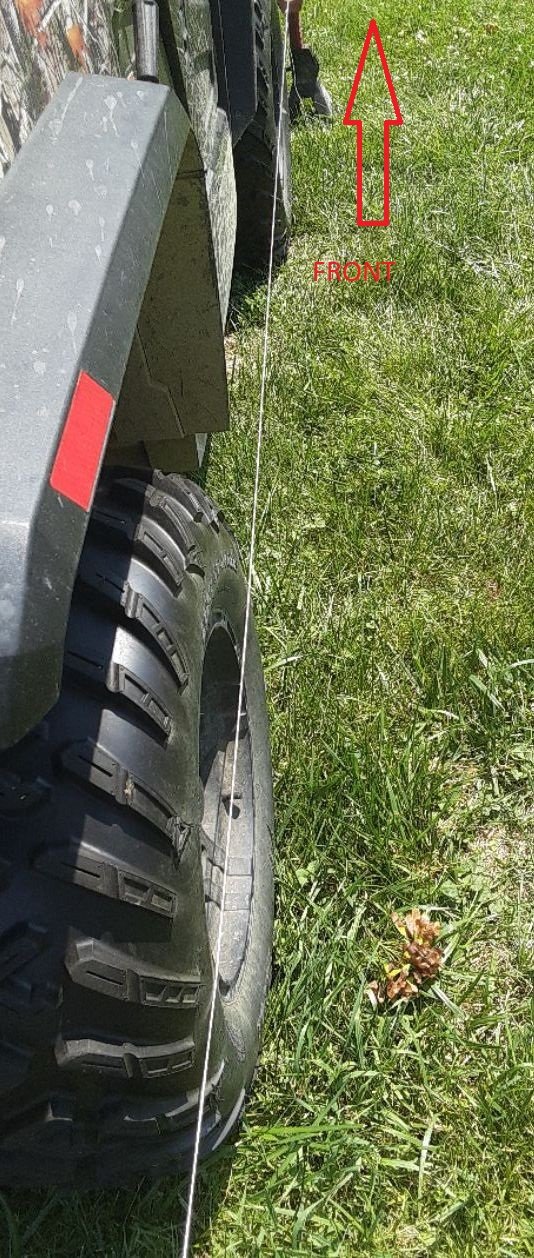
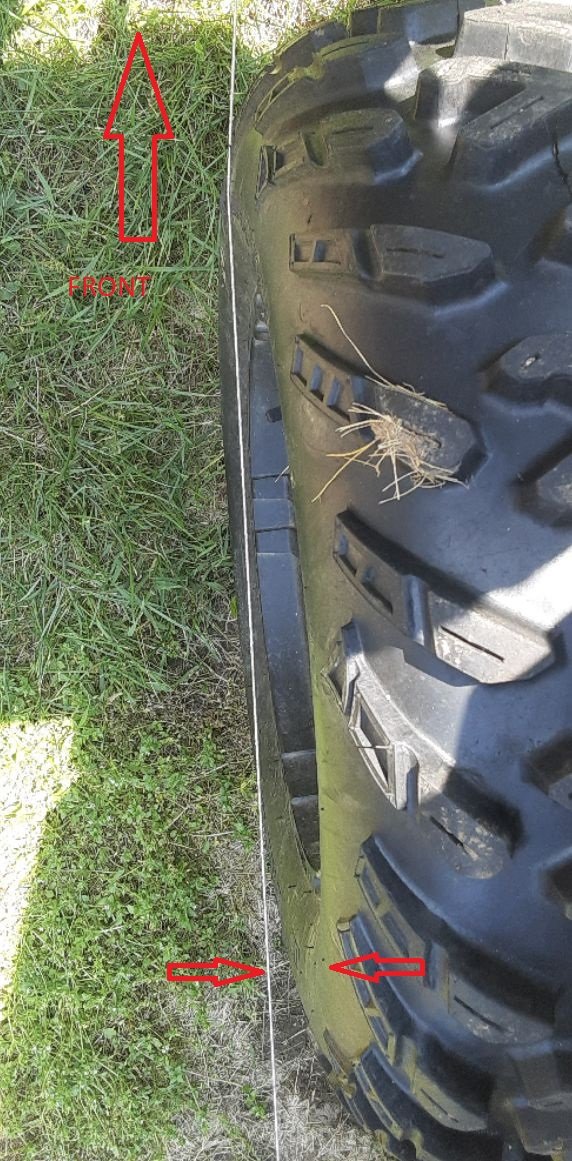
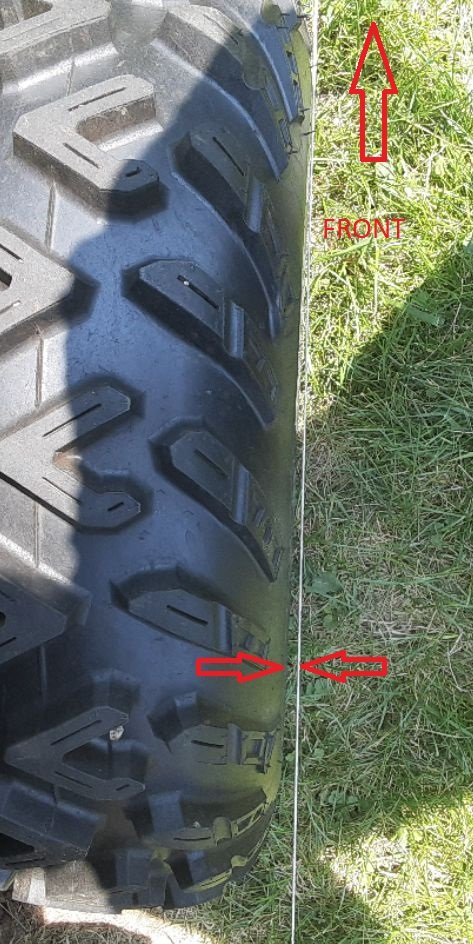
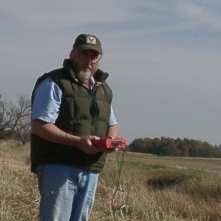
The photos I showed are what it was when I started, and indeed with a lot of toe out, especially the left tire. I didn't take photos after correcting to10mm toe in. Thanks for the added drawings, they will be very instructive for others who may be interested. I only have about 40 -50 hours on the machine so I'm pretty sure it came with the excessive toe out. I should have labeled my photos better, but I wanted to show how you can measure toe in(out) with the string method . The steering is noticeably easier with the correct toe in. It would be wise to check any machine's alignment if one hasn't done so already. The manual suggests checking every 100 hours, but I'd also suggest doing it at 0 hours. The advantage I saw with the string method is being able to get the front tires parallel with the rear, and when properly adjusted, the string was not touching the rear; cleared ~ 7-8mm (15mm/2), and the front cleared an additional 5mm to get a total of 10mm toe in. -
Coleman Outfitter 550 Adjusting Toe in
Dale Stansbery replied to Dale Stansbery's topic in Coleman UTV SxS Forum
Toe-in adjustment successful. I used the string method since there's almost no way to follow the manual and measure the distance between the tire centers at the rear of the tire. Also using the string method allows 1 person to set the toe-in. The string method uses a string stretched along the sides of the rear tires to the front tires. The string just touches the front and back of the rear tire and should be parallel to the side of the front tire if the toe-in is neutral. One caveat, the front track on the Outfitter 550 is 15mm narrower than the rear tires, so the string shouldn't touch the front tires, but be parallel and about 7.5mm (15mm/2) away.. I'm attaching three photos to help describe the procedure. First, the string stretched along the side rear to front tires. Second and third are the left and right front tires showing the misalignment before I started. The gaps between the string at the back of the tires in photos 2 and 3 is the amount the tires were toed out, the string at the front of the tire is just touching the tire. As can be seen in the photos, the toe-out was considerable on the left front and not as bad on the right front. The specs are for ~0 to 18mm toe-in. I set mine at 10mm toe in. I didn't take photos of the final string position but it was 5mm closer to the rear of the tire than the front giving me a total 10mm toe-in. One caveat, before adjusting the tie rod, slide the boot clamp out on the tie rod off the boot freeing the tie rod to rotate without winding the boot around the tie rod. I didn't and was watching the string and tire and didn't see the boot being twisted around. I had to adjust the left tie rod so far that I had the boot twisted tightly around the tie rod. I also suggest using two sets of jack stands and string both sides at the same time. It makes it easy to set the tires parallel and straight ahead with the steering wheel centered.
-
It looks like I have a steering toe in(out) issue with my Outfitter 550. It's a 2021 with pretty low hours so nothing should be too worn. After slowly driving the left front tire over a mound of dirt today, making tight turns has become much more difficult. Just eye balling it, it looks like the tires toe out. I suspect they always have some, but some how I made it worse today. My question is, do the tie rods only use one lock nut on the outer end which is visible, or is there a second lock nut on the inner end under the boot? The maintenance manual doesn't address the tie rod configuration, though I suspect there is only one. If anyone has actually made this adjustment, is there any thing to look out for? The manual makes it look like a pretty straight forward procedure. Edit: I was able to find the parts diagram for the steering and there is only one lock nut on the outboard end of tie rod. That will make life easier.
-
2019 Coleman/hisun 550 power steering out
Dale Stansbery replied to Aaron Miracle's topic in Coleman UTV SxS Forum
If you can read electric schematics, the wiring for the 550 is at the back of the repair manual. -
2019 Coleman/hisun 550 power steering out
Dale Stansbery replied to Aaron Miracle's topic in Coleman UTV SxS Forum
Ummm, I don't think the 550's came with power steering, at least the Outfitter 550 doesn't, only the 750's. Do they make a 550 called something other than Outfitter? I have a 2021 outfitter 550 and no PS.