Kinarfi
-
Posts
2,186 -
Joined
-
Last visited
-
Days Won
38
Content Type
Profiles
Events
Forums
Gallery
Downloads
Community Map
Everything posted by Kinarfi
-
Hard to argue with that, crappy, looks like you need front wheel bearings, rock your tire like that and look for movement between the hub and the cv that goes to the axle. Lenny used to sell a fix for your play, but I think he quit making them, an alternative would by to put some shim stock between the top plate and the slider piece, maybe replace the top plate with a thicker plate or make it out of steel.
-
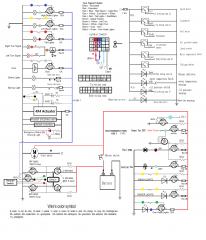
I run 35 PSI on my regulator, Hook a light across your fuel pump to monitor the voltage, also, on the computer pin out. X1-70 - MIL - Mal-function Indicating Lamp Output could be hooked up to show if you actually have a malfunction. If you want to do that, just remember that pin X1-70 is a sink to ground, that means that 12 volts is supplied to a light and the light is grounded via X1-70 if there is a mal-function.
-
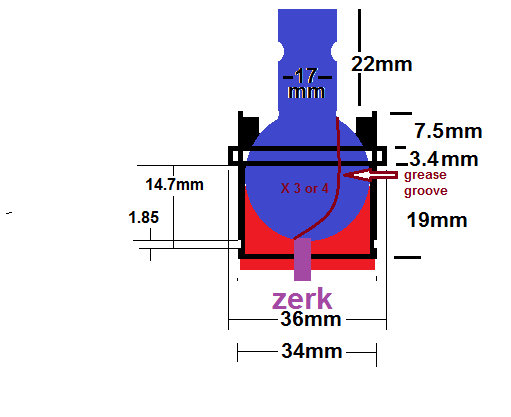
Is the slop in the ball joint or where the ball joint slips into it's pocket in the A Arm? If it's the ball joint, grind off the tack welds, take the top off, drill a hole for a zerk, take a file or Dremel and cut a few lines from top to bottom for grease channels and then screw the top back on and weld it, more than a tack, when you grease them, the pressure of the grease gun forces the ball down and it seals harder against to bottom and you can't put grease in, that's what the lines are for so make sure they go out to bottom. When you screw the top on, make it snug but not binding. Tie Rod Dust Boot, Checker Auto#13566 as shown in Parts and Pieces thread.

-
how many miles / kilometers do you have on that machine now. http://www.mcmaster.com/#91458a122/=x5bz8amay help in the meantime.
-
Trooper 1100cc NO SPARK NO PUMP NO FAN TILL WINCH IS ACTIVATED
Kinarfi replied to go_getta's topic in Joyner UTV SxS Forum
Did you measure both sides of your fuel pump? measure (IN +) to a good chassis ground, pump (IN +) to a good chassis ground, AND (IN +) TO (IN +) -
Trooper 1100cc NO SPARK NO PUMP NO FAN TILL WINCH IS ACTIVATED
Kinarfi replied to go_getta's topic in Joyner UTV SxS Forum
PM COMING -
Trooper 1100cc NO SPARK NO PUMP NO FAN TILL WINCH IS ACTIVATED
Kinarfi replied to go_getta's topic in Joyner UTV SxS Forum
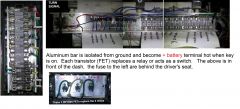
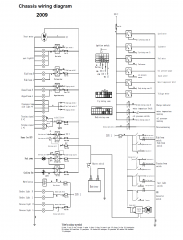
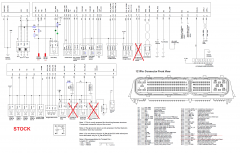
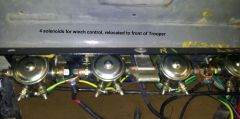
http://www.utvboard.com/gallery/album/112-kinarfis-album-2008-t2-mods/ I added a few photos that I think my be related to your problem, schematics and computer pin out and my winch relay set up. -
-
-
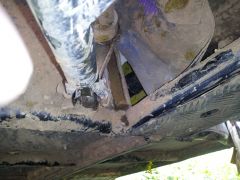
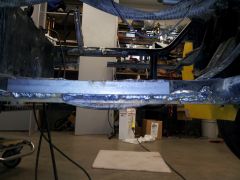
From the album: Kinarfi's Album 2008 T2 Mods
-
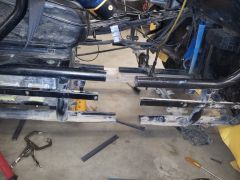
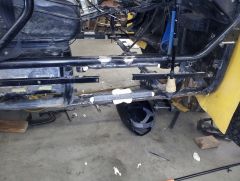
From the album: Kinarfi's Album 2008 T2 Mods
-
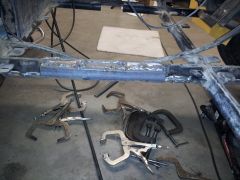
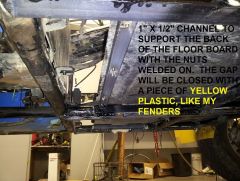
From the album: Kinarfi's Album 2008 T2 Mods
-
Trooper 1100cc NO SPARK NO PUMP NO FAN TILL WINCH IS ACTIVATED
Kinarfi replied to go_getta's topic in Joyner UTV SxS Forum
The winch relay gets real hot if used for an extended period of time because of the high wattage pull in coils. I got rid of mine and replaced it with 4 individual relays, I don't know if any major grounds or powers go through the relay system that would effect the fuel and ignition, but a tweak tightening and unplug and plug back in any connector you can find may restore what ever was lost due to corrosion or heat. The schematic for the computer is in the pinned Parts, pieces and Information topic at the bottom, you can down load it. Do you have a couple of volt meters? I will assume yes, hook one to each side of the fuel pump and turn the key on, if you read voltage on both meters, you've lost the ground, if you don't read voltage on either meter, you've lost power. try it and let us know what happens. -
Trooper 1100cc NO SPARK NO PUMP NO FAN TILL WINCH IS ACTIVATED
Kinarfi replied to go_getta's topic in Joyner UTV SxS Forum
I've dealt with the trooper for several year and I'm pretty good with the electrics and I don't see how the winch has anything to do with the the fuel pump, fan or ignition. However, it may be that it provides an electrical path via a feed back to complete the circuit for the pump fan ignition when activated. does everything keep running after the winch is deactivated? On my trooper, the VIN number is on the panel under the dash in front the passenger seat. Profile, click on your icon silhouette and the in the upper right is the edit box to click on. And welcome to the site, Jeff, AKA Kinarfi -
Trooper 1100cc NO SPARK NO PUMP NO FAN TILL WINCH IS ACTIVATED
Kinarfi replied to go_getta's topic in Joyner UTV SxS Forum
Sounds like you may have lost a ground point, there is a ground point up by the horn that is important if, I remember right. Charlie's right, but what you have to do is unbolt the fuse/relay block to look at the back side for burnt/hot wires. This is pretty common on Joyners Can you tell us more, year, miles, modifications, and fill out your profile, may some one live just around the corner from you. -
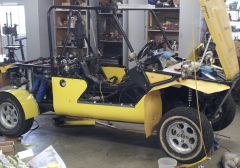
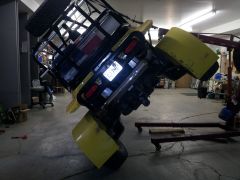
New (used and abused) 2008 Joyner Trooper T4
Kinarfi replied to Jacksnife's topic in Joyner UTV SxS Forum
I see that, thank you, -
New (used and abused) 2008 Joyner Trooper T4
Kinarfi replied to Jacksnife's topic in Joyner UTV SxS Forum
Yes, Please, How the bucket fits into the head and pushes the valve. When I had my valves done, they offered to set my valve clearances for me and I said ok, they did one valve and then said they couldn't do it. The method they used was to measure measure the clearance, and then grind off the end of the valve stem to get the clearance needed. Neat trick if you have lots of excess stem, but Chery motors don't, the keeper is to close to the end. I picked up a few shims at Honda and sanded a few down on a belt sanded and got them all within specs and have been running since, but I fear it may be getting time to do it again come next winter. I bought my Trooper mid 2008, rebuilt the engine in early 2011 because of the cheap stock air filter and bad location for it. Had a fine powder coating on the inside of the intake system and lousy compression. It would start if I had a hill to roll down or a push and run and start fine for the rest of day if the engine was warm, but wouldn't do a starter start if cold. I tore the engine down and replaced the ring and gaskets, (Don't remember for certain if I honed the cylinders or not, but I think I did, seems there was a slight lip at the top. Still running good, but some what anemic on the hills in higher gears. -
New (used and abused) 2008 Joyner Trooper T4
Kinarfi replied to Jacksnife's topic in Joyner UTV SxS Forum
The alternative that I saw, used by the people that did my valve job is to position the head and fill the back with water or oil and see if it leaks into the cylinder head. If you disassemble the head, would post a photo of the valve pushing mechanism, please? -
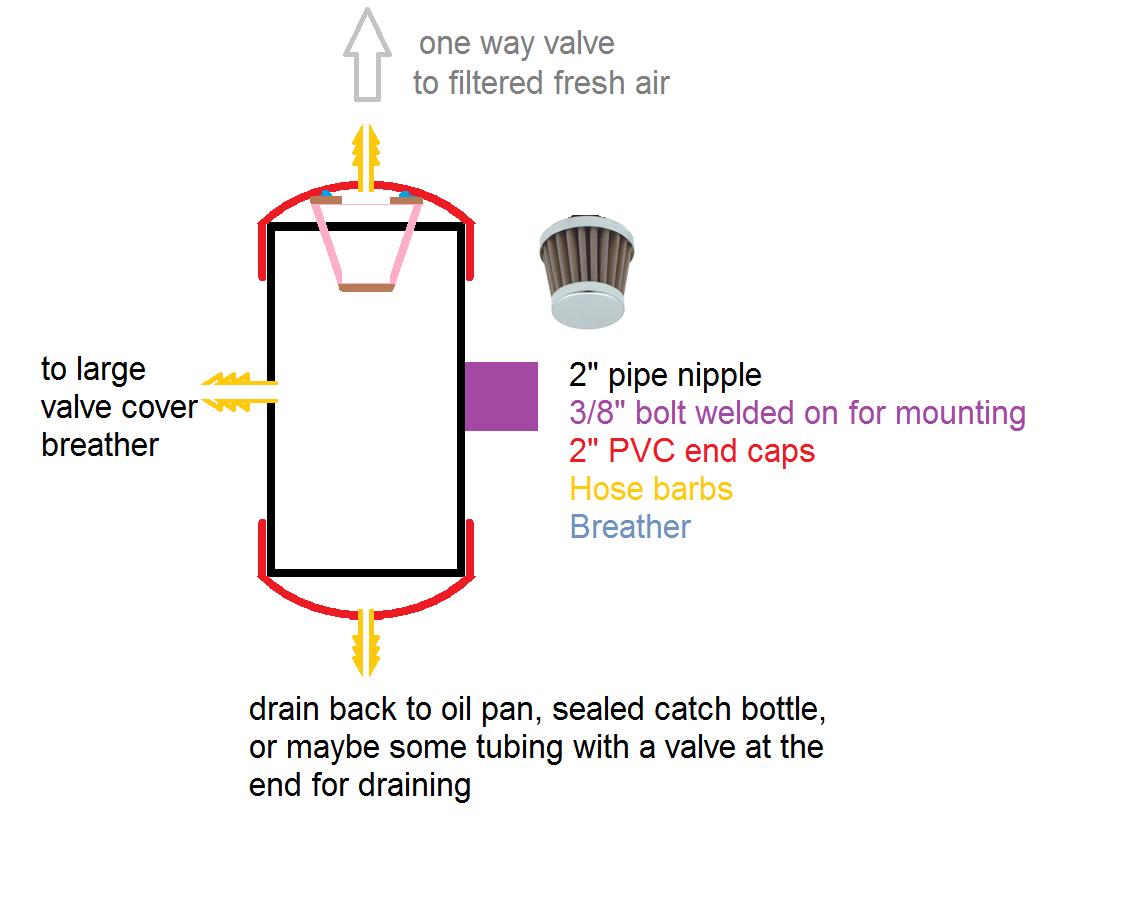
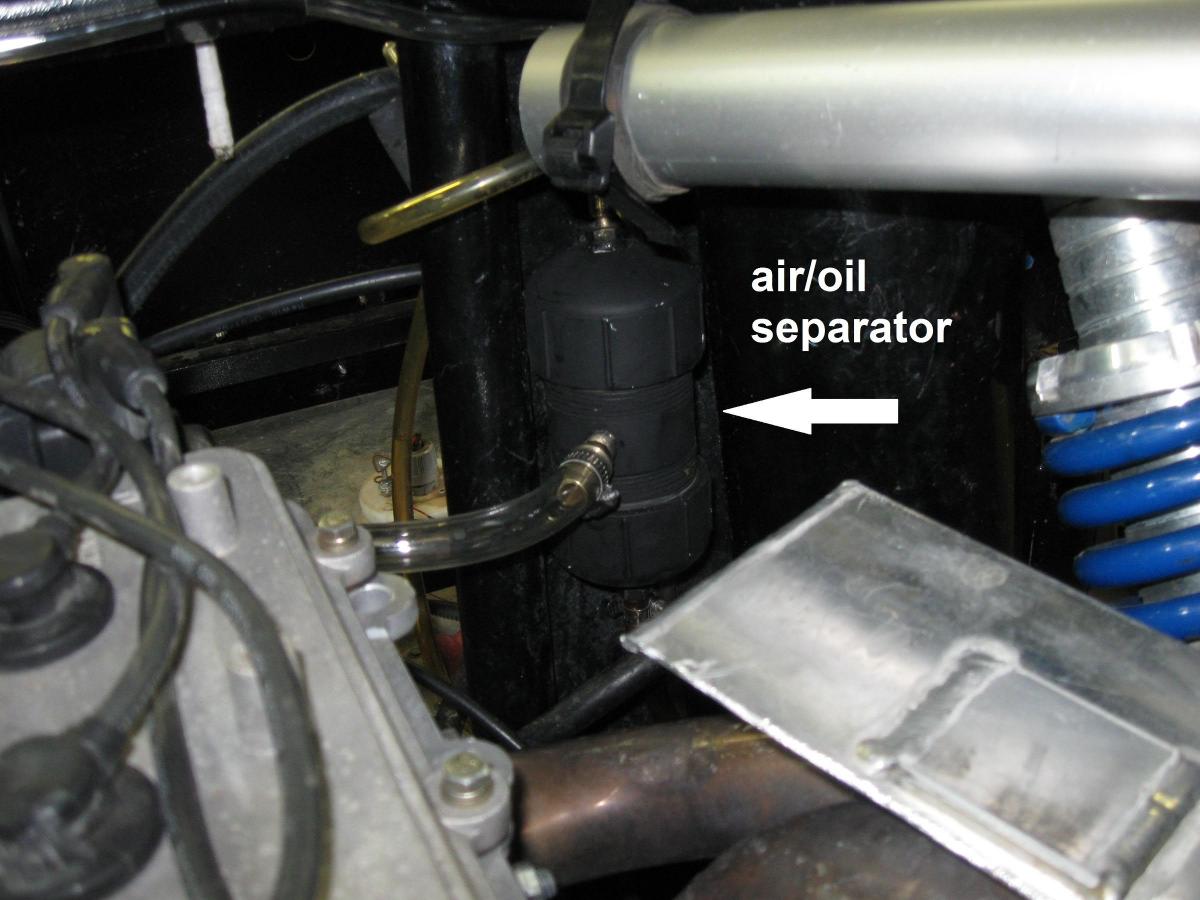
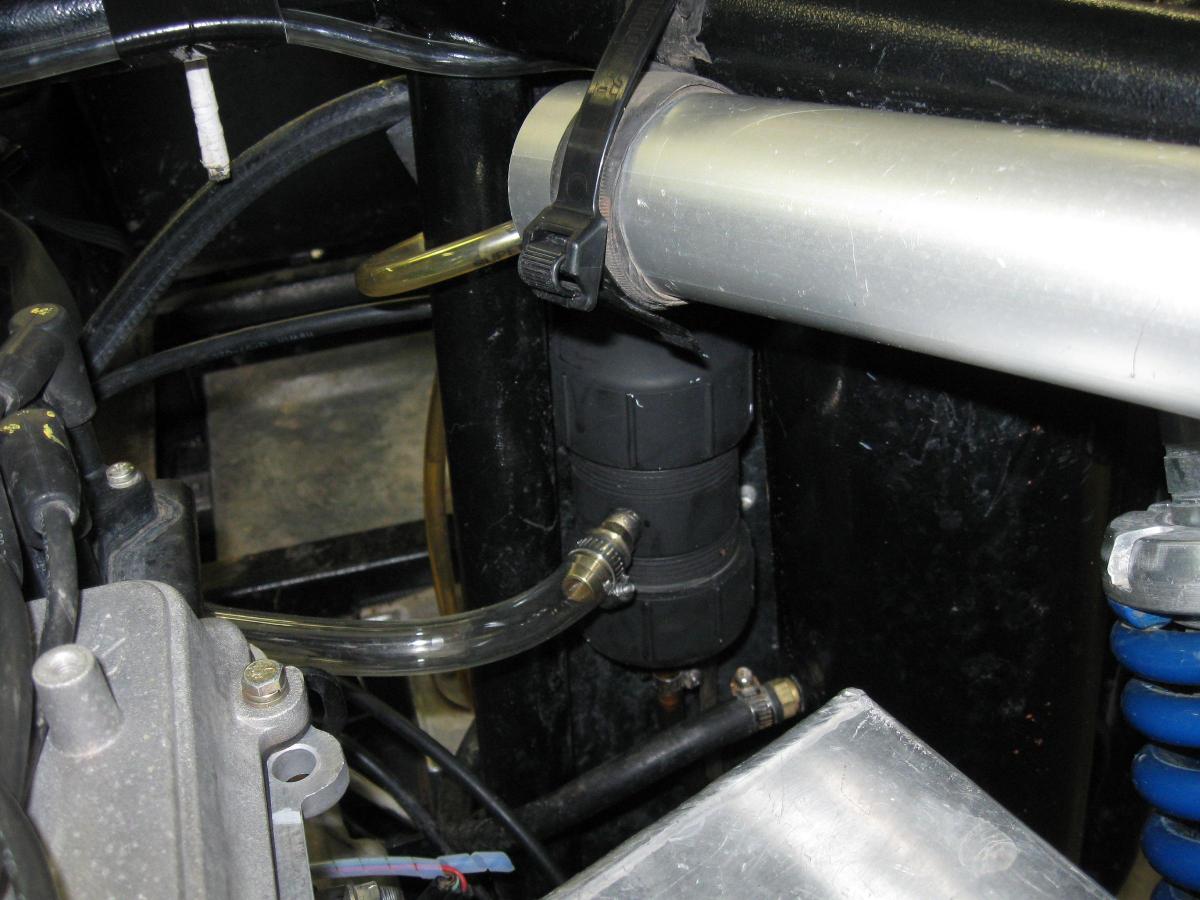
I made my own canister, see attached, the port on the valve cover goes to an oil/air separator, the oil returns to the pan on the forward passenger side and the air goes to the intake after the filter. Mine was bypassing so much that the chrome canister had oil running down the outside, this contraption won't leak. If you have questions, ask
-
New (used and abused) 2008 Joyner Trooper T4
Kinarfi replied to Jacksnife's topic in Joyner UTV SxS Forum
I remember using a flat magnet and some small channellocks to lift the the shim pucks out of there pocket, it was about 1/8 inch thick and 1 X 2" and it was a Neodymium magnet. -
You are correct about fuel pump relay feeds fan relay and always on in stock set up, you could break the wire to the fan relay and put a controller in line there, but it would have to be really really annoying for me to do that, and where are you going to pick up the temperature to turn on the fan?
-
New (used and abused) 2008 Joyner Trooper T4
Kinarfi replied to Jacksnife's topic in Joyner UTV SxS Forum
What ever you do, take lots of photos before you take things apart so you can refer back to them later as you put it back together, especially the wiring parts and how the harnesses are routed, there aren't that many bolts holding the engine to the tranny, just don't forget the plate at the bottom of the clutch housing, I would suggest leave the tranny in -
Just another option, I'm using FOA shocks, easy to rebuild, don't put more than 180# pound shocks in the front
-
New (used and abused) 2008 Joyner Trooper T4
Kinarfi replied to Jacksnife's topic in Joyner UTV SxS Forum
I agree will pulling the motor, don't let the shop that you take the head to adjust the valve by grinding on the stems, knuckle down and get the shims, some can be had at Honda, some can be belt sanded, I did it, but don't recommend it, some may be able to be adjusted by adding thin shims under main shim, that how I think some have done it, but not sure. I hope some one here can give more advise about how to adjust the valves. I had my whole engine apart and photos of it, but the photo web site shut down, Your 30 pound cylinder is probably an open valve, don't panic until you actually look at the cylinder walls, I had over a 1/4 inch end gap on my rings, If you open the tranny up get a 3rd gear synchro if you're grinding going into 3rd, I think I have a doc in the parts and pieces thread -
I don't think I have ever pin pointed where it's coming from, but I do think its every little ounce of play in the suspension bottoming out all at once, I still have it after 20,000 kilometers! I tries using limit straps, not help, It seems like my most productive attempt was to make the front end suspension as lightly sprung as I could, but I have some 200# springs which I think is a bit too much. Seems to happen on rebound.
-
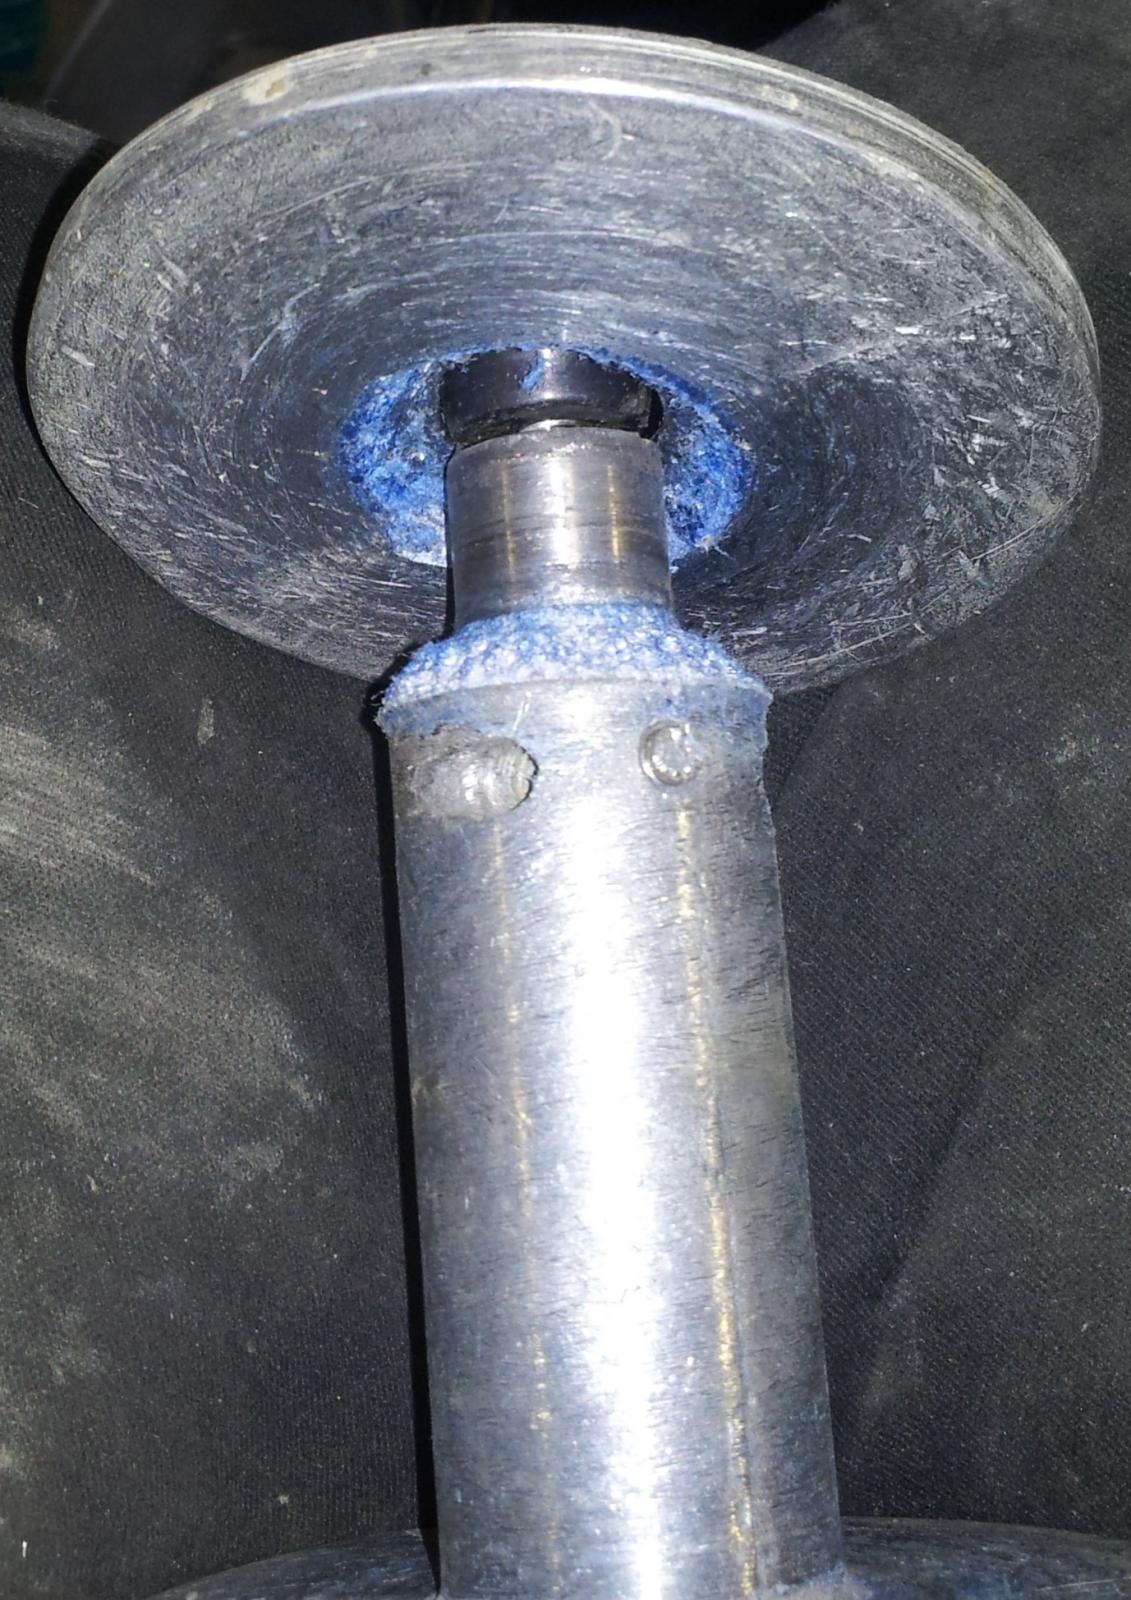
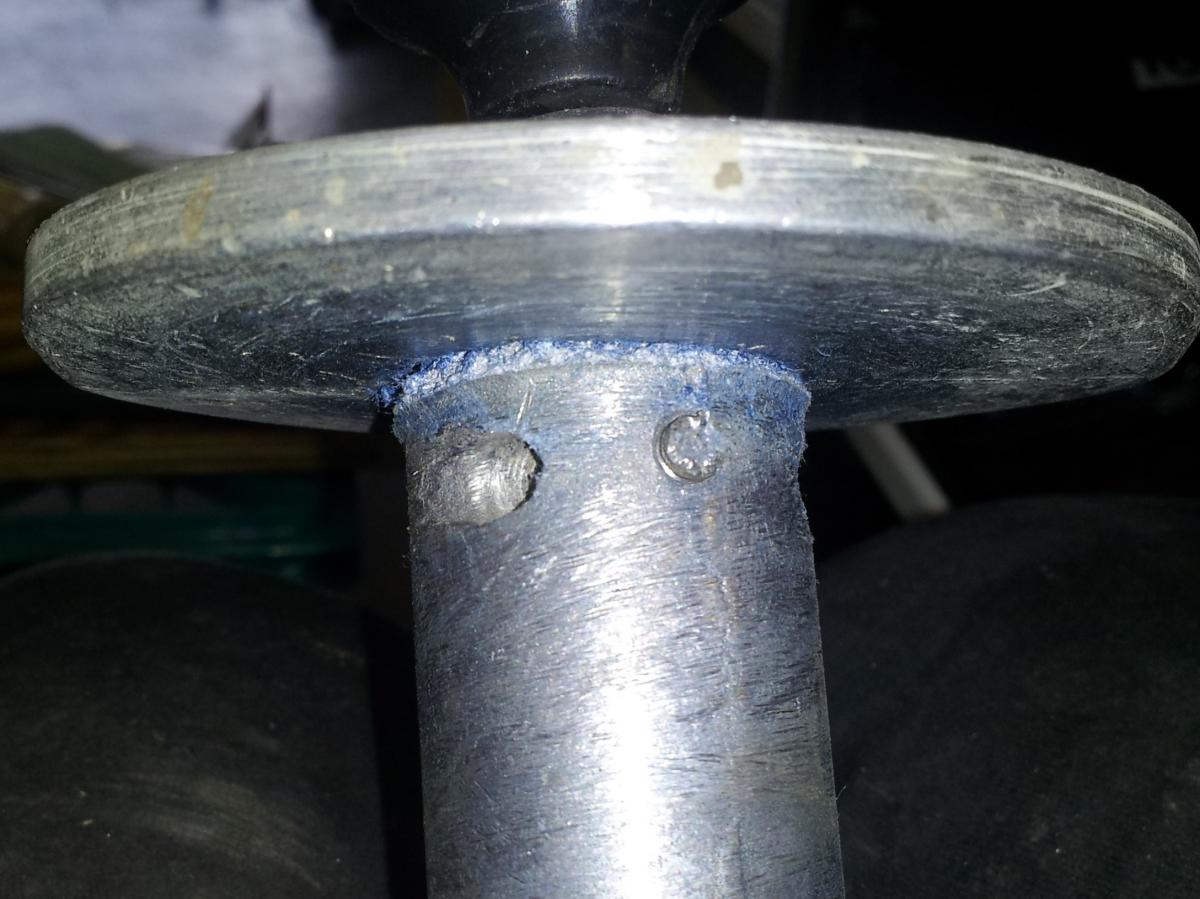
I bought 100' of 5/16" AmSteel-Blue AS-78, 13,700lb. Breaking Strength, Blue, rope for my winch and found I could put twice as much of this stuff on my winch spool as I could the wire rope that was on it. Doing it just because you can is not always a good idea. Later I needed my winch, real bad, and I let out the necessary amount of rope and started pulling. Because the new rope does NOT hold it's shape like the steel rope, the inner windings compressed and created a side pressure on the ends of my spool and blew it off. Some of the rope got damaged by being forced into the break and I ended up cutting a little less than half off. It will be carried in the Trooper, just not in the winch spool. Also, you have to consider that this is the original winch and has got me out of a few jams, but it's not the best winch out there and this is what I think happened.