Drive Line Tip
-
Similar Topics
-
By BernieG
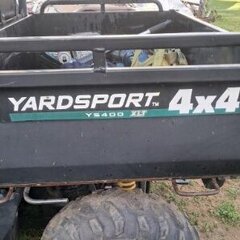
I could really use some help identifying some disconnected components on a Yard Sport YS400. The first part is this pipe, which comes out of the exhaust port area or the cylinder. It looks like it had a piece of rubber hose on it, but the hose is gone, and I have no idea what it was previously connected to.
The second item is this vacuum valve looking thing. Again only one line is still attached. What is it's function and what other lines should be connected to it?
The last thing is this hose, which exits the side top of the fuel tank (not the fuel line hose) but is not connected to anything
Any help the community could provide would be greatly appreciated. This UTV belongs to a friend, and I am trying to help him get it running correctly for his kids.
-
By Anthony Vigil
Can anyone tell me how they grease the drivelines ? Can’t grease the u joints. Do you need to take the driveline off ?
And are they easy to take off?
Thanks
-
By Havoc321
I’m looking to have my 2022 800sx fit in the 10’ garage of my toy hauler. I thought about removing the dump bed, so I wondered how far the dump extends beyond the tires. Thanks!
-
By Greg Kilgore
I would really like to know what you guys think about this. I'll try not to ramble and make it as clear as I can.
I took this new job with companyX as a fiber splicer a year ago. I have a 45' bucket truck and 10or12 x 8 ft enclosed splice trailer I have to take home. Within the last 6 months all the management in the splice dept left. Now the power/construction management and higher ups are filling in. Just recently we were told travel to our 1st job is not payable even though we are in a company vehicle.
We are union so I asked the union business manager about this. His reply was be grateful you were paid travel as long as you were and that you don't have to drive your POV to the job.
Last week I had 50hr total. The job area is 4-4.5 hrs away. My time was reduced to 44.5 hrs since we were told this travel thing on Tuesday of that week. I wasn't hired for this area. I was hired for area a lot closer to home.
Pay is good. Work is not hard. Insurance is through the union and so far pretty good.
But I hate the thought of having to work extra just to make a 40hr paycheck. Anyone who has to drive as part of their job knows windshield time is not easy.
Anyway what do you guys think. Should I look for a different job or just suck it up because of the decent pay and health insurance.
-
By Keith k
Just got this kymco 450i Uxv from a guy, drove it around before I paid. Got home drove around town a little while the next day and it started squealing and amd didn’t want to go. Got to looking at the clutch, that’s were the noise is coming from, the primarily sounds like. Maybe a bearing in there cause the grinding noise and it only makes the noise when you go to move.
-


Recommended Posts
Join the conversation
You can post now and register later. If you have an account, sign in now to post with your account.
Note: Your post will require moderator approval before it will be visible.