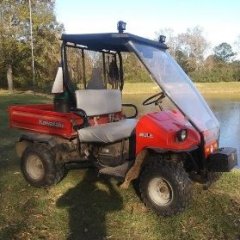
dump bed problems
-
Similar Topics
-
By didgeridoo
Hello, All! I've decided to replace the traction batteries in my 2018 Sector E1 with a 48V Lithium set. They may be expensive, but I figure the Discovery Dry Cell are, too. I am not looking for the max driving range, as I have never received near the brochured range to begin with, but a good mix of charge/ get work done/ charge is what I am expecting.
I have settled on the 48V EAGL kit from bigbattery dot com. Each battery pack provides 30Ah. The kit ships with a charger, as well. The packs would be physically connected in parallel (using a busbar) to one another, maintaining the 48V voltage, but together would be able to provide the amp draw the buggy pulls when going up hill or towing a rake (rated 320 max continuous Amps). This is in comparison to the serial connection the eight 6V lead batteries. Each of the EAGL batteries looks to have its own BMS; am I correct in thinking I will have to use their included charger rather than (simply) changing the onboard charger to lithium mode? The chemistry of the pack is LiFe PO4, for what it's worth. I haven't torn anything apart yet (to diagram), so I am not sure how the dash will interpret the AMP draw, but the kit I am looking at includes a dash mounted charge indicator.
If anyone has completed a similar conversion, do you have any tips? Specifically, how did you remove the original batteries, and how did you secure the new ones? I am guessing that almost any change from the stock batteries would involve at least some modifications. Any tips would be appreciated, especially things I may have failed to consider. Thanks!
-
By Oldman
Ive got an American Sportsworks BD-200. I can’t get the ignition switch to work, but if I cross the solenoid, it starts right up. Runs great. Can anyone send me a simple wiring diagram for a switch and where the 3 wires from the switch go! Any help is greatly appreciated!!! Thanks!
-
By Steve B
My "R" light on the dash will not go out when I take the UTV out of reverse and put it into any other gear. Is this just the light switch issue or will this effect engine performance in the other gears?
-
By NHTracker
I have 2020 Tracker 800SX LE that I bought new in 2020. Yesterday i noticed two cracks in the bed in the corners at the tailgate end. They go all the way through the bed. I use it around the property moving firewood, dirt and stuff. Don't know how they could occur. Has anyone else had this problem? Is there a fix? Help!!!
-
By Travis
Many people have issues with the kawasaki FJ400 engine fouling out spark plugs, after working on a few FJ engines and 600 series Mule's with this issue, i can say the fix for this issue is using a slightly hotter spark plug... the factory recommends a BPR6ES NGK plug.... the Number in NGK plugs represents its heat range and somewhat odd, the lower the number the hotter the plug, at least as far as NGK is concerned. If you have a Mule fouling spark plugs try installing a NGK BPR4ES spark plug.
FROM NGK
A hotter heat range spark plug has an insulator design with a longer heat flow path to the metal shell of the plug. As a result, more heat stays in the ceramic firing end and less is dissipated to the engine. A colder heat range spark plug has an insulator design with a shorter heat flow path to the metal shell of the plug. As a result, less heat stays in the ceramic firing end and more is dissipated to the engine. For a spark plug to function properly, it must have a tip temperature high enough to burn off carbon deposits (self-cleaning) and avoid fouling, while remaining low enough to avoid overheating the ceramic firing end and pre-ignition.
-


Recommended Posts
Join the conversation
You can post now and register later. If you have an account, sign in now to post with your account.
Note: Your post will require moderator approval before it will be visible.