1999 Mule 2500 Front Hood, Cowl Alternative
-
Similar Topics
-
By didgeridoo
Hello, All! I've decided to replace the traction batteries in my 2018 Sector E1 with a 48V Lithium set. They may be expensive, but I figure the Discovery Dry Cell are, too. I am not looking for the max driving range, as I have never received near the brochured range to begin with, but a good mix of charge/ get work done/ charge is what I am expecting.
I have settled on the 48V EAGL kit from bigbattery dot com. Each battery pack provides 30Ah. The kit ships with a charger, as well. The packs would be physically connected in parallel (using a busbar) to one another, maintaining the 48V voltage, but together would be able to provide the amp draw the buggy pulls when going up hill or towing a rake (rated 320 max continuous Amps). This is in comparison to the serial connection the eight 6V lead batteries. Each of the EAGL batteries looks to have its own BMS; am I correct in thinking I will have to use their included charger rather than (simply) changing the onboard charger to lithium mode? The chemistry of the pack is LiFe PO4, for what it's worth. I haven't torn anything apart yet (to diagram), so I am not sure how the dash will interpret the AMP draw, but the kit I am looking at includes a dash mounted charge indicator.
If anyone has completed a similar conversion, do you have any tips? Specifically, how did you remove the original batteries, and how did you secure the new ones? I am guessing that almost any change from the stock batteries would involve at least some modifications. Any tips would be appreciated, especially things I may have failed to consider. Thanks!
-
By BuggyBoy
So these Giant 48v/110ah batteries have just become available: https://www.aussiebatteries.com.au/giant-100ah-48v-lithium-golf-cart-deep-cycle-battery
They look like they could drop in either side of the Controller that sits in the middle of the tray as they are 330mm(W) 355(L) 295mm(H). They can be paralleled, and I think two should be enough. Technically once paralleled the system should output 400ah continuous and 800ah Max (5 secs), more than enough for the E1 - probably 1/3rd more than is needed.
However, the sales person stated that if the regen braking exceeded 400amps, it would put the batteries in standby mode for protection and they would have to be 're-started' with a jumper pack to reset them. Does anybody know the max output of the E1 Regen system, and if it does exceed that, is it possible to disable/bypass the regen so it has a zero output?
Thanks.
-
By BernieG
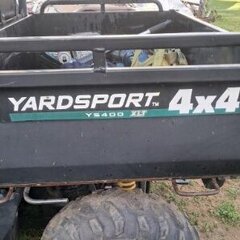
I could really use some help identifying some disconnected components on a Yard Sport YS400. The first part is this pipe, which comes out of the exhaust port area or the cylinder. It looks like it had a piece of rubber hose on it, but the hose is gone, and I have no idea what it was previously connected to.
The second item is this vacuum valve looking thing. Again only one line is still attached. What is it's function and what other lines should be connected to it?
The last thing is this hose, which exits the side top of the fuel tank (not the fuel line hose) but is not connected to anything
Any help the community could provide would be greatly appreciated. This UTV belongs to a friend, and I am trying to help him get it running correctly for his kids.
-
By Stan Morton
My 2018 XG-850-SL starter died yesterday. The old part number from Kubota is E7153-11732 which has been superceed by part # EG881-63010. I am looking for an aftermarket starter because the Kubota retail price for the starter starts at $550 and upwards toward $850. If anyone has gone down this road before and has found an aftermarket starter ~ please share with me. We own a ranch and this thing is used every single day and is sorely missed when it is down for maintenance. Kind Regards, ~ Stan
-
By Gorj
Yesterday my Hisun Sector E1 stopped charging when plugged in. Anyone one have an idea of where to look for a problem?
-


Recommended Posts
Join the conversation
You can post now and register later. If you have an account, sign in now to post with your account.
Note: Your post will require moderator approval before it will be visible.