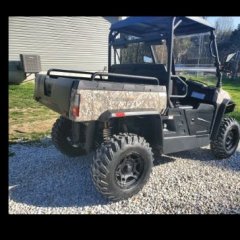
2021 Hisun 750 Coolant dripping
-
Similar Topics
-
By shepdog
I just picked up a 2009 bmx utv 500, there is a small 'nipple' on the water pump, its barbed like a hose goes on it , where is that little hose Suposed to go?
-
By Working hard to hardly work
So... I have just finished rebuilding the 500 (bought it with low compression).
The rebuild was successful runs great. But, I'm not circulating water. I've been trying to read through the forms to figure this out and I'm going through the process of trying to bleed or replace my water pump either way there is a hose barb.
-
By Pilot1996
So my 2022 Tracker 800SX developed a coolant leak. Under pressure there was a pin hole size leak which was spewing coolant towards the firewall. Upon removing the tank I discovered it was bulging pretty severely such that it caused a small crack. Has anyone else experienced this? I suspect either a faulty tank or perhaps a faulty tank cap (rated at 15PSI).
-
By Greg Kilgore
I installed an electric coolant temp gauge and volt gauge today. The oil pressure gauge I ordered had a bad sending unit. So once the replacement arrives. I'll add that install to the post. The I used a 22mm temp radiator adapter.
1/8 " NTP x 1/8 NTP adapter.
And an electric temp gauge.
Had to take a drill and drill bit to enlarge the 1/8 NTP adapter to allow the temp sending unit to pass thru. Another user on the forum enlarged the 1/8 NTP hole in the 22mm radiator to 1/4 NTP and used a 1/4 NTP x 1/8 NTP reducer. Either way would work. Both has it challenges. And both accomplished the same thing. To get the sending unit just barely in the coolant. If you just put the sending unit in. IMO it just blocks too much of the coolant flow.
I didn't get a pic of how far the sending unit protrudes into the rad adapter. But it wasn't a lot. And also since it an electric gauge the sending unit needed to be grounded. But since there wasn't a place on the temp radiator adapter. I used a clamp to secure a ground/negative wires to the temp sending unit. The gauge wiring was simple. The gauge's wiring harness had a red, green, and black wire. Red goes to a positive. Black to a negative. Green to the sending unit. Since I had some 18 AGW speaker wire. I used that to run to the sending unit. Red to green, black to black.
Then another piece of the speaker wire from the gauge to power source. I tapped into the 12V power outlet on the dash. (Just as I did for the overhead fan.)
Then used a 2" hole saw to cut into the plastic above what I'd call the radio door.
The gauge goes to about 174° F then the radiator fan kicks on. Cools down to about 150° F and kicks off. Now the lowest the temp gauge will read is 104° when you first start the machine. That is the nature of the gauge. Even says so on the web page. So I'll just have to live with it.
The voltage gauge
.
Was simple to install. Just a positive and negative wire to connect. Tapped into the 12V power outlet on the dash.
-


Recommended Posts
Join the conversation
You can post now and register later. If you have an account, sign in now to post with your account.
Note: Your post will require moderator approval before it will be visible.