


cliffyk
-
Posts
350 -
Joined
-
Last visited
-
Days Won
49
Content Type
Profiles
Events
Forums
Gallery
Downloads
Community Map
Posts posted by cliffyk
-
-
49 minutes ago, Travis said:

Methinks you found the problem...
-
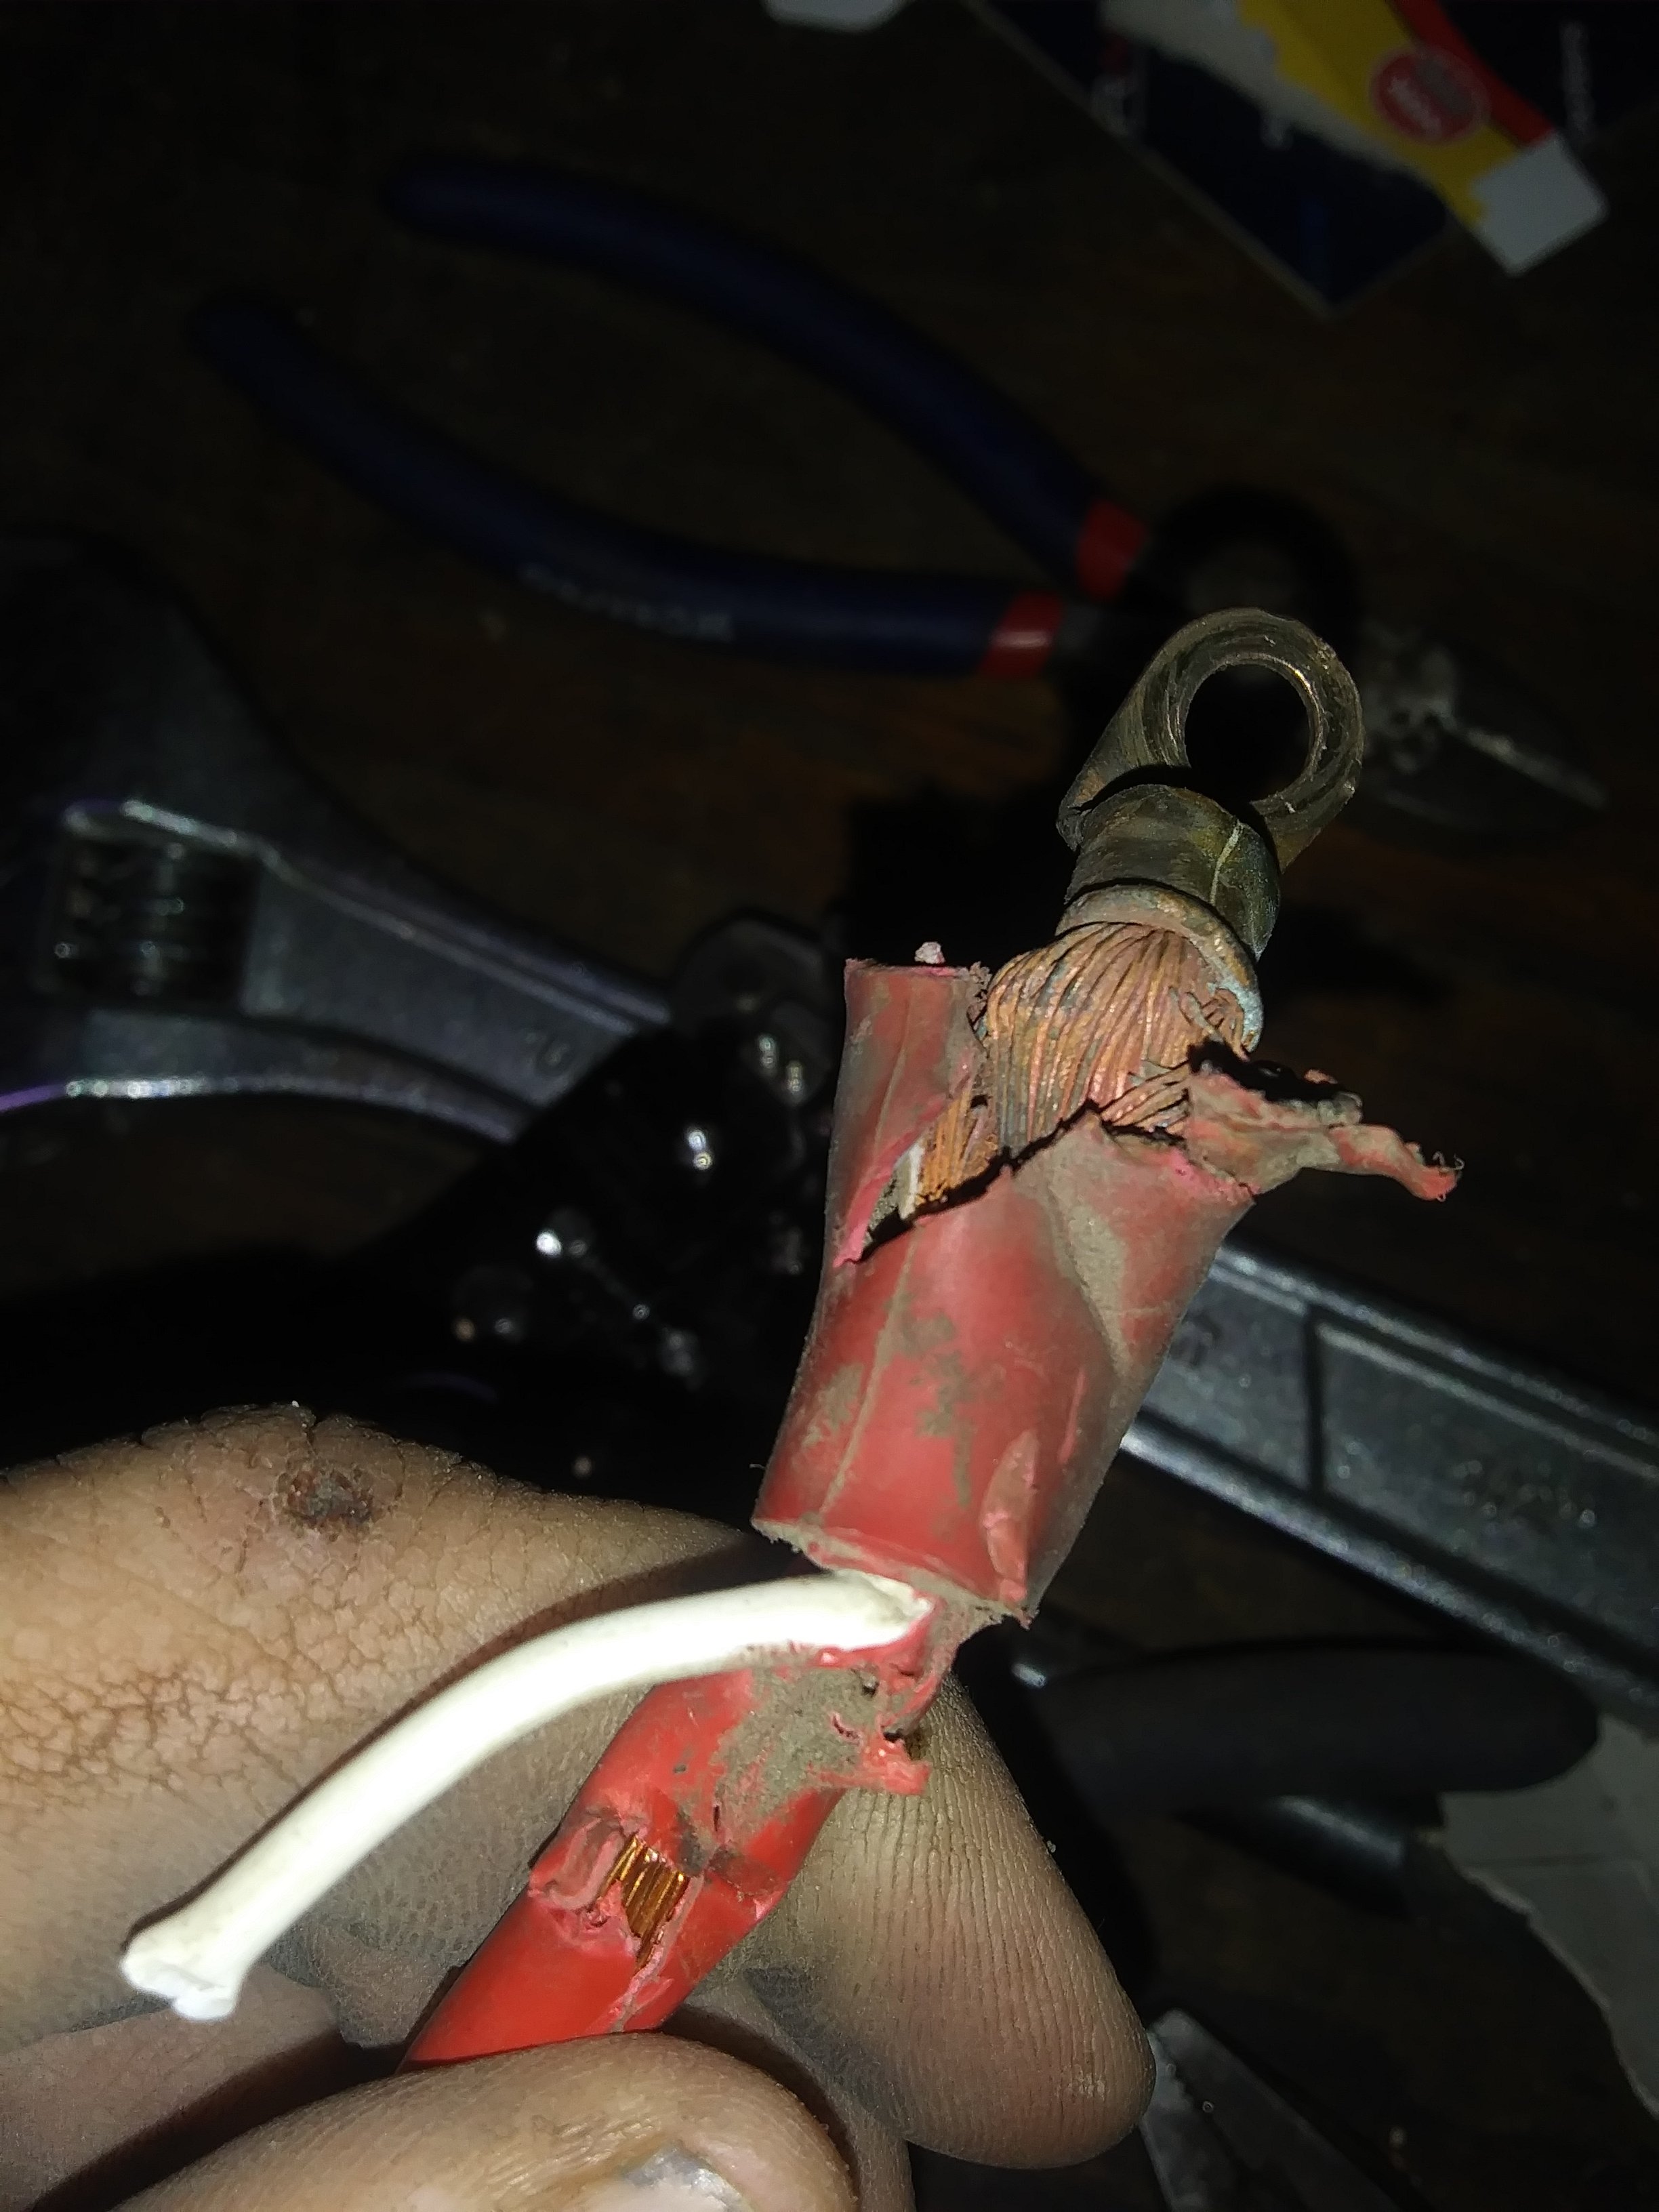
Check the battery voltage (at the cable clamps, not the battery posts) while attempting to crank the engine--it should drop to 10.6 V or so. If not the starter is not getting sufficient power--i.e.; the is likely an overly resistive wire or connection in either the supply (+) or return (-, ground) pathways to the starter.
To determine where that might be measure the voltage from the positive battery post to the positive terminal on the starter. In a perfect world (which this is not) it would be 0.0 V; however in our real world it might normally be 0.1 to 0.25 V, a value representing the voltage "drop" (an indicator of circuit resistance) across the pathway from battery to starter. If more than 0.5 V there's a overly resistive (corroded, loose, etc.) connection, component, or wire) in that pathway.
Ground connections are often overlooked in this sort of diagnosis, so do the same between the negative battery post (while cranking it over) and the starter body to determine voltage drop in the return (ground) path. Again 0.0 V would be perfect, 0.1 to 0.25 V nice, but anymore than 0.5 V is bad. 99.44% of the time a high voltage drop in the ground path is a bad connection at the engine/frame ground wire connector, an often overlooked connection often located in a place subject to all sorts of opportunity to corrode, vibrate loose, etc. If the ground cable terminates at a frame/chassis connection look for a chassis to motor block cable--if you don't find one consider adding one. The steel frame/chassis is a terrible conductor of electricity.
Getting back to the positive side of things;if the voltage drop is excessive (> 0.5V) b'twixt the positive post and positive stud on the starter then "back up" the measurement point along the pathway back to the battery post. I.e. check between the +post and the wire terminal at the starter end--this removes the terminal to stater connection "+" stud from the path to the battery--if the voltage drop is reduced then the problem was the terminal to starter "+" stud connection.
Similarly keep "backing up along the path", and check the voltage drop (while cranking) at each connection point along the way. When you find a lessening of the voltage drop you have found the bad connection. component, wire--it's between the current measurement point and the previous point.
Measuring voltage drop under load is a simple way of testing an electrical path to determine the resistance of each component of same. It is far superior to visual and/or physical inspection as it can "see" poor conductivity that we mere mortals would not recognize on our own. It works best in high current circuits where the drops will be significant. I once found a bad terminal on my step daughter's Yugo (I know, I know...) that the dealer and two auto-electric shops had failed to diagnose--the voltage drop at full charge rate (w/a 300 A carbon pile load across the battery) was over 2 volts! Cutting tghe wire back and crimping on a new terminal (properly potted in dielectric grease) fixed it right up. I went back to the dealer with her and made then give he a refund for the battery they had sold her. Thy didn't like it but they did when I explained "we can do it this way, or we can meet in small claims court (where consumers win 75%+ of the time)"
-
Idling for 10 minutes after a cold start in the cold (or at all) is not good practice--it allows all sorts of nasty, corrosive, combustion by-products to build up in the crankcase. Instead start it, let it it stabilize foe 30 to 45 seconds, then drive it under light load 'til it's warmed up. It will actually warm up faster and be much better for the lower end bearings. rings, etc. If you do continue 10-minute idling to "warm" the engine considered it VERY SEVERE duty and change the oil every 40 to 50 hours of operation--or just kiss-off optimal engine life...
I often wonder about things like this when I see negative reports about how this , that, or the other "cheap Chinese engine" sucks because of oil consumption. knocking or bearing failure.
My step-son for instance performs absolutely zero, zilch, nada preventative maintenance on machines he owns and then gripes about "what pieces of crap" they were. He burned through a $14k Yamaha 1500 cc jet-ski in 6 months--no break-in, he just beat the crap out of it right from the box, and never changed the oil--then seemed surprised when in October it had no compression-- not even enough to start and run poorly...
-
2 hours ago, Travis said:
that is mentioned here https://www.dixiebattery.com/products/golf-compare
Anyone with even a μC (micro-Coulomb) of electrical knowledge would know that...
-
2 hours ago, JeraldWTulsa said:
Another question. Why six 8 volt Batteries and not four 12 volt for 48volt machine?
The power density (Ah capacity) of 4 commonly available 12 V batteries (starting duty or "deep-cycle") would be inadequate to the task--giving people something else to bitch about...
-
17 minutes ago, Joe Breaux said:
apparently its ok to say anything, no matter how mean, degrading offensive or vulgar as long as theres a little D after your name ...
Truth very often is offensive and/or vulgar; especially from the perspective of those seeking to be offended...
-
I damned near cried--and not ashamed to say so...
-
 1
1
-
-
And we lost Rush--a damned cold day...
-
1
-
-
They are built for a very severe duty, high discharge rate, application (which running a trolling motor or a television in an RV ain't), Compare prices per Amp Hour (Ah) capacity rather than by voltage--you'll see the 8 V batteries are actually the same $$ or a bit less...
-
1
-
-
In the old days my first thought would have been a vacuum-lock in the fuel tank, a common situation that occurred--primarily with gravity feed fuel systems--when the fuel tank was full or nearly full; and was due to a clogged vent (often in the cap) that could not pass air to relieve the vacuum created as fuel was consumed. i don't know if the tanks on contemporary EFI fuel systems are susceptible to this, but I'd sill check to see:
Next time the engine stalls crack the fuel cap and listen for a rush of air. Then try to start the motor, if it starts you know the problem and where to look for solutions--if not you're no worse off...,
-
1
-
-
23 hours ago, Travis said:
Had a first today... my fuel pump froze up.
It's a crankcase vacuum pump, so there is a line from the crankcase to the pump. and usually you get a little condensation in the tube, and it froze up right inside of where the tube connects to the pump, got some rubbing alcohol to dissolve the ice and that fixed it... probably have to do it again tomorrow. but soon enough the warm air from the crankcase will prevent it for a little while after you kill it. it'd been about 5 hours since i had driven it....
I lived in New England for 45 years (been here in FL for 30)--that was an everyday occurrence in the winter, when I was in Maine it could happen while you were driving...
-
1
-
-
I had used Plexus for years on my motorcycles--it was never cheap, but then 3-4 years ago they went nuts with he price. ($30-$45 for a 13-oz. spray can (now $25+ at Amazon ) is was the best I ever used. West Marine had a similar, nearly as good house brand product, for around $15--don't know if they still do.
Beyond that just be careful--nothing except not letting it get scratched will "prevent" it from getting scratched...
-
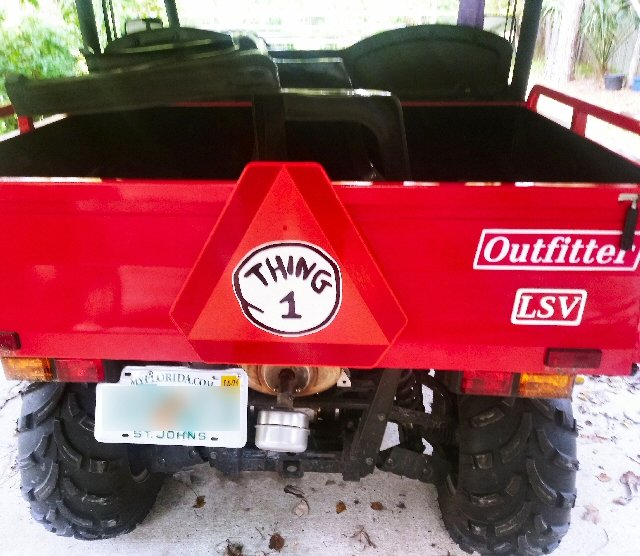
20 minutes ago, Travis said:
where's the hole in the seat?

Good question, or "holes in both seats"--we had a "two-holer" at the farm when I was a kid...
-
 1
1
-
-
3 hours ago, Scott Meszaros said:
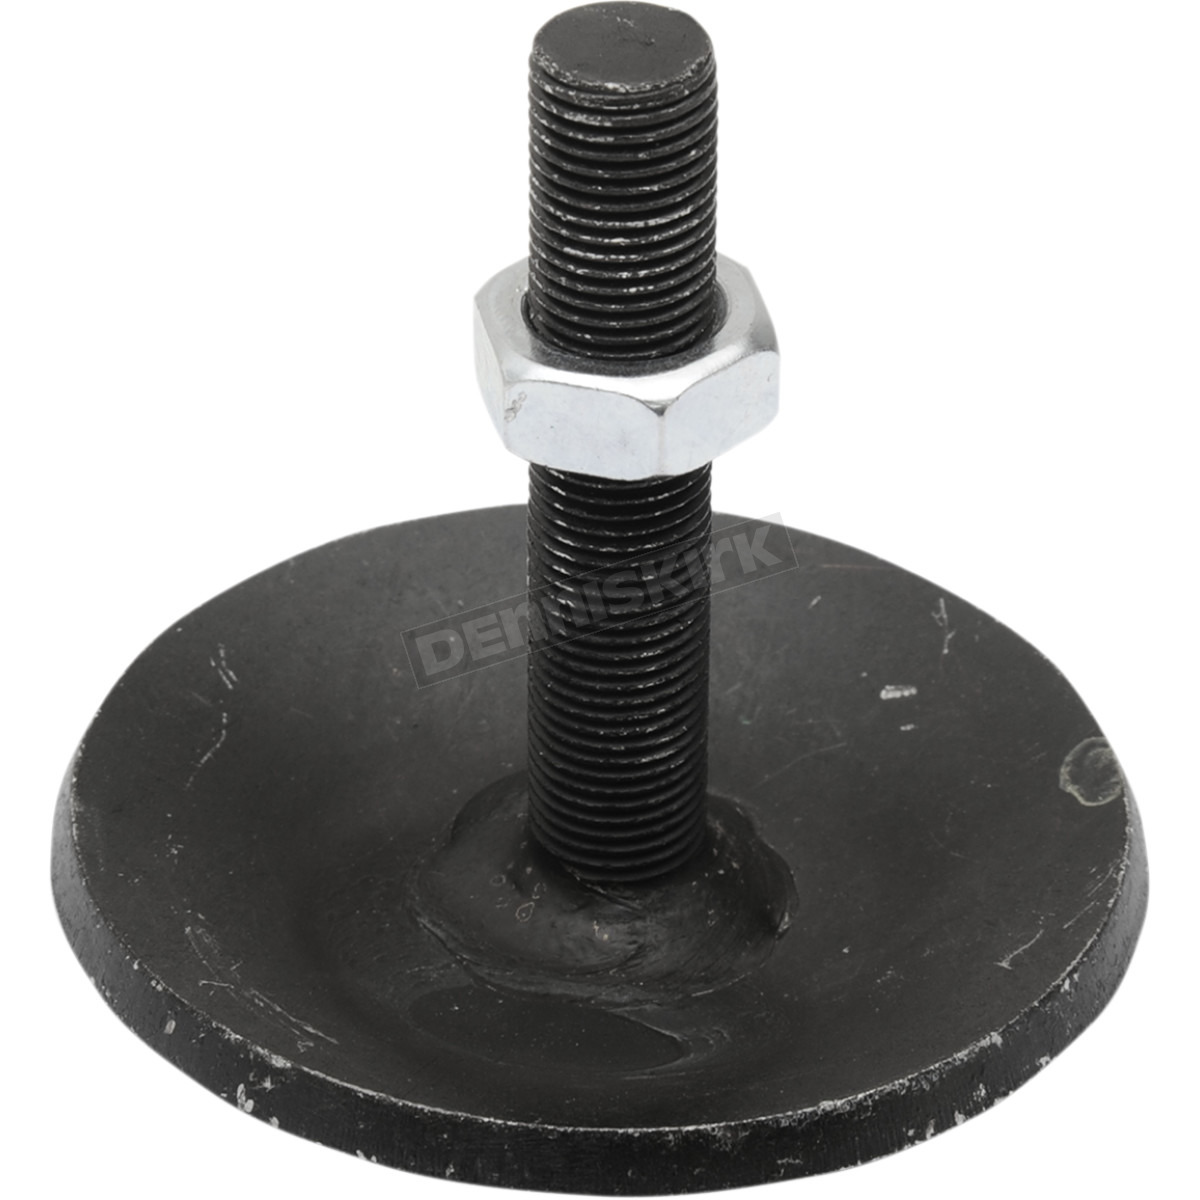
while we are at it on the topic of plows, i use a moose 5 ft blade............this year, i am having an issue with the blade pads breaking off............seems they are being made cheaper................lost two of the "mushroom" ends yesterday..........i just took them off until replacements come...........................anyone else have this issue..............i am mostly plowing 2 inch snows on concrete or blacktop driveways.............
If they are like these, I'd use a sleeve of 3/4" or 1" steel pipe as a spacer (once proper height adjustment is established) to distribute and shift the load away from the stud and weld.

-
2
-
-
The ones we had when I was a kid could be used as jack stands in a pinch. A bull could kick one across the barn without hurting it--much...
-
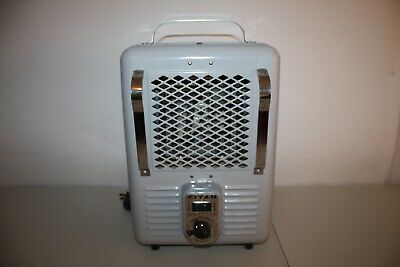
I grew up on a dairy farm--it's that classic ,metal shell, rugged as Hell, 115 VAC radiant/convection heater I m sure you've seen:
-
 1
1
-
-
6 minutes ago, Jeremy .... said:
I used a Mule 610 for plowing snow for about 12 years using a steel cable and that was with a 66" v plow and only broke the cable once. On my Pro MX I have a 72" plow using a winch with synthetic and have broken that rope at least twice in less than 2 years of plowing. I am considering going back to steel cable/roller fairlead/or using a winch strap made for a boat trailer
Were I installing a plow (not likely as I am in Saint Augustine, FL) I would go with the strap--they have a bit more stretch (which will make it much resistant to dynamic loading) , but as you are only using 6" to 8" of it it doesn't matter. A strap will also spread contact with the fairlead (roller or Hawes) out over a much larger area, greatly reducing wear.
-
I was researching winching and hoisting safety factors and ran across this very good All About Winch Cable tutorial--thought I'd share it here. It is very sobering to find your 4700 lb winch cable has a SWL (Safe Working Load) limit of just 940 lbs, applying a 5:1 safety factor (generally applied for hoisting). At 3:1, a typical winching/pulling safety factor it's still only safe to 1566 lbs.
And, that 9000 lb (max) snatch block you just bought--SWL = 3000 lbs. 9000 lbs. is the load at which it will break and fly back and kill you. That's why one of my first mods for my Outfitter 400 was a wireless remote winch controller; when you start pulling really hard it is best to be as far away as you can...
-
My bottom line, honest opinion of synthetic v steel line in this application--given the absurd geometry of the jury-rigged "hoist" configurations on most (maybe all?) ATV/UTV snowplows--it is that it's a "six of one and a half-dozen of the other" situation. The application violates 50% or more of either product's engineering guidelines. Either will fail "prematurely" from a consumer perspective.
I am a mechanical engineer (MSME MIT '71) and the first time i saw one of these things I cringed, more surprised that it worked at all than by the very short service lives we see reported.
All that said were i setting up my own I'd most likely go with the wire rope and keep it well lubricated with an extreme-pressure penetrating lubricant such as Penetro 90.
-
I would not recommend synthetic rope for most of the snowplow configurations I have seen. UHMW polyethylene (the material used to make synthetic winch rope) is very strong and has very low stretch--these normally desirable characteristics make it somewhat unsuitable for the high dynamic (impact) loads presented by a plow, and the torture path through which the cable/rope passes on most plows--this is especially true if the fairlead through which they pass has a small radius--as do most UTV winch configurations. For 12-strand 3/16" rope UHMW rope makers typically specify minimum pulley diameters of 2.5 to 3.0"--anything smaller and they downgrade the rope's breaking strength by 50%.
Steel cable does not stand up well in the typical UTV plow hoist application--those where the cable simply exits the fairlead and connects to the plow at a 75° to 90° angle--synthetic rope stands up less well . Another issue is that in a plow hoist application the stress and strain are applied repeatedly to just a very small segment of the rope's overall length, usually just 6" to 8".
Best would be a UHMW poly strap or a 3" to 4" pulley for the rope to pass over...
-
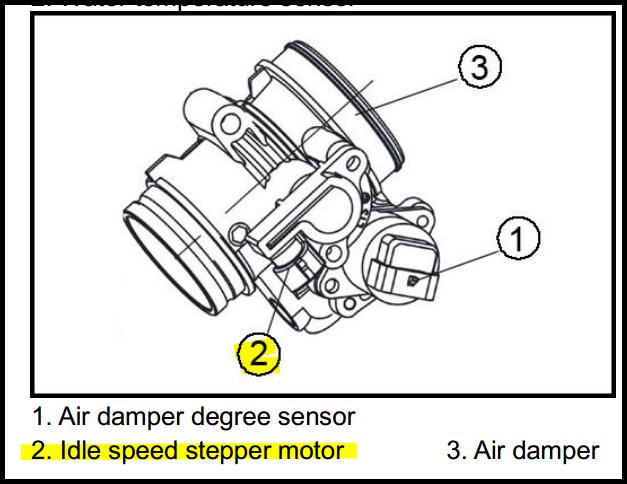
Modern EFI systems do not generally have adjustable idle settings in the classic sense--I.e. some mechanical adjustment as with carbureted engines--instead the idle speed is controlled by the electronic engine management system. Most often this a accomplished via an idle air control (IAC , Hisun seems to call it an "idle speed stepper motor") valve operated by a stepper motor or duty-factor controlled spring-loaded solenoid valve that controls the amount of intake air allowed to bypass the throttle body main damper ("butterfly"). IAC valves are usually mounted on the throttle body.
The idle speed setting is accomplished by reprogramming the engine management system--not by turning a screw or manipulating some other mechanical device
IAC mounted on the throttle body (this is from the service manual for my HS400):
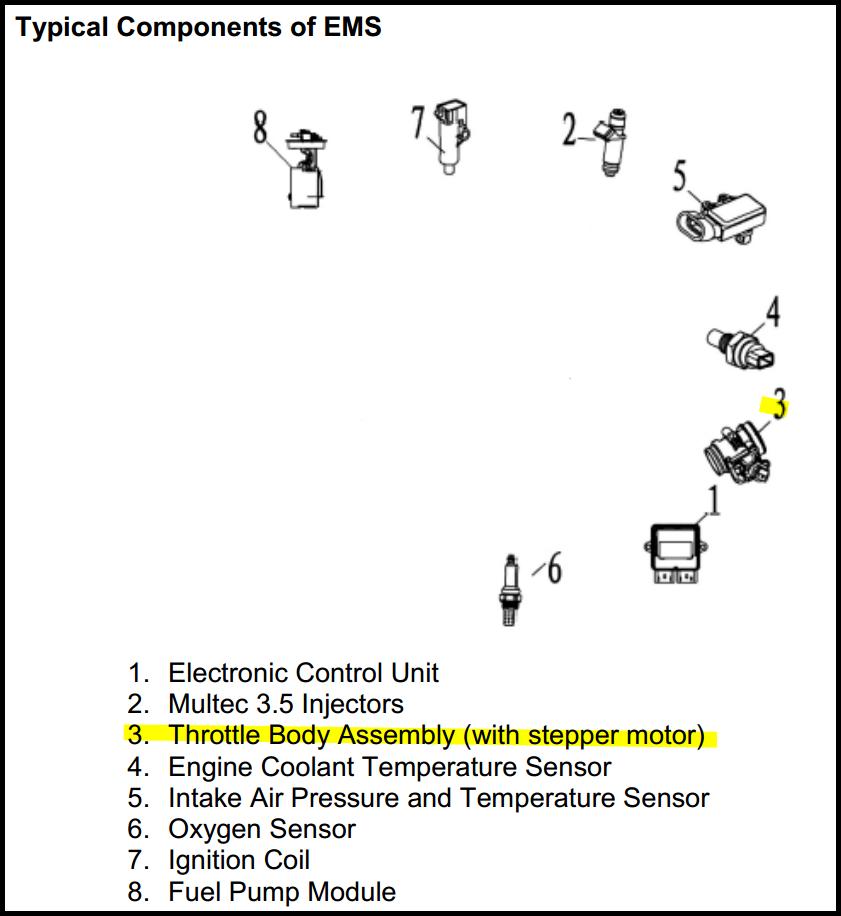
Hisun EMS schematic:
Components:
Idle too high = too much air passing through the IAC valve or leaking into the intake tract between the throttle body and the intake port on the cylinder head.. This can happen if the IAC valve sticks or otherwise cannot operate freely--or-- if air is leaking into the intake manifold "after" the throttle body.
Check that he intake gaskets, tubes, etc. are tight; If you feel competent to do so remove the throttle body and make sure the IAC operates freely.
-
1
-
-
Hello all,
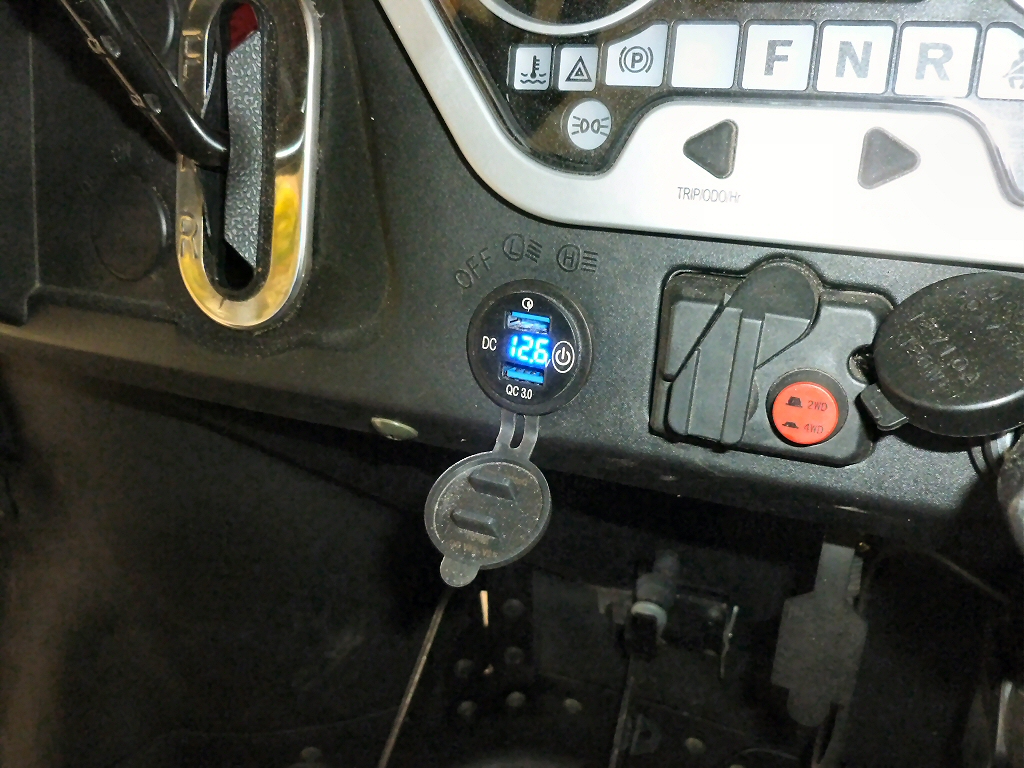
I just recently added a dual port USB charger outlet to my Hisun HS400 and thought others might be interested in same:
Got it from Amazon for $13.49. The HS400 has a couple of plugged holes in the dash, left over from prior versions that had the ignition and lighting switches in the dash (these are on the steering column on my 2020 model). The adapter mounts in a 28.5 mm hole so I hogged out the obsolete lighting switch hole (25 mm) with a Dremel tool fitted with a 1/2" sanding drum. I wired it to a permanent power source as it draws very little power (< 5 μA) when not in use--at 5 μAit would take 1.6 million hours (182 years) to drain the battery down to 10 V . It has it's own power switch.
The unit delivered 4.55 V @ 3.0 A with the engine off (12.6 V input) which meets USB specs. The voltmeter displays the system voltage with surprising accuracy-- that's a good value to monitor to reveal battery and/or charging system problems.
I like it...
the embossed legend is an artifact of the old lighting switch being here
-
1
-
-
8 hours ago, Cougsfan said:
That is absurd you had to go through all that hassle , Cliff
I bought my Hisun used so who ever owned it before never thought to provide the adapter. Sounds like it may not have worked anyhow. So I will keep on my list of things to make, and will do it as soon as I get done with the dozen or so items of higher priority for me to make.
You should contact the previous owner and see if they have it cluttering up their garage--if you don't need a hitch it's just another thing to rattle, that's why I took it off.
Mine sat, covered with a rag, on a stool in the corner of my barn for nearly 3 months 'til I just recently (in part prompted by your post) got the ambition to do something with it...
-
On 1/31/2021 at 11:33 AM, Cougsfan said:
I dunno. It is kind of weird they would put on an odd non-standard receiver size like that. I am thinking of fabricating one but have never gotten around to buying the material (if I can find it) to do that.
They know it's wrong, but don't seem to care. As vendors love to say, it is a "nominal" 1-1/4" square (nominal as in "That's what we call it.").
My Coleman Outfitter 400 (Hisun HS400) came with the same 1.713"square receiver as the OP's machine, however it also came with a 6" or so long, 1-1/4" "adapter"--problem was that the adapter 's inner dimensions were 1.245" x 1.24"--I.e. Without a hydraulic press and a torch there's no way a 1-1/4" draw bar would go in that hole.
Anyway, I got an email announcing that a Coleman rep would be at the store (our local Tractor Supply) just before Christmas; and being a glutton for punishment made the trip into town to discuss this issue. I had quite a go-round with the "factory rep"; he removed the "adapter" from a UT400 they had on display and using his "reference tool" (a well-worn retractable 16' steel tape) proceeded to show me how it was indeed 1-1/4" square inside. So I trotted my butt into the store, grabbed a 1-1/4" draw bar off the rack, brought it out, gave it to him, and said "You mount the damned thing then!" He failed of course and then declared the draw bar "oversized"--again using his precision 16' tape.
Seeing this was going nowhere I retreated to my barn and attempted to use my 1/2" x 18" belt sander to hog out the adapter (It only needs 0.030" more I told myself)--well three 60 grit belts later I had managed to make it at least square (1.245" x 1.245") and decided to go with plan "B", got out a 6" disc grinder and bastardized a 1-1/4" draw bar to fit the adapter.
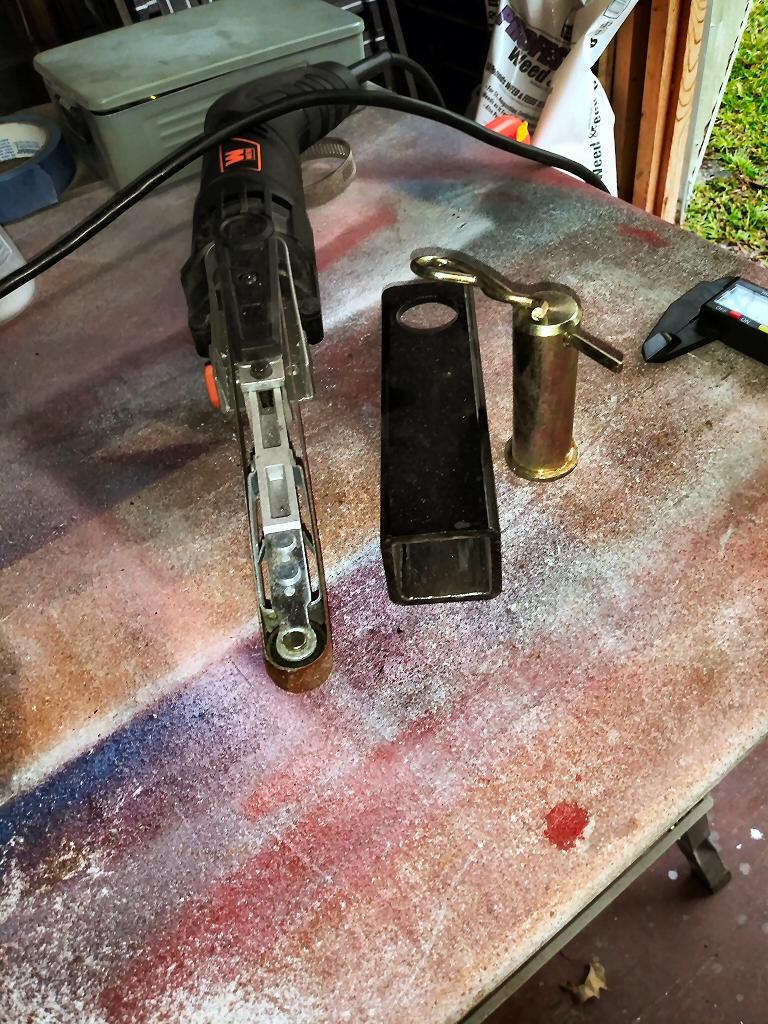
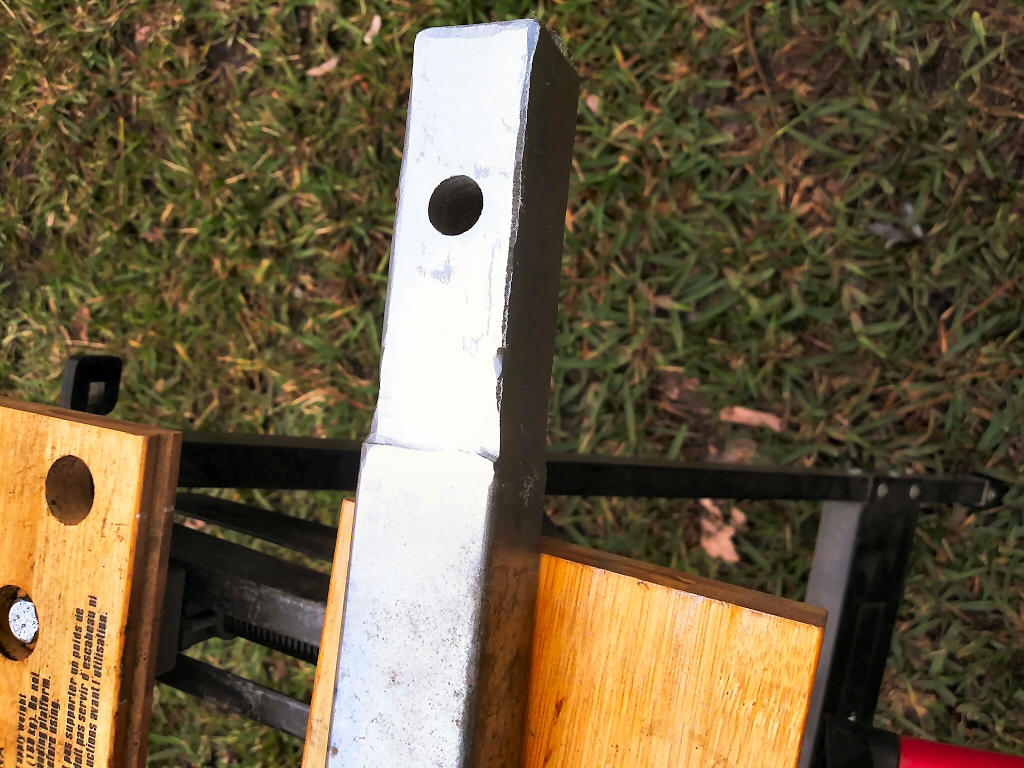
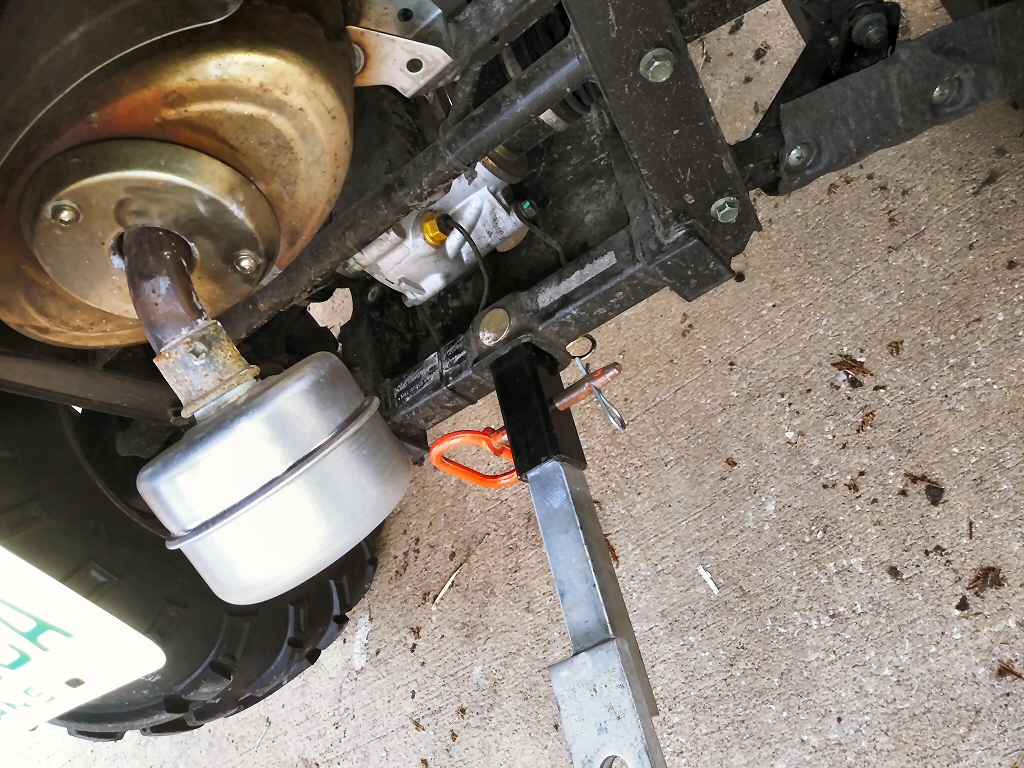
That worked; some photos;
plan "A", the adapter and my 1/2" x 18" belt sander:
plan "B", the bastardized draw bar (not my finest work, but give me a break, I've got Parkinsons--my neurologist says it's a wonder I can do this sort of thing at all):
mounted on the beast:
This of course means that this is my draw bar unless I bastardize another, but it places a ball at 14" from the ground and just took an hour or so grind down..


What do you do when
in UTV General Discussion
Posted
My maternal grandfather (a Scotsman ME) always told us that "...the last time any machine started and ran properly may well have been the last time it will start and run properly."
Also, "God created men and they are imperfect--men created machinery, so guess what that makes machines."