
2017 cub challenger exhaust upgrade.
-
Similar Topics
-
 By mrpro
I got the fronts adjusted. I'm trying to raise the ride height in the rear, but my spanner wrench keeps slipping. Is there an easier better way? It's like there's too much pressure working against me to be able to twist the height adjusters. How can I relieve that tension to make them easier to turn?
-
 By didgeridoo
Hello, All! I've decided to replace the traction batteries in my 2018 Sector E1 with a 48V Lithium set. They may be expensive, but I figure the Discovery Dry Cell are, too. I am not looking for the max driving range, as I have never received near the brochured range to begin with, but a good mix of charge/ get work done/ charge is what I am expecting.
I have settled on the 48V EAGL kit from bigbattery dot com. Each battery pack provides 30Ah. The kit ships with a charger, as well. The packs would be physically connected in parallel (using a busbar) to one another, maintaining the 48V voltage, but together would be able to provide the amp draw the buggy pulls when going up hill or towing a rake (rated 320 max continuous Amps). This is in comparison to the serial connection the eight 6V lead batteries. Each of the EAGL batteries looks to have its own BMS; am I correct in thinking I will have to use their included charger rather than (simply) changing the onboard charger to lithium mode? The chemistry of the pack is LiFe PO4, for what it's worth. I haven't torn anything apart yet (to diagram), so I am not sure how the dash will interpret the AMP draw, but the kit I am looking at includes a dash mounted charge indicator.
If anyone has completed a similar conversion, do you have any tips? Specifically, how did you remove the original batteries, and how did you secure the new ones? I am guessing that almost any change from the stock batteries would involve at least some modifications. Any tips would be appreciated, especially things I may have failed to consider. Thanks!
-
 By AaronD1982
Onto the next problem, everything has been replaced in the charging system except the Flywheel Rotor, I have it torn apart all the way down to said rotor, but it is suggested that a specific puller is required, and a compatible rotor seems virtually impossible to find. I can find many like it, but this one is mine scenario for those that get the reference. For all I know I have the last Massimo Buck 400S on the planet and will never find another part again, but who knows. Any ideas, help or otherwise that anyone might have would be greatly appreciated.
-
 By Debbie Hogan
I realize this part is discontinued but im trying to find this exhaust pipe fir my dads 550. His brother who has since passed bought this mule for my dad who is now 90 and he is trying to fix everything on it. I'm willing to take a used one. A new one would be great if someone still had in stock. I'll take anything as long as it is in workable condition. If anyone has any ideas for me im open to hearing them. Thank you so much.
Debbie fm Texas
-
 By HighSon
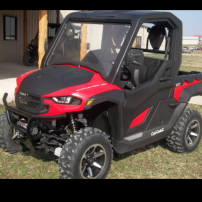
Haven't posted in a while since solving the excessive cabin noise issue, so I thought I would share a few upgrades to my Sector... Realize that this is driven daily on the street, so some of the mods are to make it more streetworthy.
Locking gas door.
Rear view mirror.
Modified windshield for better airflow in cabin.
Lowered and modified headrest bar for improved rear view. Tailgate protector.
Folding armrests.
Overhead utility rack. Keeps the interior cooler and dryer, too!
Folding rear seats.
Dust cover and seat protector.
If anyone wants links to the rear view mirror, seats, or arrests, let me know and I will post. But know that everything requires some level of fabrication. The utility rack was all custom built. Cheers!
-

Recommended Posts
Join the conversation
You can post now and register later. If you have an account, sign in now to post with your account.
Note: Your post will require moderator approval before it will be visible.