


-
Similar Topics
-
 By Karlibob
I have a 2020 800 sx with about 16 hours on it. From day one I have heard a clunking noise from the front end going over bumps. Has anyone else experienced this? Also this past weekend while out riding I heard a noise that sounded like the dump bed bounced three or four different times, again has anyone experienced anything like that. Thanks, gary
-
 By Hunterman22
2021 Hisun Axis 500 UTV (From Lowes)
Will NOT START
MY apologies if this is to much info just wanted to give yal the most information possible for help.
I'm a so called diyer. An Electrician by trade 21yrs. I got my S×S from my last job. The contractor purchased this S×S for this specific job brand new, from Lowes. They used it for hauling materials, tools, & a little bit of anything you can think of on an Industrial type job site.
I remember getting on the SxS one time & pushed the gas petal all the way to the floor & SxS had very little power.
So anyway ,when the job finished up back mid July this year (7/2024) , I asked the contractor what they was going to do with it. I was told to take it. Otherwise it would go to the contractors yard (storage yard) & most likely rust away.
Took it home washed it , it had a heavy coat of dust on it & in it dust was every where. My helper & I had to push it on the trailer to get it home. After washing it throughly I let it sit & dry out for a good day and half, maybe 2 days. Before trying to start it. NO START. Will turn over & try to start but thats it.
So here's what I've purchased & installed. New Air Filter, new spark plug, new air idle control valve (AICV), new throttle position sensor, new throttle body, new oxygen sensor, new digital dash speedometer/fuel gauge/clock.
Also drained the old oil & gas & replaced with new oil & 93oct. gas. I should probably mention that I've changed the AICV twice. The 1st time I changed the AICV I was able to get the SxS started & let idle for at least 10-15min. Drove out of the garage, with very little power, turned it around & barely got it back in the garage.That was the one & only time I've been able to start the SxS. I've also cleaned the Throttle Body and & intake with TB cleaner. So after that the AICV was making weird noise so I pulled it out & tried cleaning it, pretty sure I messed it up. So I purchased a Throttle Body that came with new AICV & TPS. Still NO START. I've checked the fuel pump & the fuel injector. I took the injector off still hooked up to wiring & turned the key over, the injector sprayed a lot of gas out kinda the size of a volleyball. I've also checked the clearance gap on the intake & exhaust valve. But today 11/2/2024 I'm going recheck spark plug gap & the valve gaps. And alot of other checking. Would the driver side seat belt have anything to do with it not starting?? I know the driver side seat belt has to be in gauged for full throttle "going fast". Thing is the drv. side seat belt will latch but feels like might be messed up inside of it. Tired opening it up but to no avail. I've never had a S×S or 4wheeler so I was really excited when I got the S×S,not so much anymore. I work on & fix my own vehicles usually no problems. But this SxS is kicking my ass.
So if possible & someone could help me with some ideas or tell me what Im doing wrong or did wrong, I would greatly appreciate it. Thank you for reading thus far.
-
 By Blair
Most of us complain about the ridiculous noise in the cabin. My wife likes to ride but the noise is a major downer. You can’t even have a conversation without shouting at each other. Well, I manage to reduce the cabin noise by approx 200%!
I addressed the intake that is poorly placed right between the driver and passenger. First, I cut the air filter inlet pipe in half (pic 1). I then reinstalled it upside down (pic 2). I then attached a flexible intake tube (pic 3) and directed it behind the cabin (pic 4). Major difference.
Then I covered the interior engine cover with Dynamat extreme and then 200 mil Chaogang sound deadener / heat shield mat on top of that (pic 5). Since I cut off the intake and redirected it, I completely closed off the intake (engine fence) so no engine noise can come thru (pic 6). It also reduced the heat approx 50%. I did leave on the heat mat that came stock on the engine cover, so it has 3 different mats. It was a snug fit. Major difference again.
My wife rides all the time now since we can have a conversation when we ride. Major improvement to my riding experience. Thought you might like to check it out.
-
 By TjB
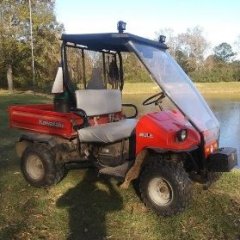
My dad has recently acquired a 2510 Kawasaki mule Diesel powered. It worked fine few weeks and then quit driving. Put a new belt on just to see. Still not driving. It already had a new clutch. Belt turns when in drive or reverse and back wheels are off ground to test. But wheels not turning. Thoughts?

-
 By rsar
So I finally got my Quad Gear cab enclosure after waiting out the backorder for three months and to say it's been a huge disappointment is a pretty big understatement. I think mostly because I could make it work, if not for one major issue. The windshield is right next to impossible to see out of. It's a real headscratcher because the side and rear windows are okay. It's not high quality 30 or 40 gauge marine vinyl but I have Quad Gear's stand-alone winshield so I knew it wasn't the best in terms of visibility, but definitely doable for the price. Incredibly, the side and rear windows of the cab eclosure are just as clear as the stand-alone windshield. And the windshield on the enclosure is like 50 percent worse than the stand-alone. It's the same company! I don't get it. If it had just been the rear windshield that was that bad I would have kept it. There are some creases and wrinkles here and there, but I've been using the stand-alone windshield for the past three months so it's good enough not to have to shell out $600 plus for the stock hard windshield. I'd put visibility at about 65- 70 percent. The wife hates it though, which is a pretty big negative. In any case, my original plans were to have an upholsterer change the crappy vinyl out for the high quality stuff and I even sent it to a guy who ended up flaking out on me and refusing to do it. He said he didn't want to charge me $400 for something I paid $200 for. Long story, short, I decided to return it and just get the insanely expensive Kawasaki enclosure next winter since the frigid temps here are about to start climbing in a couple weeks anyway. I first put it on just to see how it would look (I took pics of course) and found that it didnt even seal 100 percent and made it drafty inside the cab. So make that two major issues. At least with the stock enclosure everything will be top flight. Doors will be nice too.
-


Recommended Posts
Join the conversation
You can post now and register later. If you have an account, sign in now to post with your account.
Note: Your post will require moderator approval before it will be visible.