-
Similar Topics
-
 By rdc
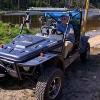
I have a 2007 Joyner 1100 sand viper and before it even get's to where the thermostat opens up the oil pressure get's so low I have to shut it down. What could fix this ? I thought about adding an oil cooler with fan, thicker oil, or removing the thermostat. Any advice?
-
 By nrggaragebuilds
2004 250DL DIRT DEVIL. Hey y’all, I already know this is a long shot. But I am looking for a the “prick gear” assembly that makes reverse work for my external reverse gearbox. OEM PN D250.08.103 and its assembly. I bought the kart as a basket case, but I saw that the reverse box was present so I was optimistic. Upon starting working on the buggy I realized there was a block off plate in plate of there the normal gear would be. If my understanding is correct that means the transmission no longer has reverse gear. I figured it’s just a standard bevel gear and I could probably find a gear to make work, but I don’t want to spend the time making all the other housing parts to shim the gear perfectly. Has anyone spare parts, or figured out an aftermarket solution from McMaster? I already know it’ll be a challenge to get this box to be happy again, but figured I would ask
-

-

-
 By J Cardwell
2024 villian overheating shuts down to crawl mode. If I turn it off for 30 minutes power returns to normal.
-


Recommended Posts
Join the conversation
You can post now and register later. If you have an account, sign in now to post with your account.
Note: Your post will require moderator approval before it will be visible.