-
Similar Topics
-
 By rdc
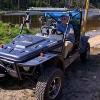
I have a 2007 Joyner 1100 sand viper and before it even get's to where the thermostat opens up the oil pressure get's so low I have to shut it down. What could fix this ? I thought about adding an oil cooler with fan, thicker oil, or removing the thermostat. Any advice?
-

-
 By AaronD1982
Onto the next problem, everything has been replaced in the charging system except the Flywheel Rotor, I have it torn apart all the way down to said rotor, but it is suggested that a specific puller is required, and a compatible rotor seems virtually impossible to find. I can find many like it, but this one is mine scenario for those that get the reference. For all I know I have the last Massimo Buck 400S on the planet and will never find another part again, but who knows. Any ideas, help or otherwise that anyone might have would be greatly appreciated.
-
 By MilSurpYinzer
Hey all, I was just wondering what you guys consider a necessary upgrade or spare part to have or mod onto your machine.
I'm going for a kind of shtf survival rig that's not going to be SUPER heavy and I'm looking at getting:
A spare belt (I keep seeing this mentioned everywhere I look so it must be important)
A spare tire and mount( So would I need a jack like one from an old jeep or something else?)
Tire chains for the winter
And maybe a cargo bed upgrade so things don't slide out.
Bumpers because duh.
I already installed high output lights and have a windshield, roof, back window, and winch. And I outfitted a Molle panel for the back of my passenger seat with extra supplies like food, first aid, and spare mags.
Any advise on increasing durability, longevity, and having something on hand because it's absolutely necessary would be a plus.
Thanks so much!
-
 By Dewayne jones
Just bought new 2024 AODES 650 work cross 2 seated for my dad and he's very resilient at 79 and still cuts trees, splits and hauls firewood for heating home. He's begun using Polaris ATV with wagon more over his 80's toyo4x4 flatbed after the wood has been split. I figured UTV would be easier, more practical at times and more fun. It does not have a heater and would like suggestions on one that best suits his. He's tough but gets chilled easy now and a heater would make joyriding much better at this time of year. I Have found nothing that specifically Says it's made for this particular UTV I don't know what to make of the More generic Hacher versions Or how adaptable they are. I've read They have come from the factory with Heaters but It says nothing about Adding
-


Recommended Posts
Join the conversation
You can post now and register later. If you have an account, sign in now to post with your account.
Note: Your post will require moderator approval before it will be visible.