


Kinarfi
-
Posts
2,186 -
Joined
-
Last visited
-
Days Won
38
Content Type
Profiles
Events
Forums
Gallery
Downloads
Community Map
Everything posted by Kinarfi
-
As moderator, I was able to add to Flatbeds post and put his photos in. Looks like a good job, keep adding photos. Jeff
-
Where'd George go and when do you think he'll be back?
-
I was talking to turbodude, Scott of Unleashed Motor Sports about gas tanks and he mentioned to me that the new tanks have a baffle in them between the gauge / filler pipe area and the rest of the tank, so I looked and of course, he's right. Interesting IMO. And since I couldn't stick my head in to look at the baffle, I stuck my camera lens in through the fuel gauge hole. More photos at http://s481.photobucket.com/albums/rr180/Kinarfi/ Played around with photobucket and think I like webshots better, just my opinion.
-
Your's is fixed and boxed and will be coming back home tomorrow, or is it monyawna, since your in Mexico right now?
-
I like the idea of going with the correct Iridium plug because the will probably never need changing, I think that's what came in my Yukon and I didn't change them until I had about 90,000 miles. In my youth, it was common for the hot rods to have stacks on the carbs, I kinda thought that maybe the long air intake manifold and maybe the snorkel acted like the old stacks of yesteryear. Anyway, the power I have now is adequate for what I do and don't feel the need to change stuff until others have proven their mods. Jeff
-
I've been working on Rocmoc's gas gauge sender unit, waiting a part, and drew up the schematic for the Troopers with a front gas tank. Not to be disagreeable, but these things are very simple in their design and construction. Their biggest problem, IMO, is the red seal where the wires come out. The under seat gauges indicate by 1/4s and front tanks indicate by 1/8s.
-
Rocmoc has a trooper and troopers run a 4/115 bolt pattern on their wheels
-
Got my fuel tank in and mounted, , mounted it on 6 rubber standoffs and it seems good, had to stop the seat 1/4" from all the way back because the 1" lift made the filler neck hit the back of seat. Will run a ground wire from frame to tank tomorrow, may add a new fuel pickup line later.
-
Number 1 and absolute first mod is fill the gas tank and then go empty it. Enjoy it. Jeff
-
Congrats, have fun, I get about 15 mpg, as high as 20 & as low as 10. The speedo is in mph & kph and is reasonably close, get a gps and the odometer is kilometers, not miles. There are some neat and easy mod posted here, but I like my air filter snorkel the most. Where are at? Can you fill out your profile so the rest of can know a bit about you. Welcome to the Trooper Driver Club. Jeff PS If you want some suggestions about posting some photos, PM me.
-
How much do you think you would charge for a set of 4 of those adjusters? Jeff Another idea would be to drill and thread a hole in the side, drop in a piece of plastic followed by a set screw or winged bolt to lock the adjuster in place, unless you think it will stay put.
-
Lenny, Take a look at these photos I took of my shock when I took it apart, I probably didn't do as good a job as you, but I got lots of photos. If I have any parts that you need, let me know, I figure a cap can be made to thread onto the body that holds the seal, thereby making it rebuildable.
-
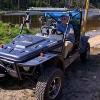
Put a snorkel on and get it up out of the dirt. Click on either picture and see my other photos, the dirt on the bottom may have been mud, do you oil your filter, take a look at the sticky (first post) for part numbers. http://www.utvboard.com/index.php?showtopic=434 Post #10
-
If you get a chance, take a look at the front gears, I still think they'll be the same as the rear, after all do you think they want to go the expense to make them different when they can just turn one upside down. Jeff
-
http://images.google.com/imgres?imgurl=htt...ficial%26sa%3DN Did you have to do all the stuff in this article or just put them in place and tighten the bolts? jeff
-
Need New Stock Rim Front and Tire can't get ahold of Joyner
Kinarfi replied to Detbohica's topic in Joyner UTV SxS Forum
Me Too, I also need a new front wheel https://teamjoynerusa.3dcartstores.com/asse...t_thumbnail.jpg, but I'm hoping for a good deal from someone who wants to sell theirs' -
Don't know if you've been here or not http://shop.delorme.com/OA_HTML/PN20/image...arisonChart.pdf, I'd like to get the pn 40 but $$$ & wife say no, the screen is 1.4" wide & 1.7" tall. I believe they are the same physically, different colors, & PN-40 is more capable. Also, I recommend the RAM holder with the suction cup & the rechargeable lithium batteries
-
I went with the DeLorme Earthmate GPS PN-20, came with Topo 6.0, They are upto to PN-40 & Topo 7.0 now. I plan the trip on my computer and upload it to the gps. I haven't used garmin enough to compare, but I'm generally happy with what I got & I rigged my buggy up so it charged while driving. You can also save your routes and trails for revue later and compare to google earth.
-
I only go to see my diff lock for a moment at the dealer when it failed to engage, it looked like the sleeve that slides in and out could be reversed to fix the problem I had. It looked like it had tried to engage while thing were spinning and rolled the teeth a little. To disengage, the cable pushes the sleeve in against a spring, and the spring's push is what causes things to engage. If you take it apart, Please take some photos to post of it and the insides of the diff also. Thank you Jeff
-
That sounds really wise and like something easily overlooked, Thanks Jeff
-
I always fill it with water, but not wet the area being soldered/welded and then ignite any vapors prior to starting. At worst, you may get a small woosh as you burn off what ever vapor is left, and since it is controlled and expected, it is relatively safe. If memory serves me, 1 gal gas, properly mixed with air, is equal to 8 sticks of dynamite. Thanks, Jeff
-
Will do on the rubber mounts, but I think I'll run the stock mounts and monitor them until the break and then have the sturdy L bracket like your's welded on. Thanks Jeff
-
Mail it to me and if I can, I'll fix, shipping charges only. I enjoy messing with things like this and if I get my capacitive fuel gauge working, I'll build some extra ones. PM me for my address if you want to do this. Jeff
-
Pulled the old tank & took the fuel gauge apart to see what makes it tick. It turns out that it has 5 reading, empty for the last 2 inches, 1/4 for about 1 1/2 inches, 1/2 for about 1 1/2 inches, 3/4 for about 1 1/2 inches and full for about 2 inches. Some other detail are: when full the resistance is 3 ohms and .3 volts when empty it has 110 ohms and 4.6 volts. It is grounded internally, poorly in my opinion, mine had started leaking if I stacked the tank, so I epoxied it to seal it up. As the gas level rises, a magnet floats up closing the reed switches, there is a stop for the float about 3/4 inch from full.
-
Just got my new fuel tank in, wow, what a long filler neck , I guess things do improve with age, no wait, it's the newer the better, oh I just don't know, guess it really doesn't matter. Take a look at the photos, , just for fun, I'm going to design & build a capacitive fuel gauge sender for it and make mod similar to flatbed's so the engine doesn't die when going down hill with low fuel. I'll take more photos
