


Kinarfi
-
Posts
2,186 -
Joined
-
Last visited
-
Days Won
38
Content Type
Profiles
Events
Forums
Gallery
Downloads
Community Map
Everything posted by Kinarfi
-
Welcome, some good people and info here, Kinarfi
-
Ditto,
-
Had a new idea, if having 2 lines from the tank induces air into the line and it is still getting gas, we could add a chamber with a float in it that when it rises, it hits a float valve just like in a carburetor, but instead of letting fuel in, when it accumulates air, the float sinks and lets any accumulated air out and the out is routed back to the tank. After all, we are moving 50 gallons an hour to develop 6 pounds of fuel pressure.
-
Been thinking about Power Steering, what if you were to remove the current gear box and replace with 1 or 2 linear actuators and replace the steering wheel with a joystick? Would that be too weird? Maybe mount something on the steering shaft to activate a switch to drive the actuators.
-
Been thinking, what if you were to remove the current gear box and replace with 1 or 2 linear actuators and replace the steering wheel with a joystick? Would that be too weird? Maybe mount something on the steering shaft to activate a switch to drive the actuators. Should this be a new thread?-Yes, Starting New Thread Called "Power Steering"
-
My vote would be no rubber, Mount the diff as solidly to the frame as possible, the diff needs to be solid so the CVs can transmit all the power in and out. If any thing moves any at all, it will wear, rubber will crumble and things will get loose, then sloppy. Also, the diff shouldn't be making any vibrations, noise either, but sometimes you can hear the gears working. 2 Cents Jeff
-
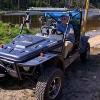
I can't help, but best of luck, maybe a helper and a pry bar on each side. Can you supply any Photos?
-
1st Annual Joyner Trooper Spring Rally @ El Golfo, Mexico
Kinarfi replied to rocmoc's topic in Joyner UTV SxS Forum
That one sounds good to me, but I live here, There seem to be lots of places in southern Utah to travel and some great scenery in the north also. I'm sure I could make it. Jeff -
Got some information about Spot, But I'm tired and Gotta go to bed to clear my head I'll be editing this tomorrow It's tomorrow now Sorry for the teaser, I really was tired. Any how!!! I went down to Las Vegas and took my spot to try it out. First the signal it sends out is referred to as a message. It has 4 messages, Track or SPOTcasting, I'm OK, Help, Emergency. Hopefully, we'll never need Help or Emergency, so I haven't played with it. What I learned is: 1. pushing the on button only turn it on and makes the light blink so you can find it in the dark. ( I thought it started the track mode - WRONG ) 2. Push the OK button and it'll send an OK message. (Duh!) I called spot for help and was told to wait 20 minutes or turn it off and back on before I start Tracking. 3. To Track, push and hold the OK button for 5+ seconds, Simple, if you know it. Help and Emergency override Tracking. 4. If you want someone to be able to follow your progress, You need to send them a link to use before you go make tracks or create one for yourself that you can send out later. To create this link, login into your account, go to share and create your link. The link you create only shows messages that are created after the link is created. When you send the link to someone, advise them to save or bookmark the link for later use, save it yourself too. I went down to Vegas via the road next to Lake Mead and stopped at Valley of Fire and thought I had it all tracked, I didn't, BUMMER! Did some more playing, if while in track mode, push the OK button for 5+ sec. and it blinks red, goes solid red and off, then you can push OK again to get an OK message. Jeff
-
At the very minimum, replace with longer shanked bolt, I suggest the higher grade, and put a nut on the back side. Even when tight, it seems that the ball joint can work it's way out and the interface of just the threads of the medium grade stock bolt is not strong enough to hold it. What I read from Lenny's or Flatbed's suggestion was to drill the hole bigger so you have more bolt interfacing with the ball joint stud. Jeff This bolt PS While your at it, Pack some grease under the boot
-
I doubt I could keep beer up there, 1, probably not strong enough and I could lose my beer, 2, It would not keep it cold, 3, not nearly handy enough, I'd have to stop to get me a beer, 4, my wife won't let me buy beer, 5, it probably wouldn't work for sody water either! . I'll probably store blankets, hammock, coats, clothes, medical stuff and while I'm riding, I'll probably put my Spot up there so it has a good view of the sky. I plan on setting my spot to track mode when I go out. My next step for up there is to put a barrier up there to keep the dirt and dust from coming into the cab via all the holes around the brake cylinders and locker handles and build a lid for that box to keep things in there clean. In front of the shock mount bar, I plan to make a mount for my jack, presently in the white box behind the cab.
-
Here's the bolt that came out of mine, notice the damaged threads, that's where the stud on the ball joint hit and was supposed to be kept from falling out, I figure solid shank instead of threads would hold it. I replaced it with a longer shanked bolt and the next grade up and put a nut on to lock it in place.
-
Here's what I have so far, still need to do the rod for holding it up, plan to try a tube hooked at the molded dent, center rear of the hood, notch the metal support for the center of hood so the tube slides through when down, when the hood is up, the tube rests on the support bar. If this is clear, later photos will clear it up. Haven't decided what to do with all my bolt holes or how to tie the hood down yet.
-
I got lazy and finished mine without figuring out if I need the return line going back into the pump suction line. I just put it back into the bottom where it was before. I drilled and tapped a 1/4 npt 90 degree fitting into the front of the tank, then looped the 5/16" lines to a Tee and the output from that goes to a screen filter, then the pump, the filter, the regulator and then the return. I mount the Tee in foam to keep it low and to keep it from bouncing around, the foam had to crush about 1/4" so all should stay put. In my testing, playing, spilling gas, making a fire hazard mess, it seemed that once the pump is primed and running, getting air in the line didn't really hurt anything, so I'm going to try this setup for a while. I have clear fuel lines so I should be able to see if I'm getting air sucked in. Too cold to test right now, so on to the hinged hood project & under hood storage. Also need to check steering box. Already did the new bolt with shank thing on the ball joints. Git er dun if you haven't yet, right flatbed? Took a handful of photos, here's the first, click and look at the rest, if you want. Jeff
-
What has been done with hinged hoods? Has anyone hinged it at the front Yet? Thanks, Kinarfi
-
Congratulations, now the fun and enjoyment begins. Jeff
-
Wow, good drawings, what program did you use to make these? PM coming.
-
About the same happened to me when I pulled the breather filter off, I figured that maybe the oil mist was collecting on the filter and with the weight of the chrome cover, maybe the oil was running out instead of back into the separator. So I took a coke bottle and heated it up so it shrunk down to seal around the filter to make a damn so the oil had to go back in, instead of out. So far so good, I also put a hose back on that was loose, the one from the valve cover to the intake manifold.
-
You have a good system, no doubt, but I don't have a welder to weld the chamber on with, shame because I have an extra tank to cut parts off of. If I had the equipment, I would weld 1/2" ID fuel direction reversal lines to the to the bottom of my tank with a 5/8 hose fitting at the junction, that's what the hose to the pump is. Lenny, if you have time, wait till I get my parts and make a test or two. My logic says the reversing line should work. Jeff
-
If you're going to add another pump, add another filter also and a shuttle valve, now all you have to worry about is do you have too much fuel flow. Did you analyze my last 3 drawings? Especially the how I handle the return. Waiting parts, expect them on the 20th. If you have some clear tubing, fill a length with water and hold the end together, now while the ends are still pointing up, raise any part of the rest of the loop above the ends. If you have enough tubing to hold the center of the loop high and still have the ends pointed up, like a W with a high center, move one of the ends higher than the other end and then back. Where's Mister Wizard when you need him?
-
I don't know, I have abandoned the valve idea for now except for the pendulum idea. My favorite right now is this one, click on picture. When I was looking a Lennys drawing, http://thumb18.webshots.net/t/74/74/1/64/4...58rDYlTd_th.jpg, I realized that his little chamber would stay full because of the siphon effect and if I extended the lines past the end of the tank and I figure that as long as both outlets don't uncover, the junction will stay full. The only problem I see is the volume that the pump moves, the solution is loop the return line to the junction and the all that's needed is enough flow from the tank to run the engine, not a very big volume. But that brings in another problem, if air get in the line, how do you get it out? Feed the return into a Tee and let the air go to the top of the tank and the fuel to the junction. I've got some more testing to do, but I'm waiting for parts. Jeff
-
We all want "German" engineering at "China" prices and we want it "made in America". It's kind of like I saw somewhere; Economical, Dependable, Fast, you can only have two.
-
Sorry guys, when I read your first replies and you mention valves and other stuff, I wasn't sure you had my picture or my idea down pat, so I redrew the picture and replaced the old one and I wasn't sure you'd go back and reread, so I put that big red post for you to see. I'll go delete all the big red posts. I also redrew and numbered and colored the drawing. Now for my Lenny type explanation. Sorry. as the fuel drains out of green 1, it will stop draining at the red level line. The yellow line will stay full and so will the junction, it can't can't get any air. As the fuel is draw off by the pump the yellow line and the junction will stay full until the air enters the lowest point of the yellow at 2. At this point, were out of gas. The level of the fuel in the green line will depend on the free flow out of the tank at 2 and the drag of the yellow line. The blue pump line will pull 50gph, if the yellow can not supply that, the green will empty and the junction will fill with air. If the return is sent to the junction, then the yellow line only has to provide the fuel needed to run and I believe that the 5/16 lines can handle that with ease and we should be able to run the tank dry. Jeff
-
It will take even longer to build because you MUST take photos of each step completed. My testing shows that the pump CAN handle a big slug of air, like I said, were moving 50 gallon of gas per hour, a quart every 18 seconds. And here's my latest idea and I need your thinking too. Imagine your heading home with low fuel and you drop over a hill going down at 29 degrees, that what my drawing ended up being, the red line indicates the gas level. Now, take a look at the drawing and tell me whats going to happen, Please. I will take your post, copy it, and move it into this post and delete yours. Kinarfi says: first the fuel will drain from the rear down to the red line pushing gas through the junction back into the tank via the front outlet, then as gas is drawn of by the engine, the junction will stay full until the gas level at the front drops to where air enter the line, then the engine dies. Lenny says: Flatbed says: ........... says:
-
The hole for the needle valve is .150 which IMO MAY work and WILL work if it does not have to handle the return fuel volume. I don't support the use of the needle valve because of complexity of the flow pattern. How would you use it without making a special chamber for it to be screwed into. The way I see it, we have 3 individual fuel flows to be considered. 1 engine fuel 2 return fuel 3 pump fuel = 1+ 2 4 tank fuel = 1 or 1+ 2, depending on what is done with the return fuel. I'm still going with Occam's razor is often paraphrased as "All other things being equal, the simplest solution is the best." a central, low as possible junction with an air / fuel separator in the return line. Yesterday, after moving the filter and pump, I tested every thing using a bottle as the gas tank and since I'm using 5/16 clear super thane fuel line, I noticed the fuel drained from the line after shut down. Another question, when you start your engine, do you wait for the system to do it's checks before you hit the starter or just turn it on and hit the starter?
