


Kinarfi
-
Posts
2,186 -
Joined
-
Last visited
-
Days Won
38
Content Type
Profiles
Events
Forums
Gallery
Downloads
Community Map
Everything posted by Kinarfi
-
Mine came with a nice loose leaf type manual, maybe it was just my dealer, but the web manual is getting updated occasionally, I downloaded it and print the pages as needed. kinarfi
-
What after market tires are you using and how do you like them
Kinarfi replied to 4x4x454's topic in UTV General Discussion
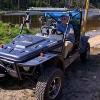
Bead / rim protection provided by Grabber A/t 3 photos kinarfi -
Some time back I opened an account with webshots, http://community.webshots.com/user/TrooperFolk, and shared the user name and pass word with most of the posters here because it was easy, or at least I thought so, and lots of us have used it. It has lots of room for lots of photos and accepts pictures and videos. If you come up with something quicker and easier, I'm sure it would get used, I like it because you can post one photo and it opens the album and you can see all the photos even if you're not registered, important, for instance, look at Lennys post, http://www.utvboard.com/Nelson-Hills-ride-report-t867.htm, What we need to do is learn how to write ride reports, like Lenny's and be able to put photos and videos in the report, maybe under it's own non-branded forum. I always enjoy reading my sons forum, here's what that forum looks like, just for an idea, http://www.advrider.com/forums/showthread.php?t=317714, lots of picts. You could drop the KYMCO UTV line, or not. That's my 2 bits worth. Kinarfi
-
What after market tires are you using and how do you like them
Kinarfi replied to 4x4x454's topic in UTV General Discussion
General Grabber AT2 27x8.50 R14 95Q 6PR OWL $90.10 http://ssl.delti.com/tyre-pictures/General/GRABBERAT2.jpg Got them for a little over 80 each at tirerack.com + shipping -
What after market tires are you using and how do you like them
Kinarfi replied to 4x4x454's topic in UTV General Discussion
I haven't had mine on long enough to give an honest answer, but I believe they're the best I could get for my rims and was influenced by my son's off road racing knowledge, would have used B. F. Goodrich if they made one for 14". You got to consider your type of riding too. I'm not aggressive in general but occasional, get very aggressive, so I went with what will do the job and last as long as possible, least expensive over long run. I do like the bead/rim guard on these though. Photo later. kinarfi -
Thanks Lenny, just what I need, more pressure Already thought about how to slow response time down on the motor, that would be to an inductor in the line, it resists a change in current, momentarily, then becomes just a piece of wire. Also the speed of the motor can be made to ramp up over time, milliseconds to minutes. Got a project for you, but I need to take and upload some photos for you so I can put the pressure back onto you. I have some parts from a Power Wheels that I can try out to see if this Idea is viable and need an attachment/coupler to test it with. Kinarfi
-
Looks good, but you should put a picture of Troopers on it.
-
That's some hill, good story, Get an old tire iron and a deep socket out your junk tool stash and weld them together., I think I ended up using an 11/16 deep socket with 1/2 in. drive, it fits kind of tight, which is nice because the corners don't get rolled off. kinarfi
-
When you get a part #, let me know so I can put it in parts & pieces. Thanks
-
photos man, photos, Sounds good. Another product that may have worked is Coroplast, sort of like card board, but made out of plastic. I've found lots of uses for it.
-
I would love to design, build, sell and make a fortune with a really neat power steering unit for out Troopers, BUT!!!!! so here are some ideas in case some one want to carry the ball for a while. First the schematic, two micro switches to drive the 2 3 pole double throw 12 vdc relays, and one single pole 12 vdc safety relay. As you turn the wheel, you activate a micro switch which closes a relay and powers the motor. The thing about a dc motor is that it also generates when turned and the normally closed contacts short the motor out creating a tremendous amount of drag so that if you get a bump steer, first it is resisted by the shorted motor, then trips the switch in the opposite direction. If you lose power, relay C1 opens up to remove the drag caused by the shorted motor. The two relays are interlocked so they can not both turn on at the same time. To activate the micro switches, you need some play in the steering, as I was looking at how to mount the micro switches, I found the shafts that slide together give you enough play. The second drawing is just an idea of how put the gears on a plate that mounts on the steering box, or we could steal the motor and gear box off our child's Power wheel and build an adapter to tie to the lower half of the steering linkage. Just something to keep us busy. Kinarfi
-
Just keep trying, sooner or later, you'll succeed If necessary, use more power!!!!!!!
-
Never get lost! LOL! - That's no FUN!!!!! You need to get out, not more, but further, like into Utah , and go places where you can get lost and do some exploring. I love to go see what I've never seen before, love my GPS too, but then again, I'm a gadget person. Kinarfi
-
I had to dig this up for myself, but thought other might be able to use it.\ Kinarfi
-
The skid plate mounting method on mine sux!!!! so I'm changing them all to these speed nuts that leaves the head of the screw/bolt exposed instead of the nut, which was always getting buggered, so now I can get them out. My hopes are to put a one piece sheet of 3/8 or 1/2 inch nylon under the buggy like the off road racing trucks use. The aluminum on mine is diamond plate and very soft, so soft that it actually smears, I had to cut 3/8 inch off after hammering it flat when I took it off to work on my gas tank. kinarfi
-
I think your talking about where I had the welder build up in the areas where I planned to drill and tap for my fittings. It's just a build up to give me more metal to tap into, worked well. kinarfi
-
Got it cleaned out, painted and mounted, waiting pump and plumbing. Now I'll start working on Cruise Control. kinarfi
-
What I hope to use, if I win it on ebay, is a 4-5 psi, 30 gph pump that should let my tubing prevent drawing air because it's not pulling so hard, and if it does, it will just go into the surge and out the top. And like the old statement that electricity takes the path of least resistance, which has always bugged me because it's WRONG, It follows ALL paths!!!, not just the one with least resistance. Same with fuel flow, it may get some air but it will still draw fuel and pump it into the surge tank. I plan to put a couple of switches in the pump circuit so it turns on when about 1/3 empty and off when full, so it should only pump about a 1/2 gallon and rest until that 1/2 gallon is burnt. Worse case scenario, the pump can't get gas because of the slope, I have a gallon in the surge tank and I draw from the bottom. Other good things: if I need to make a fire, boyscout style, One Match and some GAS, I can get some from the drain valve, I can also get rid of any water that may get in the system and if I run into a fellow tourist who has run out of fuel, I can drain some into a cup, can, or bottle for him/her quite easily. I quite like this system and see no real problems, you could even skip the switches and just let the excess flow back to the main tank out of the top. Kinarfi
-
Surge Tank, I built a surge tank today, it's 18" tall, 5" diameter and holds 1.53 gallons. I plan to mount it above the right rear swing arm pivot, It will have a 1/2 npt X 1/2" barbed fitting for the fuel pump and a 1/4 npt drain valve in the bottom, a 1/4 npt X 5/16 barb about mid point for the return, a 1/4 npt X 1/4 barb for the vent in the top and a 1/4 npt X 1/4 barb low on the side for visible fuel level indicator. I'll get some photos out as I progress. Kinarfi
-
That sounds fun
-
TROOPER GENERAL COMMENTS & QUESTIONS, VARIED SUBJECT LINES
Kinarfi replied to brostar's topic in Joyner UTV SxS Forum
The price wasn't bad either, a local business throws tons of it away, so I send the better 3/4 dumpster diving. Want some? and if I can find the thicker stiffer stuff, it works even better. -
UNM-L6 U nuts IN USE and where to get 12 VDC.
-
TROOPER GENERAL COMMENTS & QUESTIONS, VARIED SUBJECT LINES
Kinarfi replied to brostar's topic in Joyner UTV SxS Forum
Didn't know where to put this but here's what I think will keep some dust out of the cab, People with windshields. And another Idea for you' Kinarfi -
here's some photo I took of my laser aligning http://community.webshots.com/album/570304075nwGyyY Toe in marking Laser spot on tire Shadow of tire Laser spot
-
Hey, welcome and glad you made it here, I'm in P.G. maybe we can do some exploring together. One good area to go play is up by Currant Creek Reservoir. West mountain ain't bad either. oh yea, would you please fill out the profile info. kinarfi
